Lauten Audio Rim Mount Handleiding
Lauten Audio
Statief
Rim Mount
Bekijk gratis de handleiding van Lauten Audio Rim Mount (1 pagina’s), behorend tot de categorie Statief. Deze gids werd als nuttig beoordeeld door 30 mensen en kreeg gemiddeld 4.3 sterren uit 15.5 reviews. Heb je een vraag over Lauten Audio Rim Mount of wil je andere gebruikers van dit product iets vragen? Stel een vraag
Pagina 1/1
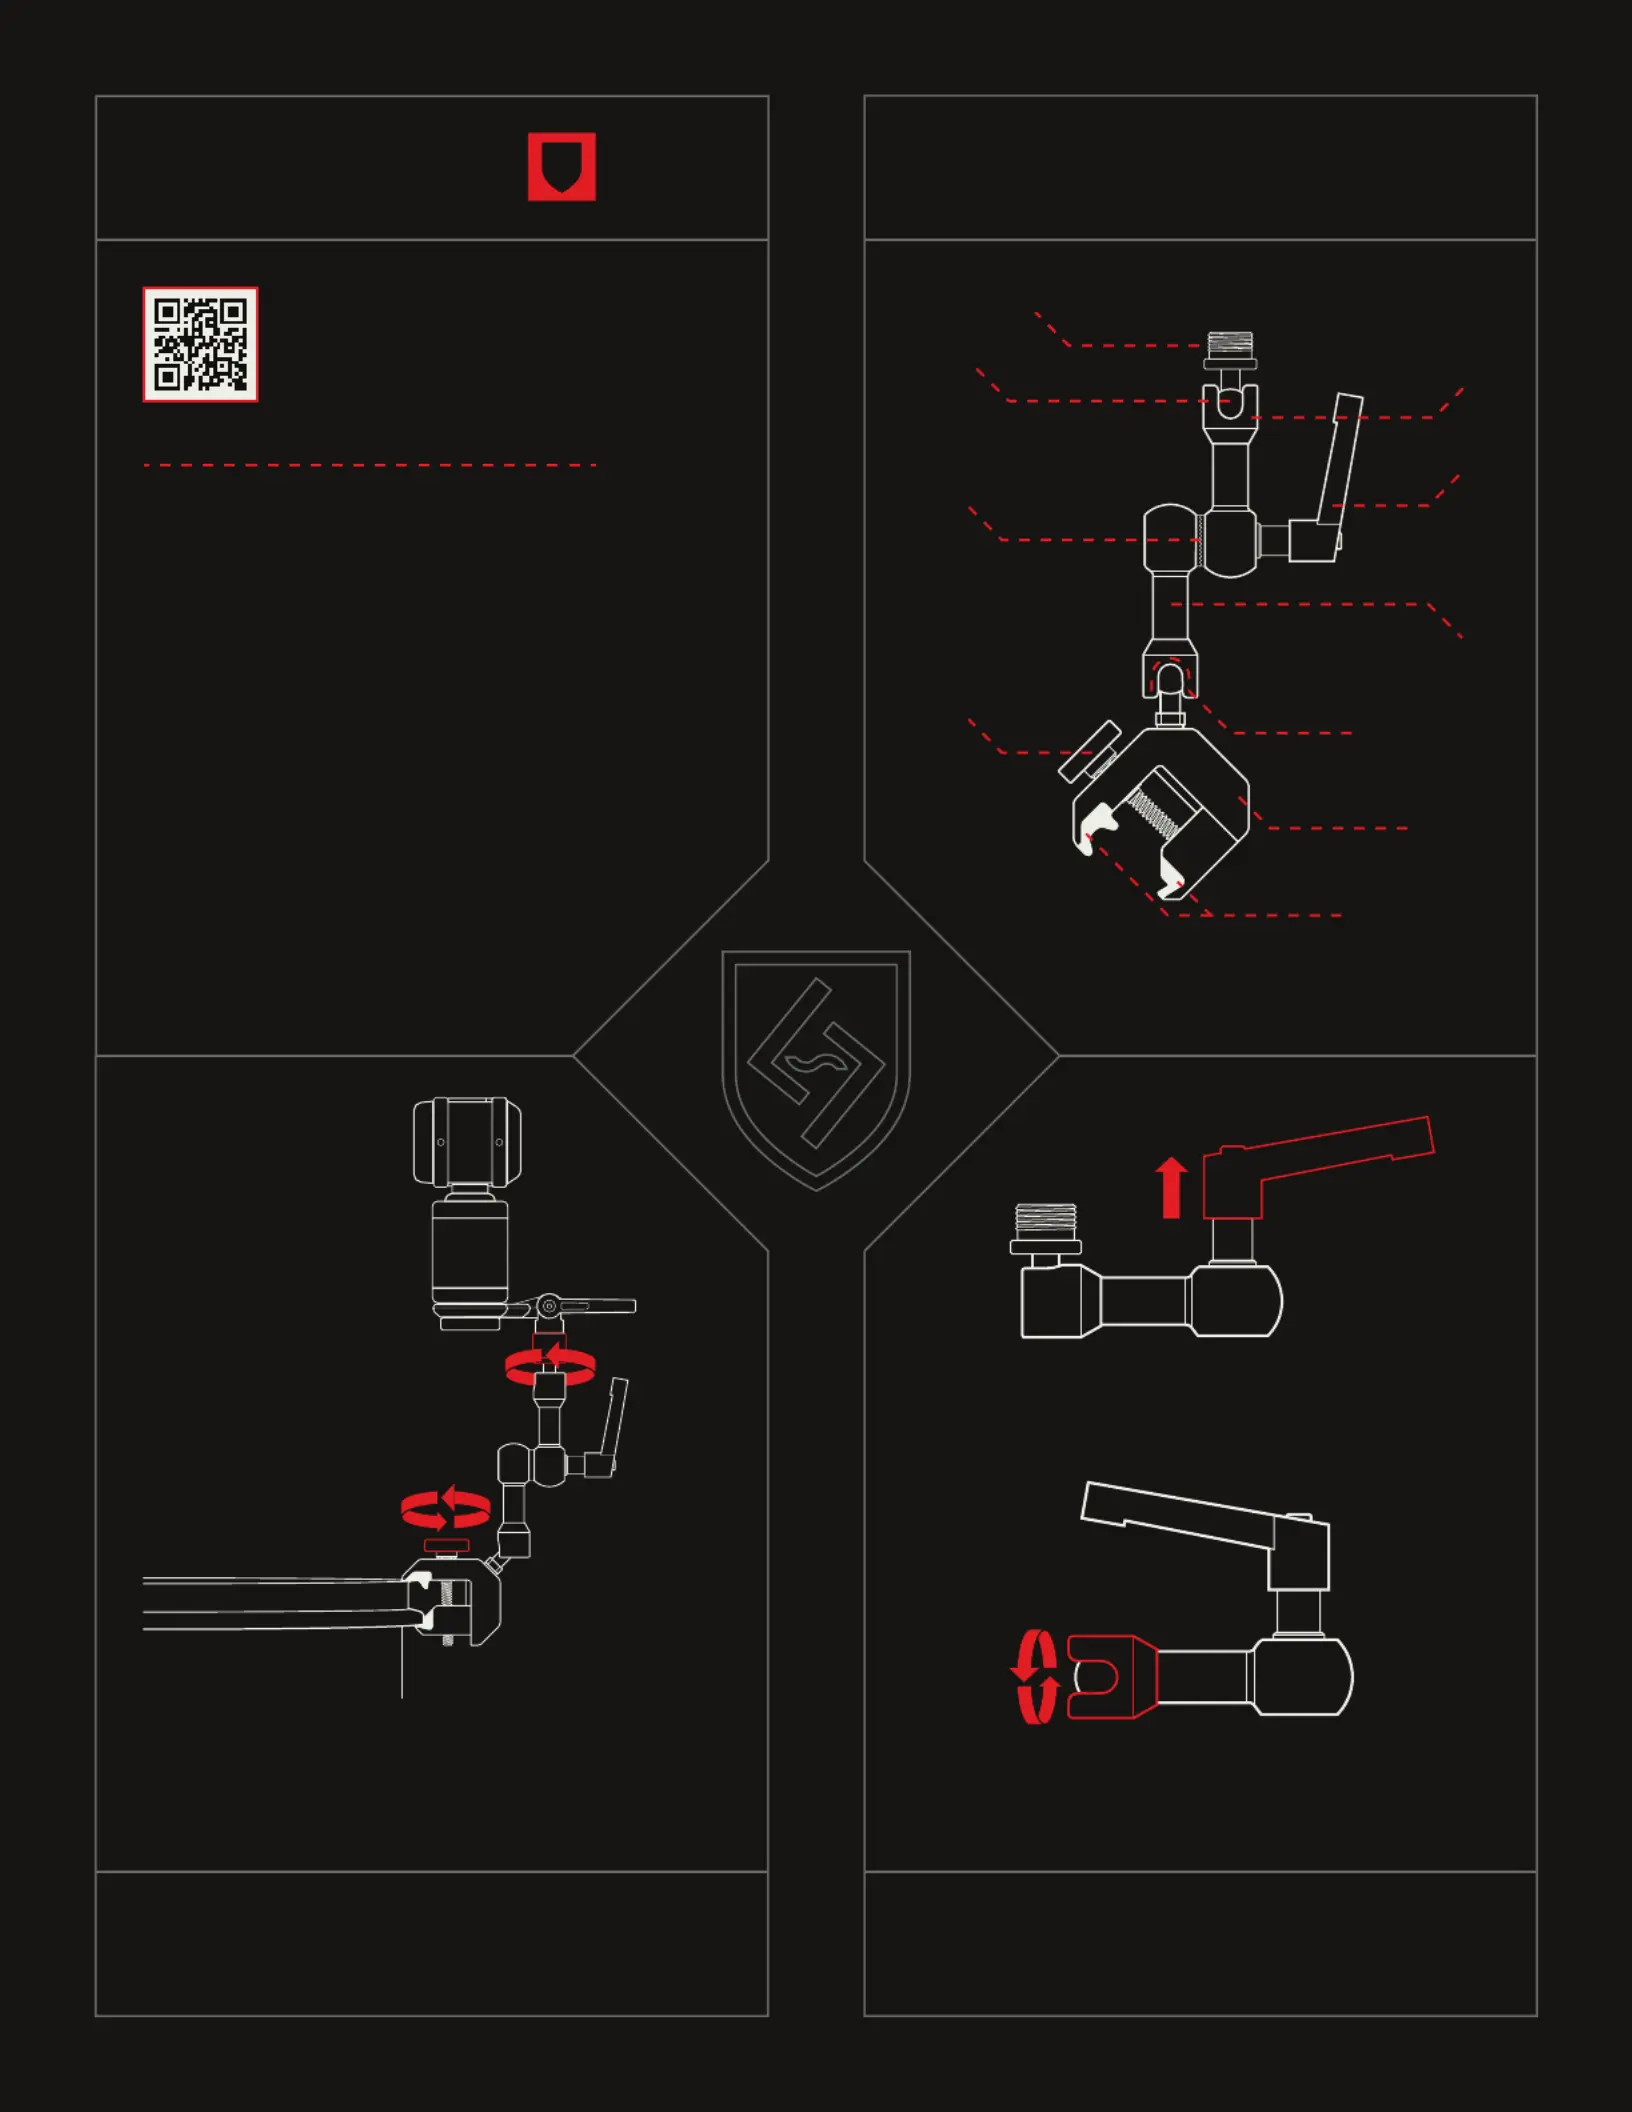
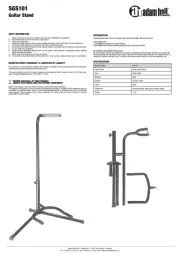
RIM MOUNT ANATOMY
TIGHTEN TIPS
THREAD TO MIC CLIP
CUFF
BALL JOINT
ARM
ELBOW JOINT
CLAMP TEETH
CLAMP
CUFF NOTCH
THUMB SCREW
Rim Mount’s max load capacity is 3.3 LBS. It easily holds
larger industry classics like the SM57, MD421, 414, and
more. Please visit www.lautenaudio.com/faq for more
details and frequently asked questions.
Your new Rim Mount includes
a three-year limited warranty.
Please scan the code for
warranty details.
Cuffs can rotate independently of arms and provide
additional positioning options and notch locations.
After tightening, pull up on the handle and rotate to
avoid obstacles.
Firmly tighten the thumb screw. Often times an extra
turn or two is necessary as the Rim Mount teeth
compress against the rim of the drum.
Firmly tighten the threads
that connect the mic clip to
the Rim Mount arm.
WWW.LAUTENAUDIO.COM/RIM-MOUNTLAUTEN AUDIO OFFICIAL RIM MOUNT QUICK START GUIDE
HANDLE
Product specificaties
| Merk: | Lauten Audio |
| Categorie: | Statief |
| Model: | Rim Mount |
Heb je hulp nodig?
Als je hulp nodig hebt met Lauten Audio Rim Mount stel dan hieronder een vraag en andere gebruikers zullen je antwoorden
Handleiding Statief Lauten Audio

28 Januari 2025
Handleiding Statief
- Krux
- BoomTone DJ
- Ulanzi
- Eurolite
- Olloclip
- Laserliner
- Rolls
- MotoCrane
- Rode
- SteadiCam
- Cam Caddie
- Carson
- AVerMedia
- Ibiza Sound
- FeiYu-Tech
Nieuwste handleidingen voor Statief
15 September 2025
8 September 2025
1 September 2025

28 Augustus 2025

26 Augustus 2025

13 Augustus 2025
5 Augustus 2025
5 Augustus 2025
31 Juli 2025
31 Juli 2025