La Crosse Technology WS-9118U Handleiding
La Crosse Technology Asztali WS-9118U
Bekijk gratis de handleiding van La Crosse Technology WS-9118U (20 pagina’s), behorend tot de categorie Asztali. Deze gids werd als nuttig beoordeeld door 62 mensen en kreeg gemiddeld 4.6 sterren uit 4 reviews. Heb je een vraag over La Crosse Technology WS-9118U of wil je andere gebruikers van dit product iets vragen? Stel een vraag
Pagina 1/20
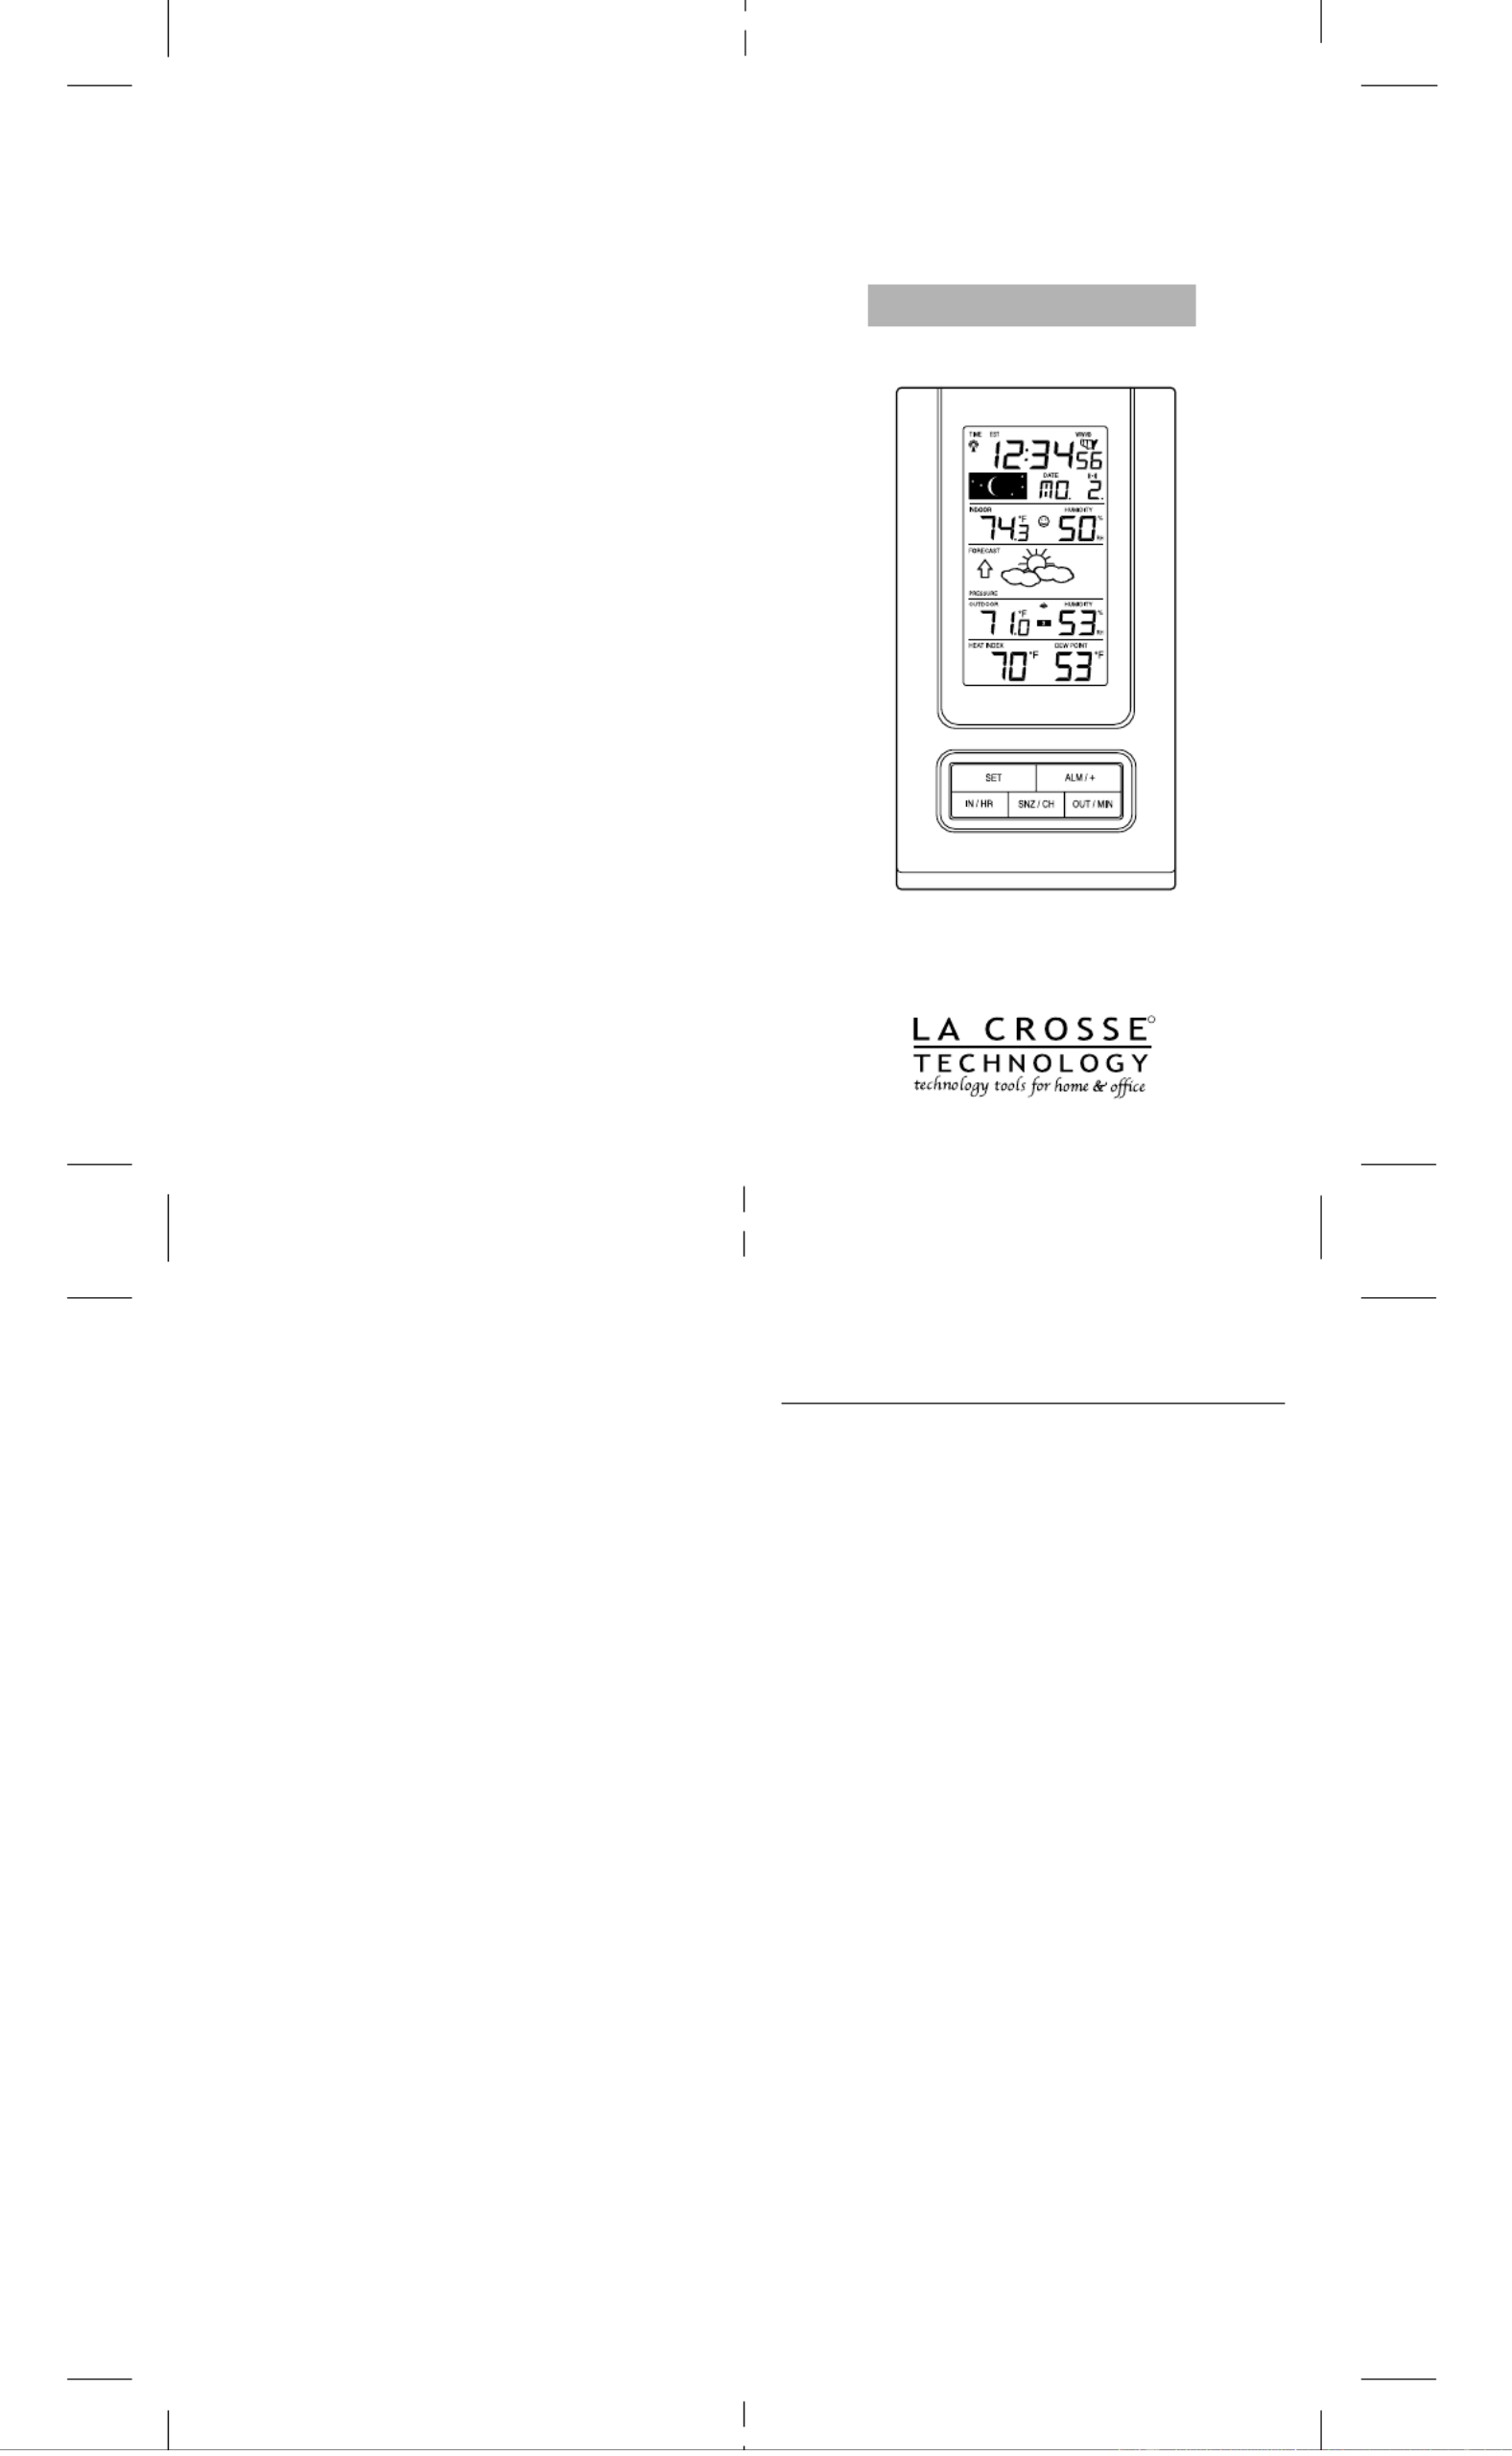
WS-9118U
Wireless 433 MHz
Radio-controlled Weather Station
Instruction Manual
Contents
LanguagePage
English2
Français27
Spanish53
FCC DISCLAIMER
FCC ID: OMO-01RX (Receiver), OMO-01TX (transmitter)
This device complies with part 15 of the FCC rules. Operation
is subject to the following two conditions:
1.This device may not cause harmful interference.
2.This device must accept any interference received,
including interference that may cause undesired operation.
R
Product specificaties
| Merk: | La Crosse Technology |
| Categorie: | Asztali |
| Model: | WS-9118U |
Heb je hulp nodig?
Als je hulp nodig hebt met La Crosse Technology WS-9118U stel dan hieronder een vraag en andere gebruikers zullen je antwoorden
Handleiding Asztali La Crosse Technology

5 Januari 2026
27 December 2025
30 September 2025
4 Maart 2025
7 Januari 2025
7 Januari 2025
19 November 2024
19 November 2024
19 November 2024
22 Augustus 2024
Handleiding Asztali
Nieuwste handleidingen voor Asztali
22 Januari 2026
21 Januari 2026
19 Januari 2026
8 Januari 2026
20 December 2025
18 December 2025
9 December 2025
1 December 2025
29 November 2025
25 November 2025