Keurig K-Supreme Plus Handleiding
Keurig
Koffiezetapparaat
K-Supreme Plus
Bekijk gratis de handleiding van Keurig K-Supreme Plus (6 pagina’s), behorend tot de categorie Koffiezetapparaat. Deze gids werd als nuttig beoordeeld door 130 mensen en kreeg gemiddeld 4.6 sterren uit 65.5 reviews. Heb je een vraag over Keurig K-Supreme Plus of wil je andere gebruikers van dit product iets vragen? Stel een vraag
Pagina 1/6

10oz6 oz
8o z
4oz
1 2 3
12oz
S
T
R
E
N
G
T
H
T
E
M
P
er IceOv
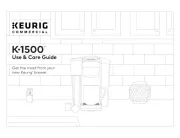
Get the most from your
new Keurig® brewer
Use & Care Guide
K•Supreme Plus™

Ove r I ce
10oz6 oz
8 oz
4oz
1 2 3
12oz
S
T
R
E
N
G
T
H
T
E
M
P
Remove packing tape from brewer.
Plug into a grounded outlet.
Place a large mug (10oz minimum)
on the drip tray.
Remove the water reservoir lid, then
lift the reservoir straight up to remove
it. If you have a Keurig
®
Water Filter,
install it now. Refer to your Water
Filter Starter Kit for instructions.
Rinse reservoir with fresh water and
ill to the MAX FILL line.
Replace water reservoir. Replace lid.
NOTE: Do not use distilled water.
Lift and lower the handle. Do not
insert a K-Cup® pod. The brewer will
power on automatically.
The 5 cup sizes will blink. Press the 8oz
button, then press the blinking brew
button to start a cleansing brew. Pour
the hot water into the sink.
The one-time setup process is now
complete and you are ready to brew!
1
3
5
2
4
6
Before You Brew
Place a mug on the drip tray. If using a
travel mug, remove the drip tray and
place the mug on the drip tray base.
Lift the handle and place a K-Cup® pod
in the K-Cup® pod holder. Lower the
handle completely to close the lid.
Do not remove the foil lid on the
K-Cup® pod.
The 5 brew size buttons will blink.
Select your brew size, then press the
blinking brew button. The brew button
will remain illuminated while brewing.
Brewing is complete when the buttons
are no longer illuminated. Lift the
handle and dispose of the K-Cup® pod.
CAUTION: While brewing, there is extremely hot water
in the K-Cup® pod holder. To avoid injury, do not lift the
handle during the brewing process..
1 2 3
6oz
4oz
8oz
10oz
12oz
S
T
R
E
N
G
T
H
T
E
M
P
Ov e r Ic e
1 2 3
6
oz
4
oz
8
oz
10
oz
12
oz
S
T
R
E
N
G
T
H
T
E
M
P
Ove r Ic e
Plug & Place Rinse & Fill
Lift & Lower Cleansing Brew
Place Mug & Pod Brew & Enjoy!
Brewer Features
Smart Start heats then brews in one simple process. No need
to wait for the brewer to heat before selecting brew size. Simply
power on your brewer by lifting the handle, insert a K-Cup® Pod,
select your brew size, and press the brew button. The brewer will
heat, then automatically begin brewing.
Auto Off automatically turns your brewer off 5 minutes after
the last brew for energy savings.
High Altitude To ensure your brewer works properly at higher
altitudes (5,000 feet), enable the High Altitude setting by
pressing and holding the brew button 8oz and buttons for
3 seconds.
Brew Your First Cup
Power Button
Brew Button
Brew Button
1
10oz6o z
8oz
4oz
1 2 3
12oz
S
T
R
E
N
G
T
H
T
E
M
P
er IceOv
For bolder coffee press the STRENGTH button until you have
reached the desired level of strength, then select brew size,
followed by the brew button.
For hotter coffee TEMP press the button until you have reached
the desired level of heat, then select brew size, followed by the
brew button.
For iced beverages ill a large plastic tumbler with ice. Insert
any K-Cup® pod, then press the OVER ICE button, followed by
brew button.”
NOTE: choose a tumbler large enough to accommodate both the ice and dispensed liquid
to prevent overlow.
To set a preference, use the 3 user proile buttons. Once the
desired brew size, strength, and temperature settings are chosen,
press and hold one of the user proile buttons to save your
settings.
Once saved, you can press the user proile button followed by the
brew button.
ATTENTION!
This brewer is only compatible with newly de
Keurig® My K-Cup® Universal Reusable Coffe
Do not attempt to use any other reusable il
previous versions of Keurig® My K-Cup® Unive
Reusable Coffee Filter; may cause damage
to brewer.

Caring For Your Brewer
Regular cleaning keeps your brewer running smoothly. Always be sure to turn off and unplug your brewer before cleaning.
The water reservoir should be
cleaned periodically by wiping the
inside of the reservoir and underside
of the lid with a damp, non-abrasive,
lint free cloth. Do not dry the inside
of the water reservoir with a cloth as
lint may remain. Allow the reservoir
to dry completely.
Brewer Exterior
Keep your Keurig® brewer looking
its best by cleaning the exterior
from time to time. Just clean the
metal areas with a paper towel and
a non-vinegar glass cleaner, and the
plastic with a damp, soapy, lint-free,
non-abrasive cloth. Never immerse the
brewer in water or other liquids.
Drip Tray
The drip tray can hold up to 8 ounces
of overlow and should be emptied
and cleaned occasionally. To remove,
slide it toward you, keeping it level to
avoid spilling. Rinse and clean with a
damp, soapy, lint-free, non-abrasive
cloth.
Water Reservoir
K-Cup® Pod Holder
To remove the K-Cup® pod holder from
the brewer, lift the handle and grasp
the top of the K-Cup® pod holder
with one hand while pushing up on
the bottom of the K-Cup® pod holder
from underneath with the other until
it releases. After cleaning, align the
K-Cup® pod holder with the opening
using the two front ribs as a guide
and snap into place from the top.
Funnel
Washing the funnel ensures a fresh
beverage experience. The funnel
should be washed regularly and can
be removed from the K-Cup® pod
holder by pulling on it until it pops off.
To replace it, orient the snaps to the
indent and just snap it back onto the
K-Cup® pod holder.
Exit Needle
Remove the pod holder assembly
and detach the funnel. Locate the
exit needle on the inside bottom
of the K-Cup® pod holder. Insert a
straightened paper clip into the exit
needle to loosen any coffee grounds.
Entrance Needles
Lift the brewer handle and locate the
entrance needles on the underside
of the lid. To clean the holes in the
needles, hold the brewer handle
in the upward position and with
your other hand, carefully insert a
straightened paper clip into all the
holes. Gently move it around to
loosen any coffee grounds. Lower
the handle completely and run a
cleansing brew two times. Do not
insert a K-Cup® pod.
CAUTION: There are sharp needles that puncture the K-Cup® pod above the K-Cup® pod holder and in the
bottom of the K-Cup® pod holder. To avoid risk of injury, do not put your ingers in the K-Cup® pod holder.
NOTE: Always remove and dispose of the used K-Cup® pod after brewing.
Ove r Ic e
10oz6o z
8o z
4oz
1 2 3
12 oz
S
T
R
E
N
G
T
H
T
E
M
P
Regular Maintenance
For great-tasting coffee, keep your brewer running at peak
performance by following the recommended maintenance
schedule:
*To turn off Descale notiication, follow the full descaling procedure as outlined
in the Use & Care Guide
Product specificaties
| Merk: | Keurig |
| Categorie: | Koffiezetapparaat |
| Model: | K-Supreme Plus |
Heb je hulp nodig?
Als je hulp nodig hebt met Keurig K-Supreme Plus stel dan hieronder een vraag en andere gebruikers zullen je antwoorden
Handleiding Koffiezetapparaat Keurig

25 Augustus 2025
25 Augustus 2025
28 Juli 2025

26 April 2024

20 Februari 2024

20 Februari 2024

27 September 2023

27 September 2023

27 September 2023

27 September 2023
Handleiding Koffiezetapparaat
- Trebs
- Eureka
- Innova
- Nutrichef
- Suntec
- Tornado
- Amici
- Tower
- La Pavoni
- Presto
- Create
- Camry
- Amica
- Wilbur Curtis
- Sogo
Nieuwste handleidingen voor Koffiezetapparaat
15 September 2025
15 September 2025
15 September 2025
15 September 2025
15 September 2025
15 September 2025
15 September 2025
15 September 2025
14 September 2025

13 September 2025