K&K Sound Bass Master Rockabilly Plus Handleiding
K&K Sound Niet gecategoriseerd Bass Master Rockabilly Plus
Bekijk gratis de handleiding van K&K Sound Bass Master Rockabilly Plus (2 pagina’s), behorend tot de categorie Niet gecategoriseerd. Deze gids werd als nuttig beoordeeld door 144 mensen en kreeg gemiddeld 4.1 sterren uit 2 reviews. Heb je een vraag over K&K Sound Bass Master Rockabilly Plus of wil je andere gebruikers van dit product iets vragen? Stel een vraag
Pagina 1/2
92798 Cape Arago Hwy, Coos Bay, OR 97420 | 541-888-3517 | Toll Free 1-800-867-6863 | kksound.com
BASS MASTER ROCKABILLY SYSTEM
The Bass Master Rockabilly is a double bass
transducer system designed specifically for
Rockabilly and Slap Bass. It combines two
transducers (the Bass Max and a fingerboard
pickup) to create an integrated double bass pickup
system that brings out the percussive and subtle
fingerboard sounds, as well as strong and warm
bass tones. Each Bass Master Rockabilly can be
fine-tuned via the separate bass and treble controls
within the dual channel preamp, providing an
infinite range of combinations for every player and
any style of play.
The Bass Master RB Upgrade System includes a
fingerboard pickup and preamp to upgrade from an
existing wing transducer (or other compatible
pickup). Please skip this section (Installation and
Setup: Wing Transducer) for the Upgrade System.
INSTALLATION AND SETUP
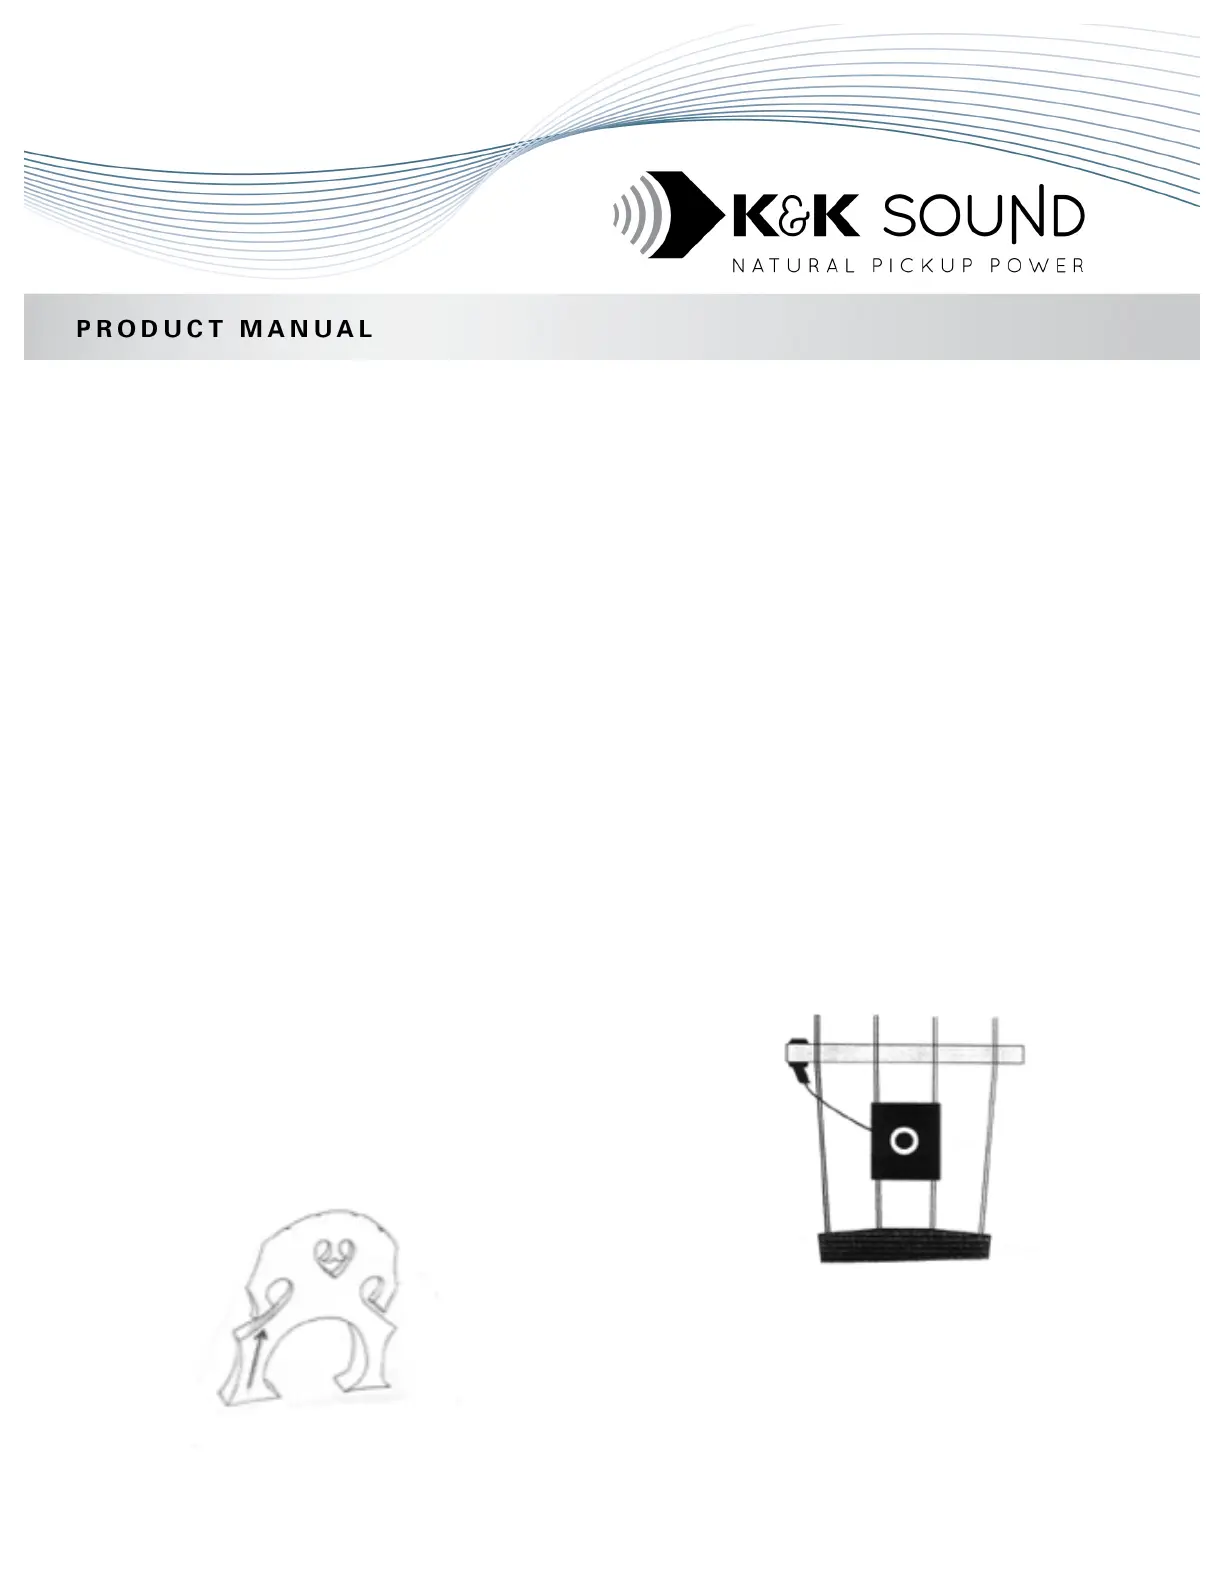
Wing Transducer
You can attach the wing transducer on either side of
the bridge. We recommend trying the low string (E
string) side first. If the slot is too narrow, DO NOT
FORCE THE PICKUP INTO THE SLOT! YOU WILL
BREAK THE PIEZO CERAMIC ELEMENT AND VOID
THE WARRANTY!
For the right fit, you may have to remove some
material from the lower part of the bridge. You’ll
achieve best results with a snug fit. If the slot is too
big, please insert some cardboard or veneer to
build it up.
Fingerboard Pickup
We suggest you place the fingerboard pickup near
the top of your fingerboard, on the reverse side. The
wire should travel behind your fingerboard, through
the bridge center "heart" (or the unused wing slot, if
the heart is too small).
Before you proceed to attaching the fingerboard
transducer, thread the transducer and wire through
the heart. A small piece of foam is supplied to
isolate the wire from bridge vibrations; wedge it into
the bridge “heart” and cut a small slit in it. If the
foam block is too large, trim it, but allow enough
excess material so it stays in place when
compressed, isolating the wire.
Pickup Installation
1.Cut a small piece from the double-sided tape,
wide enough for the pickup, and peel the off the
wax paper. Press the tape (on the brown
backing) in place behind the fingerboard. See
the next section, Placement of the Fingerboard
Pickup, for more detailed placement instructions.
Product specificaties
| Merk: | K&K Sound |
| Categorie: | Niet gecategoriseerd |
| Model: | Bass Master Rockabilly Plus |
Heb je hulp nodig?
Als je hulp nodig hebt met K&K Sound Bass Master Rockabilly Plus stel dan hieronder een vraag en andere gebruikers zullen je antwoorden
Handleiding Niet gecategoriseerd K&K Sound

13 September 2025
12 September 2025
19 Februari 2024
19 Februari 2024
19 Februari 2024
19 Februari 2024
19 Februari 2024
19 Februari 2024
19 Februari 2024
19 Februari 2024
Handleiding Niet gecategoriseerd
Nieuwste handleidingen voor Niet gecategoriseerd
7 Juni 2026
7 Juni 2026
7 Juni 2026
7 Juni 2026
7 Juni 2026
6 Juni 2026
6 Juni 2026
6 Juni 2026
6 Juni 2026
6 Juni 2026