Integral LED ILFLA004 Handleiding
Integral LED
Verlichting
ILFLA004
Bekijk gratis de handleiding van Integral LED ILFLA004 (2 pagina’s), behorend tot de categorie Verlichting. Deze gids werd als nuttig beoordeeld door 6 mensen en kreeg gemiddeld 3.6 sterren uit 3.5 reviews. Heb je een vraag over Integral LED ILFLA004 of wil je andere gebruikers van dit product iets vragen? Stel een vraag
Pagina 1/2

Thank you for purchasing an INTEGRAL LED product. When
installed correctly this unit will provide years of service – with
no lamp changes required. For support or warranty information
please see integral-led.com.
Important Details – Please read prior to installation
1. Installation must be completed by a qualied electrician in accordance with all
recognised local and national electrical and construction regulations.
2. Ensure that the power is OFF during installation and that power cannot be
unexpectedly reconnected.
3. The light tting is designed to operate with an electricity 85-265 VAC 50Hz
supply. Do not use the light tting if damaged or if the protective glass is missing
or damaged. Do NOT open the driver cover on the rear of the unit or remove the
front protective glass. There are no serviceable parts inside.
4. This light tting is rated – suitable for indoor and outdoor use, e.g. IP67
gardens, entrances, garages, parking areas, corridors etc. Not suitable for water
immersion. Do NOT cover the light source or heat-sink. To avoid damage; do
NOT lift, carry or let the light tting hang by its wiring. Suitable to be mounted
on a stable, solid surface such as brick, concrete or wood.
5. Failure to comply with the recommendations and instructions provided herein
may cause damage to the light tting or present a risk of injury or death (e.g.
short-circuit, re, burns or electric shock). Any modications to the light tting,
incorrect installation or unsuitable positioning may be dangerous to users and
may cause the warranty to become void.
Installation Instructions
1. Ensure that the power is OFF during installation and that power cannot be
unexpectedly reconnected.
2. Place the light tting on a stable surface and with an Allen key remove the
U-bracket from the LED oodlight and store the retaining bolts, split-locks and
washers (M8 bolts) (g. 1).
3. Present the U-bracket to a suitable position and surface so that it can be
mounted ush. Check with a spirit level if required (g 2).
4. Mark out two suitable xing positions. Use suitable tools and xings to mount
the U-bracket safely and securely to the surface, depending on the substrate;
alternative xings to the items supplied may be required. We recommend
using washers to x the U-bracket. Avoid damage to any wiring. 2 X screws and
washers supplied (g. 2).
5. Once the U-bracket is mounted, securely reattach the LED oodlight ensuring
it is the correct way up and at the appropriate angle. Ensure bolts are tight on
both sides of the U-bracket (g. 3).
6. Connect the LED oodlight cable to a suitably protected waterproof junction
box. Please pay attention to the polarity and Earth. The ood light is a CLASS I
device – an EARTH connection is MANDATORY.
NEUTRAL = BLUE LIVE = BROWN GREEN/YELLOW = EARTH
7. Check connections and switch power ON when safe to do so.
Nous vous remercions d’avoir acheté un produit INTEGRAL LED.
Lorsqu’il est correctement monté, ce produit vous assurera
plusieurs années de vie utile – sans exiger aucun changement
d’ampoule. Pour toutes informations relatives à l’assistance
technique ou la garantie, rendez-vous sur integral-led.com
Important – Lire attentivement avant installation
1. L’installation doit être eectuée par un électricien qualié conformément aux
réglementations locales et nationales reconnues relatives à la construction et
aux installations électriques.
2. Assurez-vous que l’alimentation est coupée pendant l’installation et de
l’impossibilité de toute réactivation inopinée.
3. L’éclairage est conçu pour fonctionner avec une alimentation 85-265 VAC 50Hz.
N’utilisez pas l’éclairage s’il est endommagé ou si le verre de protection est
absent ou endommagé. N’OUVREZ PAS le capot du pilote situé à l’arrière de
l’unité ; n’enlevez pas le verre de protection de façade. Aucune des pièces se
trouvant à l’intérieur ne nécessitent d’intervention.
4. Éclairage de catégorie – convient à une utilisation intérieure et extérieure, IP67
telle que pour les jardins, entrées, garages, espaces de parking, couloirs etc. Ne
doit pas être immergé dans l’eau. NE PAS COUVRIR la source de lumière ou le
dissipateur de chaleur. An d’éviter toute dégradation : NE PAS soulever, porter
ou suspendre l’éclairage par le câble. Peut être xé à une surface stable solide,
telle que la brique, le béton ou le bois.
5. Le non-respect des recommandations et instructions fournies ici peut
endommager le luminaire ou présenter un risque de mort ou de blessure
(ex. court-circuit, incendie, brûlures ou électrocution). Toutes modications
apportées au luminaire, installation inappropriée ou mauvais positionnement
peuvent se révéler dangereux pour les utilisateurs et entraîner l’annulation de
la garantie.
Instructions d’installation
1. Assurez-vous que l’alimentation est coupée pendant l’installation et de
l’impossibilité de toute réactivation inopinée.
2. Posez l’éclairage sur une surface stable puis, à l’aide de la clé Allen, déposez le
support en U du projecteur LED et réservez les boulons de retenue, les goupilles
fendues et les rondelles (boulons M8) (g. 1).
3. Présentez le support en U en position et sur une surface appropriée de façon
à pouvoir l’encastrer. Vériez à l’aide d’un niveau à bulle le cas échéant (g 2).
4. Marquez les deux positions de xation appropriées. Servez-vous d’outils et
xations adaptés pour xer le support en U à la surface en toute sécurité et
sûreté, en fonction du support ; d’autres xations pour les éléments fournis
peuvent être requis. Nous recommandons d’utiliser des rondelles pour xer le
support en U. Évitez tout risque de dommage au niveau des câbles. 2 X vis et
rondelles requises (g. 2).
5. Une fois le support U xé, réinstallez solidement le projecteur LED en veillant à
ce qu’il soit bien vertical et à angle approprié. Vériez que les boulons situés des
deux côtés du support en U sont bien serrés (g. 3).
6. Connectez le câble du projecteur LED à une boîte de dérivation étanche
dûment protégée. Faites attention au sens de la polarité et à la mise à la terre.
Le projecteur est un système de CLASSE I – une connexion à la TERRE est
OBLIGATOIRE.
NEUTRE = BLEU PHASE = MARRON VERT/JAUNE = TERRE
7. Vériez les connexions et activez l’alimentation électrique lorsque les conditions
de sécurité le permettront.
Gracias por adquirir un producto INTEGRAL LED. Si se instala
correctamente, esta unidad funcionará durante años sin
necesidad de cambiar las bombillas. Si desea obtener información
sobre la garantía o solicita asistencia técnica, visite el sitio web
integral-led.com.
Importante: leer antes de realizar la instalación.
1. La instalación debe realizarla un electricista cualicado que debe cumplir todas
las normativas eléctricas y sobre construcción locales y nacionales aplicables.
2. Asegúrese de que la alimentación eléctrica esté apagada durante la instalación y
de que no pueda volver a conectarse de forma inesperada.
3. La luminaria se ha diseñado para funcionar con un suministro eléctrico de
85-265 VAC 50 Hz. No utilice la luminaria en el caso de estar dañada o en el caso
de que el cristal protector faltara o estuviera dañado. NO abra la cubierta del
controlador de la parte trasera de la unidad ni retire el cristal protector frontal.
En el interior hay piezas que no necesitan revisarse.
4. Esta luminaria tiene una clasicación , ideal para interiores y exteriores, por IP67
ejemplo, jardines, entradas, garajes, aparcamientos, pasillos, etc. Producto no
apto para su inmersión acuática. NO tape la fuente de luz ni el disipador. Para
evitar daños, NO tire del cable de la luminaria ni deje que cuelgue del mismo.
Producto apto para instalarse en una supercie estable y sólida, como por
ejemplo, construcciones de ladrillo, cemento o madera.
5. Si no sigue las instrucciones ni las recomendaciones que aquí se indican, pueden
producirse daños en la luminaria o los usuarios pueden sufrir lesiones o incluso
la muerte (por ejemplo, cortocircuitos, incendios, quemaduras o descargas
eléctricas). Si realiza modicaciones en la luminaria, la instala o la coloca
incorrectamente, los usuarios podrían sufrir daños y la garantía podría anularse.
Instrucciones para la instalación
1. Asegúrese de que la alimentación eléctrica esté apagada durante la instalación y
de que no pueda volver a conectarse de forma inesperada.
2. Coloque la luminaria en una supercie estable y con una llave Allen retire el
soporte en forma de U del foco LED y conserve los pernos de retención, clavijas
y arandelas (pernos M8) (g. 1).
3. Coloque el soporte en forma de U en una posición y supercie adecuadas
para que pueda instalarse correctamente. Compruébelo con un nivel si fuera
necesario (g. 2).
4. Señale las dos posiciones de jación adecuadas. Utilice herramientas y
accesorios adecuados para instalar de forma segura el soporte en forma de U
en la supercie, en función del sustrato; puede que sea necesario utilizar los
accesorios adicionales. Recomendamos utilizar arandelas para jar el soporte
en forma de U. Evite provocar daños en el cableado. 2 X tornillos y arandelas
suministrados (g. 2).
5. Una vez que se haya instalado el soporte en forma de U, vuelva a colocar
el foco LED asegurándose de que esté colocado hacia arriba y en el ángulo
adecuado. Asegúrese de que los pernos están apretados en ambos laterales del
soporte en forma de U (g. 3).
6. Conecte el cable de foco LED a una caja de conexiones estanca
debidamente protegida. Preste atención a la polaridad y a la conexión a tierra. El
foco es un dispositivo de CLASE I, la conexión A TIERRA es OBLIGATORIA.
NEUTRO = AZUL ACTIVO = MARRÓN VERDE/AMARILLO = CONEXIÓN A
TIERRA
7. Compruebe las conexiones y encienda la alimentación eléctrica cuando sea
seguro hacerlo.
Integral Product Code 6 Digit Code Wattage
ILFLA001 00-75-14 20W
ILFLA002 00-76-64 30W
ILFLA003 00-76-66 50W
ILFLA004 00-80-16 100W
Warranty/Technical and contact information are all
available at www.integral-led.com
Fig.3
Fig.2
Fig.1
Non-Dimmable IP67
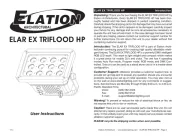
INSTALLATION INSTRUCTION
SUPER SLIM Floodlight
INSTRUCTIONS D’INSTALLATION
Projecteur SUPER SLIM
INSTRUCCIONES PARA LA INSTALACIÓN
Foco SUPER SLIM
EN FR ES

Danke, dass Sie sich für den Kauf eines Produkts von INTEGRAL
LED entschieden haben. Sofern diese Einheit ordnungsgemäß
installiert wird, kann sie über Jahre hinweg betrieben werden –
ohne, dass ein Glühbirnenwechsel erforderlich wird. Bitte siehe
integral-led.com für Support- oder Garantieinformationen.
Wichtig - Bitte vor der Installation durchlesen
1. Die Installation muss von einem qualizierten Elektriker in Übereinstimmung
mit allen anerkannten lokalen und nationalen elektrotechnischen sowie
Bauvorschriften durchgeführt werden.
2. Stellen Sie sicher, dass die Netzversorgung während der Installation
ausgeschaltet ist und dass sie nicht unerwartet wiederhergestellt werden kann.
3. Die Lampenfassung wurde entwickelt, um mit einer Energieversorgung von
85-265 VAC, 50Hz betrieben zu werden. Verwenden Sie die Lampenfassung
nicht, wenn sie beschädigt ist oder wenn das Schutzglas fehlt oder beschädigt
ist. Die Treiberabdeckung auf der Rückseite der Einheit NICHT önen und das
vordere Schutzglas NICHT entfernen. Es sind keine betriebsfähigen Teile im
Inneren.
4. Die Lampenfassung ist als Schutzart IP67 eingestuft - geeignet für den Innen- und
Außengebrauch, z. B. Gärten, Eingänge, Garagen, Parkplätze, Gänge, etc. Kein
Wasser eindringen lassen. Die Lichtquelle und den Kühlkörper NICHT abdecken.
Um Schäden zu vermeiden NICHT anheben, tragen oder die Lampenfassung an
den Kabeln hängen lassen. Geeignet für eine Montage auf einer stabilen und
soliden Oberäche wie Steinen, Beton oder Holz.
5. Nichteinhaltung der hier enthaltenen Empfehlungen und Anweisungen kann zu
Schäden an der Lampenfassung führen oder eine Verletzungs- oder Lebensgefahr
darstellen (z. B. Kurzschluss, Feuer, Verbrennungen oder elektrischer Schlag).
Sämtliche Umbauten an der Lampenfassung, eine inkorrekte Installation oder
eine ungeeignete Positionierung können Benutzer gefährden und die Garantie
für ungültig erklären.
Installationsanweisungen
1. Stellen Sie sicher, dass die Netzversorgung während der Installation
ausgeschaltet ist und dass sie nicht unerwartet wiederhergestellt werden kann.
2. Platzieren Sie die Lampenfassung auf einer stabilen Oberäche und entfernen
Sie mit einem Inbusschlüssel die U-Halterung vom LED-Außenstrahler. Bewahren
Sie die Haltebolzen, Spannverschlüsse und Unterlegscheiben (M8-Bolzen) gut
auf (Abb. 1).
3. Bringen Sie die U-Halterung in einer geeigneten Position und auf einer
geeigneten Oberäche an, damit sie eben montiert werden kann. Überprüfen
Sie diese wenn nötig mit einer Wasserwaage (Abb. 2).
4. Markieren Sie die zwei geeigneten Befestigungspunkte. Verwenden Sie geeignete
Werkzeuge und Befestigungen, um die U-Halterung sicher an der Oberäche zu
befestigen. Je nach Trägermaterial können alternative Befestigungsmittel für die
bereitgestellten Artikel erforderlich sein. Wir empfehlen die Verwendung von
Unterlegscheiben, um die U-Halterung zu befestigen. Vermeiden Sie Schäden
an der Verkabelung. 2 X Schrauben und Unterlegscheiben enthalten (Abb. 2).
5. Sobald die U-Halterung montiert wurde, bringen Sie den LED-
Außenstrahler sicher wieder an. Vergewissern Sie sich, dass der LED-
Außenstrahler richtig herum und in einem angemessenen Winkel montiert
wurde. Stellen Sie sicher, dass die Bolzen auf beiden Seiten der U-Halterung fest
angezogen sind (Abb. 3).
6. Verbinden Sie das LED-Außenstrahler-Kabel mit einem angemessen
geschützten und wasserfesten Verteilerkasten. Bitte beachten Sie die Polarität
und Erdung. Der Außenstrahler ist ein Gerät der KLASSE I – eine ERDUNGS-
Verbindung ist OBLIGATORISCH.
NEUTRAL = BLAU UNTER SPANNUNG = BRAUN GRÜN/GELB = ERDUNG
7. Überprüfen Sie die Verbindungen und schalten Sie die Energieversorgung EIN,
wenn es sicher ist.
Hartelijk dank voor uw aankoop van een INTEGRAL LED-product.
Als u dit product correct installeert, biedt het u jarenlang plezier -
zonder dat de lamp vervangen hoeft te worden. Ga naar integral-
led.com voor ondersteuning of garantie-informatie.
Belangrijk - lezen voor installatie
1. De installatie dient uitgevoerd te worden door een bevoegd elektricien conform
alle lokale en nationale elektrische en bouwregels.
2. Controleer of de stroom is UITGESCHAKELD tijdens installatie, en zorg dat hij
niet onverwacht weer ingeschakeld kan worden.
3. De verlichtingsarmatuur is bedoeld voor een stroomtoevoer van 85-265 VAC
50 Hz. Gebruik de verlichtingsarmatuur niet indien hij beschadigd is of
als het beschermingsglas ontbreekt of beschadigd is. Open de afdekking
van de aandrijving op de achterkant van het product NIET en verwijder het
beschermingsglas aan de voorkant niet. Het product beschikt niet over
onderdelen die u door gerepareerd kunnen worden.
4. Deze verlichtingsarmatuur heeft de beoordeling - geschikt voor gebruik IP67
binnen en buiten, bijv. tuinen, ingangen, garages, parkeerplaatsen, gangen, enz.
Niet geschikt voor onderdompeling in water. De lichtbron en het koelelement
NIET afdekken. Om schade te voorkomen mag u de verlichtingsarmatuur NIET
optillen, dragen of aan de draden laten hangen. Geschikt voor montage op een
stabiele, stevige ondergrond als baksteen, beton of hout.
5. Het niet opvolgen van aanbevelingen en instructies in deze handleiding kan
leiden tot schade aan de verlichtingsarmatuur of een risico op overlijden
vormen (bijv. kortsluiting, brand, brandwonden of elektrische schokken). Iedere
aanpassing aan de verlichtingsarmatuur, onjuiste installatie of ongeschikte
plaatsing kan gevaarlijk zijn voor gebruikers en kan leiden tot ongeldigheid van
de garantie.
Installatie-instructies
1. Controleer of de stroom is UITGESCHAKELD tijdens installatie, en zorg dat hij niet
onverwacht weer ingeschakeld kan worden.
2. Plaats de verlichtingsarmatuur op een stabiele ondergrond en verwijder met
een Allen-sleutel de U-haak van de LED-schijnwerper en bewaar de bouten,
veerringen en sluitringen (M8-bouten) (g. 1).
3. Plaats de U-haak op een geschikte positie en oppervlak, zodat hij recht
gemonteerd kan worden. Gebruik eventueel een waterpas (g. 2).
4. Markeer de twee geschikte bevestigingsposities. Gebruik goed gereedschap
en bevestigingsmaterialen om de U-haak veilig en stevig op het oppervlak
te bevestigen, afhankelijk van de ondergrond. Het kan zijn dat u andere
bevestigingsmaterialen nodig hebt dan de meegeleverde items. We raden aan
sluitringen te gebruiken voor het bevestigen van de U-haak. Voorkom schade
aan de bedrading. 2 schroeven en sluitringen meegeleverd (g. 2).
5. Als de U-haak gemonteerd is, bevestigt u de LED-schijnwerper en zorgt
u ervoor dat hij op de juiste manier en in de juiste hoek hangt. Controleer of de
bouten aan beide zijden van de U-haak stevig vastgedraaid zijn (g. 3).
6. Sluit de kabel van de LED-schijnwerper op een veilige, waterdichte
aansluitdoos aan. Let hierbij op de polariteit en aarding. De schijnwerper is een
apparaat in KLASSE I - een GEAARDE aansluiting is VERPLICHT.
NEUTRAAL = BLAUW ONDER SPANNING = BRUIN GROEN/GEEL =
AARDE
7. Controleer de aansluitingen en schakel de stroom IN wanneer dit veilig is.
Dziękujemy za zakup produktu INTEGRAL LED. Poprawny montaż
zapewni długie lata użytkowania — bez konieczności wymiany
żarówki. Aby uzyskać pomoc lub informacje dotyczące gwarancji,
prosimy odwiedzić witrynę internetową integral-led.com.
Ważne - przeczytać przed montażem
1. Montaż musi być przeprowadzony przez wykwalikowanego elektryka zgodnie
z obowiązującymi lokalnymi i krajowymi przepisami budowlanymi oraz
dotyczącymi urządzeń elektrycznych.
2. Podczas montażu należy upewnić się, że zasilanie jest WYŁĄCZONE i nie można
go niespodziewanie włączyć.
3. Oprawa oświetleniowa jest przeznaczona do pracy z napięciem 85-265 VAC
50 Hz. Nie należy używać oprawy oświetleniowej, jeśli jest uszkodzona oraz
jeśli brakuje szkła ochronnego lub jest ono uszkodzone. NIE otwierać pokrywy
sterownika z tyłu modułu oraz nie zdejmować przedniego szkła ochronnego.
Wewnątrz nie ma części, które mogą być naprawiane lub konserwowane.
4. Oprawa oświetleniowa ma certykat — jest przeznaczona do użytku IP67
wewnątrz i na zewnątrz budynków, np. w ogrodach, wejściach, garażach,
miejscach parkingowych, korytarzach. Nie należy zanurzać oprawy w wodzie.
NIE przykrywać źródła światła i radiatora. Aby uniknąć uszkodzenia, NIE należy
przenosić oprawy oświetleniowej, trzymając za jej okablowanie. Osłona
przeznaczona do montażu na stabilnej, twardej powierzchni, takiej jak cegły,
beton i drewno.
5. Niestosowanie się do zaleceń i instrukcji zawartych w niniejszym dokumencie
może spowodować uszkodzenie oprawy oświetleniowej lub ryzyko obrażeń
ciała, a nawet śmierci (np. zwarcie, pożar, poparzenie lub porażenie prądem
elektrycznym). Wszelkie modykacje oprawy oświetleniowej, nieprawidłowy
montaż lub nieodpowiednie umieszczenie produktu mogą być niebezpieczne
dla użytkowników i powodują utratę gwarancji.
Instrukcja montażu
1. Podczas montażu należy upewnić się, że zasilanie jest WYŁĄCZONE i nie można
go niespodziewanie włączyć.
2. Umieścić osłonę oświetleniową na stabilnej powierzchni i za pomocą klucza
imbusowego odkręcić wspornik typu U od reektora LED. Umieścić śruby
zabezpieczające, podkładki sprężyste i podkładki śrub (śruby M8) w bezpiecznym
miejscu (rys. 1).
3. Umieścić wspornik typu U w odpowiednim miejscu i na odpowiedniej
powierzchni, aby można było dokonać montażu podtynkowego. W razie potrzeby
użyć poziomicy (rys. 2).
4. Zaznaczyć dwa miejsca na otwory montażowe. Użyć odpowiednich narzędzi,
aby bezpiecznie zamontować wspornik typu U do powierzchni. W zależności od
rodzaju powierzchni może być wymagany alternatywny sposób montażu. Do
montażu wspornika typu U zaleca się użyć podkładek. Uważać, aby nie uszkodzić
okablowania. 2 śruby i podkładki w zestawie (rys. 2).
5. Po zamontowaniu wspornika typu U zamontować reektor LED.
Sprawdzić, czy reektor nie jest zamontowany odwrotnie lub pod niewłaściwym
kątem. Sprawdzić, czy śruby po obu stronach wspornika typu U są prawidłowo
dokręcone (rys. 3).
6. Podłączyć przewód zasilający reektora LED do odpowiednio
zabezpieczonej, wodoodpornej puszki elektroinstalacyjnej. Zwrócić uwagę na
biegunowość i uziemienie. Oprawa oświetleniowa to urządzenie KLASY I —
UZIEMIENIE jest BEZWZGLĘDNIE WYMAGANE.
NEUTRALNY =
NIEBIESKI POD NAPIĘCIEM = BRĄZOWY UZIEMIENIE (SYMBOL) =
ZIELONY/ŻÓŁTY
7. Sprawdzić połączenia i WŁĄCZYĆ zasilanie, gdy można to zrobić bezpiecznie.
Agradecemos ter adquirido um produto LED INTEGRAL. Quando
instalada corretamente, esta unidade oferece anos de serviço
sem que seja necessária a substituição da lâmpada. Para obter
assistência ou informação sobre a garantia, consulte integral-
led.com.
Importante - Leia estas instruções antes de proceder à instalação
1. A instalação deve ser executada por um eletricista qualicado em conformidade
com todos os regulamentos elétricos e de construção reconhecidos a nível local,
e nacional.
2. Certique-se de que a alimentação se encontra DESLIGADA durante a instalação
e de que a mesma não será reativada inesperadamente.
3. O foco luminoso foi concebido para funcionar com uma alimentação elétrica
de 85-265 VAC 50Hz. Não utilize o foco luminoso caso apresente danos ou
caso o vidro de proteção não esteja presente ou esteja danicado. NÃO abra a
tampa de transmissão situada na parte traseira da unidade nem retire o vidro
de proteção dianteiro. Não existem peças para manutenção no interior.
4. Este foco luminoso tem a classicação de – adequado para uso em IP67
espaços interiores ou exteriores como jardins, entradas, garagens, áreas de
estacionamento, corredores, etc. Não é adequado para imersão em água. NÃO
cubra a fonte de luz ou a base de calor. Para evitar danos, NÃO deve elevar,
transportar ou suspender o foco luminoso pelo o. Adequado para montagem
numa superfície estável e sólida como tijolo, cimento ou madeira.
5. O incumprimento das recomendações e instruções fornecidas no presente
documento poderá provocar danos ao foco luminoso ou apresentar risco de
lesões ou morte (por ex., curto-circuito, incêndio, queimaduras ou choque
elétrico). Quaisquer modicações efetuadas no foco luminoso, a sua instalação
incorreta ou o seu posicionamento inadequado podem ser perigosos e podem
resultar na anulação da garantia.
Instruções de instalação
1. Certique-se de que a alimentação se encontra DESLIGADA durante a instalação
e de que a mesma não será reativada inesperadamente.
2. Coloque foco luminoso numa superfície estável e com uma chave de parafusos
retire a braçadeira em U do projetor LED, e guarde as restantes porcas, fechos e
arruelas (porcas M8) (g. 1).
3. Coloque a braçadeira em U numa posição e superfície adequadas para que
possa ser montado diretamente. Verique a exatidão da montagem com um
nível caso seja necessário (g. 2).
4. Marque as duas posições de xação adequadas. Utilize ferramentas e acessórios
adequados para montar a braçadeira em U em segurança na superfície;
dependendo do substrato poderão ser necessários acessórios alternativos.
Recomendamos a utilização de arruelas para xar a braçadeira em U. Evite a
ocorrência de danos na cablagem. 2 x parafusos e arruelas fornecidos (g. 2).
5. Logo que a braçadeira em U estiver montada, volte a xar em segurança
o projetor LED certicando-se de que se encontra na direção correta no ângulo
adequado. Certique-se de que as porcas estão apertadas de ambos os lados
da braçadeira em U (g. 3).
6. Ligue o cabo do projetor LED a uma caixa de junção impermeável devidamente
protegida. Tenha atenção à polaridade e à ligação à terra. O projetor é um
aparelho da CLASSE I; é OBRIGATÓRIA uma ligação à TERRA.
NEUTRO = AZUL CORRENTE = CASTANHO VERDE/AMARELO =
TERRA
7. Verique as ligações e LIGUE a corrente quando for seguro.
INSTALLATIONSANWEISUNGEN
SUPER SLIM Außenstrahler
INSTALLATIE-INSTRUCTIES
SUPER SLIM schijnwerper
INSTRUKCJA MONTAŻU
Reektor SUPER SLIM
INSTRUÇÕES DE INSTALAÇÃO
Projetor SUPER SLIM
DENL PL PT
Product specificaties
| Merk: | Integral LED |
| Categorie: | Verlichting |
| Model: | ILFLA004 |
| Kleur van het product: | Zwart |
| Gewicht: | 2400 g |
| Breedte: | 324 mm |
| Diepte: | 90 mm |
| Hoogte: | 258 mm |
| Gewicht verpakking: | 2650 g |
| Breedte verpakking: | 350 mm |
| Diepte verpakking: | 285 mm |
| Hoogte verpakking: | 120 mm |
| Materiaal behuizing: | Aluminium, Glass |
| Aantal lampen: | - gloeilamp(en) |
| Stroombron: | AC |
| Internationale veiligheidscode (IP): | IP67 |
| Certificering: | LVD\nEN-60598 |
| Duurzaamheidscertificaten: | RoHS |
| Lichtstroom: | 9000 lm |
| Levensduur lamp: | 20000 uur |
| Kleur licht: | Koel wit |
| Kleurtemperatuur: | 4000 K |
| Handvat(en): | Ja |
| Totaal vermogen: | 100 W |
| Dimbaar: | Nee |
| Lichtrendement: | 90 lm/W |
| Color Rendering Index (CRI): | 70 |
| Power factor: | 0.95 |
| Stralingshoek: | 120 ° |
| Lamptechnologie: | LED |
| Inclusief driver: | Ja |
| AC-ingangsspanning: | 85 - 265 V |
| AC-ingangsfrequentie: | 50 - 60 Hz |
| Bedrijfstemperatuur (T-T): | -25 - 50 °C |
Heb je hulp nodig?
Als je hulp nodig hebt met Integral LED ILFLA004 stel dan hieronder een vraag en andere gebruikers zullen je antwoorden
Handleiding Verlichting Integral LED

29 Juli 2024

29 Juli 2024

22 September 2023

22 September 2023

22 September 2023
Handleiding Verlichting
- Enerdan
- Cateye
- Ludeco
- Craftsman
- Busch-Jaeger
- Sengled
- WAC Lighting
- Dydell
- Luxform Lighting
- Clas Ohlson
- LivarnoLux
- Ledar
- IFM
- Mazda
- Ecomed
Nieuwste handleidingen voor Verlichting
12 September 2025
10 September 2025

9 September 2025
8 September 2025
8 September 2025

8 September 2025

2 September 2025
2 September 2025
2 September 2025
2 September 2025