Heatmiser DS1-E Handleiding
Heatmiser Thermostaat DS1-E
Bekijk gratis de handleiding van Heatmiser DS1-E (2 pagina’s), behorend tot de categorie Thermostaat. Deze gids werd als nuttig beoordeeld door 13 mensen en kreeg gemiddeld 4.0 sterren uit 7 reviews. Heb je een vraag over Heatmiser DS1-E of wil je andere gebruikers van dit product iets vragen? Stel een vraag
Pagina 1/2
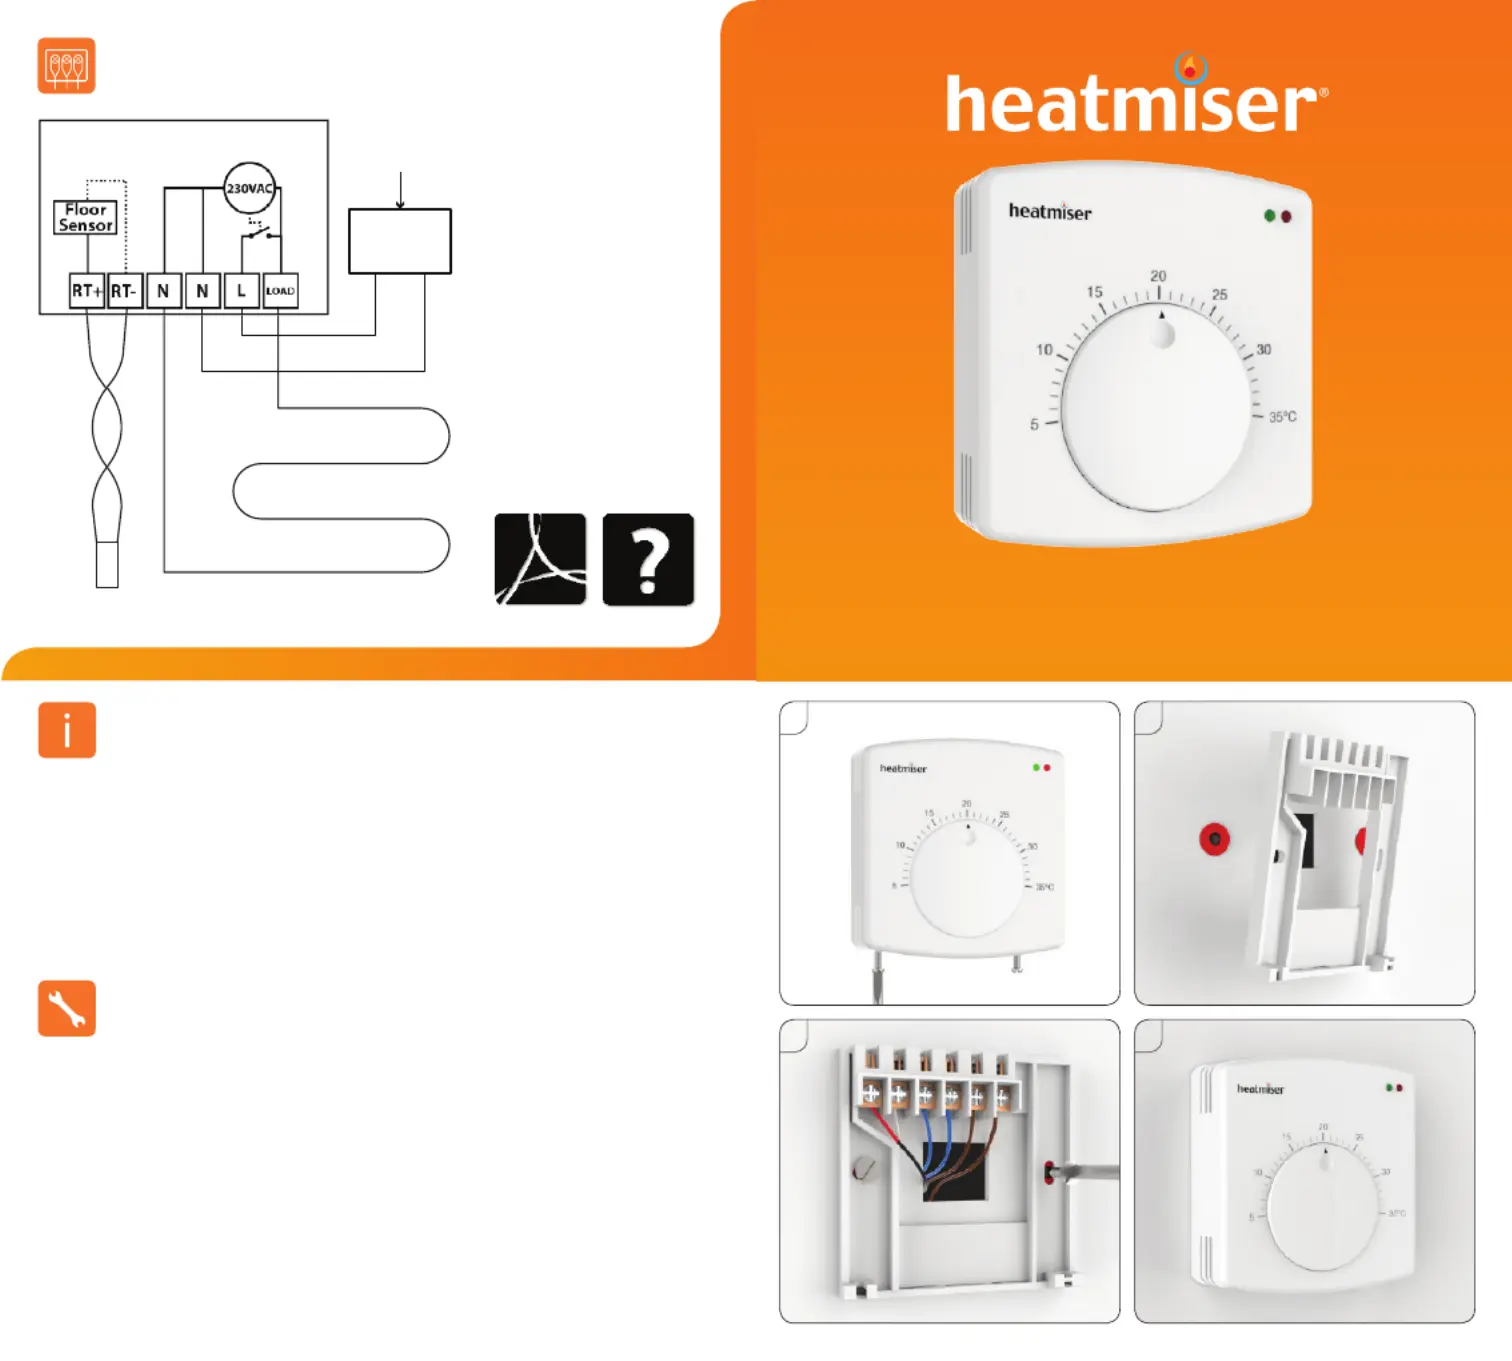
Wiring Diagram
RCD
MAINS SUPPLY
LN
MATTING OR WIRE
FlOOR PROBE
DS1-E
The Heatmiser DS1-E dial type thermostat is designed
specically for electric underoor heating.
This thermostat incorporates the following functions;
• Adjustable Switching Dierential
• LED Heat and Power Indication
• 230v AC, 13A Switching
Want More Information?
Call our support team on:
+44 (0)1254 669090
Or view video specications
directly on our website:
www.heatmiser.com
Introduction
1
4
Model: DS1-E
IN ORDER TO AVOID ANY RISK OF ELECTRIC SHOCK, TURN OFF THE POWER TO THE
HEATING SYSTEM.
This dial thermostat is designed to be surface mounted.
1. Separate the front part of the thermostat by unscrewing securing screws on the
bottom face of the thermostat.
2. Mark 2 hole positions on the wall using the backplate as a positioning template. Drill at
the marked positions and insert a wall plug in to each hole.
3. Terminate the thermostat as per wiring diagram and screw the DS1-E back plate to the
back box.
4. Reconnect the thermostat front plate and insert the securing screws.
Installation
PDFFAQ
2
3
Product specificaties
| Merk: | Heatmiser |
| Categorie: | Thermostaat |
| Model: | DS1-E |
Heb je hulp nodig?
Als je hulp nodig hebt met Heatmiser DS1-E stel dan hieronder een vraag en andere gebruikers zullen je antwoorden
Handleiding Thermostaat Heatmiser

8 Augustus 2024
8 Augustus 2024
8 Augustus 2024
8 Augustus 2024
8 Augustus 2024
8 Augustus 2024
8 Augustus 2024
8 Augustus 2024
8 Augustus 2024
8 Augustus 2024
Handleiding Thermostaat
Nieuwste handleidingen voor Thermostaat
14 Juli 2026
12 Juli 2026
10 Juli 2026
9 Juli 2026
8 Juli 2026
12 Juni 2026
4 Juni 2026
3 Juni 2026
3 Juni 2026
3 Juni 2026