Garmin HUD Handleiding
Bekijk gratis de handleiding van Garmin HUD (6 pagina’s), behorend tot de categorie Navigator. Deze gids werd als nuttig beoordeeld door 10 mensen en kreeg gemiddeld 4.9 sterren uit 5.5 reviews. Heb je een vraag over Garmin HUD of wil je andere gebruikers van dit product iets vragen? Stel een vraag
Pagina 1/6


All rights reserved. Under the copyright laws, this manual may not be copied, in whole or in part, without the written consent of Garmin. Garmin reserves the
right to change or improve its products and to make changes in the content of this manual without obligation to notify any person or organization of such
changes or improvements. Go to for current updates and supplemental information concerning the use of this product.www.garmin.com
Garmin®, the Garmin logo, and StreetPilot ® are trademarks of Garmin Ltd. or its subsidiaries, registered in the USA and other countries. These trademarks
may not be used without the express permission of Garmin.
The Bluetooth® word mark and logos are owned by the Bluetooth SIG, Inc. and any use of such marks by Garmin is under license. iPad ® and iPhone ® are
trademarks of Apple® Inc., registered in the U.S. and other countries. Android™ is a trademark of Google Inc. Windows ® is a registered trademark of
Microsoft Corporation in the United States and other countries. Other trademarks and trade names are those of their respective owners.
Getting Started
WARNING
See the guide in the Important Safety and Product Information
product box for product warnings and other important
information.
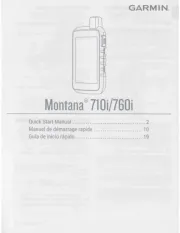
Applying the Film to the Windscreen
NOTICE
Before applying the film to the windscreen, check all applicable
laws and ordinances in the area where you drive. Some laws
prohibit or restrict the application of film to the front window. It is
your responsibility to apply the film in compliance with all
applicable laws and ordinances. Garmin is not responsible for
any fines, penalties, or damages that may be incurred as a
result of any law or ordinance relating to the use of your Garmin
device.
Before applying the film, test the location with the device turned
on. You cannot move the film after it is applied and has dried.
Do not apply the film to a dry surface. If you apply the film to a
dry surface and try to remove the bubbles, the film will be
ruined.
You can use the included film to reflect the display onto the
windscreen.
1Select a location to apply the film.
See the guide for Important Safety and Product Information
more information.
2Clean and dry the windscreen with a lint-free cloth.
3Spray clean water on the windscreen.
The water enables the film to attach to the window.
4Pull the white tab to remove the protective layer from the
adhesive side of the film.
5Apply the film to the window, with the protective layer with
the green tab facing out.
6If necessary, move the film to the ideal viewing location while
the windscreen is still wet.
7Use a card to scrape the bubbles out to the edge of the film.
Only remove the bubbles when the top protective layer is still
on the film.
The fewer bubbles under the film, the better the view of the
data.
8Pull the green tab to remove the final protective layer from
the film.
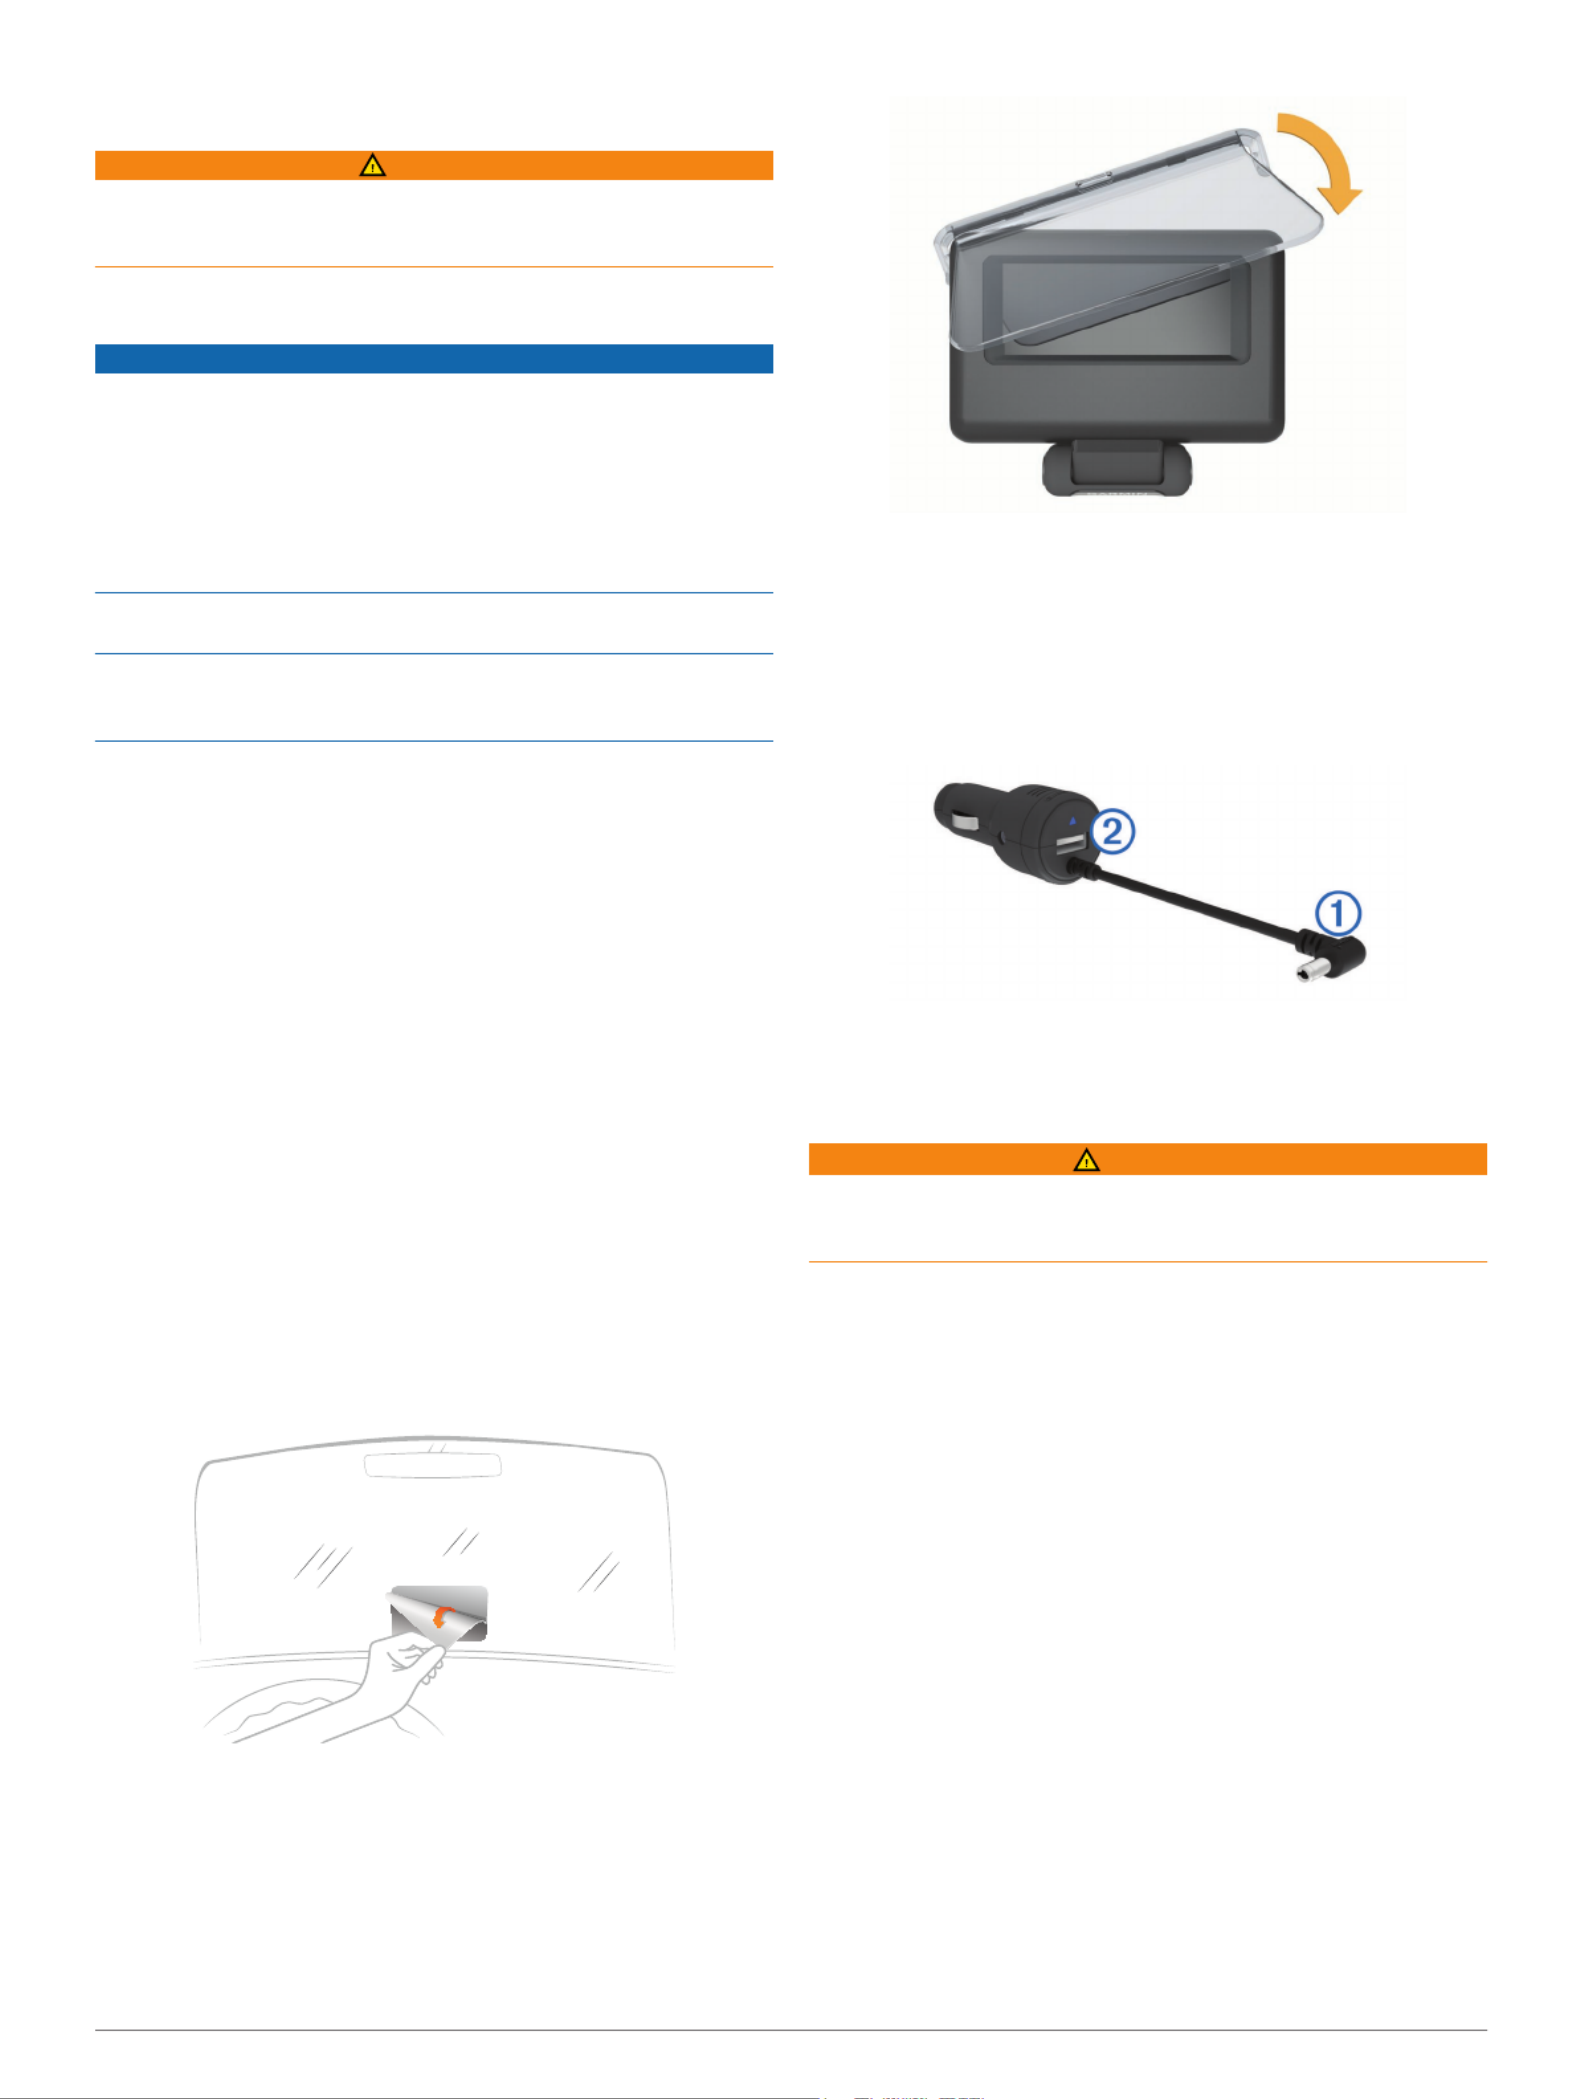
Connecting the Reflector Lens
You can use the snap-on reflector lens instead of the
windscreen film. This allows you to use the head-up display in
other vehicles or in areas where the film is not permitted.
Snap the reflector lens onto the device.
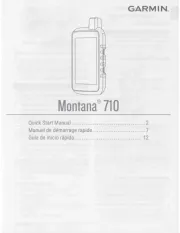
Connecting to Vehicle Power
You can charge a smartphone device using the USB port on the
vehicle power connector.
1Plug the vehicle power cable into a power outlet in your
vehicle.
2Plug the other end of the device power cable
À to the small
hole on the device.
3If necessary, plug the smartphone power cable into the USB
port Á.
Placing the Device on the Dashboard
WARNING
When placing the device in a vehicle, observe all placement
considerations listed in the Important Safety and Product
Information guide.
1Select a location for the device.
2Clean and dry the dashboard where you are placing the
device.
3Place the device on the dashboard.
4Press the base down.
The base conforms to the shape of the dashboard.
5Adjust the viewing angle as needed.
TIP: Adjusting the viewing angle can also increase the
brightness of the display.
If the bottom surface of the device slides on the dashboard due
to dust and dirt buildup, wipe it clean using a cloth dampened
only with water. Do not use soap or cleaning fluids.
Connecting the Device to Your Smartphone
Before you can use the head-up display, you must connect it to
your smartphone.
1Plug in the device and ensure it is turned on.
2Bring the smartphone and the device within 33 ft. (10 m) of
each other.
3On the smartphone, enable Bluetooth
® wireless technology
and search for devices.
A list of nearby Bluetooth devices appears.
4Select the Garmin HUD in the list.
Getting Started 1
Product specificaties
| Merk: | Garmin |
| Categorie: | Navigator |
| Model: | HUD |
| Kleur van het product: | Zwart |
| Gewicht: | 277 g |
| Breedte: | 108 mm |
| Diepte: | 88 mm |
| Hoogte: | 19 mm |
| Gebruikershandleiding: | Ja |
| Stroom: | 2.1 A |
| Beeldscherm: | VFD |
| Ingangsspanning: | 5 V |
| Compatibele besturingssystemen: | iOS, Android, Windows Phone 8 |
| Type mobiele apparatuur: | Mobiele telefoon/Smartphone |
Heb je hulp nodig?
Als je hulp nodig hebt met Garmin HUD stel dan hieronder een vraag en andere gebruikers zullen je antwoorden
Handleiding Navigator Garmin

10 Maart 2025
10 Maart 2025
10 Maart 2025
9 Januari 2025

14 December 2024
14 December 2024
7 December 2024

7 December 2024
7 December 2024

15 November 2024
Handleiding Navigator
- Parrot
- Scosche
- Dashmate
- Standard Horizon
- Alfa Romeo
- Hitachi
- VDO Dayton
- Overmax
- CarTrek
- Cydle
- Kapsys
- Becker
- Magellan
- Xzent
- Chrysler
Nieuwste handleidingen voor Navigator
5 Juli 2025

3 Juli 2025

3 Juli 2025

3 Juli 2025
2 Juli 2025
2 Juli 2025
2 Juli 2025
2 Juli 2025

2 Juli 2025

1 Juli 2025