GARDE 181COBASE2 Handleiding
GARDE Niet gecategoriseerd 181COBASE2
Bekijk gratis de handleiding van GARDE 181COBASE2 (1 pagina’s), behorend tot de categorie Niet gecategoriseerd. Deze gids werd als nuttig beoordeeld door 39 mensen en kreeg gemiddeld 4.9 sterren uit 8 reviews. Heb je een vraag over GARDE 181COBASE2 of wil je andere gebruikers van dit product iets vragen? Stel een vraag
Pagina 1/1
08/2023
IT IS RECOMMENDED THE KNIFE AND GEAR ARE
REPLACED AT THE SAME TIME FOR OPTIMAL PERFORMANCE.
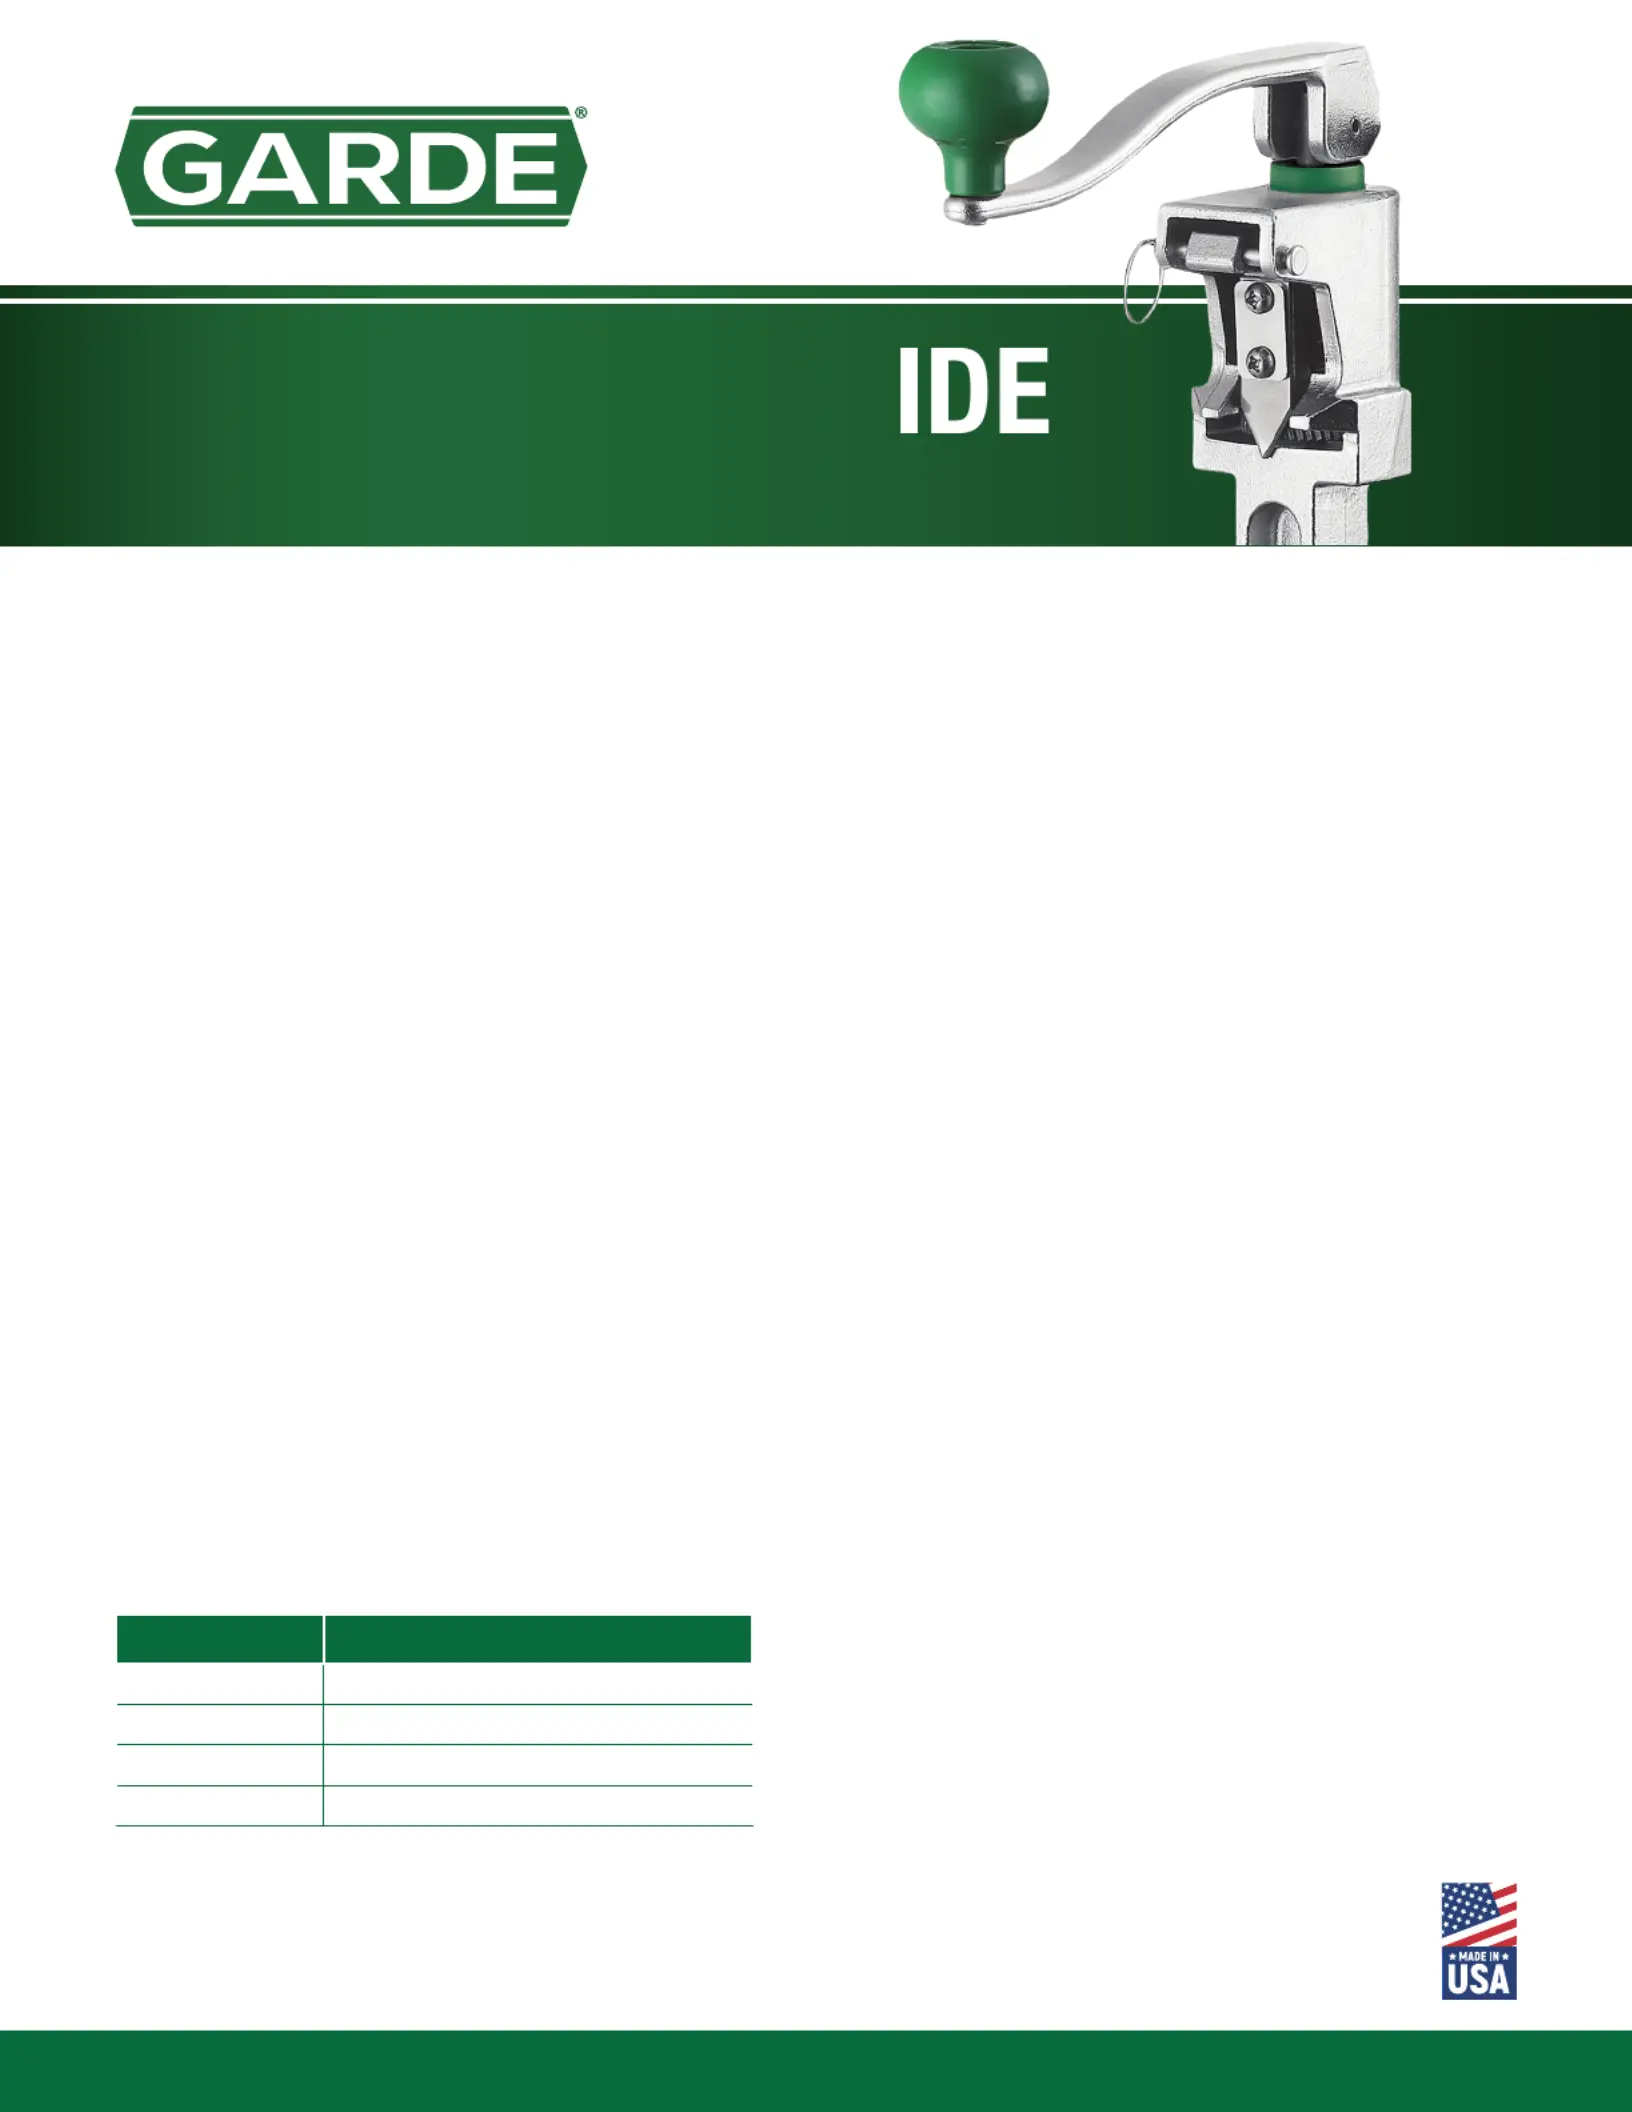
1. Insert the can opener into the base. The base will be
needed for leverage while removing the gear.
2. Use a at head screwdriver to hold the gear in place by
jamming the head of the screw driver into the teeth of the
old gear. You will need to apply enough pressure to hold
the gear in place.
3. With the screwdriver in place, begin turning the handle
counter clockwise. You should feel the tension in the
spring ease up and the gear will come loose after a few
turns.
4. Remove the old gear and keep the washer. Insert the
new gear with the washer on top. Turn the handle clock-
wise until the handle connects to the shaft below the gear.
The spring should be tense now and the can opener is
ready to use.
(181COM2GEAR)
REPLACING THE GEAR
1. Using either a Phillips or at head screw driver to remove
the 2 screws that connect the knife to the opener.
2. Remove and discard the old knife while keeping the
knife support plate.
3. Position the new knife in line with the holes and place the
support plate on top of the knife.
4. Use the screwdriver to tighten the screws.
(181COM2KNIFE)
REPLACING THE KNIFE
The can opener’s surface should be cleaned regularly using
a food safe sanitizer.
Recommendation:
Noble Chemical’s QuikSan Sanitizer and Disinfectant (147QUIKSAN)
Use a toothbrush-style brush to ensure you are able to reach
the crevices around the knife.
Recommendation:
Scrubble Products 7¼ Utility Brush Stainless Steel Bristles (27140675)
After cleaning, apply a food safe oil to the gear to keep it
turning smoothly.
Recommendation:
Petrol-Gel Food Grade Sanitary Lubricant - 4 oz. Tube (401PETROGEL)
CLEANING / MAINTENANCE
USE CAUTION WHEN CLEANING
ITEM NUMBERDESCRIPTION
181COBASE2Steel Base
181COM2KNIFEKnife
181COM2GEARGear
181COM2SCRWKnife Screws
These parts can be purchased from the same location as the can opener.
REPLACEMENT PARTS
1. Position the can you are opening on the counter on top of
the base with the lip of the can touching the can opener.
2. Line up the knife on the inside lip of the can. With the
handle upright, punch down so the knife punctures the
can’s lid.
3. Push the handle down so it is parallel with the counter
and begin turning the handle to open the can.
4. Once the lid is separated, safely remove it from the can.
Avoid touching the sharp edges of the lid created while
opening the can.
5. Pull the can opener up and move the can away from the
opener.
USING YOUR NEW CAN OPENER
The Garde Standard Duty Can Opener is made of durable cast
iron construction with a rust-resistant coating. It can be used to
open cans of all sizes, including #10 Cans. Bases are sold sepa-
rately and are required for proper leverage when opening cans.
ABOUT
Please read and comply with the instructions listed on this document. To get the
best service life and performance from your machine, clean it thoroughly before
and after each use by following the instructions listed below. Minimize the use of
alkaline cleaners as they may dull the nish and cause pitting.
181COM2BST - Plated Steel Base
181COM2NB - No Base
MODELS
STANDARD DUTY CAN OPENERS
QUICK START GU
Product specificaties
| Merk: | GARDE |
| Categorie: | Niet gecategoriseerd |
| Model: | 181COBASE2 |
Heb je hulp nodig?
Als je hulp nodig hebt met GARDE 181COBASE2 stel dan hieronder een vraag en andere gebruikers zullen je antwoorden
Handleiding Niet gecategoriseerd GARDE

27 Mei 2026
26 Mei 2026
25 Mei 2026
23 September 2025
22 September 2025
22 September 2025
22 September 2025
Handleiding Niet gecategoriseerd
Nieuwste handleidingen voor Niet gecategoriseerd
23 Juli 2026
23 Juli 2026
23 Juli 2026
23 Juli 2026
23 Juli 2026
22 Juli 2026
22 Juli 2026
22 Juli 2026
22 Juli 2026
22 Juli 2026