Extron ASA 304 Handleiding
Bekijk gratis de handleiding van Extron ASA 304 (4 pagina’s), behorend tot de categorie Receiver. Deze gids werd als nuttig beoordeeld door 58 mensen en kreeg gemiddeld 5.0 sterren uit 3 reviews. Heb je een vraag over Extron ASA 304 of wil je andere gebruikers van dit product iets vragen? Stel een vraag
Pagina 1/4
1
ASA 204 and ASA 304 • User Guide
About the ASA Series
The Extron ASA series high-performance audio summing amplifiers convert stereo audio signals into balanced or
unbalanced mono signals. The series consists of the following two models:
• ASA 204 — The ASA 204 has four independent active summing amps with four pairs of RCA connectors for
unbalanced line level stereo audio inputs. The unit has captive screw connectors for four balanced or unbalanced
mono outputs. Because of its input/output configuration, the ASA 204 can also function as an unbalanced to
balanced audio converter.
• ASA 304 — The ASA 304 has four independent active summing amps with four 5-pole captive screw connectors
for balanced or unbalanced line level stereo audio inputs. The unit has captive screw connectors for four balanced or
unbalanced mono outputs.
The ASA 204 and ASA 304 include an external 12V power supply that accepts 100-240VAC input.
Features
• Four, independent active audio summing amplifiers in a single enclosure
• Stereo inputs on RCA connectors, mono output on captive screw connectors
• Converts stereo audio to balanced or unbalanced mono audio
• ±6 dB output gain switch
• Rack-mountable 1U, quarter rack width metal enclosure
• Extron Everlast Power Supply (included) is covered by a 7-year parts and labor warranty
Installation and Operation
Mounting the ASA 204 and ASA 304
The ASA 204 and ASA 304 can be set on a table, or mounted on a rack shelf, under a desk or tabletop, or on a projector
mount.
Tabletop placement
Attach the four provided rubber feet to the bottom of the unit and place it on a convenient tabletop location.
Rack mounting
For optional rack mounting, do not install the rubber feet. Mount the ASA on a 19” 1U rack shelf or a standard universal
1U rack shelf. On the standard rack shelf, the ASA mounts in one of four locations to the rear of the rack or in one of four
locations to the front of the rack.
1. Remove rubber feet if they were previously installed on the
bottom of the ASA.
2. Mount the ASA on the rack shelf, using two 4-40 x 3/16”
screws in opposite (diagonal) corners to secure the amplifier
to the shelf.
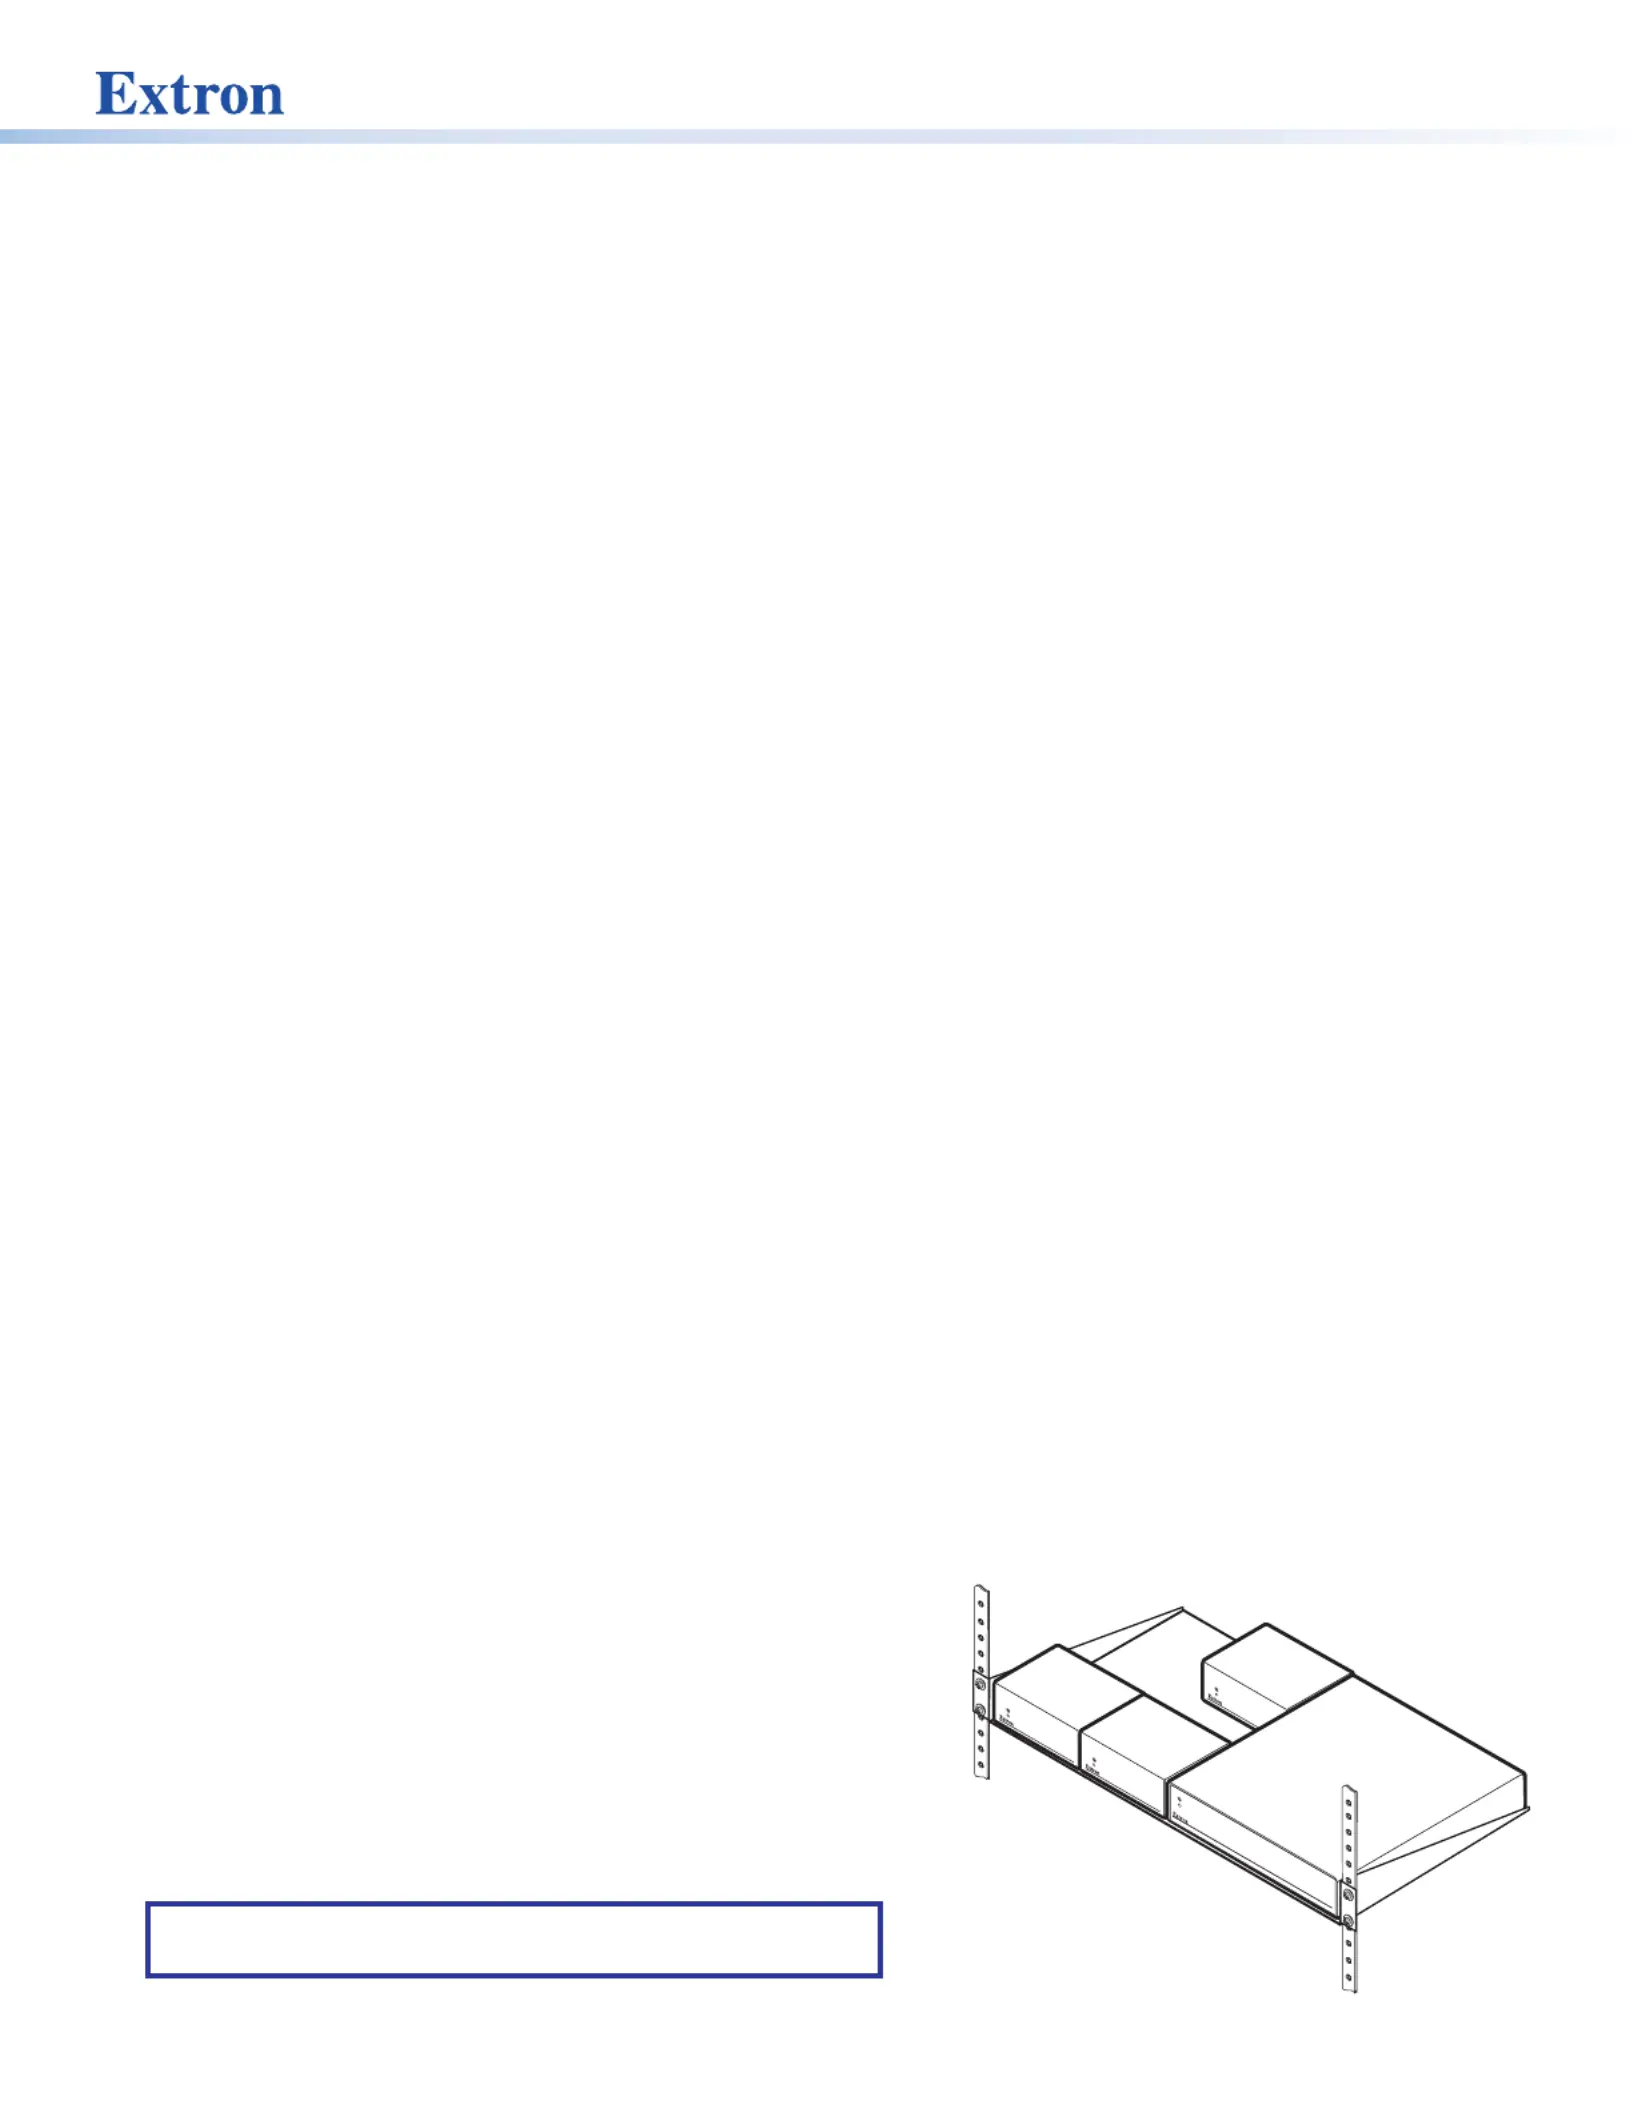
3. Install blank panels or other units on the rack shelf (see the
image on the right).
4. Attach the rack shelf to the rack using the supplied bolts.
NOTE:Most 1U rack-mountable Extron products can be
mounted on the standard shelf.
Product specificaties
| Merk: | Extron |
| Categorie: | Receiver |
| Model: | ASA 304 |
| Kleur van het product: | Grijs |
| Gewicht: | 300 g |
| Breedte: | 109 mm |
| Diepte: | 76 mm |
| Hoogte: | 43 mm |
| Gewicht verpakking: | 790 g |
| Connectiviteitstechnologie: | Bedraad |
| Afmetingen verpakking (BxDxH): | 181 x 241 x 62 mm |
| Audio-ingang (L, R): | 4 |
| Bedoeld voor: | Optreden/podium |
| Audio (L,R) out: | 4 |
| Temperatuur bij opslag: | -40 - 70 °C |
| Luchtvochtigheid bij opslag: | 10 - 90 procent |
| Audio-uitgangskanalen: | 4.0 kanalen |
| Frequentiebereik: | 20 - 20000 Hz |
| Signaal/ruis-verhouding: | 90 dB |
| Totale harmonische vervorming (THD): | 0.03 procent |
| AC-ingangsspanning: | 100-240 V |
| AC-ingangsfrequentie: | 50 - 60 Hz |
| Bedrijfstemperatuur (T-T): | 0 - 50 °C |
| Relatieve vochtigheid in bedrijf (V-V): | 10 - 90 procent |
| Code geharmoniseerd systeem (HS): | 85184000 |
| Piekvermogen per kanaal: | - W |
| Synchronisatie ingangsimpedantie: | 23000 Ohm |
| Output impedance: | 100 Ohm |
Heb je hulp nodig?
Als je hulp nodig hebt met Extron ASA 304 stel dan hieronder een vraag en andere gebruikers zullen je antwoorden
Handleiding Receiver Extron

9 Juli 2026
10 December 2025
2 April 2025
28 Maart 2025
10 Maart 2025
10 Maart 2025
30 September 2024
24 September 2024
11 September 2024
6 September 2024
Handleiding Receiver
Nieuwste handleidingen voor Receiver
20 Juli 2026
15 Juli 2026
15 Juli 2026
15 Juli 2026
15 Juli 2026
14 Juli 2026
14 Juli 2026
13 Juli 2026
13 Juli 2026
13 Juli 2026