Exakta Exa I Handleiding
Exakta
Niet gecategoriseerd
Exa I
Bekijk gratis de handleiding van Exakta Exa I (42 pagina’s), behorend tot de categorie Niet gecategoriseerd. Deze gids werd als nuttig beoordeeld door 10 mensen en kreeg gemiddeld 4.6 sterren uit 5.5 reviews. Heb je een vraag over Exakta Exa I of wil je andere gebruikers van dit product iets vragen? Stel een vraag
Pagina 1/42

1
[Translated from the German Ihagee manual with the aid of QuickDic 7.2
(www.quickdic.de
)
. Notes in square brackets are mine – Steve Sheppard.]

2
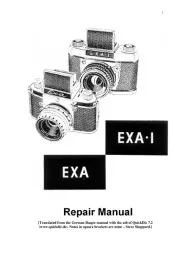
EXA, EXA I Repair Manual.
Basic Remarks:
The camera under repair is placed with the lens mount 350.09 to the front, i.e. in the photograph
taking direction.
EXA
Right: Side with wind knob 350.07-23.
Left: Side with time setting lever 350.04 U 3.
EXA I/63
Right: Side with wind knob 350.17-24.
Left: Side with time setting disc 350.21 U 3.
All screws and nuts have right-hand threads. Never use force!
Before every repair remove the viewfinder (Do not touch the ground-glass screen).
A. Disassembly of EXA camera.
1. Remove the back 350.02
a) Withdraw the take-up spool 350.10.
2. Right side open.
a) Slacken the grub-screw in the wind knob 350.07-23, and withdraw the wind knob upwards.
b) Remove the two top-plate screws M1.2 DIN 91, take off the right top-plate 350.01-7, and
the rewind release button 350.01-6.
c) Refit the wind-knob. The grub-screw must be firmly tightened on the milled face of the
spindle. Take notice of the ratchet pawl 350.07-22 for the frame counter.
3. Left side open.
(This disassembly is not necessary to dismantle the inner parts.)
a) Remove the two top-plate screws M1.2 DIN 91.
b) Slacken the grub-screw in the wind knob 350.07-23, and withdraw the wind knob upwards.
Withdraw the rewind spindle 350.12-6 from below.
c) Take off the left top-plate 350.03-7.
d) Refit the rewind knob. Tighten the grub-screw firmly on to the milled face of the rewind
spindle.
4. Mechanism removal.
a) Cock the shutter.
b) Place the camera front upwards.
c) Remove the four fixing screws M1.7 x 6.5 DIN 91 from the lens flange 350.09, and remove
the flange (noting any shims 300.21-52/1).
d) Remove the shutter inhibit lever 300.21-46, the screws M1.2 for the front-plate, and the
front-plate 350.11 U1 (or 350.11 U3).
Product specificaties
| Merk: | Exakta |
| Categorie: | Niet gecategoriseerd |
| Model: | Exa I |
Heb je hulp nodig?
Als je hulp nodig hebt met Exakta Exa I stel dan hieronder een vraag en andere gebruikers zullen je antwoorden
Handleiding Niet gecategoriseerd Exakta

31 Maart 2025
31 Maart 2025
31 Maart 2025
31 Maart 2025

31 Maart 2025

31 Maart 2025
31 Maart 2025

31 Maart 2025
Handleiding Niet gecategoriseerd
- Nemef
- PowerWalker
- Cecotec
- MKC
- Qute
- Valera
- Winston
- Casio
- Echogear
- IMM Photonics
- Tefal
- Beper
- Tacklife
- Newell
- Bolsey
Nieuwste handleidingen voor Niet gecategoriseerd
19 September 2025
19 September 2025
19 September 2025

18 September 2025

18 September 2025
18 September 2025
18 September 2025
18 September 2025
18 September 2025
18 September 2025