Dymo LabelManager PCII Handleiding
Dymo
Niet gecategoriseerd
LabelManager PCII
Bekijk gratis de handleiding van Dymo LabelManager PCII (6 pagina’s), behorend tot de categorie Niet gecategoriseerd. Deze gids werd als nuttig beoordeeld door 290 mensen en kreeg gemiddeld 4.8 sterren uit 145.5 reviews. Heb je een vraag over Dymo LabelManager PCII of wil je andere gebruikers van dit product iets vragen? Stel een vraag
Pagina 1/6

English
Quick Start
Follow these steps to install the LabelMANAGER PCII printer and print your first label.
1. Unpacking your LabelMANAGER PCII Printer
NOTE For Windows, do not plug the printer into your computer until asked to do so during the
software installation.
1 Unpack your printer and save the packing materials.
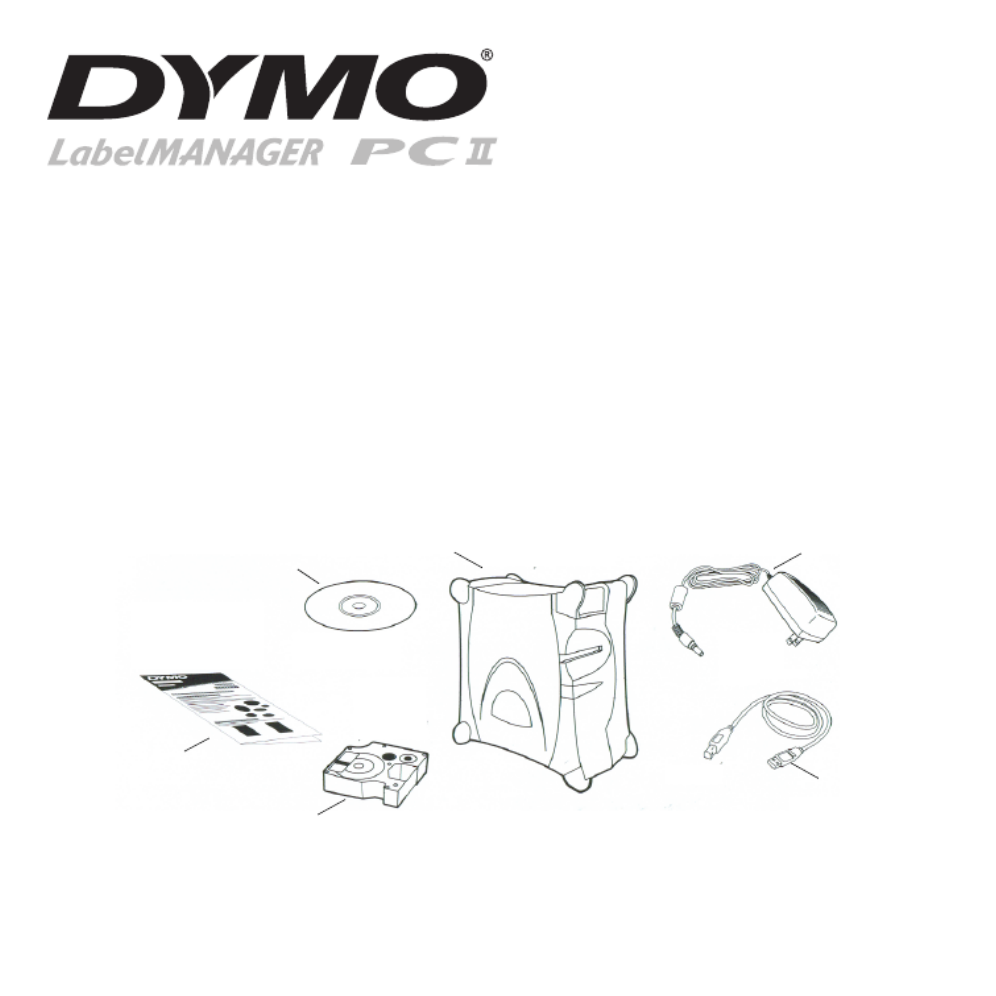
2Make sure you have all the items shown in Figure 1.
Figure 1
Power Adapter
LabelMANAGER PCII Label Printer
CD-ROM
D1 Tape Cassette
Quick Start Guide
USB Cable

2
2. Installing the Software
To install the software on a Windows system
NOTE Do not connect the printer until instructed to do so during the software installation.
1 Insert the DYMO Label Software CD into your CD-ROM drive.
After a few seconds, the installation screen appears.
If the installation screen does not appear:
a. Click Start, and then Run on the Windows taskbar. The Run dialog box
appears.
b. Enter D:\install.exe (where D is the letter assigned to the CD-ROM drive)
and click OK.
2 Select the language version to install and then follow the on-screen instructions.
To install the software on a Macintosh system
1 Insert the DYMO Label Software CD into the CD-ROM drive.
After a few seconds, the DYMO Label Software Installer icon appears.
See Figure 2.
2 Double-click the Installer icon and then follow the on-screen
instructions.
3. Connecting your LabelMANAGER PCII Printer
During the software installation, you will be asked to connect the printer to the USB port.
NOTE If you are connecting the printer to a Windows system, do not connect the printer to your
computer until asked to do so during the software installation.
DYMO Label
Software Installer
Figure 2

3
To connect the power
1 Plug the power adapter into the power connector on the
back of the printer. See Figure 3.
2 Plug the other end of the power cord into a power outlet.
To connect the USB cable
1 Plug the USB cable into the USB port on the back of the
printer. See Figure 3.
2 When asked during the software installation, plug the
USB cable into an available USB port on your computer.
4. Loading Labels
To load the D1 tape cassette
1 Press and release the label cassette cover to open the label
compartment. See Figure 4.
NOTE The first time you open the printer, remove the
protective cardboard insert from the tape exit slot.
2 Make sure the tape and ribbon are taut across the mouth
of the cassette and that the tape passes between the
guideposts. If necessary, turn the spool clockwise with a
pencil to tighten the ribbon.
3 Insert the cassette and press firmly until the cassette
clicks into place. Make sure tape and ribbon are
positioned correctly.
4 Close the label cassette cover.
You are now ready to print your first label.
Figure 3
USB
Power
Figure 4
Press
Figure 5
Remove
Cardboard Insert
Product specificaties
Merk: | Dymo |
Categorie: | Niet gecategoriseerd |
Model: | LabelManager PCII |
Heb je hulp nodig?
Als je hulp nodig hebt met Dymo LabelManager PCII stel dan hieronder een vraag en andere gebruikers zullen je antwoorden
Handleiding Niet gecategoriseerd Dymo
2 Januari 2025
2 November 2024
5 Mei 2023
11 April 2023
9 April 2023
24 Maart 2023
19 Maart 2023
19 Maart 2023
4 Maart 2023
2 Maart 2023
Handleiding Niet gecategoriseerd
- Mach Power
- Best Fitness
- RAVPower
- Sportime
- Bissell
- Heatit
- Solid State Logic
- Kress
- Kiev
- Vestil
- Walther
- Qubino
- Aarke
- Disty
- Kenmore
Nieuwste handleidingen voor Niet gecategoriseerd
16 Juni 2025
16 Juni 2025
16 Juni 2025
16 Juni 2025
16 Juni 2025
16 Juni 2025
16 Juni 2025
16 Juni 2025
16 Juni 2025
16 Juni 2025