Denver DAB-43 Plus Handleiding
Bekijk gratis de handleiding van Denver DAB-43 Plus (2 pagina’s), behorend tot de categorie Radio. Deze gids werd als nuttig beoordeeld door 6 mensen en kreeg gemiddeld 4.6 sterren uit 3.5 reviews. Heb je een vraag over Denver DAB-43 Plus of wil je andere gebruikers van dit product iets vragen? Stel een vraag
Pagina 1/2

ENGLISH
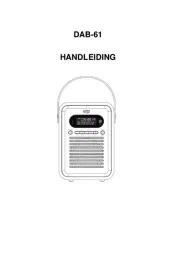
DAB-43 PLUS
DAB+/ DAB (BAND III) / FM RADIO
INSTRUCTION MANUAL
LOCATION OF CONTROLS
Setup
For use with battery power, remove the Battery Compartment Cover and insert six
“AA” size alkaline batteries, observing the proper polarity (+/–) as indicated inside the
Battery Compartment. Reattach Battery Compartment Cover.
For use with electrical AC power, plug the AC Power Cord into a standard 230-volt AC
electrical outlet.
1. VOL+ BUTTON
2. DOWN BUTTON
3. INFO/SETUP BUTTON
4. UP BUTTON
5. PRESET1 BUTTON
6. LCD DISPLAY
7. PRESET2 BUTTON
8. SHIFT
9. PRESET4 BUTTON
10. SPEAKER
11. PRESET3 BUTTON
12. FUNCTION/SNOOZE BUTTON
13. ALARM/SLEEP BUTTON
14. AUTO SCAN BUTTON
15. STANDBY BUTTON
16. VOL- BUTTON
17. POWER (ON/OFF) BUTTON
18. AUX IN JACK
19. PHONES JACK
20. DC 6V JACK
21. BATTERY DOOR
22. FM TELESCOP IC ANTENNA
POWER SUPPLY
OPERATING THE UNIT ON AC POWER
Insert one end at the supplied power cord to the DC 6V IN Jack located at the rear of the
unit and the other end into the Wall outlet.
When the First time used the cord has to be firmly pushed into the socket if does not work
on AC, to try again to be sure for a positive connection.
OPERATING THE UNIT ON BATTERIES
1. To play your unit on batteries, the AC power cord must be disconnected from the player.
2. Unplug the AC power cord from the unit and insert 4 size “A A” batteries (not provided)
in the compartment.
3. Close the battery compartment door.
Note:
Check your batteries regularly. Old or discharged batteries should be replaced. If the unit
is not to be used for sometime or is being run exclusively on AC electrical current, remove
batteries from the battery compartment to avoid leakage.
Warning: Before using the unit. Check that the local mains supply is compatible with the
Unit Do not plug or unplug the power cable when your hands wet.
When planning not to use this unit for long periods of time (i.e. Vacation etc.) disconnect
the plug from the wall outlet.
BATTERY SAFETY PRECAUTIONS:
• Keep batteries away from children and pets.
• Insert the batteries observing the proper polarity (+/–). Failure to properly align the
battery polarity can cause personal injury and/or property damage.
• Remove old or discharged batteries from the product. Remove the batteries when the
product will not be used for extend ed periods of time to prevent damage due to rusted
or corroded batteries
• Never throw batteries into a fire, do not expose batteries to fire or other heat sources
• Battery Disposal: Old or discharged batteries must be properly disposed of and recycled
in compliance with all applicable laws. For detailed information, contact your local solid
waste authorit y
• Follow the battery manufacturer’s safety, usage, and disposal instructions.
FUNCTION DESCRIPTION
short press----------- indicates t hat you should press and release the key to activate the
function
long press ------------indicat es that you should press and hold the key until the function is
activated
POWER (ON/OFF) SWITCH
Press it to switch the unit between OFF and STAND BY. The press action also controls
functions such as SNOOZE and SLEEP Timer cancel.
VOLUME BUTTON
Press the volume button to adjust the volume. VOL+ to increase and VOL– to decrease.
This BUTTON also controls the volume of the headphone output.
UP & DOWN BUTTON
These but tons are used to set the Alarm and Sleep timer
ENTER BUTTON
The ENTER BUTTON is used to
-confirm station selection in DAB mode
-Change audio mode in FM mode
-Confirm Alarm and Sleep settings
INFO/SETUP BUTTON
Short press the INFO/SETUP button to change the type of information shown on the display
FUNCTION/SNOOZE BUTTON
Short press the FUNCTION/SNOOZE button to change between DAB and FM
PRESET1,PRESET2,PRESET3 & PRESET4 BUTTONS
These keys are used to store and recall station presets in DAB and FM modes
ALARM/SLEEP BUTTON
Short press to select the Alarm setup menu
In radio on mode,Long press to select the sleep setup menu
AUTO SCAN BUTTON
In DAB mode, A short press starts a quick DAB scan ,A long press for a full DAB scan
In FM mode, A short press st arts a FM scan
HEADPHONES
A 3.5mm socket for connecting a set of stereo headphones (not included). The internal
loudspeaker is muted when headphones are plugged-in.
Avoid listening to headphones at high volume levels to prevent possible hearing damage.
AUX LINE INPUT
This 3.5mm socket is for connecting an external source such as an MP3 player, CD player,
TV or computer.
DC 6V JACK
Connect to the UNIT power adapter.
STANDBY MODE
1. Press POWER (ON/OFF) switch to “ON” position.
2. The display on the UNIT will light and display ‘Welcome! Digital Radio’
3. After 2-3s the display light dims, the message changes to ‘Standby’ and then goes to the
Time screen.
Time and date will automatically update on-air, when the radio is operated.
OPERATING THE UNIT IN DAB MODE
AUTO SCAN
1. Fully extend the telescopic antenna.
2. Short press the STA NDBY button to switch on the radio.
3. The first time the radio is powered and switched on, it will automatically select DAB
mode and start a scan of the DAB channels to search for available stations. Please leave
it to complete this process otherwise no DAB stations will be stored for later selection.
During the scan the display shows the scan progress, channel number, the mult iplex
name and then the total number of stations.
4. When the scan is complete, the UNIT will automatically tune to the first station in the
list. Stations are list ed in numeric-alpha order i.e. from 0 to 9 and then A to Z.
5. If no stations are detected during the scan the display will show ‘NO SIGNAL DAB’ ,in
this case, reposition the unit and /or the aerial and short press theAUTO SCAN but ton
to start another scan.
Note: Like Digital TV there are some areas where it may still be difficult to get a good
DAB signal. The broadcasters are constantly improving DAB coverage so in some cases it
may be neccesary to wait before some or all DAB services become available. You can check
coverage for your area .
SELECTING A STATION
1. Short press either the UP or DOWN button to scroll through the available station list
and stop at the required station.
2. The d isplay may show ‘SEARCHING …’ while the radio selects the new station. If after
selecting a station, ‘not available’ is shown, try relocating the radio to improve reception.
SECONDARY STATIONS
Some stations have one or more secondary services associated with them. When
secondary stations are available a > sign is shown after the station name.
BBC5Live> >BBC Sport Extra
BBC National DAB BBC National DAB
PRESETS
TO STORE A STATION PRESET
1. Select a DAB station as described above.
2. Press and hold one of the Preset keys until the display shows ‘Preset x stored’.
TO RECALL A PRESET STATION
Short press the required Preset key.
Note: The unit can store 8 stations for DAB & 8 stations for FM
Note: To use memory 5~8 function, you shall press the shift key f irst and then press the
PRESET1~4 buttons together.
1 2 3 4 5 6 7
8
17
18
19
20
21
22
9
11
13
14
15
16
12
10
DAB-43 PLUS (English_2014) (495 x 150 mm) • 10 Feb 2014 • AT

INFO
The UNIT has DAB information modes which are shown on the bottom line of the display.
Short press the INFO key to see the available types.
1. program type
Displays the type of station content being broadcast e.g. Classic, Pop, News, etc.
2. Ensemble Freq.
Displays the DAB station frequency such as 13F 239.200MHz.
3. Audio Bit Rate
Displays the data rate in kilo Bits per second and the audio mode e.g. Stereo.
4. Ensemble name
Displays the name of the multiplex to which the Digital1 Network current station belongs
5. Signal strength
Displays the signal strength for the station being listened to.
6. Time/Date
Displays current time and date, received off-air.
7. DLS (Dynamic Link Segment)
Scrolling text which includes messages such as Artist and track name, phone numbers,
program details, etc.
FINDING NEW STATIONS
As and when new stations are introduced it will be necessary to do an auto-scan in order
to detect and store the new stations. Short press the Auto-tune button on the rear of the
unit to start an auto-scan. DAB services are generally localised, so if you move the UNIT
to a different area it will be necessary to do an auto-scan in order to pick up stations in the
new local.
MANUAL TUNE
Manual tuning allows you to tune directly to a DAB station.
1. Long press the ENTER button until the display shows ‘Manual Tune’
2. Short press the UP or DOWN key to select a different channel number
Please note: You may have to wait for the UNIT to tune in to the new channel.
OPERATING THE UNIT IN FM MODE
1. Fully extend the telescopic antenna.
2. Press the POWER (ON/OFF) switch to ”ON” position to enter standby mode.
3. Short press the STANDBY button to switch the unit on.
4. If the UNIT is in DAB mode, short press the FUNCTION/SNOOZE BUTTON to change
to FM.
The UNIT remembers the selected source when switched to Standby and automatically
selects it the next time it is switched on. If the power is disconnected the UNIT will
always select DAB mode when first switched on.
5. The display shows the current tuning frequency and information line.
SELECTING A STATION
MANAUL TUNING
Short press the UP or DOWN BUTTON to change the tuning frequency.
note: Wait for a second or so between each press for the UNIT to re-tune.
PRESETS
TO STORE A STATION PRESET
1. Select an FM or DAB station as described above.
2. Press and hold one of the Preset keys (for approximately 3s) until the display shows “Preset
1 stored”
TO RECALL A STATION PRESET
1. Short press the required preset key.
Please note: 8 presets are available in both DAB and FM modes.
You can overwrite any of the presets at any time by holding the preset key until ‘Preset x
stored’ is shown.
AUDIO MODE
Normally, the UNIT will automatically select Mono or Stereo mode depending on what is
being broadcast and the signal strength. However if a stereo station is being received and the
signal is weak, some hiss may be audible. To reduce the hiss it is possible to switch the UNIT
from Auto to Mono mode.
1. Short press the ENTER button to display the Audio Mode screen.
2. Short press the ENTER button to switch between Auto and Mono modes. The new setting
is shown for a short time and then the display returns to the Radio screen.
INFO
The UNIT has six FM information modes which are shown on the bottom line of the display.
Short press the INFO/SETUP button to see the available types.
1. PTY (program type)
Displays the type of station content being broadcast e.g. Classic, Pop, News, etc.
2. Signal strength
Displays the signal strength for the station being listened to.
3. Time and Date
Displays current time and date, received off-air.
4. Station frequency
Displays the frequency of the station being listened to.
5. Audio mode
Displays the current audio mode setting i.e. Auto(Stereo) or Mono.
6. Radio Text
Scrolling text which includes messages such as Artist and track name, phone numbers,
program details, etc.
USING THE AUX INPUT
1. Connect the AUX connect wire from the out jack of your Personal Player such as portable
MP3 player to the AUX input jack.
2. Power on the unit by pressing the STANDBY button
3. Turn on your Personal Player to begin playing, adjust the volume to desire listening level.
4. Adjust the volume by pressing the Vol + or Vol – button
Note: Once the AUX jack is inserted with the aux plug, The FM/DAB sound is muted but the
display will not be changed.
SETTING AND USING THE ALARM
VIEW ALARM SETTINGS
With the UNIT switched on, or in Standby, short press the ALARM/SLEEP button. The
display shows the current ALARM settings for 5s and then returns to the previous screen.
From Standby, the display will light, show the settings for about 5s and then go back to
Standby.
SET THE ALARM 1
1. With the UNIT switched ON, or in Standby mode, press the ALARM/SLEEP button
until the Alarm1 menu is shown.
2. OFF or ON is flashing to indicate that it can be changed. Short press the UP or DOWN
button to change between OFF and ON and short press ENTER to confirm
3. The hour digits are now flashing. Use the UP or DOWN button to set the required time
and short press the ENTER button to confirm. Short press the UP or DOWN button to
change the hour setting in one hour increments or long press either key to scroll quickly
to the required setting.
4. The minutes can now be set, as described above and then short press ENTER button to
confirm.
5. Alarm source (BEEP1,BEEP2,FM or DAB) is now flashing. Short press the UP or DOWN
button to select and short press ENTER button to conf irm. The display continues to
show the ALARM settings for a short time and then exits the Alarm menu.
SET THE ALARM 2
1. With the UNIT switched ON, or in Standby mode, press the ALARM/SLEEP button 2
times until the Alarm2 menu is shown.
2. OFF or ON is flashing to indicate that it can be changed. Short press the UP or DOWN
button to change between OFF and ON and short press ENTER button to confirm
3. The hour digits are now flashing. Use the UP or DOWN button to set the required time
and short press the ENTER button to confirm. Short press the UP or DOWN button to
change the hour setting in one hour increments or long press either key to scroll quickly
to the required setting.
4. The minutes can now be set, as described above and then short press ENTER button to
confirm.
5. Alarm source (BEEP1,BEEP2,FM or DAB) is now flashing. Short press the UP or DOWN
button to select and short press ENTER button to conf irm. The display continues to
show the ALARM settings for a short time and then exits the Alarm menu.
Note: The ALARM1 or ALARM2 symbol is shown in the top right hand corner of the
display when the unit is in Standby mode.
In standby mode, the alarm (BEEP1,BEEP2,FM or DAB) will sound automatically at
your desried alarm setting time.
CHANGE THE ALARM SOUND
The Alarm sound on the UNIT can be changed to an electronic beep tone if preferred.
1. At step 5 (above) i.e. when FM is flashing, short press either the UP or DOWN button
to change the setting to BEEP tone1 or BEEP tone2. Short press the ENTER button to
confirm.
If you have selected a DAB station as the Alarm sound and for any reason the station is
not available e.g. is off-air, the BUZZ sound will be heard when the Alarm activates.
ALARM ON-OFF
With the Alarm set to ON, it will sound each day at the set time. To turn the Alarm OFF,Short
press the ALARM/SLEEP button and while the Alarm settings are still on screen, press the
UP or DOWN button to select alarm OFF then press ENTER button to conf irm.
This can be done with the UNIT switched ON or in Standby mode.
ALARM CANCEL
To cancel the Alarm when it has activated. Press ALARM/SLEEP button or STANDBY button
to stop the alarm sound.
The Alarm will automatically switch off after 59 munites unless cancelled or switched off
manually.
SNOOZE
The UNIT includes a 9 minute snooze timer.
When the Alarm activates, short press the FUNCTION/SNOOZE button to start the Snooze
timer. The UNIT goes to Standby.
SETTING AND USING THE SLEEP TIMER
VIEW SLEEP TIMER SETTINGS
With the UNIT switched ON, press and hold the ALARM/SLEEP button to view the current
Sleep timer settings.
SET THE SLEEP TIMER
1. With the UNIT switched ON and playing any of the inputs i.e. DAB, FM or AUX, long
press the SLEEP key until the Sleep menu is shown.
2. The minutes are now flashing. Short press ALARM/SLEEP button to change the Sleep time
(such as 15mins, 30mins ,45mins, 60mins & 90mins)
3. Available Sleep time is 15 to 90 minutes, in 15 minutes increments. Set the required time
and short press ENTER button to conf irm.
4. The display continues to show the settings for 3s and then returns to the Radio screen. The
UNIT plays for the selected time and then switches to Standby.
CANCEL SLEEP TIMER
1. With the UNIT switched ON and playing any of the inputs i.e. DAB, FM or AUX, long
press the SLEEP key until the Sleep menu is shown.
2. The minutes are now flashing. Short press ALARM/SLEEP button to change the Sleep time
to OFF.
SYSTEM RESET
System Reset can be used to clear the station list, the presets and all Alarm and Sleep settings.
This is useful if you move the UNIT to a different location (when you move house for instance)
as some stations may not be available in the new area.
1. In DAB & FM mode, long press the FUNCTION/SNOOZE button until the display shows
“Press Enter Key to Reset”.
2. Short press the ENTER button. The display now shows ‘System Reset’.
3. The UNIT will now clear the internal memory and automatically start a quick scan.
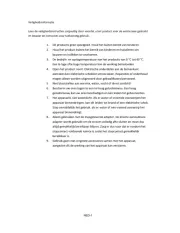
Electric and electronic equipment contains materials, components and substances
that can be hazardous to your health and the environment, if the waste material
(discarded electric and electronic equipment) is not handled correctly.
Electric and electronic equipment is marked with the crossed out trash can
symbol, seen below. This symbol signifies that electric and electronic equipment
should not be disposed of with other household waste, but should be disposed
of separately.
All cities have established collection points, where electric and electronic
equipment can either be submitted free of charge at recycling stations and other
collection sites, or be collected from the households. Additional information is
available at the technical department of your city.
DAB-43 PLUS (English_2014) (495 x 150 mm) • 10 Feb 2014 • AT
Imported by:
DENVER ELECTRONICS A/S
Stavneagervej 22
DK-8250 Egaa
Denmark
www.facebook.com/denverelectronics
ALL RIGHTS RESERVED, COPYRIGHT DENVER ELECTRONICS A/S
www.denver-electronics.com
Product specificaties
| Merk: | Denver |
| Categorie: | Radio |
| Model: | DAB-43 Plus |
Heb je hulp nodig?
Als je hulp nodig hebt met Denver DAB-43 Plus stel dan hieronder een vraag en andere gebruikers zullen je antwoorden
Handleiding Radio Denver
8 September 2025

7 Juli 2025
6 Mei 2025
6 Mei 2025
6 Mei 2025

6 Mei 2025
6 Mei 2025

6 Mei 2025

5 Mei 2025

5 Mei 2025
Handleiding Radio
- Aconatic
- Hitachi
- MOOOV
- Brigmton
- Sweex
- Futaba
- Altec Lansing
- Digitalbox
- Sony
- Ion
- Narex
- N'oveen
- Tevion
- Grundig
- Pryme
Nieuwste handleidingen voor Radio

16 September 2025

15 September 2025
15 September 2025
15 September 2025
13 September 2025

13 September 2025
12 September 2025
9 September 2025
8 September 2025
8 September 2025