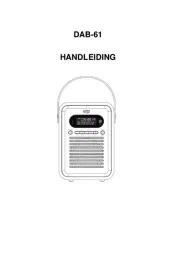
Denver CRB-619 MK2 Handleiding
Bekijk gratis de handleiding van Denver CRB-619 MK2 (9 pagina’s), behorend tot de categorie Radio. Deze gids werd als nuttig beoordeeld door 23 mensen en kreeg gemiddeld 4.2 sterren uit 12 reviews. Heb je een vraag over Denver CRB-619 MK2 of wil je andere gebruikers van dit product iets vragen? Stel een vraag
Pagina 1/9

ENGLISH
FUNCTION AND CONTROLS
1. POWER ON – OFF / ALARM OFF BUTTON
2. SOURCE BUTTON
3. MEMORY/ CLK.ADJ. BUTTON
4. ALARM 1 ON-OFF SET BUTTON
5. SNOOZE / SLEEP / DIMMER BUTTON
6. ALARM 2 ON-OFF SET BUTTON
7. SKIP BACK BUTTON
8. MEMORY UP / PLAY / PAUSE BUTTON / PAIR BUTTON
9. SKIP FORWARD BUTTON
10. VOLUME KNOB
11. SPEAKER
12. SET KNOB
13. BATTERY COMPARTMENT (BOTTOM OF UNIT)
14. DISPLAY
15. RATING LABEL (BOTTOM OF UNIT)
16. LINE IN JACK
17. DC POWER INPUT
18. USB CHARGING SOCKET
19. FM ANTENNA
ENG-1
CRB-619BLACK MK2

LED DISPLAY
PREPARATION FOR USE
AC-DC adaptor connection: The retro radio unit can be powered
by an external AC-DC adaptor, required the output DC 5V 1.5A
(included).
POWER CONNECTION
Plug the AC-DC adaptor to a household outlet AC source, connect
the adaptor’s DC output plug to the DC POWER INPUT Jack of
the main unit. This unit is equipped with a battery back up system;
it requires a “AAA” batteries x 2 (not included). Insert the battery
in the battery compartment, making certain that the positive and
negative (+and-) battery terminals are attached to the corresponding
terminals on the plate in the battery compartment. If an AC power
failure occurs, the clock automatically switches to the battery power
supply, the clock and timer memory continue running. When the AC
power resumes, the clock switches back to AC again.
TO SET CLOCK MANUALLY:
1. Press and hold the CLK.ADJ. button (3) in standby mode and
keep depress over 2 seconds to enter time set mode. The
display “24 Hr” will ash.
2. Turn the SET KNOB (12) to adjust the “12 Hr” or “24 Hr” mode.
3. Press the CLK.ADJ. button (3). The time display will ash.
4. Turn the SET KNOB (12) to adjust the clock and press the clock
adjust button the clock setting is complete.
Note:
- Press SKIP BACK BUTTON (7) button to adjust data backward.
- Press SKIP FORWARD button (9) to adjust data forward.
- Keep depress SKIP BACK (7) or SKIP FORWARD (9) button for
2 seconds to enable auto forward.
PM Indicator
AUX Indicator
ALARM 1 Indicator
BLUETOOTH Indicator
FM Indicator
ALARM 2 Indicator
TIME Indicator
ENG-2

SETTING THE ALARMS:
1. Press and hold the (4) alarm 1 or (6) alarm 2 button until the
alarm time ashes.
2. Turn the SET KNOB (12) to set the desired alarm time, Press the
alarm button the setting is complete.
Note:
- Press SKIP BACK button (7) to adjust data backward.
- Press SKIP FORWARD button (9) to adjust data forward.
- Keep depress SKIP BACK (7) or SKIP FORWARD (9) button for
2 seconds to enable auto forward.
ENABLE / DISABLE THE AL ARM
Press and hold the “ALARM 1” (4) / “ALARM 2” (6) button to enable
or disable the alarm. Once the alarm is activated, the bell symbol
will be appeared on the display.
ALARM DURATION
Beep alarm or radio alarm will continue output for 60 minutes if no
key press, then it will stop automatically and wait for same alarm
time on next day.
SNOOZE FUNCTION
When the alarm rings, press Snooze button (5) will activate the
snooze function, Beep alarm or Radio alarm will stop.
Note: The interval time of the snooze is 9 minute (not include second
offset)
Snooze will continue unless press ON/OFF button (1) to alarm off of
Buzzer alarm or Radio Alarm stop automatically after 60 minutes.
SLEEP OPERATION
When listening to radio, press Sleep button (5) to enter sleep mode.
You can just adjust the sleep timer from 120 mins to 10 mins by
pressing the Sleep button (5). The unit will automatically turn off
after the selected time.
DIMMER CONTROL
In standby mode, press the DIMMER (5) button allows you to set the
brightness of the LED display to high, low levels.
1. The clock display with dimmer low is the default setting.
2. It will consume more power if you set the clock display with
dimmer higher.
ENG-3
Product specificaties
| Merk: | Denver |
| Categorie: | Radio |
| Model: | CRB-619 MK2 |
| Kleur van het product: | Black, White |
| Ingebouwd display: | Ja |
| Gewicht: | 1150 g |
| Breedte: | 121 mm |
| Diepte: | 208 mm |
| Hoogte: | 118 mm |
| Breedte verpakking: | 145 mm |
| Diepte verpakking: | 235 mm |
| Hoogte verpakking: | 155 mm |
| Geïntegreerde klok: | Ja |
| Stroombron: | AC/Batterij |
| Bluetooth: | Ja |
| Beeldschermdiagonaal: | 0.6 " |
| Snooze functie: | Ja |
| Klokmodus: | 24 uur |
| Ingebouwde luidsprekers: | Ja |
| Gemiddeld vermogen: | 4 W |
| FM-radio: | Ja |
| Soort tuner: | Analoog |
| Wekker: | Ja |
| USB-aansluiting: | Ja |
| Inclusief dockingstation: | Nee |
| Thermometer: | Nee |
| MP3 afspelen: | Nee |
| AUX ingang: | Ja |
| Ondersteunde frequentiebanden: | FM |
| Radio: | Persoonlijk |
| Apple docking-compatibiliteit: | Niet ondersteund |
| Dimmer: | Ja |
| PLL-synthesizer: | Ja |
| AC-ingangsspanning: | 230 V |
| AC-ingangsfrequentie: | 50 Hz |
| Slaaptimer: | Ja |
| Type beeldscherm: | LED |
| Producten per intermodale container (40 ft - High Cube): | 10578 stuk(s) |
| Producten per intermodale container (20 ft): | 4419 stuk(s) |
Heb je hulp nodig?
Als je hulp nodig hebt met Denver CRB-619 MK2 stel dan hieronder een vraag en andere gebruikers zullen je antwoorden
Handleiding Radio Denver
8 September 2025

7 Juli 2025
6 Mei 2025
6 Mei 2025

6 Mei 2025

6 Mei 2025

6 Mei 2025

6 Mei 2025

5 Mei 2025

5 Mei 2025
Handleiding Radio
- Hama
- Sanwa
- View Quest
- Voxx
- Gewiss
- Listo
- Hager
- Clint
- Proline
- Jazmm
- Mac Audio
- Icom
- Tiny Audio
- Esky
- Linn
Nieuwste handleidingen voor Radio

16 September 2025

15 September 2025
15 September 2025
15 September 2025

13 September 2025

13 September 2025

12 September 2025
9 September 2025
8 September 2025
8 September 2025