Crestron FT2-202-MECH-PTL Handleiding
Crestron Niet gecategoriseerd FT2-202-MECH-PTL
Bekijk gratis de handleiding van Crestron FT2-202-MECH-PTL (7 pagina’s), behorend tot de categorie Niet gecategoriseerd. Deze gids werd als nuttig beoordeeld door 21 mensen en kreeg gemiddeld 4.0 sterren uit 9 reviews. Heb je een vraag over Crestron FT2-202-MECH-PTL of wil je andere gebruikers van dit product iets vragen? Stel een vraag
Pagina 1/7
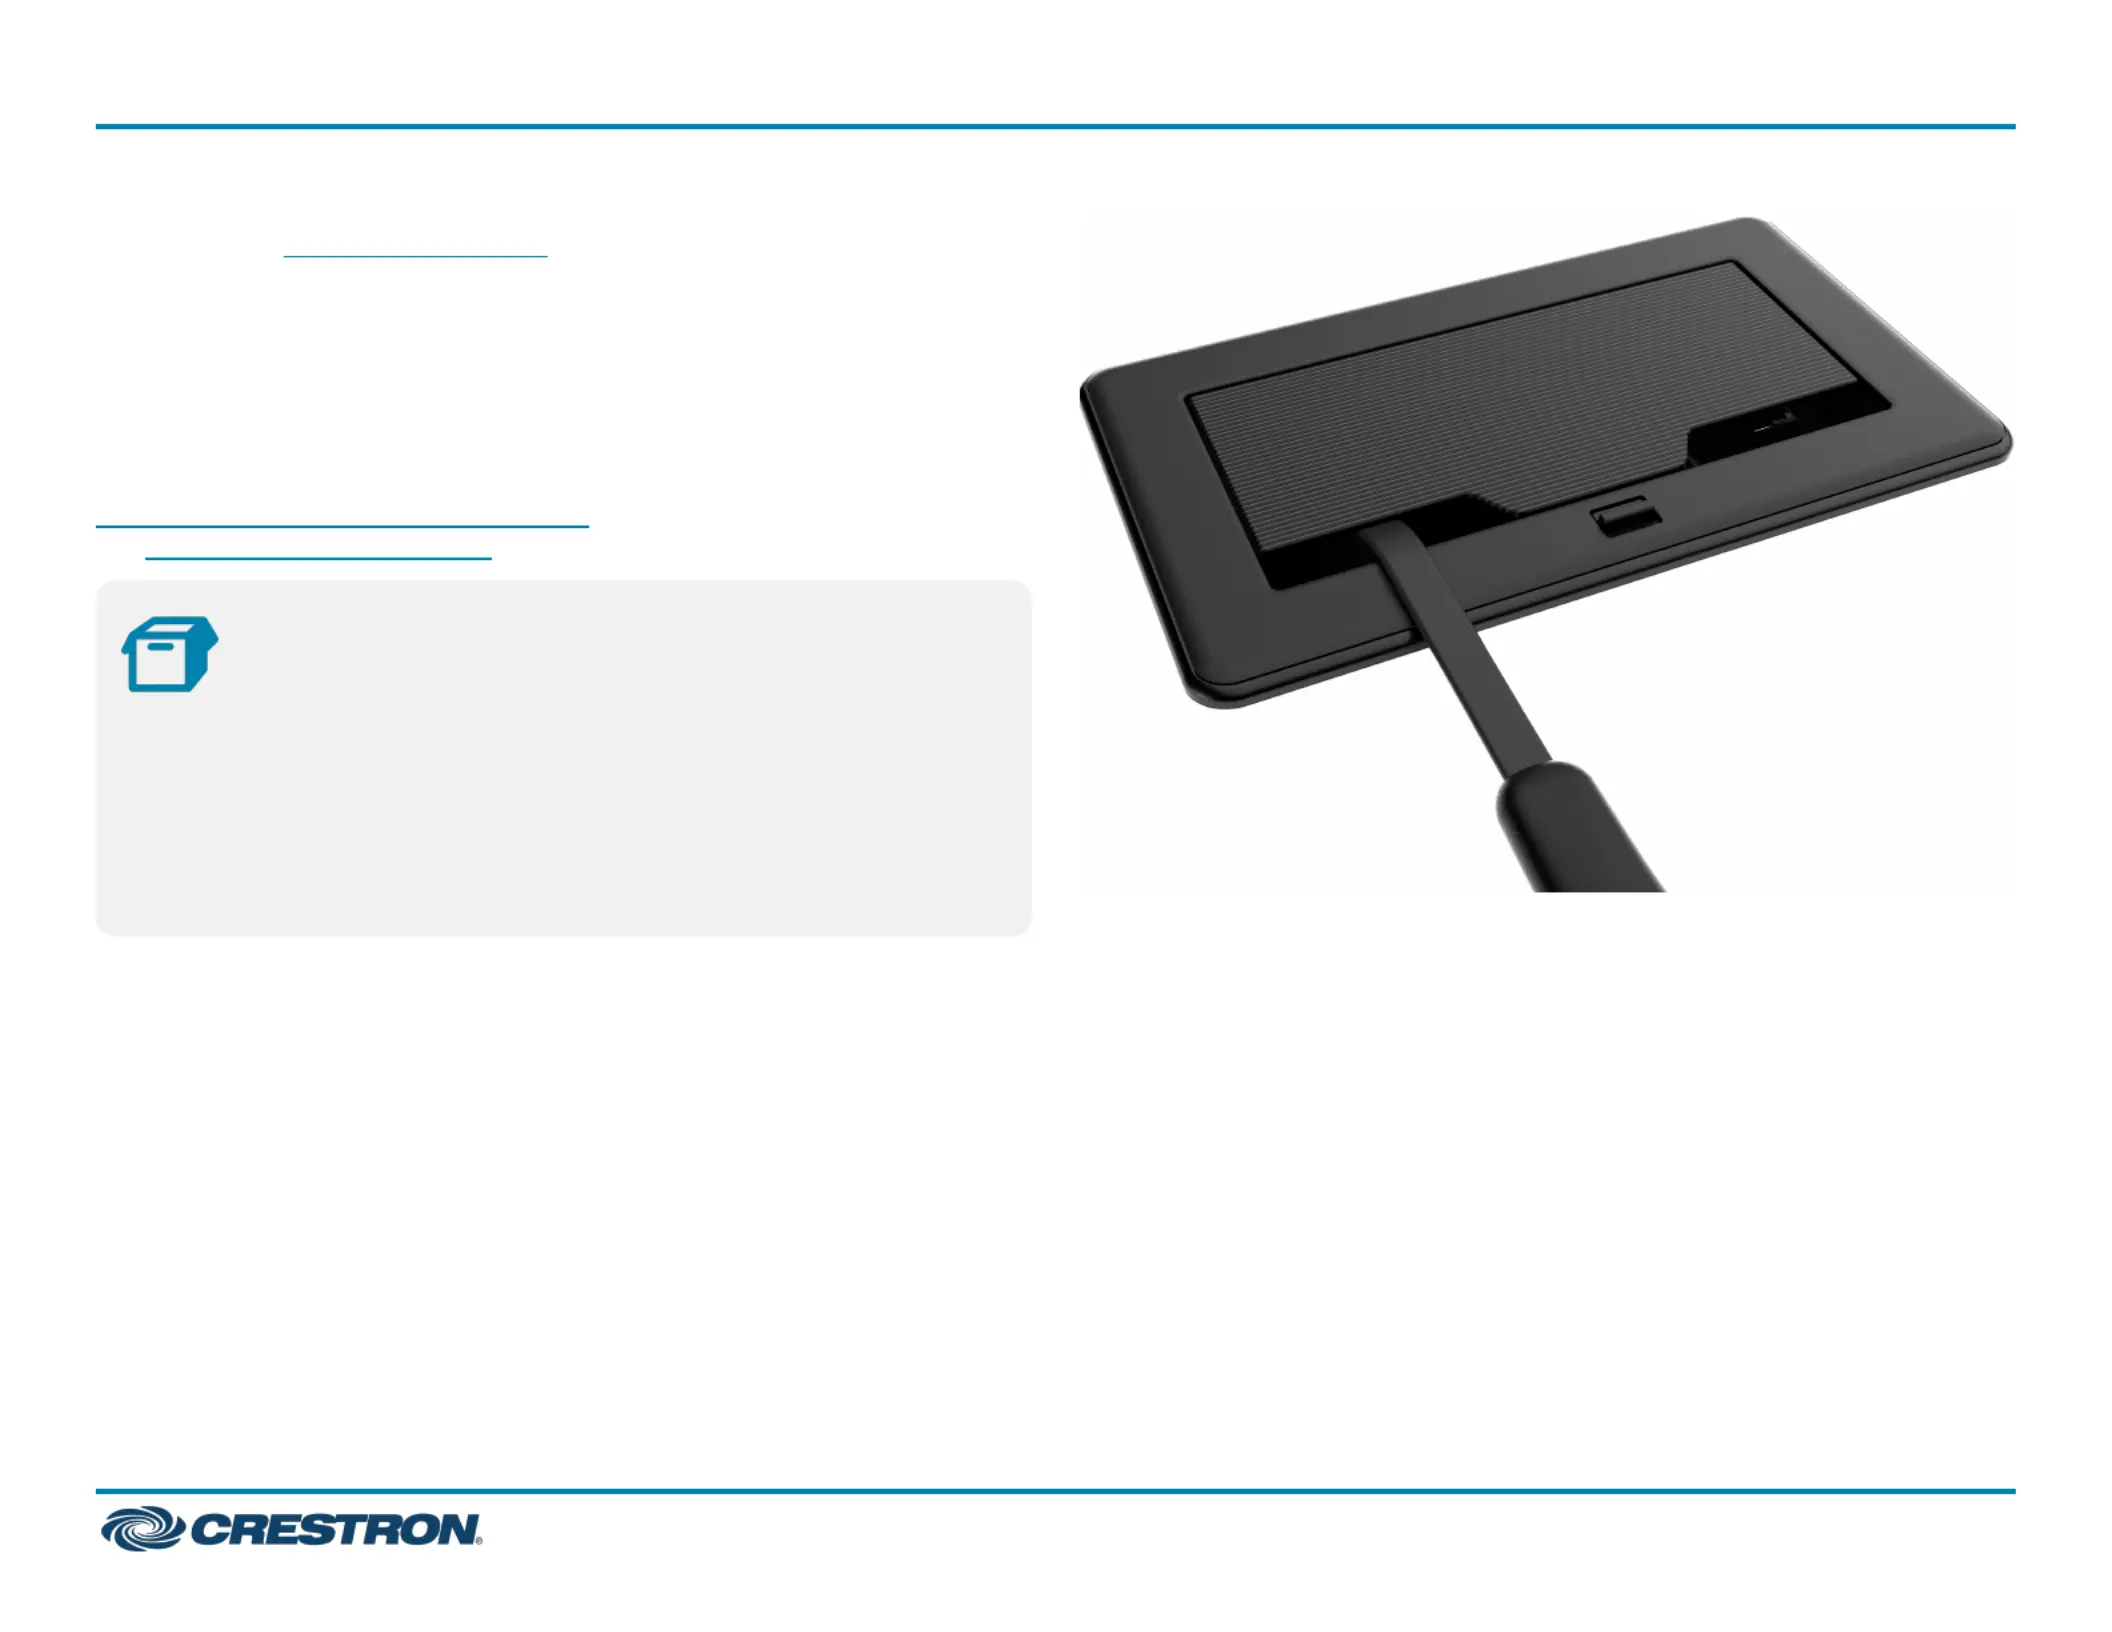
TheCrestron®FlipTop™cablemanagementsystemFT2-202-MECH-PTL
installsintoatableorotherhorizontalsurfacetoprovidemodular
connectivity.Itfeaturesaretractinglidthatdisappearswithinthe
enclosure.Whenthelidisretracted,sixmoduleslotsarearrangedinone
row.Theflexiblemodulardesignmayalsobecustomizedwithan
assortmentofCrestronaccessories,andthepass-throughlidstyle
allowscablestobefullyextendedwhilethelidisclosed.
Formoreinformationabouttheaccessories,pleasevisit
www.crestron.com/Crestron-FlipTops.ToconfigureyourFlipTop,launch
the.FlipTopConfigurationTool
In
In
In
InInthe
the
the
thetheBox
Box
Box
BoxBox
1
FT2-202-MECH-PTL
Additional
Additional
Additional
AdditionalAdditionalItems
Items
Items
ItemsItems
2LockingBarswithscrewsandgaskets(4532479)
1
CutoutTemplate(4529443)
FT2-202-MECH-PTL
FT2-202-MECH-PTL
FT2-202-MECH-PTL
FT2-202-MECH-PTLFT2-202-MECH-PTL
QuickStart
FlipTop™
FlipTop™
FlipTop™
FlipTop™FlipTop™FT2
FT2
FT2
FT2FT2Series
Series
Series
SeriesSeriesCable
Cable
Cable
CableCableManagement
Management
Management
ManagementManagementSystem,
System,
System,
System,System,202
202
202
202202Size,
Size,
Size,
Size,Size,Mechanical,
Mechanical,
Mechanical,
Mechanical,Mechanical,Pass-Through
Pass-Through
Pass-Through
Pass-ThroughPass-ThroughLid
Lid
Lid
LidLid
1
1
1
11
Product specificaties
| Merk: | Crestron |
| Categorie: | Niet gecategoriseerd |
| Model: | FT2-202-MECH-PTL |
Heb je hulp nodig?
Als je hulp nodig hebt met Crestron FT2-202-MECH-PTL stel dan hieronder een vraag en andere gebruikers zullen je antwoorden
Handleiding Niet gecategoriseerd Crestron

26 Mei 2026
7 Maart 2026
4 Maart 2026
28 Januari 2026
27 Januari 2026
4 December 2025
3 December 2025
2 December 2025
2 December 2025
2 December 2025
Handleiding Niet gecategoriseerd
Nieuwste handleidingen voor Niet gecategoriseerd
8 Juni 2026
8 Juni 2026
8 Juni 2026
8 Juni 2026
8 Juni 2026
8 Juni 2026
8 Juni 2026
8 Juni 2026
7 Juni 2026
7 Juni 2026