Crestron B10-BTN Handleiding
Crestron
Niet gecategoriseerd
B10-BTN
Bekijk gratis de handleiding van Crestron B10-BTN (4 pagina’s), behorend tot de categorie Niet gecategoriseerd. Deze gids werd als nuttig beoordeeld door 12 mensen en kreeg gemiddeld 3.5 sterren uit 6.5 reviews. Heb je een vraag over Crestron B10-BTN of wil je andere gebruikers van dit product iets vragen? Stel een vraag
Pagina 1/4

Crestron B10-BTN
Button Caps for the HTT-B10X
Installation Guide

Crestron B10-BTN Button Caps for the HTT-B10X
Button Caps for the HTT-B10X:
B10-BTN
Introduction
The Crestron
®
B10-BTN is available in four different models. For
simplicity within this guide, B10-BTN is used except where noted.
Models
MODEL NUMBER DESCRIPTION
B10-BTNB-T 5 BLANK Blank Buttons, Black
B10-BTNB-T 5 ENGRAVED Engraved Buttons, Black
B10-BTNW-T 5 BLANK Blank Buttons, White
B10-BTNW-T 5 ENGRAVED Engraved Buttons, White
Button Installation
The HTT-B10X is shipped with 10 blank buttons (two columns of five
buttons each). To replace one or both button columns, follow this
procedure:
1. Disconnect the 12 Volt power pack (if connected) and remove the
batteries.
2. Remove the four Phillips screws from the four corners on the
bottom of the unit.
3. Remove the cover from the front of the unit.
4. Remove the old button column(s) and replace with the new one(s),
making sure the column is seated in the two small holes on the
side. No screws are required.
Installation Guide – DOC. 6641A Button Caps for the HTT-B10X: B10-BTN •
•
•
•• 1

Button Caps for the HTT-B10X Crestron B10-BTN
5. Replace the cover on the front of the unit.
6. Replace the four Phillips screws on the bottom of the unit.
7. Reinstall batteries and reconnect 12 Volt power pack.
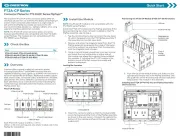
HTT-B10X Button Installation
2 •
•
•
•• Button Caps for the HTT-B10X: B10-BTN Installation Guide – DOC. 6641A
Product specificaties
| Merk: | Crestron |
| Categorie: | Niet gecategoriseerd |
| Model: | B10-BTN |
Heb je hulp nodig?
Als je hulp nodig hebt met Crestron B10-BTN stel dan hieronder een vraag en andere gebruikers zullen je antwoorden
Handleiding Niet gecategoriseerd Crestron
9 September 2025
9 September 2025
9 September 2025
9 September 2025
9 September 2025
9 September 2025
9 September 2025
8 September 2025
8 September 2025
8 September 2025
Handleiding Niet gecategoriseerd
- Enermax
- Legrand
- Stalco Perfect
- Finder
- FoodSaver
- Scanstrut
- Elta
- Hatco
- Fillikid
- Accucold
- Cabstone
- Silverline
- Soundstream
- Bluemarina
- Giordani
Nieuwste handleidingen voor Niet gecategoriseerd
16 September 2025
16 September 2025
16 September 2025

16 September 2025
16 September 2025
16 September 2025
16 September 2025
16 September 2025

16 September 2025
16 September 2025