Coleman Voyager Go 200 Handleiding
Bekijk gratis de handleiding van Coleman Voyager Go 200 (4 pagina’s), behorend tot de categorie powerbank. Deze gids werd als nuttig beoordeeld door 22 mensen en kreeg gemiddeld 4.8 sterren uit 7 reviews. Heb je een vraag over Coleman Voyager Go 200 of wil je andere gebruikers van dit product iets vragen? Stel een vraag
Pagina 1/4
Getting Started: Charging your Battery Generator
Product Details LCD Screen Details
IMPORTANT: The Battery Generator should be placed in a dry, well ventilated area with at least 6 inches of space on all sides for proper ventilation.
IMPORTANT: The 12V, AC and USB ports must be turned Off after use in order to conserve battery energy.
BEFORE YOU START: See “Safety Information” section for important precautions. The user should conform to all safety precautions in the guide. Keep this guide in a safe place for future reference.
IMPORTANT - CHARGE BEFORE USE: Fully charge the Battery Generator before using it and/or storing it. Keep the unit plugged in when not in use so
it is ready when you need it. The charger is designed to maintain the battery in a healthy state.
NOTE: The 7 hour charge time may vary depending on your AC outlet power and the climate (Battery Generator may charge more slowly in very high or low temperatures).
Charging your Battery Generator from an AC outlet
Estimated Charge Time: 7 hours to full
Plug the other end of the charger into an AC
outlet, then plug the barrel of the AC
Charger* into the DC Input Port on the back
of the Battery Generator.
• The Battery Generator can be charged from grid power (AC or Type-C USB) or solar energy (solar panels).
• If your Battery Generator is fully discharged (0% available power), the LCD screen will be completely dark. This screen will illuminate as soon as the Battery Generator is connected to power, letting you know that
the unit is charging, and will continually display the charge level as the Battery Generator charges.
Important Note:
All outputs (AC, 12V DC, and USB) will
automatically turn off during charging via
AC, solar or Type-C USB input.
You may keep the Battery Generator
plugged into your AC outlet for maintenance
charging. The internal charger is designed to
optimize power without overcharging the
battery. We recommend keeping your
Battery Generator charged so it provides
maximum power when you need it.
Keep charged for
immediate use
DC INPUT
1
*AC charger is included with the Battery
Generator
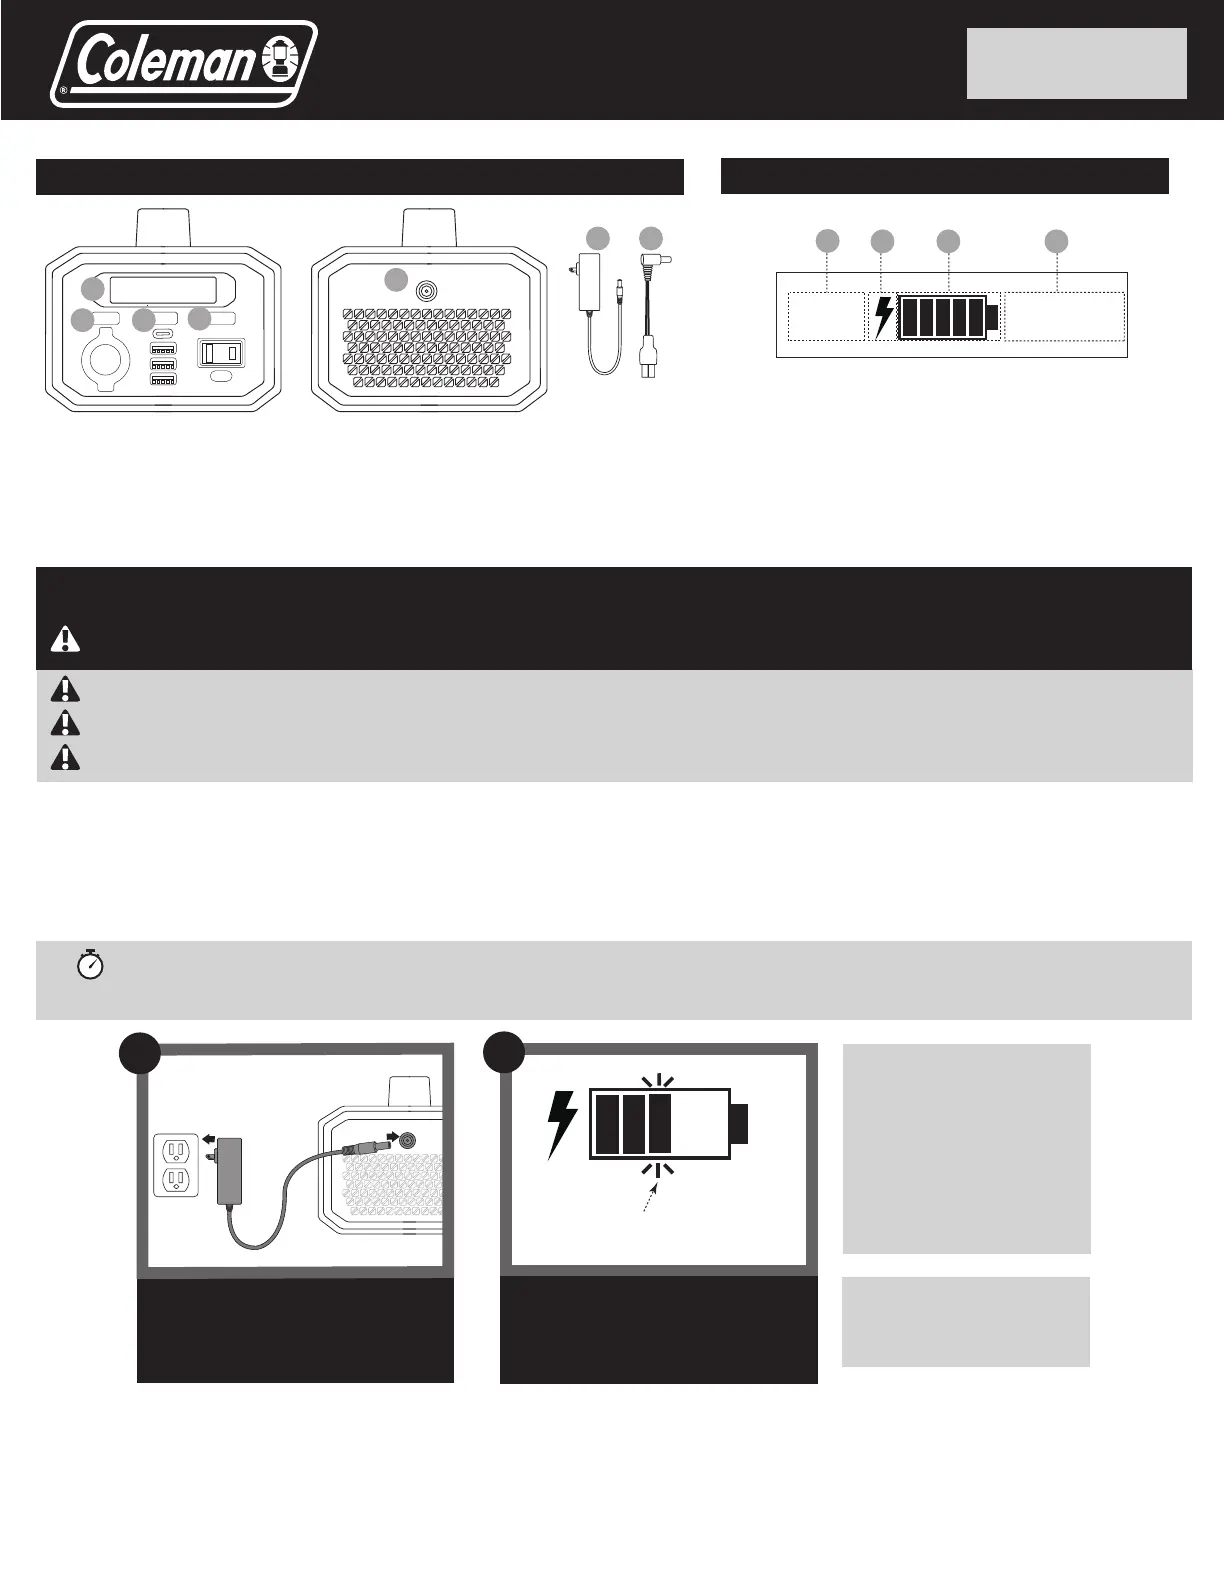
A. LCD Screen: See details at right
B. 12V Power Button and Accessory Socket
C. USB Power Button and Ports
D. AC Power Button and Outlet
E. DC Input Port: Use AC charger,
solar panel or 12V DC source
F. AC Charger
G. Solar Input Cable with Anderson connectors
A. Warning Indicators
• HI TEMP
• FAULT
B. Charging Indicator
B
F
G
12VUSBAC
120V
12V
DC INPUT
D
E
A
BC
HI TEMP
FAULT
12V
USB
USB-C AC
CD
A
The LCD Screen will show the Charging
Indicator (lighting bolt) and the Fuel
Gauge will show the charge level.
2
Battery fuel gauge bars will flash
as the charge level increases
Getting Started
C. Fuel Gauge
D. Active Output Ports
• 12V • USB
• AC • USB-C
Battery Generator 200
Portable Power Station User Guide
MANUALS
EN ESPAÑOL / ET FRANÇAIS
ColemanPowerStations.com
Product specificaties
| Merk: | Coleman |
| Categorie: | powerbank |
| Model: | Voyager Go 200 |
Heb je hulp nodig?
Als je hulp nodig hebt met Coleman Voyager Go 200 stel dan hieronder een vraag en andere gebruikers zullen je antwoorden
Handleiding powerbank Coleman

19 Februari 2024
Handleiding powerbank
Nieuwste handleidingen voor powerbank
12 Juli 2026
12 Juli 2026
12 Juli 2026
11 Juli 2026
9 Juli 2026
15 Juni 2026
2 Juni 2026
2 Juni 2026
1 Juni 2026