Cherry Secure Board 1.0 Handleiding

Cherry Niet gecategoriseerd Secure Board 1.0

Lees hieronder de đź“– handleiding in het Nederlandse voor Cherry Secure Board 1.0 (6 pagina's) in de categorie Niet gecategoriseerd. Deze handleiding was nuttig voor 19 personen en werd door 2 gebruikers gemiddeld met 4.5 sterren beoordeeld

Pagina 1/6
1
Bevor Sie
beginnen ...
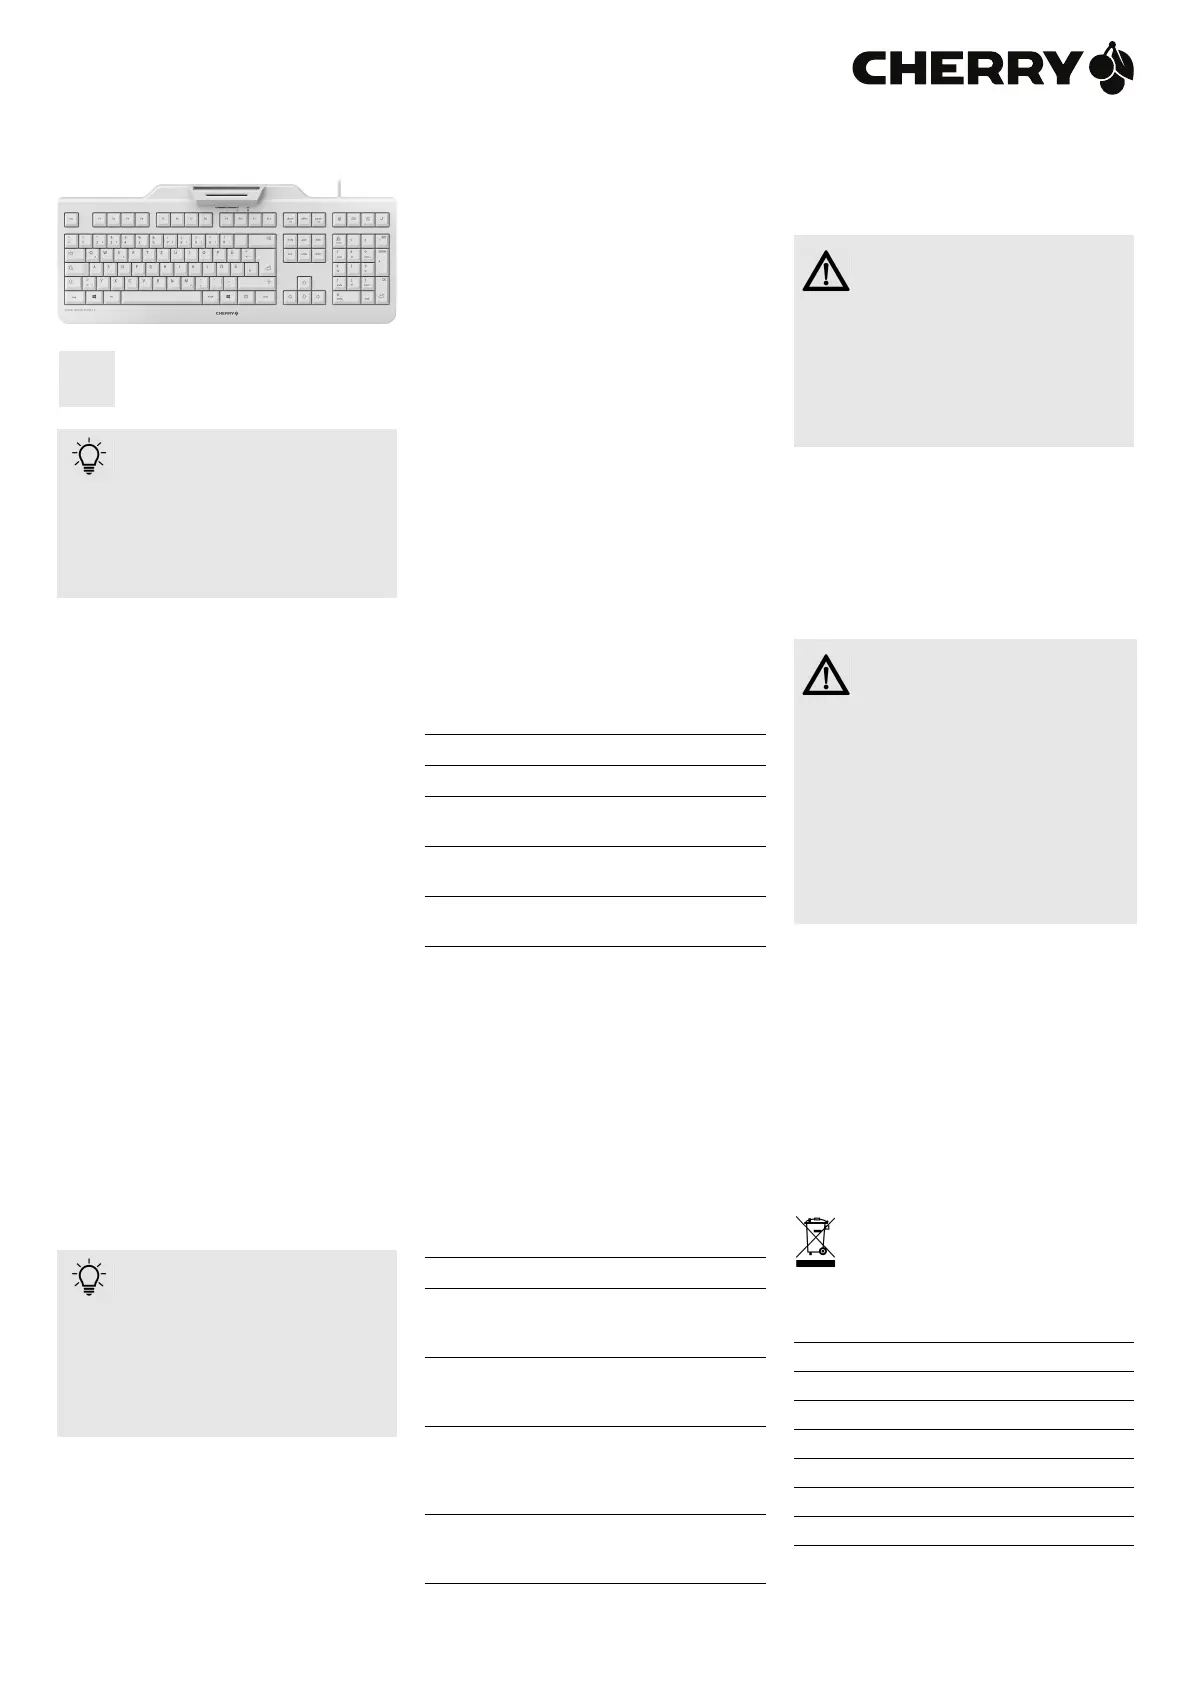
Das CHERRY SECURE BOARD 1.0 ist eine Tastatur
mit integriertem Chipkarten-Leser fĂĽr
kontaktbehaftete und kontaktlose Chipkarten.
Sie zeichnet sich besonders durch folgende
Eigenschaften aus:
• Secure PIN Entry für direkte Übertragung der
PIN an die Chipkarte
• Secure Modus für verschlüsselte Übertragung
der Daten zwischen Tastatur und System
FĂĽr Informationen zu weiteren Produkten,
Downloads und vielem mehr, besuchen Sie bitte
www.cherry.de.
1 Tastatur an den PC
anschlieĂźen und Treiber
installieren
• Verbinden Sie den USB-Stecker der Tastatur mit
dem USB-Anschluss des PCs/Notebooks.
Der integrierte Kartenleser wird von Windows
erkannt und der Treiber automatisch geladen.
• Sollte der Kartenleser nicht erkannt werden,
nutzen Sie die Installationsanweisung fĂĽr ein
Treiber-Update auf unserer Support Seite
www.cherry.de unter Service > Downloads. Dort
finden Sie auch den Link zum Linux-Treiber.
2 Chipkarten-Leser
verwenden
2.1 Kontaktbehaftete Chipkarten
lesen
• Stecken Sie die Chipkarte mit dem Chip nach
unten und nach vorn zeigend in den Chipkarten-
Schacht.
Nachdem ein deutlicher Druckpunkt
ĂĽberwunden ist, erfolgt die Kontaktierung.
Jedes Gerät ist anders!
In der Bedienungsanleitung erhalten
Sie Hinweise zur effektiven und
zuverlässigen Verwendung.
• Lesen Sie die Bedienungsanleitung
aufmerksam durch.
• Bewahren Sie die Bedienungsanleitung auf
und geben Sie sie an andere Benutzer weiter.
Zwei Chipkarten gleichzeitig im oder
am Chipkarten-Leser
Wenn Sie eine Chipkarte einlesen
möchten, obwohl sich bereits eine Chipkarte im
oder am Chipkarten-Leser befindet, greift der
Leser nur auf die erste Chipkarte zu. Es ist dabei
egal, ob es sich um eine kontaktbehaftete oder
kontaktlose Chipkarte handelt.
• Entfernen Sie die erste Chipkarte.
DE
2.2 Kontaktlose Chipkarten lesen
• Halten Sie die Chipkarte waagrecht zwischen die
FĂĽhrungen an die RĂĽckseite des Chipkarten-
Lesers.
Wenn die Chipkarte vollständig und nah am
Gehäuse des Chipkarten-Lesers anliegt, werden
die Daten ĂĽbertragen.
3 Secure PIN Entry (nur bei
kontaktbehafteten
Chipkarten)
Bei UnterstĂĽtzung durch Ihre Applikation wird die
Eingabe der PIN nicht an das System ĂĽbertragen,
sondern vom Nummernblock der Tastatur direkt
an die Chipkarte ĂĽbergeben.
• Bestätigen Sie die PIN mit einer der beiden
„Enter“-Tasten.
• Brechen Sie den Vorgang mit der „Esc“-Taste
oder der „+“-Taste auf dem Nummernblock ab.
• Korrigieren Sie Ihre Eingabe mit der
„Backspace“-Taste oder der „–“-Taste auf dem
Nummernblock.
3.1 Statusanzeige PIN
4 Secure Modus
Die Tastatur kann durch das System in einen
sicheren Modus geschaltet werden. Sie kann dann
authentifiziert werden, wodurch Tasteneingaben
verschlĂĽsselt ĂĽbertragen werden.
FĂĽr den Secure Modus mĂĽssen vom Hersteller auf
dem System eine entsprechende Software
installiert sein. Hierzu stellen wir einen Software
Developer’s Guide zur Verfügung (siehe
www.cherry.de unter Service > Downloads).
4.1 Statusanzeige Schloss-Symbol
GrĂĽn Rot Status
Leuchtet Aus Chipkarte erkannt
Flackert Aus Kommunikation mit der
Chipkarte
Blinkt Aus Chipkarten-Leser wartet
auf Antwort der Chipkarte
Aus Leuchtet Secure PIN Entry Modus
aktiv
LED Status
Aus Standard HID-Tastatur Modus. Daten
werden an den Host-HID Treiber
gesendet.
Leuchtet Secure Modus, TLS-Kanal
eingerichtet. Daten werden
verschlĂĽsselt gesendet.
Blinkt Der Secure Modus wird gerade
eingerichtet oder es wurde noch kein
Benutzerzertifikat bereitgestellt. Es
werden keine Daten gesendet.
Flackert Der Secure Modus wurde ohne
Autorisierung abgebrochen. Es werden
keine Daten gesendet.
5 Tipps
5.1 Tastatur reinigen
1 Schalten Sie den PC aus.
2 Reinigen Sie die Tastatur mit einem leicht
feuchten Tuch und etwas mildem
Reinigungsmittel (z. B.: GeschirrspĂĽlmittel).
3 Trocknen Sie die Tastatur mit einem
fusselfreien, weichen Tuch.
5.2 RSI-Syndrom
5.3 Hilfe im Problemfall
• Verwenden Sie einen anderen USB-Anschluss
am PC/Notebook.
• Um sicherzustellen, dass kein Defekt der
Tastatur vorliegt, testen Sie diese nach
Möglichkeit an einem anderen PC/Notebook.
• Setzen Sie im BIOS des PCs die Option "USB
Keyboard Support" bzw. "USB Legacy Mode" auf
enabled.
6 Entsorgung
Entsorgen Sie das Altgerät über eine
Sammelstelle fĂĽr elektronischen Abfall
oder Ihren Händler.
7 Technische Daten
VORSICHT: Beschädigung durch
aggressive Reinigungsmittel oder
FlĂĽssigkeit in der Tastatur
• Verwenden Sie zur Reinigung keine Lösungs-
mittel wie Benzin oder Alkohol und keine
Scheuermittel oder Scheuerschwämme.
• Verhindern Sie, dass Flüssigkeit in die Tastatur
gelangt.
• Entfernen Sie nicht die Tastenkappen der
Tastatur.
"Repetitive Strain Injury" = "Verletzung
durch wiederholte Beanspruchung".
RSI entsteht durch kleine, sich ständig
wiederholende Bewegungen.
Typische Symptome sind Beschwerden in den
Fingern oder im Nacken.
• Richten Sie Ihren Arbeitsplatz ergonomisch ein.
• Positionieren Sie Tastatur und Maus so, dass
sich Ihre Oberarme und Handgelenke seitlich
vom Körper befinden und ausgestreckt sind.
• Machen Sie mehrere kleine Pausen, ggf. mit
DehnĂĽbungen.
• Ändern Sie oft Ihre Körperhaltung.
Bezeichnung Wert
Kartenleseeinheit 100 000 Steckzyklen
Protokolle T=0, T=1,T=CL
Versorgungsspannung 5,0 V/DC ±5 % SELV
Stromaufnahme Max. 100 mA
Lagertemperatur –20 °C ... +60 °C
Betriebstemperatur 0 °C ... +50 °C
64410057-01, DE, EN, FR, ES, IT, Okt 2019 (KC 1000 SC = Mod. JK-A04)
CHERRY SECURE BOARD 1.0
BEDIENUNGSANLEITUNG / OPERATING MANUAL / MODE D’EMPLOI /
MANUAL DE INSTRUCCIONES / ISTRUZIONE D’USO
2
8 Kontakt
Bitte halten Sie bei Anfragen an den Technischen
Support folgende Informationen bereit:
• Artikel- und Serien-Nr. des Produkts
• Bezeichnung und Hersteller Ihres Systems
• Betriebssystem und ggf. installierte Version
eines Service Packs
Cherry GmbH
CherrystraĂźe
91275 Auerbach/OPf.
Internet: www.cherry.de
Telefon: +49 (0) 9643 2061-100*
*zum Ortstarif aus dem deutschen Festnetz, abweichende
Preise für Anrufe aus Mobilfunknetzen möglich
9 Allgemeiner
Anwenderhinweis
Technische Ă„nderungen, die dem Fortschritt
dienen, behalten wir uns vor. Unsachgemäße
Behandlung und Lagerung können zu Störungen
und Schäden am Produkt führen.
Die vorliegende Anleitung ist nur gĂĽltig fĂĽr das
mitgelieferte Produkt.
10 Gewährleistung
Es gilt die gesetzliche Gewährleistung.
Bitte wenden Sie sich an Ihren Händler oder
Vertragspartner.
Die Gewährleistung erlischt komplett, sofern
unautorisierte Ă„nderungen am Produkt
durchgefĂĽhrt worden sind. FĂĽhren Sie
eigenmächtig keine Reparaturen durch und öffnen
Sie das Produkt nicht.
11 Hinweis zum
GS-Zeichen
Aufgrund der Position der Nulltaste des
Nummernfelds ist die Tastatur fĂĽr
Saldiertätigkeiten, die überwiegend blind erfolgen,
in Deutschland nicht anzuwenden. Eine Tastatur
mit nicht-deutscher Tastenknopfbelegung ist in
Deutschland aufgrund der Zeichenbelegung
(DIN 2137 Teil 2) nicht fĂĽr den Dauereinsatz an
Bildschirmarbeitsplätzen zu verwenden.
Before you begin ...
The CHERRY SECURE BOARD 1.0 is a keyboard
with an integrated chip card reader for contact and
contactless chip cards.
It is characterized by the following features:
• Secure PIN entry for the direct transmission of
the PIN to the chip card
• Secure mode for encrypted transmission of data
between the keyboard and system
For information on other products, downloads and
much more, visit us at www.cherry.de.
Every device is different!
The operating instructions contain
information on effective and reliable
use.
• Read the operating instructions carefully.
• Keep the operating instructions and pass them
on to other users.
EN
1 Attaching the keyboard to
the PC and installing the
driver
• Connect the USB connector on the keyboard to
the USB port on the PC/laptop.
The integrated card reader is recognized by
Windows and the driver is automatically loaded.
• If the card reader is not recognized, use the
installation instructions for a driver update on
our support page www.cherry.de under
Service > Downloads. You will also find the link
to the Linux driver there.
2 Using the chip card
reader
2.1 Reading a contact chip card
• Insert the chip card with the chip facing down
and forward into the chip card slot.
After a significant pressure point has been
reached, contact is made.
2.2 Reading a contactless chip card
• Hold the chip card horizontally between the
guides to the back of the chip card reader.
When the chip card fits completely tightly against
the housing of the chip card reader, the data are
transmitted.
3 Secure PIN entry (only for
contact chip cards)
If your application supports it, the entry of the PIN
is not transmitted to the system, but instead from
the numerical keypad of the keyboard directly to
the chip card.
• Confirm the PIN by using one of the two "Enter"
keys.
• Abort the process by using the "Esc" key or the
"+" key on the number block.
• Correct your entry with the "Backspace" key or
the "–" key on the number block.
3.1 PIN status display
Two chip cards in or on the reader at
the same time
If you try to read a chip card when there
is already another one in or on the reader, the
reader will only access the first card. It does not
matter whether it is a contact or contactless chip
card.
• Remove the first chip card.
Green Red Status
Lit up Off Chip card recognized
Flickers Off Communication with the
chip card
Flashing Off Chip card reader is waiting
for an answer from the chip
card
Off Lit up Secure PIN entry mode
active
4 Secure mode
The keyboard can be switched to secure mode by
the system. It can then be authenticated, so that
key entries will be transmitted in encrypted form.
For the secure mode, the corresponding software
must be installed on the system by the
manufacturer. We provide a Software Developer’s
Guide for this purpose (see www.cherry.de under
Service > Downloads).
4.1 Status display: lock symbol
5 Tips
5.1 Cleaning the keyboard
1 Switch off the PC.
2 Clean the keyboard with a slightly damp cloth
and some mild cleaning agent (e.g. dish washing
liquid).
3 Dry off the keyboard with a soft, lint-free cloth.
5.2 RSI syndrome
5.3 Troubleshooting
• Use another USB port on the PC/laptop.
• To make sure that the keyboard is not defective,
test it if possible with another PC/laptop.
• Set the option "USB Keyboard Support" or "USB
Legacy Mode" to enabled in the BIOS of the PC.
6 Disposal
Dispose of the used device at an official
collection point for electronic waste or at
your local dealer.
LED Status
Off Standard HID keyboard mode. Data are
sent to the host HID driver.
Lit up Secure mode, TLS channel set up.
Data are sent in encrypted form.
Flashing Secure mode is currently being set up,
or no user certificate has been
provided yet. No data are sent.
Flickers Secure mode was aborted without
authorization. No data are sent.
CAUTION: Damage may be caused by
harsh cleaning agents or liquids in the
keyboard
• Do not use solvents such as gasoline or
alcohol and scouring agents or scouring
sponges for cleaning.
• Prevent liquids from entering the keyboard.
• Do not remove the keycaps of the keyboard.
RSI stands for "Repetitive Strain
Injury". RSI arises due to small
movements continuously repeated
over a long period of time.
Typical symptoms are discomfort in the fingers or
neck.
• Set up your workspace ergonomically.
• Position the keyboard and mouse in such a
manner that your upper arms and wrists are
outstretched and to the sides of your body.
• Take several short breaks, with stretching
exercises if necessary.
• Change your posture often.
3
7 Technical data
8 Contact
Please provide the following information about the
device when contacting technical support:
• Item and serial no. of the product
• Name and manufacturer of your system
• Operating system and, if applicable, installed
service pack version
For Europe:
Cherry GmbH
CherrystraĂźe
91275 Auerbach/OPf.
Germany
Internet: www.cherry.de
For USA:
Cherry Americas, LLC
5732 95th Avenue
Suite 850
Kenosha, WI 53144
USA
Tel.: +1 262 942 6508
Email: sales@cherryamericas.com
Internet: www.cherryamericas.com
9 General advice
We reserve the right to make technical
modifications which serve the development of our
products. Improper use and storage can lead to
faults and damage to the product.
These instructions are only valid for the supplied
product.
10 Warranty
The statutory warranty applies. Please contact your
specialist dealer or contractual partner.
The warranty expires completely once unauthorized
modifications to the product have been carried out.
Do not carry out any unauthorized repairs and do
not open up the product.
11 Certifications
11.1 Federal Communications
Commission (FCC) Radio
Frequency Interference
Statement
This device complies with part 15 of the FCC Rules.
Operation is subject to the following two conditions:
(1) This device may not cause harmful interference,
and (2) this device must accept any interference
received, including interference that may cause
undesired operation.
Note: This equipment has been tested and found to
comply with the limits for a Class B digital device,
pursuant to part 15 of the FCC Rules. These limits
are designed to provide reasonable protection
against harmful interference in a residential
installation. This equipment generates, uses and
can radiate radio frequency energy and, if not
installed and used in accordance with the
Designation Value
Card reading unit 100,000 insertions
Protocols T=0, T=1, T=CL
Supply voltage 5.0 V/DC ±5% SELV
Current consumption Max. 100 mA
Storage temperature –20 °C ... +60 °C
Operating temperature 0 °C ... +50 °C
instructions, may cause harmful interference to
radio communications. However, there is no
guarantee that interference will not occur in a
particular installation. If this equipment does cause
harmful interference to radio or television
reception, which can be determined by turning the
equipment off and on, the user is encouraged to try
to correct the interference by one or more of the
following measures:
• Reorient or relocate the receiving antenna.
• Increase the separation between the equipment
and receiver.
• Connect the equipment into an outlet on a circuit
different from that to which the receiver is
connected.
• Consult the dealer or an experienced radio/TV
technician for help.
Caution: Any changes or modifications not
expressly approved by the party responsible for
compliance could void the user's authority to
operate the equipment.
11.2 For UL
For use with Listed Personal Computers only!
Avant de
commencer...
CHERRY SECURE BOARD 1.0 est un clavier Ă 
lecteur intégré pour cartes à puce à ou sans
contact.
Il se distingue par les caractéristiques suivantes :
• Entrée sécurisée du numéro d’identification
personnel (Secure PIN Entry) pour transmission
directe de celui-ci Ă  la carte Ă  puce
• Mode sécurisé de transmission cryptée de
données du clavier au système
Pour obtenir des informations sur d'autres
produits, sur les téléchargements et bien d'autres
choses, consultez le site www.cherry.de.
1 Connexion du clavier au
PC et installation de
pilote
• Branchez la prise USB au port USB du PC de
l’ordinateur portable.
Windows reconnaîtra le lecteur de carte intégré
et installera automatiquement le pilote.
• S’il ne reconnait pas le lecteur de carte,
consultez notre notice d’installation et observez
nos instructions de mise Ă  jour de pilote en vous
rendant sur notre page d’assistance
www.cherry.de, Assistance > Téléchargement.
Vous y trouverez Ă©galement le lien vers le pilote
Linux.
Chaque appareil est différent !
Le mode d’emploi contient des
consignes pour une utilisation
efficace et fiable.
• Lisez attentivement le mode d’emploi.
• Conservez le mode d’emploi et
transmettez-le aux autres utilisateurs.
FR
2 Exploitation du lecteur de
carte Ă  puce
2.1 Lecture de carte Ă  puce Ă  contact
• Introduisez la carte dans la fente, la puce vers le
bas et dirigée vers l’avant.
Après dépassement du point de pression, le
contact est Ă©tabli.
2.2 Lecture de carte Ă  puce sans
contact
• Tenez la carte à l’horizontale entre les guidages
au dos du lecteur.
La transmission des données commencera dès
que la carte sera intégralement à proximité du
boîtier du lecteur.
3 Entrée sécurisée du
numéro d’identification
personnel (carte Ă 
contact uniquement)
La saisie du PIN est prise en charge par votre
application et transmise directement du pavé
numérique du clavier à la carte à puce sans être
transmise au système.
• Validez le PIN avec l'une des deux touches
"Entrée".
• Vous pouvez interrompre la procédure à l'aide de
la touche "Echap" ou de la touche "+" du pavé
numérique.
• Utilisez la touche "Retour arrière" ou la touche
"–" du pavé numérique pour corrigez votre
saisie.
3.1 Affichage d’état de numéro
d’identification personnel
4 Mode de sécurité
Le système rend le clavier authentifiable en le
faisant passer en mode de sécurité ; cela permet le
cryptage de la transmission des entrées au clavier.
Le mode sécurisé requiert l’installation d’un logi-
ciel par le fabricant sur le système. Nous mettons
à cet effet un guide de développeur de logiciels
(Software Developer’s Guide) à disposition (cf.
www.cherry.de, Assistance > Téléchargement).
Deux cartes Ă  puce en mĂŞme temps
dans ou sur le lecteur de carte Ă  puce
Si vous souhaitez lire une carte Ă  puce
alors qu’une carte se trouve déjà dans ou sur le
lecteur de carte à puce : le lecteur n’a accès qu’à
la première carte qu’il s’agisse d’une carte à
puce Ă  contact ou sans contact.
• Retirez la première carte à puce.
Vert Rouge État
Allumé(e) Éteint(e) Carte à puce détectée
Vacille-
ment
Éteint Communication en cours
avec la carte Ă  puce
Clignote
ment
Éteint(e) Le lecteur attend la
réponse de la carte à
puce
Éteint(e) Allumé(e) Mode d’entrée sécurisée
du numéro d’identifica-
tion personnel activé


Product specificaties

Merk: Cherry
Categorie: Niet gecategoriseerd
Model: Secure Board 1.0
Kleur van het product: Zwart
Snoerlengte: 1.8 m
Gewicht verpakking: 1150 g
Breedte verpakking: 472 mm
Diepte verpakking: 232 mm
Hoogte verpakking: 55 mm
Type stroombron: USB
Aantal toetsen, toetsenbord: 109
Certificering: cURus\nTĂśV-SĂĽd GS\nVCCI\nCE\nFCC\nFIPS 201\nCitrix\nUKCA
Duurzaamheidscertificaten: Blue Angel
Ergonomisch ontwerp: Ja
Aanbevolen gebruik: Kantoor
Temperatuur bij opslag: -20 - 65 °C
Backlight: Nee
Aansluiting: USB
Numeriek toetsenblok: Ja
Inclusief muis: Nee
Aanwijsapparaat: Nee
Windows-toetsen: Ja
Oppervlakte kleur: Monochromatisch
Toetsenbordindeling: QWERTY
Polssteun: Nee
Dimensies toetsenbord (BxDxH): 458 x 188 x 46 mm
Gewicht toetsenbord: 840 g
Bedrijfstemperatuur (T-T): 0 - 50 °C
Aantal producten inbegrepen: 1 stuk(s)
Code geharmoniseerd systeem (HS): 84716060
Taal toetsenbord: Scandinavisch
Levensduur toetsenbordtoetsen: 10 miljoen tekens
Keyboard key switch technology: Cherry LPK

Heb je hulp nodig?

Als je hulp nodig hebt met Cherry Secure Board 1.0 stel dan hieronder een vraag en andere gebruikers zullen je antwoorden


Handleiding Niet gecategoriseerd Cherry

Handleiding Niet gecategoriseerd

Nieuwste handleidingen voor Niet gecategoriseerd