Casio Edifice EFR-550D-1AV Handleiding

Casio Horloge Edifice EFR-550D-1AV

Lees hieronder de 📖 handleiding in het Nederlandse voor Casio Edifice EFR-550D-1AV (6 pagina's) in de categorie Horloge. Deze handleiding was nuttig voor 30 personen en werd door 2 gebruikers gemiddeld met 4.5 sterren beoordeeld

Pagina 1/6
E-7
Mode Reference Guide
The mode you should select depends on what you want to do.
To do this: Enter this mode: See:
View the current date in the Home City
Configure Home City and daylight saving time (DST) settings
Configure time and date settings
Timekeeping Mode E-13
Determine the temperature at your current location Thermometer Mode E-21
Use the stopwatch to measure elapsed time Stopwatch Mode E-25
Use the countdown timer Countdown Timer Mode E-27
View the current time in one of 48 cities (31 time zones) around the globe World Time Mode E-29
Set an alarm time
Turn the hourly time signal on or off Alarm Mode E-32
E-6
Illumination ………………………………………………………………………………………………… E-35
To turn on illumination manually ………………………………………………………………… E-35
To change the illumination duration ……………………………………………………………… E-35
To enable or disable auto light……………………………………………………………………… E-37
Button Operation Tone …………………………………………………………………………………… E-39
To enable or disable the button operation tone ………………………………………………… E-39
Troubleshooting …………………………………………………………………………………………… E-40
Specifications ……………………………………………………………………………………………… E-43
E-5
Using the Stopwatch ……………………………………………………………………………………… E-25
To enter the Stopwatch Mode ……………………………………………………………………… E-25
To perform an elapsed time operation ………………………………………………………… E-26
To pause at a split time …………………………………………………………………………… E-26
To measure two finishes …………………………………………………………………………… E-26
Using the Countdown Timer …………………………………………………………………………… E-27
To enter the Countdown Timer Mode ……………………………………………………………… E-27
To specify the countdown start time ……………………………………………………………… E-27
To perform a countdown timer operation ………………………………………………………… E-28
To stop the alarm …………………………………………………………………………………… E-28
Checking the Current Time in a Different Time Zone ………………………………………………… E-29
To enter the World Time Mode …………………………………………………………………… E-29
To view the time in another time zone …………………………………………………………… E-29
To specify standard time or daylight saving time (DST) for a city ……………………………… E-30
To swap your Home Time and World Time Cities ……………………………………………… E-31
Using the Alarm …………………………………………………………………………………………… E-32
To enter the Alarm Mode …………………………………………………………………………… E-32
To set an alarm time ………………………………………………………………………………… E-33
To test the alarm …………………………………………………………………………………… E-33
To turn an alarm and the Hourly Time Signal on and off………………………………………… E-34
To stop the alarm …………………………………………………………………………………… E-34
E-4
Contents
About This Manual …………………………………………………………………………………………… E-2
Things to check before using the watch ………………………………………………………………… E-3
Mode Reference Guide ……………………………………………………………………………………… E-7
General Functions (All Modes) …………………………………………………………………………… E-10
Timekeeping ………………………………………………………………………………………………… E-13
Configuring Home City Settings ………………………………………………………………………… E-14
To configure Home City settings …………………………………………………………………… E-14
To change the daylight saving time (summer time) setting……………………………………… E-15
Configuring Current Time and Date Settings ……………………………………………………… E-16
To change the current time and date settings …………………………………………………… E-16
Hand Home Position Adjustment ……………………………………………………………………… E-19
To adjust home positions …………………………………………………………………………… E-19
Taking Temperature Readings …………………………………………………………………………… E-21
To take temperature readings ……………………………………………………………………… E-21
To calibrate the temperature sensor ……………………………………………………………… E-23
Specifying Temperature Unit …………………………………………………………………………… E-24
To specify the temperature unit …………………………………………………………………… E-24
E-3
Things to check before using the watch
1. Check the Home City and the daylight saving time (DST) setting.
Use the procedure under “To configure Home City settings” (page E-14) to configure your Home City and
daylight saving time settings.
Important!
Proper World Time Mode data depends on correct Home City, time, and date settings in the
Timekeeping Mode. Make sure you configure these settings correctly.
2. Set the current time.
See “Configuring Current Time and Date Settings” (page E-16).
The watch is now ready for use.
E-2
About This Manual
Depending on the model of your watch, digital display text appears
either as dark figures on a light background, or light figures on a dark
background. All examples in this manual are shown using dark figures
on a light background.
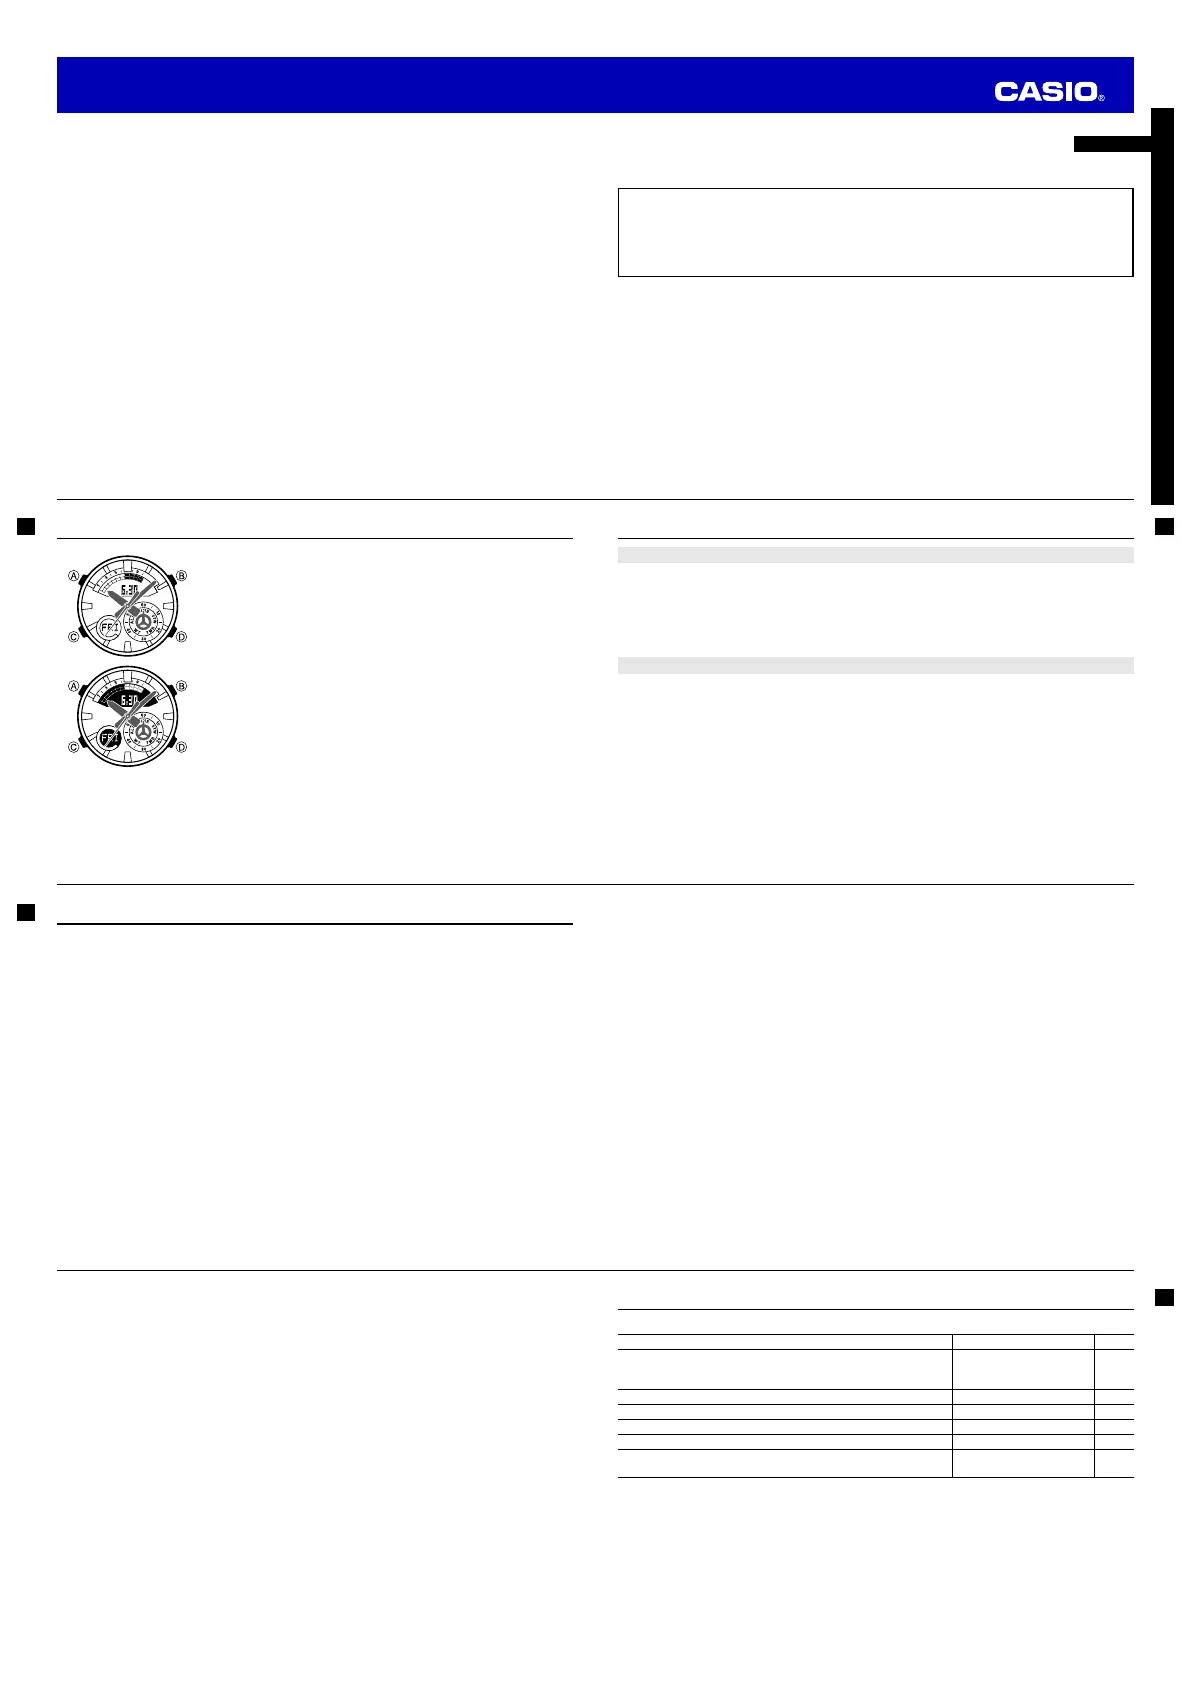
Button operations are indicated using the letters shown in the
illustration.
Note that the product illustrations in this manual are intended for
reference only, and so the actual product may appear somewhat
different than depicted by an illustration.
E-1
ENGLISH
Congratulations upon your selection of this CASIO watch.
Warning!
The measurement functions built into this watch are not intended for taking measurements that
require professional or industrial precision. Values produced by this watch should be considered
as reasonable representations only.
Note that CASIO COMPUTER CO., LTD. assumes no responsibility for any damage or loss
suffered by you or any third party arising through the use of your watch or its malfunction.
MO1607-EA © 2016 CASIO COMPUTER CO., LTD.
Operation Guide 5499
E-15
5. After all of the settings are the way you want, press A to exit the setting screen.
The indicator appears to indicate that daylight saving time is turned on.DST
Note
After you specify a city code, the watch will use UTC* offsets in the World Time Mode to calculate
the current time for other time zones based on the current time in your Home City.
* Coordinated Universal Time, the world-wide scientific standard of timekeeping.
The reference point for UTC is Greenwich, England.
To change the daylight saving time (summer time) setting
1. In the Timekeeping Mode, hold down A until ADJ appears in the
lower display.
When you release A (after ADJ appears), SET
will be flashing in
the upper display.
2. Press C.
This will cause the
DST indicator to appear in the upper display and
the DST setting of the currently selected Home City to appear in the
lower display.
3. Press D to toggle the DST setting between daylight saving time (
ON) and standard time (OFF).
4. After all of the settings are the way you want, press A to exit the setting screen.
The indicator appears to indicate that daylight saving time is turned on.DST
l
l
l
l
l
l
l
l
l
l
l
l
l
l
l
l
l
l
l
l
l
l
l
l
l
l
l
l
l
l
l
l
l
l
l
l
l
l
l
l
l
l
l
l
l
l
l
l
l
l
l
l
l
l
l
l
l
l
l
l
l
l
l
l
l
l
l
l
l
l
l
l
l
l
l
l
l
l
l
l
l
l
l
l
l
l
l
l
l
l
l
l
l
l
l
l
l
l
l
l
l
l
l
l
l
l
l
l
l
l
l
l
l
l
l
l
l
l
l
l
l
l
l
l
l
l
l
l
l
l
l
l
l
l
l
l
l
l
l
l
l
l
l
l
l
l
l
l
l
l
E-14
Configuring Home City Settings
There are two Home City settings: actually selecting the Home City and selecting either standard time or
daylight saving time (DST).
To configure Home City settings
1. In the Timekeeping Mode, hold down A until ADJ appears in the
lower display.
When you release A (after ADJ appears), SET
will be flashing in
the upper display. This is the setting mode.
The watch will exit the setting mode automatically if you do not
perform any operation for about two or three minutes.
2. Use D (East) and B (West) to scroll through the available city codes.
Keep scrolling until the city code you want to select as your Home
City is shown in the lower display.
For details about city codes, see the “City Code Table” at the back
of this manual.
3. Press C.
This will cause the
DST indicator to appear in the upper display and
the DST setting of the currently selected Home City to appear in the
lower display.
4. Press D to toggle the DST setting between daylight saving time (
ON)
and standard time (
OFF ).
Note that you cannot switch between standard time and daylight
saving time (DST) while UTC is selected as your Home City.
City code and city name
l
l
l
l
l
l
l
l
l
l
l
l
l
l
l
l
l
l
l
l
l
l
l
l
l
l
l
l
l
l
l
l
l
l
l
l
l
l
l
l
l
l
l
l
l
l
l
l
l
l
l
l
l
l
l
l
l
l
l
l
l
l
l
l
l
l
l
l
l
l
l
l
l
l
l
l
l
l
l
l
l
l
l
l
l
l
l
l
l
l
DST indicator
l
l
l
l
l
l
l
l
l
l
l
l
l
l
l
l
l
l
l
l
l
l
l
l
l
l
l
l
l
l
l
l
l
l
l
l
l
l
l
l
l
l
l
l
l
l
l
l
l
l
l
l
l
l
l
l
l
l
l
l
l
l
l
l
l
l
l
l
l
l
l
l
l
l
l
l
l
l
l
l
l
l
l
l
l
l
l
l
l
l
l
l
l
l
l
l
l
l
l
l
l
l
l
l
l
l
l
l
l
l
l
l
l
l
l
l
l
l
l
l
l
l
l
l
l
l
l
l
l
l
l
l
l
l
l
l
l
l
l
l
l
l
l
l
l
l
l
l
l
l
E-13
Timekeeping
Use the Timekeeping Mode to set and view the current time and date.
Each press of A in the Timekeeping Mode will change digital display contents as shown below.
Timekeeping
Mode
Hour hand
Day of week
Minute hand
Month Day
Second hand
Seconds
Date Screen
Seconds
Hour : MinutesPM indicator
Time Screen
A
E-12
2. Holding down B again as you press C will cause the hands to return to their normal positions (normal
timekeeping).
Note
Watch button functions are the same regardless of whether the hands are moved out of the way or at
their normal positions.
Changing to another mode will cause the hands to move back to their normal positions.
The hands also will move back to their normal positions automatically if no operation is performed for
about one hour.
E-11
Moving the Hands Out of the Way for Better Viewing
You can use the procedure below to temporarily move the hour and minute hands out of the way to better
view what is on the display.
This operation can be performed in any mode. In the case of a setting mode (setting flashing on the
screen), the hands will move out of the way automatically, even if you do not perform the operation
below.
1. While holding down B, press
C.
This will cause the hour and minute hands to move to a location where they do not block your view
of the digital display.
Example: When the current time is 10:08
Flashes while the hands
are moved out of the way.
l
l
l
l
l
l
l
l
l
l
l
l
l
ll
l
l
l
l
l
l
l
l
l
l
l
l
l
l
l
l
l
l
l
l
l
l
l
l
l
l
l
l
l
l
l
l
l
l
l
l
l
l
l
l
l
l
l
l
l
l
l
l
l
l
l
l
l
l
l
l
l
l
l
l
l
l
l
l
l
l
l
l
l
l
l
l
l
l
l
l
l
l
l
l
l
l
l
l
l
l
l
l
l
l
l
l
l
l
l
l
l
l
l
l
l
l
l
l
l
E-10
General Functions (All Modes)
The functions and operations described in this section can be used in all of the modes.
Auto Return Features
The watch will automatically return to the Timekeeping Mode if you do not perform any button operation
for a particular amount of time in each mode.
Mode Name Approximate Elapsed Time
Alarm 3 minutes
Thermometer 1 to 2 minutes
Setting screen (digital setting flashing) 3 minutes
Initial Screens
When you enter the Timekeeping, Alarm, or World Time Mode, the data you were viewing when you last
exited the mode appears first.
Scrolling
The
D and B buttons are used on the setting screen to scroll through data on the digital display. In
most cases, holding down these buttons during a scroll operation scrolls through the data at high
speed.
E-9
The dial hand indicates the watch’s current mode.
Stopwatch Mode Countdown Timer Mode
Alarm Mode World Time Mode
C
C
C
E-8
Selecting a Mode
The illustration below shows which buttons you need to press to navigate between modes.
To return to the Timekeeping Mode from any other mode, hold down C for about two seconds.
Timekeeping Mode
Thermometer Mode
Dial hand
C
C
D
Operation Guide 5499
E-23
To calibrate the temperature sensor
1. Take a reading with another measurement device to determine the
exact current temperature.
2. With the watch in the Timekeeping Mode, press D to enter the
Thermometer Mode.
3. Hold down A for about two seconds until the temperature reading
disappears from the upper display. Release A at this time, which will
cause the temperature reading to flash, which indicates the setting
mode.
4. Use D (+) and B (–) to calibrate the temperature value with the reading of another instrument.
Each press of a button changes the temperature value in units of 0.1°C (0.2°F).
To return the currently flashing value to its initial factory default setting, press
D and B at the same
time.
5. Press A to return to the Thermometer Mode.
Thermometer Precautions
Temperature measurements are affected by your body temperature (while you are wearing the watch),
direct sunlight, and moisture. To achieve a more accurate temperature measurement, remove the watch
from your wrist, place it in a well ventilated location out of direct sunlight, and wipe all moisture from the
case. It takes approximately 20 to 30 minutes for the case of the watch to reach the actual surrounding
temperature.
l
l
l
l
l
l
l
l
l
l
l
l
l
l
l
l
l
l
l
l
l
l
l
l
l
l
l
l
l
l
l
l
l
l
l
l
l
l
l
l
l
l
l
l
l
l
l
l
l
l
l
l
l
l
l
l
l
l
l
l
l
l
l
l
l
l
l
l
l
l
l
l
l
l
l
l
l
l
l
l
E-22
Temperature
Temperature is displayed in units of 0.1°C (or 0.2°F).
The displayed temperature value changes to - - - °C (or °F) if a
measured temperature falls outside the range of –10.0°C to 60.0°C
(14.0°F to 140.0°F). The temperature value will reappear as soon as
the measured temperature is within the allowable range.
Display Units
You can select either Celsius (°C) or Fahrenheit (°F) for the displayed temperature value. See “To specify
the temperature unit” (page E-24).
Temperature Sensor Calibration
The temperature sensor built into the watch is calibrated at the factory and normally require no further
adjustment. If you notice serious errors in the temperature readings produced by the watch, you can
calibrate the sensor to correct the errors.
Important!
Incorrectly calibrating the temperature sensor can result in incorrect readings.
Carefully read the following before doing anything.
Compare the readings produced by the watch with those of another reliable and accurate thermometer.
– If adjustment is required, remove the watch from your wrist and wait for 20 or 30 minutes to give the
temperature of the watch time to stabilize.
Temperature
E-21
Taking Temperature Readings
This watch uses a temperature sensor to measure temperature.
To take temperature readings
1. While in the Timekeeping Mode, press D to enter the Thermometer
Mode.
TEMP will appear in the lower display and temperature
measurement will start. After about one second, the measurement
reading will appear in the upper display.
The watch will continue to take temperature readings every five
seconds for one or two minutes.
2. Press D to return to the Timekeeping Mode.
The watch will return to the Timekeeping Mode automatically if you
do not perform any operation for about one or two minutes after
entering the Thermometer Mode.
Temperature
E-20
The dial hand must point to 12 o’clock.
The watch will return to regular timekeeping automatically if you do not perform any operation for
about two or three minutes. Any changes you have made to settings up to that point will be saved.
2. Use D (+) and B (–) to adjust the position of the currently selected hand.
Holding down either button will cause the hand to move at high speed. Once started, high-speed
hand movement will continue even if you release the button. To stop high-speed hand movement,
press any button.
The second hand and dial hand will automatically stop high-speed movement after they complete
one revolution. The minute hand will stop automatically after 12 revolutions.
3. Press A to exit home position correction and return to regular timekeeping.
Note
After performing home position adjustment, enter the Timekeeping Mode and check to make sure that
the analog hands and the upper display indicate the same time. If they do not, perform home position
adjustment again.
E-19
Hand Home Position Adjustment
Strong magnetism or impact can cause the hands of the watch to go out of alignment.
Home position adjustment is not necessary when the analog time and digital time are the same time in
the Timekeeping Mode.
To adjust home positions
1. In the Timekeeping Mode, hold down A and keep it depressed for
about five seconds until H.SET appears on the lower display.
When you release A after H.SET appears, the second hand will
move to 12 o’clock. This indicates the second hand home position
adjustment mode.
Though ADJ will appear in the lower display about two seconds
after you hold down A, do not release the button yet. Keep it
depressed until H.SET appears.
Use the C button to select a hand for adjustment. Each press of
C cycles in sequences from the second hand, to the hour and
minute hands, and then the dial hand. Selecting a hand causes it to
move to 12 o’clock and the content of the upper display changes as
shown in the table below.
Upper display Selected hand
Flashing 00 Second hand
Flashing 0:00 Hour and minute hands
Flashing SUB Dial hand
If the selected hand does not move exactly to 12 o’clock, perform step 2 below to adjust it.
Dial hand
l
l
l
l
l
l
l
l
l
l
l
l
l
l
l
l
l
l
l
l
l
l
l
l
l
l
l
l
l
l
l
l
l
l
l
l
l
l
l
l
l
l
l
l
l
l
l
l
l
l
l
l
l
l
l
l
l
l
l
l
E-18
Note
While the 12-hour format is selected for timekeeping, a (PM) indicator will appear for times from P
noon to 11:59 p.m. No indicator appears for times from midnight to 11:59 a.m. With 24-hour format,
time is displayed from 0:00 to 23:59, without any (PM) indicator.P
The watch’s built-in full automatic calendar makes allowances for different month lengths and leap
years. Once you set the date, there should be no reason to change it except after you have the
watch’s batteries replaced.
The day of the week changes automatically when the date changes.
E-17
2. Press C to move the flashing in the sequence shown below to select the other settings.
Illumination Duration
(page E-35)
Button Operation Tone
On/Off (page E-39)
City Code
(page E-14)
DST
(page E-15)
12/24-Hour
Format Seconds Hour Minutes
Day Month Year
CC C
CCCC
C
C
C
C
The following steps explain how to configure timekeeping settings only.
3. When the timekeeping setting you want to change is flashing, use D and/or B to change it as
described below.
Screen To do this: Do this:
Toggle between 12-hour (
12H) and 24-hour (
24H)
timekeeping. Press D.
Reset the seconds to 00
(If the current seconds count is between 30 and 59,
one is added to the minute count).
Press D.
Change the hour or minutes
Use D (+) and
B (–).
Change the year, month, or day
4. After all of the settings are the way you want, press A
to exit the setting screen.
E-16
Configuring Current Time and Date Settings
You can use the procedure below to adjust the Timekeeping Mode time and date settings if they are off.
Changing the digital Home City data should cause the analog time setting to change accordingly. If the
analog time does not indicate the digital time, check the home positions of the hands and make
adjustments if necessary (page E-19).
To change the current time and date settings
1. In the Timekeeping Mode, hold down A until ADJ appears in the
lower display.
When you release A (after ADJ appears),
SET will be flashing in
the upper display.
City code
l
l
l
l
l
l
l
l
l
l
l
l
l
l
l
l
l
l
l
l
l
l
l
l
l
l
l
l
l
l
l
l
l
l
l
l
l
l
ll
l
l
l
l
l
l
l
l
l
l
l
l
l
l
l
l
l
l
l
l
l
l
l
l
l
l
l
l
l
l
l
l
l
l
l
l
l
l
l
l
l
l
l
ll
l
l
l
l
l
Operation Guide 5499


Product specificaties

Merk: Casio
Categorie: Horloge
Model: Edifice EFR-550D-1AV

Heb je hulp nodig?

Als je hulp nodig hebt met Casio Edifice EFR-550D-1AV stel dan hieronder een vraag en andere gebruikers zullen je antwoorden


Handleiding Horloge Casio

Handleiding Horloge

Nieuwste handleidingen voor Horloge