Canon PowerShot S400 Handleiding
Bekijk gratis de handleiding van Canon PowerShot S400 (2 pagina’s), behorend tot de categorie Camcorder. Deze gids werd als nuttig beoordeeld door 101 mensen en kreeg gemiddeld 4.3 sterren uit 51 reviews. Heb je een vraag over Canon PowerShot S400 of wil je andere gebruikers van dit product iets vragen? Stel een vraag
Pagina 1/2
CDI-E083
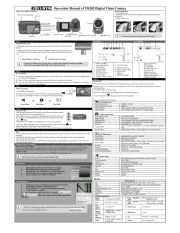
This guide explains the required operations the first time the camera is used, how to download images
to a computer, as well as connecting a printer for direct printing. For more information about handling
precautions and detailed instructions, please refer to the manuals listed above.
Please refer to the section of the if you have trouble installing the software or downloadingTroubleshooting Software Starter Guide
images.
Do not connect the camera to the computer before the software is installed.
Handling precautions
Camera’s detailed operations
➜Camera User Guide
Software operations
➜Software Starter Guide
Detailed software operations
➜ZoomBrowser EX Software User Guide (Windows®)
➜ImageBrowser Software User Guide (Macintosh)
(These PDF format manuals are available on the Canon
website. Please download them from the following URL:
http://www.canon.co.jp/Imaging/information-e.html)
CDI-E083-010 XX02XXXX © 2003 CANON INC. PRINTED IN JAPAN
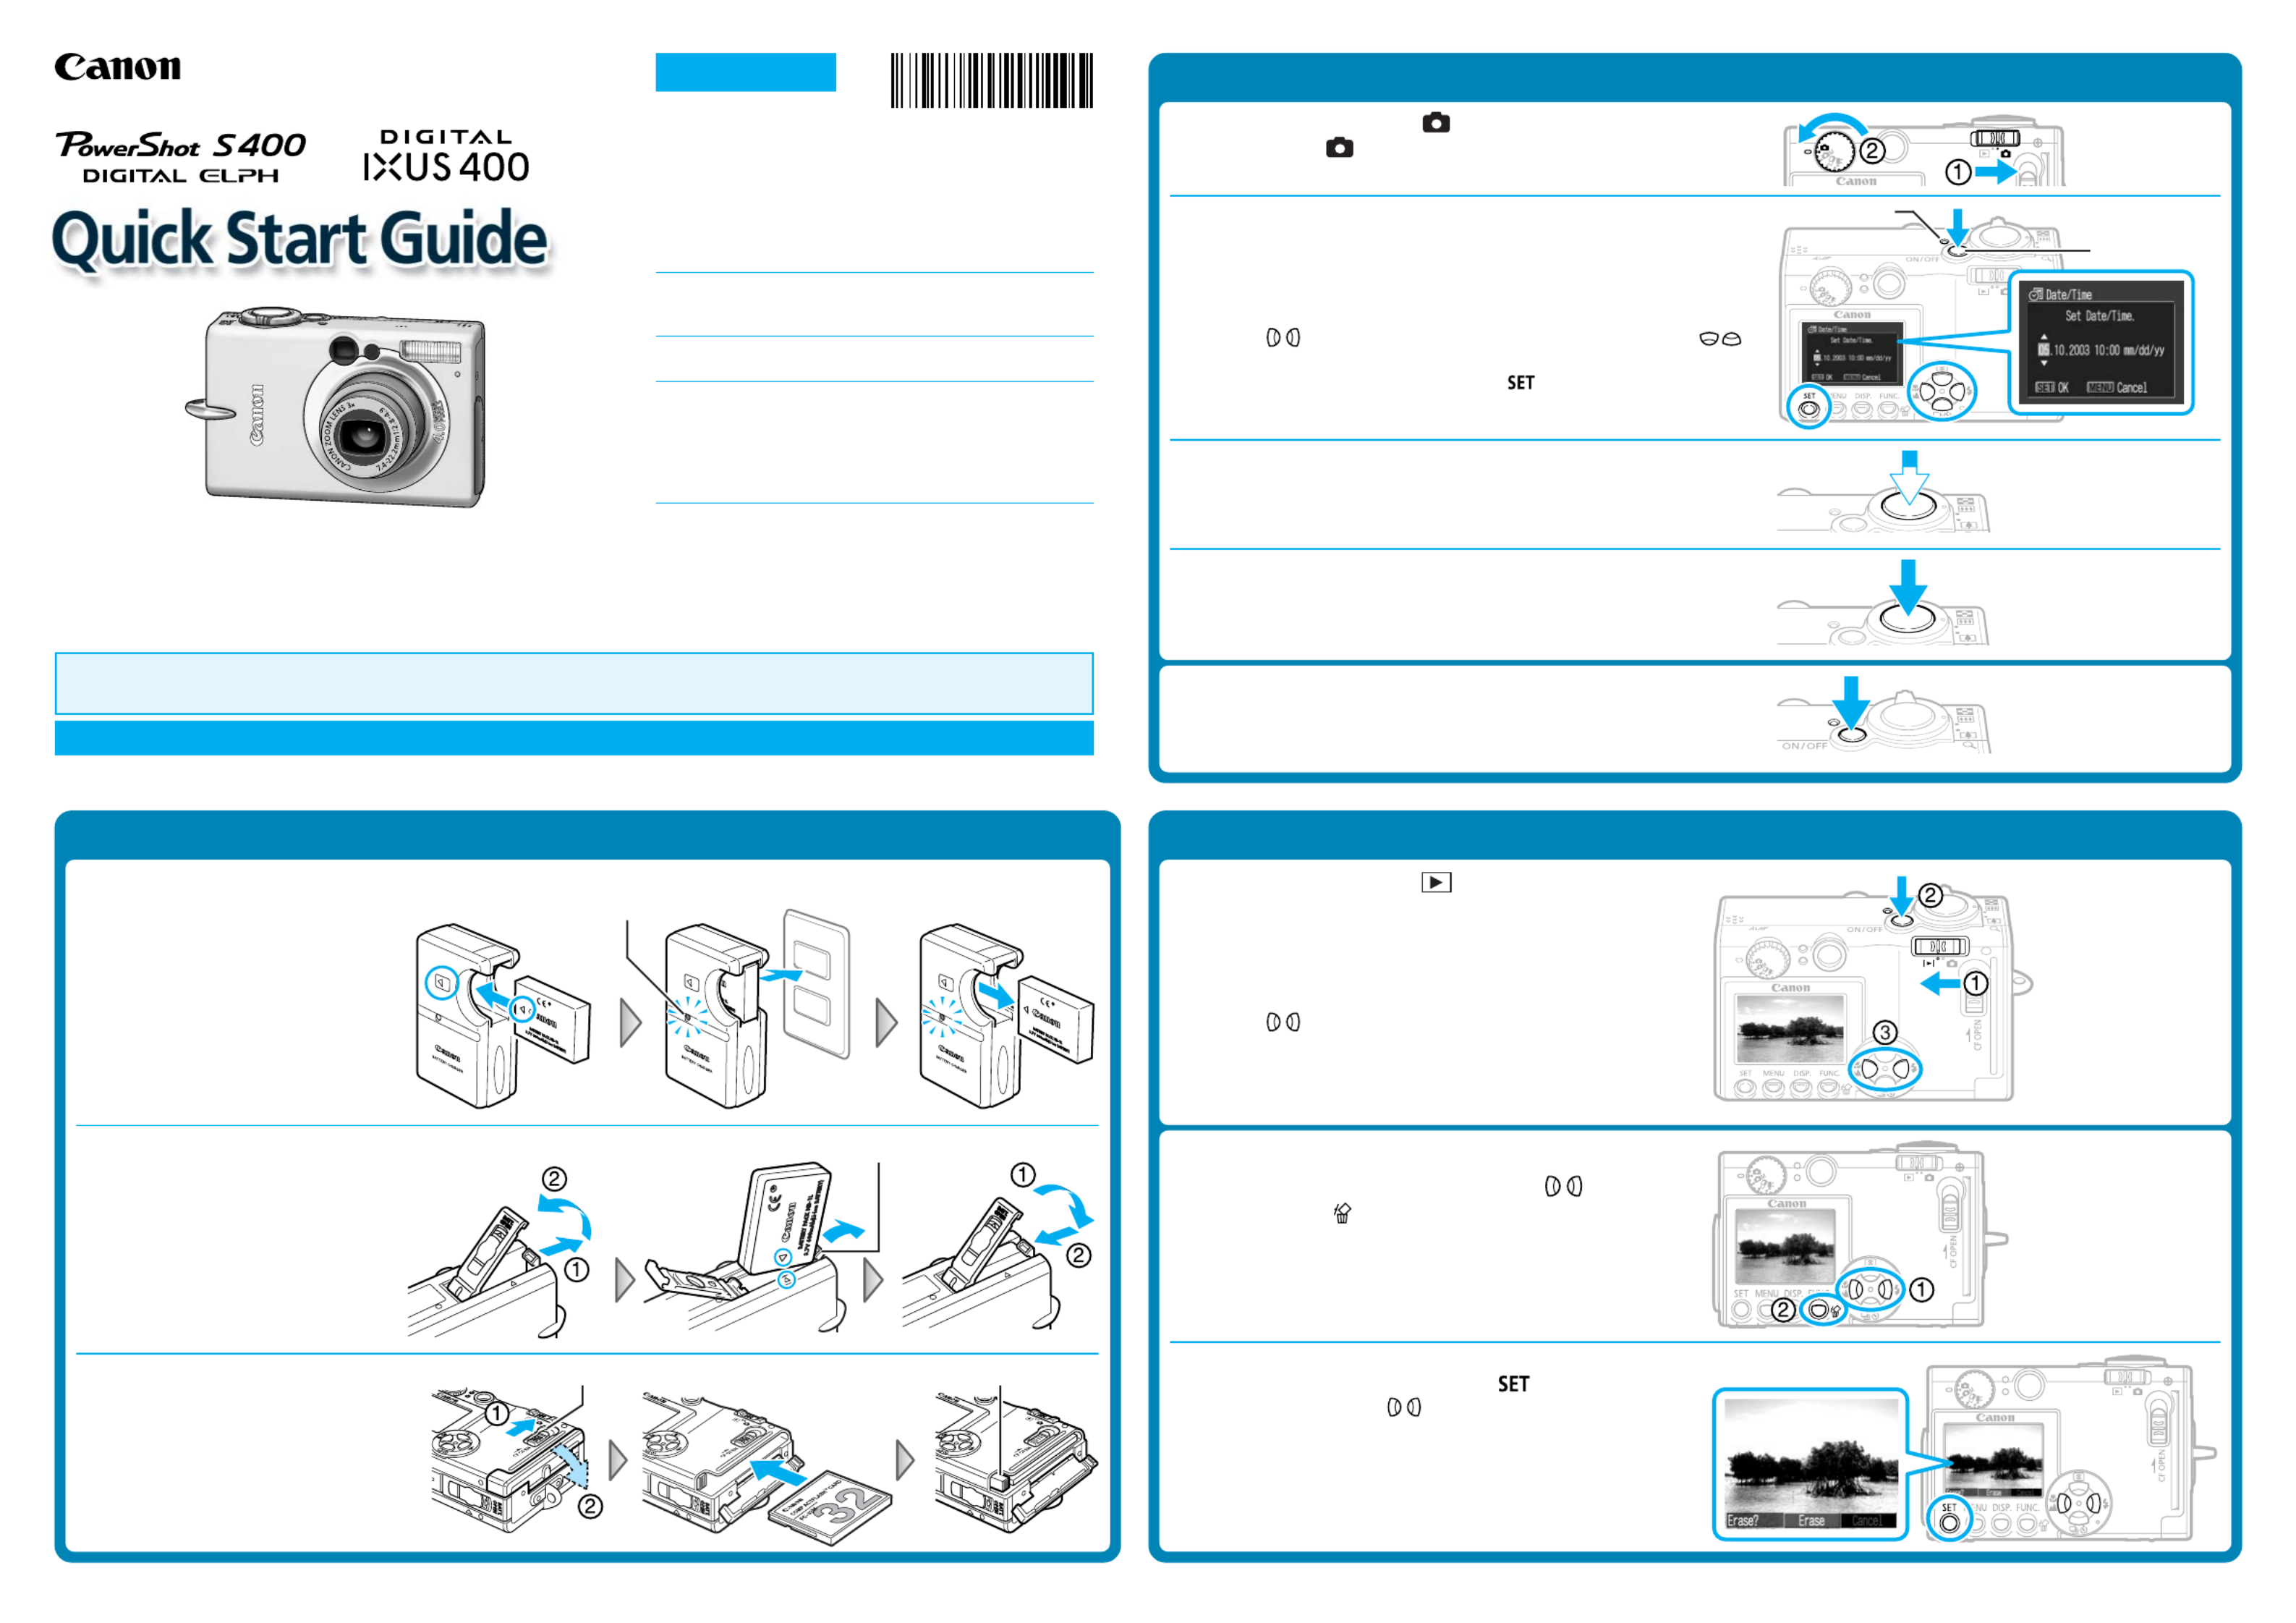
Step 1 Preparing the Camera
1. Charge the battery pack. (Battery charger types vary by region.)
Place the battery pack in the battery
charger and plug the charger into a
power outlet. The charge indicator
lights red while charging and
changes to green when the battery
pack is charged.
Charging the battery pack takes
approximately 130 minutes.
2. Install the battery pack.
Slide the battery cover open. Press
the battery lock while inserting the
battery pack all the way in, aligning
the arrows on the camera and
battery pack. Slide the battery cover
closed.
3. Install the CF card.
Slide the lock and open the CF card
slot cover. Insert the CF card with its
label facing upward until the CF
card eject button fully extends.
Close the CF card slot cover.
CF Card Eject Button
Step 2 Shooting
1. Set the mode switch to (Shooting) and the shooting
mode dial to (Auto).
2. Turn on the power.
Press the ON/OFF button until the power lamp lights.
The Date/Time menu will appear on the LCD monitor when the camera
is first turned on.
3. Set the date and time (First time the camera is powered on).
Use the buttons to select the items you wish to set, and the
buttons to change the value.
To put the settings into effect, press the button.
4. Focus.
Point the camera in the direction of the subject you wish to shoot and
press the shutter button halfway. The camera beeps twice when the
subject is in focus.
5. Shoot.
Press the shutter button fully. The shutter sound will sound once when
the shot has been taken. The recorded image is displayed on the LCD
monitor for approximately 2 seconds.
Turn off the power.
Press the ON/OFF button. Even if the ON/OFF button is not pressed, the
power will automatically shut down 3 minutes after the last control is
accessed.
Step 3 Reviewing an Image
1. Set the mode switch to (Replay).
2. Turn on the power.
Press the ON/OFF button until the power lamp lights.
The last recorded image appears in the LCD monitor.
3. View the images.
Use the buttons to display the image you wish to see.
To Delete an Unwanted Image
1. Select the unwanted image with the buttons
and press the button.
2. When the confirmation screen appears, check that
[Erase] is selected and press the button.
Select [Cancel] with the buttons to cancel without erasing.
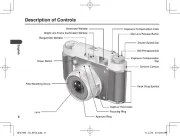
Charge Indicator
Battery Lock
Lock
Power Lamp
ON/OFF Button
Continued on the reverse side.
ENGLISH

Downloading Images to a Computer
Do not connect the camera to the computer before the software is installed.
Follow each step below in order.
List of Things to Prepare
• Camera and computer
• Canon Digital Camera Solution Disk provided with the camera
• USB cable (use the cable provided with the camera)
Steps to Follow
1. Set the Canon Digital Camera Solution Disk in
the CD-ROM drive.
2. Install the software from the disk.
For details on software installation, see the Software
Starter Guide included in your package.
3. After your computer restarts, eject the Solution
Disk from the CD-ROM drive.
5. Start the program.
•Windows*: The Event dialog will automatically display.
4. Connect the camera to the computer using the
USB cable.
Select [Canon ZoomBrowser EX] and click [OK].
* If the above dialog (Event dialog) does not appear automatically, double-click
the [ZoomBrowser EX] icon on the desktop.
•Mac OS X (10.1/10.2):
1. If Image Capture or iPhoto are running, click on in the upper left corner of
the window to close the application.
2. Double-click the [Canon ImageBrowser] icon on the desktop.
•Mac OS 9.0-9.2: ImageBrowser will start and open the ImageBrowser Automation
wizard.
Confirm that [Display Images] is selected and click the [OK] button.
6. Download images to the computer using the program you started.
For details on downloading images, see the included in yourSoftware Starter Guide
package.
Printing with a Direct Print Compatible Printer (CP Series)
It is easy to print out crisp prints of the images you shoot by connecting your camera
directly to a separately sold, direct print compatible printer (CP series) with a cable. For
details, please see the user guide for the printer.
You can also print with a separately sold, direct print compatible Bubble Jet printer. For
details, please see the user guide included with the Bubble Jet printer.
1. Load the ink cassette and the paper cassette into the printer.
2. Connect the power cord to the printer.
With the CP-10 printer, the printer’s power turns on automatically.
3. Connect the camera to the printer and press the printer’s ON/OFF
button to turn on the power. Set the camera’s mode switch to and
turn on the power.
• appears on the camera’s LCD monitor.
• If you cannot use the camera’s compact power adapter*, please use a fully charged
battery pack.
4. Choose an image using the button and press the or button.
5. Choose [Print] using the / / / buttons and press the
button.
The image will start to print and, when it is completely finished, the display will revert
to standard replay mode.
Ink Cassette
Paper Cassette
To DIGITAL
Terminal
Camera’s Compact Power Adapter*
To Power
Outlet
Direct Interface Cable DIF-100
(Included with the printer) * Included with the optional AC Adapter Kit ACK500
To Power
Outlet
To DC Coupler
Terminal
For details on printing images, see the included in your package.Camera User Guide
DC Coupler*
Set the camera’s mode switch to and turn on the
power.
Product specificaties
| Merk: | Canon |
| Categorie: | Camcorder |
| Model: | PowerShot S400 |
Heb je hulp nodig?
Als je hulp nodig hebt met Canon PowerShot S400 stel dan hieronder een vraag en andere gebruikers zullen je antwoorden
Handleiding Camcorder Canon
25 Februari 2025
1 December 2024

4 November 2024

16 November 2023

13 November 2023

30 Juni 2023

17 Juni 2023

11 Juni 2023

11 Juni 2023

9 Juni 2023
Handleiding Camcorder
- RCA
- ATN
- Braun Phototechnik
- Trust
- Garmin
- Leotec
- Renkforce
- Nikkei
- Iget
- Jay-tech
- Minolta
- DJI
- Hamlet
- Aiptek
- Mio
Nieuwste handleidingen voor Camcorder
9 Juli 2025
9 Juli 2025
6 Juli 2025
5 Juli 2025

5 Juli 2025
4 Juli 2025
17 Juni 2025
17 Juni 2025
17 Juni 2025
16 Juni 2025