Busch-Jaeger 6800-0-2285 Handleiding
Busch-Jaeger
Bewegingsdetector
6800-0-2285
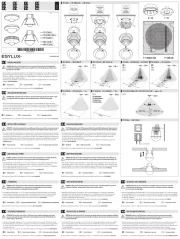
Bekijk gratis de handleiding van Busch-Jaeger 6800-0-2285 (2 pagina’s), behorend tot de categorie Bewegingsdetector. Deze gids werd als nuttig beoordeeld door 89 mensen en kreeg gemiddeld 4.5 sterren uit 45 reviews. Heb je een vraag over Busch-Jaeger 6800-0-2285 of wil je andere gebruikers van dit product iets vragen? Stel een vraag
Pagina 1/2

0273-1-7133
03.02.2011
0273-1-7133
Busch-Komfortschalter®
6815U 2-Draht-Einsatz
6816U Relais-Einsatz
6815-xxx Sensor
Pos: 1 /35x28/35 Mehrspr achig/Art und Sprache der Doku/Betriebsan leitung/Betriebsa nleitung ger-eng-f re-dut @ 0\mod99_1.doc @ 13 31 @
GER Betriebsanleitung
Sorgfältig lesen und aufbewahren
ENG Operating instructions
Read carefully and keep in a safe place
FRE Instructions d'utilisation
Les lire attentivement et les respecter
DUT Handleiding
Zorgvuldig doorlezen en bewaren
Pos: 2 /35x28/35 Mehrspr achig/Sicherhei tshinweise/Sic herheitshinweise 230V/Si cherheitshinwei se 230V ger-eng-fr e-dut @ 0\mod15_1.doc @ 923 @
Sicherheitshinweise Safety instructions Consignes de sécurité Veiligheidsinstructies
Arbeiten am 230 V Netz dürfen
nur von Fachpersonal
ausgeführt werden! Vor
Montage, Demontage
Netzspannung freischalten!
Durch Nichtbeachtung von
Installations- und Bedienungs-
hinweisen können Brand und
andere Gefahren entstehen!
Work on the 230 V supply
system may only be
performed by specialist staff!
De-energize mains power
supply prior to installation
and/or disassembly!
Failure to observe installation
and operating instructions
may result in fire and other
hazards!
Toute intervention sur l'alimentation
électrique en 230 V doit être
effectuée par des techniciens
spécialisés ! Déconnecter la tension
secteur avant tout montage et
démontage!
Le non-respect des consignes
d'installation et d'utilisation peut
entraîner un incendie ou être la
source d'autres dangers !
Werkzaamheden op het 230 V net
mogen uitsluitend worden
doorgevoerd door bekwaam
personeel! Vóór de montage en
demontage netspanning
uitschakelen!
Als de installatie- en
bedieningsinstructies niet opgevolgd
worden, dan kan dit leiden tot brand
of andere gevaren!
Pos: 3 /35x28/35 Mehrspr achig/Inhalt/ xx_Sonder-Dokumenta tionen/6815/6816/681 5/6816_ger-eng- fre-dut @ 16\mod_129406 4583686_1.doc @ 97888 @
Technische Daten Technical Data Caractéristiques
techniques
Technische gegevens
Nennspannung: Rated voltage: Tension nominale : Nominale spanning: 230 V~, ±10%, 50/60 Hz
Nennleistung 6815U:
Nennleistung 6816U:
Rated power 6815U:
Rated power 6816U:
Puissance nominale 6815U :
Puissance nominale 6816U :
Nominaal vermogen 6815U:
Nominaal vermogen 6816U:
300 W/VA
2300 W/VA
Mindestlast 6815U: Minimum load 6815U: Charge minimale 6815U : Min. belasting 6815U: 40 W/VA
Temperaturbereich: Temperature range: Plage de température : Temperatuurbereik: 0°C – +35°C
Verlustleistung: Power loss: Puissance dissipée : Stand-by stroomverbruik: < 1 W
Schaltkontakt 6815U:
(Öffnungskontakt)
Schaltkontakt 6816U :
Switching contact 6815U:
(Break contact)
Switching contact 6816U:
Contact de
commutation 6815U:
(Contact rupteur)
Contact de commutation
6816U :
Schakelcontact 6815U:
(verbreekcontact)
Schakelcontact 6816U:
0 mm
µ
Schutzart: Protection type: Type de protection : Beschermingsgraad: IP 20
Dämmerungssensor
(manuell):
Twilight sensor
(manual):
Capteur crépuscule
(manuelle) :
Schemersensor
(handmatig):
0,5 – 300 Lux
Kurzschlussschutz
6815U:
Short-circuit protection
6815U:
Protection contre les courts-
circuits
6815U :
Kortsluitbeveiliging
6815U:
T 2,0 H
Überlastschutz 6815U:
● Temperaturbegrenzer
Overload protection 6815U:
● Temperature limiter
Protection contre les
surcharges 6815U :
● Limiteur de température
Overbelastingsbeveiliging
6815U:
● Temperatuurbegrenzer
Ausschaltverzögerung
(manuell):
Switch-off delay
(manual):
Minuterie de mise à l'arrêt
(manuelle) :
Uitschakelvertraging
(handmatig):
1 – 10 Min.
Erfassung Detection Détection Detectie
– horizontal: – horizontal: – horizontal : – horizontaal: 170 °
– vertikal – vertical – vertical – verticaal +/- 5 °
Reichweite Coverage Portée Bereik
– frontal max.: – frontal max.: – frontale max. : – frontaal max.: 5 m
– seitlich max. – Lateral max. – latérale max. – zijwaarts max. 3 m
Montagehöhe: Mounting height: Hauteur de montage : Montagehoogte: 0,8 m – 1,2 m
Leitungslänge
Nebenstelleneingang
(Tasteranzahl beliebig):
Extension unit input line
length (any number of
buttons):
Longueur de ligne Entrée de
commande supplémentaire
(nombre de boutons-
poussoirs au choix) :
Leidinglengte
nevenaansluiting (aantal
knoppen willekeurig):
max. 100 m
Funktion Function Fonction Functie
Die Einsätze 6815U/6816U
schalten angeschlossene
Verbraucher nach Erfassung oder
manueller Bedienung durch den
Sensor 6815-xxx.
Es sind 4 unterschiedliche
Betriebsarten (siehe Bedienung)
möglich.
The inserts 6815U/6816U switch
connected consumers after a
detection or manual operation of
the sensor 6815-xxx.
Four different operating modes are
possible (see operation).
Les ensembles 6815U/6816U
commutent les consommateurs
reliés en cas de détection ou
d'actionnement manuel via le
capteur 6815-xxx.
Quatre modes de fonctionnement
différents sont possibles (voir
Commande) :
De sokkels 6815U/6816U
schakelen de aangesloten
verbruikers na detectie of
handmatige bediening door de
sensor 6815-xxx.
Er zijn 4 verschillende modi (zie
bediening) mogelijk.
Der Komfortschalter
ist kein Bewegungs-
oder Präsenzmelder!
Er dient
ausschließlich dem
automatischen
Schalten von
Beleuchtungen.
The comfort switch is not a motion
detector or presence watchdog. It is
only used to control lighting
automatically.
Le commutateur Confort n'est pas un
détecteur de mouvement ou de
présence ! Il sert uniquement à la
commutation automatique de
systèmes d'éclairage.
De comfortschakelaar is geen
bewegings- of aanwezigheidsmelder!
Deze is uitsluitend bestemd voor het
automatisch schakelen van
verlichtingen.
Montage Montage Montage Mounting
Netzspannung abschalten!
Die Einsätze 6815U/6816U sind für
den Einbau in eine feste Wand oder
in handelsübliche Unterputzdosen
einzubauen.
Disconnect mains supply!
Inserts 6815U/6816U are to be
installed in a solid wall or in
commercially available flush-mounted
boxes.
Débrancher l'alimentation
électrique !
Les ensembles 6815U/6816U sont
conçus pour un montage dans une
paroi fixe ou dans des boîtes de
branchement encastrées disponibles
dans le comerce.
Netspanning uitschakelen!
De sokkels 6815U/6816U moeten in
een vaste wand of in een in de
handel verkrijgbare inbouwdoos
worden ingebouwd.
Bei einer
Erstinbetriebnahme oder
Spannungszuschaltung
die Startzeit des Gerätes
von 1 Min. (LED blinkt)
abwarten.
At initial startup or when connecting
the supply voltage, wait for a start
time of 1 min. (LED blinks).
Lors de la première mise en service
ou lors de la mise sous tension,
patienter 1 min pendant que l’appareil
démarre (la LED clignote).
Bij de eerste inbedrijfstelling of
inschakelen van de spanning moet
eerst de starttijd van het apparaat
van 1 min. (LED knippert) worden
afgewacht.
Erfassungsbereich Detection range Plage de détection Detectiebereik:
Fig. 1; Afb. 1 Fig. 2; Afb. 2
Erfassungsbereich vertikal Detection range, vertical Erfassungsbereich horizontal Detection range, horizontal
Couverture verticale Detectiebereik verticaal Couverture horizontale Detectiebereik horizontaal
Derating 6815U Derating 6815U Derating 6815U Réduction de la charge 6815U
Fig. 3; Afb. 3
% = Nennleistung;
Rated power;
Puissance nominale ;
Nominaal vermogen
°C = Umgebungstemperatur;
Ambient temperature;
Température ambiante ;
Omgevingstemperatuur
Anschluss Connection Raccordement Aansluiting
Ein Nebenstellenanschluss
ist sowohl gegen L, N, als
auch gegen den Ausgang
möglich.
It is possible to have an extension
unit against L, N, as well as against
the output .
Le raccordement de commandes
supplémentaires est possible sur L et
N ainsi que sur la sortie .
Een nevenaansluiting is zowel aan L,
N als aan de uitgang mogelijk
Fig. 4; Afb. 4 Fig. 5; Afb. 5
6815U mit Nebenstellenanschluss
(z.B. 2020 US)
6815U with extension unit (e.g, 2020
US)
6815U mit Wechselschaltung 6815U two-way circuit
6815U avec raccordement de
commande supplémentaire (par ex.
2020 US)
6815U met nevenaansluiting
(bijvoorbeeld 2020 US)
6815U avec commutateur inverseur 6815U met wisselschakeling

Fig. 6; Afb. 6 Fig. 7; Afb. 7
L
N
N 1L
L
N
N 1L N 1L
6816U mit Nebenstellenanschluss
(z.B. 2020 US)
6816U with extension unit (e.g., 2020
US)
Parallelschaltung mehrerer 6816U Parallel connection of several 6816U
6816U avec raccordement de
commande supplémentaire (par ex.
2020 US)
6816U met nevenaansluiting
(bijvoorbeeld 2020 US)
Connexion parallèle de plusieurs
6816U
Parallelle schakeling van meerdere
6816U apparaten
Bei beleuchtetem Taster ist
N-Leiter erforderlich
A neutral conductor is required with
an illuminated button
En cas de bouton-poussoir
éclairé, le conducteur N est
nécessaire
Bij verlichte knop is N-leider vereist
Lastarten Load types Types de charge Belastingstypes
Für 6815U:
● Glühlampen mit 230 V
● 230 V Halogenlampen
● Niedervolt Halogenlampen mit
elektronischen oder
konventionellen Transformatoren
For 6815U:
● 230 V incandescent lamps
● 230 V halogen lamps
● Low voltage halogen lamps with
electronic or conventional
transformers
Pour 6815U :
● Lampes à incandescence 230 V
● Lampes halogènes 230 V
● Lampes halogènes basse tension
avec transformateurs
électroniques ou conventionnels
Voor 6815U:
● gloeilampen met 230 V
● 230 V halogeenlampen
● laagvolt-halogeenlampen met
elektronische transformatoren of
conventionele transformatoren
Für 6816U:
● Glühlampen max. 2300 W
● 230 V Halogenlampen
max.1200 W
● Niedervolt Halogenlampen mit
konventionellem oder
elektronischen Transformatoren
max.2300 W
● Energiesparlampen
7 W – 500 W
● Leuchtstofflampen max. 2300 W
cos φ = 0,5 bei
Parallelkompensation max. C=140
µF
● LED-Leuchtmittel 3 W – 500 W
For 6816U:
● Incandescent lamps 2300 W max.
● 230 V halogen lamps
max.1200 W
● Low-voltage halogen lamps with
conventional or electronic
transformers
2300 W max.
● Energy-saving bulbs
7 W – 500 W
● Incandescent lamps max. 2300 W
cos φ = 0.5 at parallel
compensation max. C=140 µF
● LED lamps 3 W – 500 W
Pour 6816U :
● Lampes à incandescence 2 300 W
maxi
● Lampes halogènes 230 V
1 200 W maxi.
● Lampes halogènes basse tension
avec transformateur conventionnel
ou électronique
2 300 W maxi.
● Lampes à faible consommation
d'énergie
7 W – 500 W
● Tubes fluorescents 2 300 W maxi.
cos φ = 0,5 avec une
compensation parallèle maxi.
C=140 µF
● Système d'éclairage à LED 3 W –
500 W
Voor 6816U:
● gloeilampen max. 2300 W
● 230 V halogeenlampen
max.1200 W
● laagvolt-halogeenlampen met
conventionele of elektronische
transformatoren max. 2300 W
● spaarlampen
7 W – 500 W
● φ TL-lampen max. 2300 W cos =
0,5 bij parallelcompensatie max.
C=140 µF
● LED-lichtbron 3 W – 500 W
Trafoverlustleistung
berücksichtigen:
– Elektronische Trafos 5%
– Konventionelle Trafos
20%
Consider transformer power loss:
- Electronic transformers 5%
- Conventional transformers 20%
Prendre en compte la perte de
puissance due au transformateur :
– Transformateurs électroniques 5%
– Transformateurs conventionnels
20 %
Rekening houden met het
vermogensverlies van de
transformator:
– elektronische transformatoren 5%
– conventionele transformatoren
20%
Bedienung Bediening Operation Commande
Die Einsätze
6815U/6816U können
ausschließlich mit den
Komfortschaltersensoren
6815-xxx betrieben
werden.
The inserts 6815U/6816U can only
be operated with the comfort switch
sensor 6815-xxx.
Les ensembles 6815U/6816U
peuvent être uniquement utilisés
avec les capteurs-interrupteurs
Confort
6815-xxx.
De sokkels 6815U/6816U kunnen
alleen samen met de comfort-
schakelaarsensoren 6815-xxx
worden gebruikt.
Fig. 8; Afb. 8 Fig. 9; Afb. 9
außerer Rahmen quadratisch u eckig Outer frame square and rectangular Rahmen quadratisch u eckig Frame square and rectangular
Boîtier extérieur carré et polygonal buitenste raam vierkant en
rechthoekig
Boîtier carré et polygonal raam vierkant en rechthoekig
Einstellung
Über die Einstellpotis auf der
Rückseite des Sensors (Fig. 8 Pos
1,2) können die Betriebsarten, die
Einschalthelligkeit und die
Nachlaufzeit der Beleuchtung bis
zum automatischen Ausschalten
stufenlos eingestellt werden.
Setting
The setting potentiometer on the rear
of the sensor (Fig. 8 Pos. 1, 2) can be
used to set the following infinitely
variable: the operating modes, the
switch-on brightness and the light-on
time for the lighting up to automatic
switch-off.
Réglage
Les potentiomètres de réglage à
l'arrière du capteur (Fig. 8 Pos 1,2)
permettent de régler par incréments
les modes de fonctionnement, la
luminosité de déclenchement et le
temps de fonctionnement de
l'éclairage jusqu'à la mise à l'arrêt
automatique.
Instelling
Met de instelpotentiometers aan de
achterzijde van de sensor (afb. 8,
pos. 1,2) kunnen de modi, de
lichtsterkte bij inschakeling en de
nalooptijd van de verlichting tot het
automatisch uitschakelen traploos
worden ingesteld.
Halbautomatik Betrieb
Gerät schaltet automatisch,
bei Betreten des Raumes
bzw. bei Bewegung ein.
Die Helligkeitsschaltschwelle
ist einstellbar.
Das Ausschalten erfolgt durch
kurzen Tastendruck. Die LED
(Fig.9 Pos 1) leuchtet bis das
Gerät ausgeschaltet wird
(manuelle Bedienung wird
erwartet).
Semiautomatic mode
The device automatically
switches on when a person
enters the room or moves
accordingly.
The brightness threshold is
adjustable.
Rapidly press and release to
switch off this function. The
LED (Fig.9. pos. 1) lights up
until the device is switched off
(manual operation is
anticipated).
Fonctionnement semi-
automatique
L'appareil commute
automatiquement en cas
d'entrée dans la pièce ou en
cas de mouvement.
Le seuil de luminosité pour le
déclenchement peut être
réglé.
La mise à l'arrêt se fait en
appuyant brièvement sur le
bouton. La LED (Fig.9 Pos 1)
s'allume jusqu'à ce que
l'appareil soit mis à l'arrêt
(commande manuelle
attendue).
Halfautomatische werking
Apparaat schakelt
automatisch in bij het betreden
van de ruimte en/of bij
beweging.
De schakeldrempel voor de
lichtsterkte kan worden
ingesteld.
Uitschakelen met een korte
druk op de knop. De LED (afb.
9 pos. 1 brandt totdat het
apparaat wordt uitgeschakeld
(handbediening verwacht).
Eine erneute Einschaltung
kann erst nach einer Sperrzeit
von 15 sec. erfolgen.
You can switch on the device
again after the 15 second lock
time.
Il n’est possible de remettre en
marche l’appareil qu’après
une durée de blocage de 15 s.
Er kan pas opnieuw worden
ingeschakeld als de
blokkeertijd van 15 sec. is
verstreken.
Zeitautomat
Gerät muss manuell
eingeschaltet werden. Die
LED (Fig.8 Pos 1) leuchtet bis
zur Einschaltung(manuelle
Bedienung wird erwartet).
Das Ausschalten erfolgt nach
der eingestellten Nachlaufzeit
ab letzter Erfassung.
Time control
The device must be switched
on manually. The LED (Fig.8.,
pos. 1) lights up until the
device is switched off (manual
operation is anticipated).
The device switches off after
the specified light-on time
beginning from the most
recent detection.
Interrupteur à minuterie
L'appareil doit être mis en
marche manuellement. La
LED (Fig.8 Pos 1) s'allume
jusqu'à la mise en marche
(une commande manuelle est
attendue).
La mise à l'arrêt se fait en
fonction de la durée de
fonctionnement réglée, à partir
de la dernière détection.
Tijdautomaat
Het apparaat moet met de
hand worden ingeschakeld.
De LED (afb. 8 pos. 1 brandt
totdat het apparaat wordt
ingeschakeld (handbediening
verwacht).
Het uitschakelen vindt plaats
na de ingestelde nalooptijd
vanaf de laatste detectie.
Automatikbetrieb
Licht wird automatisch, in
Abhängigkeit von Bewegung
und eingestellter
Helligkeitsschaltschwelle
eingeschaltet. Das
Ausschalten erfolgt nach der
eingestellten Nachlaufzeit ab
letzter Erfassung.
Die LED (Fig.8 Pos 1) ist in
dieser Betriebsart aus.
Automatic mode
In automatic mode, the light
switches on automatically,
depending on motion and the
specified brightness threshold.
The device switches off after
the specified light-on time
beginning from the most
recent detection.
The LED (Fig. 8, pos. 1) is off
in this mode.
Fonctionnement
automatique
La lumière est
automatiquement actionnée
en cas de mouvement et en
fonction du seuil de luminosité
réglé pour le déclenchement.
La mise à l'arrêt se fait en
fonction de la durée de
fonctionnement réglée, à partir
de la dernière détection.
La LED (Fig.8 Pos 1) est
éteinte dans ce mode de
fonctionnement.
Automatische werking
Licht wordt automatisch
ingeschakeld afhankelijk van
beweging en ingestelde
schakeldrempel voor de
lichtwaarde. Het uitschakelen
vindt plaats na de ingestelde
nalooptijd vanaf de laatste
detectie.
De LED (afb. 8 pos. 1) is in
deze modus uit.
Manueller Betrieb
Gerät arbeitet als
Tastschalter. Kurzer
Tatendruck schaltet das Licht
Ein und Aus. Die LED (Fig.8
Pos 1) leuchtet permanent
(Orientierungslicht).
Manual mode
The device functions as a
switch. Press and release to
switch the light on or off. The
LED (Fig. 8, pos. 1) lights up
permanently (orientation light).
Mode manuel
L'appareil fonctionnement
comme un bouton-poussoir.
Un appui bref allume et éteint
l'éclairage. La LED (Fig.8 Pos
1) est allumée en permanence
(lumière d'orientation).
Handbediening
Apparaat werkt als
drukschakelaar. Kort
indrukken van de knop
schakelt het licht in en uit. De
LED (afb. 8 pos. 1) brandt
permanent (oriëntatielicht).
Handbetrieb
Durch einen langen
Tastendruck (größer 3 sek)
schaltet das Gerät in
manuellen Betrieb z.B. wenn
ein ungewöhnlich langer
Aufenthalt in einem Raum
notwendig ist. Die LED (Fig.9
Pos 1) leuchtet permanent
(Orientierungslicht). Der
nächste lange Tastendruck
(größer 3 sek) schaltet das
Gerät in den vorher
eingestellten Zustand zurück.
Manual mode
Press and hold the button
(longer than 3 sec) to switch
the device to manual mode,
e.g., if you need to stay in a
room longer than usual. The
LED (Fig. 9, pos. 1) lights up
permanently (orientation light).
The next time you press and
hold the meter (longer than 3
sec), the device will revert to
the previously configured
condition.
Fonctionnement manuel
Un appui long sur le bouton
(plus de 3 s) met l'appareil en
mode manuel, par ex. s'il est
nécessaire de rester dans une
pièce pendant une durée
inhabituellement longue. La
LED (Fig. 9 Pos 1) est allumée
en permanence (lumière
d'orientation). Le prochain
appui long sur le bouton (plus
de 3 s) permet de revenir à
l'état précédemment réglé.
Handbediening
Door het lang indrukken van
de knop (langer dan 3
seconden) schakel het
apparaat in handbediening,
bijvoorbeeld als het nodig is
om ongebruikelijk lan in de
ruimte te verblijven. De LED
(afb. 9 pos. 1) brandt
permanent (oriëntatielicht). De
volgende keer dat de knop
lang wordt ingedrukt (langer
dan 3 seconden) schakelt het
apparaat terug in de daarvoor
ingestelde toestand.
Pos: 4 /35x28/35 Mehrspr achig/Service/ Service_BJE @ 0\mod277_1. doc @ 1947 @
Service
Busch-Jaeger Elektro GmbH – Ein Unternehmen der ABB-Gruppe, Freisenbergstraße 2, D-58513 Lüdenscheid
Zentraler Vertriebsservice Tel: 0180-5 66 99 00, www.BUSCH-JAEGER.de
=== Ende der Liste für Textmarke Inhalt ===
Product specificaties
| Merk: | Busch-Jaeger |
| Categorie: | Bewegingsdetector |
| Model: | 6800-0-2285 |
| Kleur van het product: | Beige |
| Gebruikershandleiding: | Ja |
| Materiaal behuizing: | Kunststof |
| Internationale veiligheidscode (IP): | IP20 |
| Plaatsing: | Binnen |
| Connectiviteitstechnologie: | Bedraad |
| Montagewijze: | Muur |
| Certificering: | CE |
| Type beeldsensor: | Fotocelsensor |
| Bedrijfstemperatuur (T-T): | 0 - 35 °C |
| Detectie hoek: | 170 ° |
| Detectieafstand: | 5 m |
| Installatie hoogte (min): | 0.8 m |
| Installatie hoogte (max): | 1.2 m |
| Lichtgevoeligheid: | 300 Lux |
| Langdurigheidsaanpassing: | 60 - 600 s |
| Switch: | 28 |
Heb je hulp nodig?
Als je hulp nodig hebt met Busch-Jaeger 6800-0-2285 stel dan hieronder een vraag en andere gebruikers zullen je antwoorden
Handleiding Bewegingsdetector Busch-Jaeger

5 Mei 2024

3 Mei 2024

14 Juni 2023

11 Mei 2023

21 April 2023

21 April 2023

9 April 2023

1 April 2023

25 Maart 2023

11 Maart 2023
Handleiding Bewegingsdetector
- Honeywell
- Vimar
- Megatron
- Gira
- Eaton
- Syrp
- Maxsa
- Joy-it
- D-Link
- Konyks
- Brinno
- IFM
- Wentronic
- Cotech
- Legrand
Nieuwste handleidingen voor Bewegingsdetector
6 Juli 2025
6 Juli 2025
5 Juli 2025

5 Juli 2025
5 Juli 2025
5 Juli 2025
5 Juli 2025
5 Juli 2025
5 Juli 2025
4 Juli 2025