Black And Decker F505 Handleiding
Bekijk gratis de handleiding van Black And Decker F505 (12 pagina’s), behorend tot de categorie Strijkijzer. Deze gids werd als nuttig beoordeeld door 41 mensen en kreeg gemiddeld 4.8 sterren uit 21 reviews. Heb je een vraag over Black And Decker F505 of wil je andere gebruikers van dit product iets vragen? Stel een vraag
Pagina 1/12

1200 W 120V 60 Hz~
1200 W 220V~50/60 Hz
®
SAVE THIS USE AND CARE BOOK
LEASE ESTE INSTRUCTIVO ANTES DE USAR EL PRODUCTO
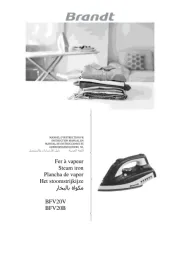
Advanced System &ProXpress™
Irons / Planchas
?
U.S.A/CANADA 1-800-231-9786
MEXICO 01-800-714-2503
®
POLARIZED PLUG
(North and Central American Models Only)
This appliance has a polarized plug (one blade is wider
than the other). As a safety feature, this plug will fit into a polarized
outlet only one way. If the plug does not fit fully into the outlet, reverse
the plug. If it still does not fit, contact a qualified electrician. Do not
attempt to defeat this safety feature.
ENCHUFE POLARIZADO
(Solamente para los modelos Norte y Centro americanos)
Se emplean enchufes polarizados con un contacto más ancho que el otro
para reducir los riesgos de choque eléctrico. Cuando el cable tiene este tipo
de enchufe, entra únicamente a un contacto polarizado. Si el enchufe no
entra en su contacto, inviértalo. Si aún así no entra, busque la ayuda de un
electricista calificado para que instale un contacto polarizado apropiado.
Por ningún motivo trate de modificar o hacerle cambios al enchufe.
Models F505S,
F550S, F605S,
F612, F650S

®
BEFORE FIRST USE
IMPORTANT: Follow this procedure before first
use.
1. Remove any labels, stickers, or tags which
may be attached to the body or soleplate of
the iron. Do Not Remove theNOTE:
Mercury warning label from the cordset
(Certain Models Only).
2. Fill the Water Tank about 1/3 full with water.
(See “Filling With Water.”)
3. Plug the iron into a standard electrical outlet.
4. Set the Temperature Selector Dial to the
Cotton or Linen settings (6 or 7) and preheat
for about 2 minutes. (See “Starting The Iron”)
5. While ironing on an old cotton terry cloth
towel for about 2 minutes, try using the
iron’s spray feature by pumping the SPRAY
“ ” button and different steam settings by
turning the Adjustable Steam Dial. For irons
with Surge of Steam, turn the Spray/Surge
button so that the word SURGE or the steam
PUFF “ ” is toward the front of the iron.
For model F612 only, you must flip the
Surge/Spray Switch at the side of the iron
up to SURGE. Pump theSPRAY/SURGE
button a few times.
ANTES DE USAR LA PLANCHA POR
PRIMERA VEZ:
IMPORTANTE: Siga el proceso a continuación.
1. Retire cualquier etiqueta o calcomanía
adherida al cuerpo o a la suela de la plancha.
NOTA: No retire la etiqueta en el cable
referente al mercurio (en ciertos modelos
únicamente).
2. Llene 1/3 del tanque con agua. Consulte la
sección de llenado.
3. Enchufe la plancha a una toma de corriente
estándar.
4. Ajuste el control de temperatura para
algodón o lino entre el 6-7 y permita que se
caliente unos 2 minutos. Consulte la sección
en como encender la plancha.
5. Mientras plancha sobre un paño de algodón
o una toalla por 2 minutos, trate de bombear
el botón SPRAY (rocío) “ ” girando el
control hacia diferentes niveles. Para las
planchas que emiten un impacto de vapor,
gire el botón de vapor y rocio de modo que la
palabra SURGE o PUFF (emisión de vapor)
“ ” queden hacia el frente de la plancha.
Para el modelo F612 únicamente, deberá
subir el interruptor para rocío y vapor en el
costado de la plancha a la posición SURGE.
Bombee el botón SPRAY/SURGE unas
cuantas veces.
A
B
®
C
®
D
HOW TO USE YOUR IRON
COMO USAR LA PLANCHA
2

FILLING WITH WATER
1. Be sure the iron is OFF and unplugged and the Adjustable Steam Dial is
at DRY. Use ordinary tap water – do not use water processed through a
home softening system.
2. With a clean measuring cup (or the Fill Cup provided with certain mod-
els), pour water into the Water Fill Hole until the level reaches the FULL
Mark on the Water Window (A). Do not overfill. Refill as necessary.
3. In extremely hard water areas (over 180 parts per million) consider using
distilled or demineralized water. If using distilled or demineralized water,
tap water should be used the first time you use the iron and once per
month thereafter to maintain steam performance.
USING THE IRON
1. Plug in the iron and push the ON Button (B).
2. Use the Heat Fabric Guide on the body of the iron to help you select the
setting for the fabric to be ironed (such as Nylon, Cotton, etc.).
3. Turn the Temperature Selector Dial to the appropriate setting (such as #6
for Cotton) and allow to preheat for approximately 1-2 minutes before
ironing.
4. NOTE: For Model 550S Only: The Cycle Light will come on until the iron
reaches the desired temperature setting; it will then go off. It is normal
for the Light to cycle on and off during ironing. For Model 650S Only:
The Red Temperature Wait Light will come on while the iron preheats.
When it reaches the desired temperature setting, the Red Light will go
out and the Green Temperature Ready Light will come on.
5. Automatic Shut Off - These models areFor Models F605S and F612:
designed to shut off after an hour whether or not they are in use. The
“On” light will blink for several minutes as a warning that the iron will
COMO LLENAR EL TANQUE CON AGUA
1. Asegúrese que la plancha esté en la posición OFF (apagada), desconectada,
y que el control ajustable de vapor esté en DRY (seco). Use agua ordinaria
de la llave, y no agua procesada en casa.
2. Con una taza limpia o con la taza (provista en algunos modelos), vierta
agua dentro del orificio del llenado de agua hasta alcanzar la marca del
nivel FULL (lleno) en la ventana de agua (A). No llene demasiado. Llene
de nuevo conforme sea necesario.
3. En las áreas donde el agua es extremadamente dura (sobre 180 partes por
millón) considérese el uso de agua destilada o sin minerales. Si se usa
agua destilada o sin minerales, úsese agua de la llave la primera vez que
planche, y una vez por mes después para mantener en buen fucionamiento
la emisión de vapor.
COMO USAR LA PLANCHA
1. Enchufe la plancha y oprima el botón ON (B).
2. Use la guía de tejidos en el cuerpo de la plancha para que pueda determinar
la temperatura apropiada para la tela que va a planchar (tal como nailon,
algodón, etc.).
3. Gire el control de temperatura al nivel apropiado (por ejemplo el #6
para algodón) y permita que la plancha se caliente de 1-2 minutos antes d
e planchar.
4. NOTA: Para el modelo 550S únicamente: La luz indicadora del ciclo se
iluminará hasta que la plancha haya alcanzado la temperatura deseada;
y después se apagará. Es normal que mientras se plancha, la luz
permanezca intermitente. La luz roja dePara el modelo 650S únicamente:
la temperatura se ilumina para indicarle que espere mientras la plancha
se calienta. Una vez que la plancha alcanza la temperatura deseada, se
ilumina una luz verde para indicarle que puede comenzar a planchar.
5. Apagado automático Estos dos modelos se para los modelos F605 y F612:
3
Product specificaties
| Merk: | Black And Decker |
| Categorie: | Strijkijzer |
| Model: | F505 |
Heb je hulp nodig?
Als je hulp nodig hebt met Black And Decker F505 stel dan hieronder een vraag en andere gebruikers zullen je antwoorden
Handleiding Strijkijzer Black And Decker

22 Juli 2024

16 Juni 2023

8 Juni 2023

8 Juni 2023

7 Juni 2023

20 Mei 2023

11 Mei 2023

8 Mei 2023

6 Mei 2023

Handleiding Strijkijzer
- Exquisit
- Vivax
- AEG
- Foppapedretti
- BEKO
- Lervia
- Nevir
- Lümme
- Silvercrest
- Bomann
- Lagrange
- Alpina
- Privileg
- Conair
- Laurastar
Nieuwste handleidingen voor Strijkijzer
21 Juli 2025
21 Juli 2025

15 Juli 2025
15 Juli 2025
15 Juli 2025

15 Juli 2025
15 Juli 2025

14 Juli 2025

14 Juli 2025
14 Juli 2025