BDI Muv 1252 Handleiding
Bekijk gratis de handleiding van BDI Muv 1252 (5 pagina’s), behorend tot de categorie Tafel. Deze gids werd als nuttig beoordeeld door 13 mensen en kreeg gemiddeld 4.6 sterren uit 4 reviews. Heb je een vraag over BDI Muv 1252 of wil je andere gebruikers van dit product iets vragen? Stel een vraag
Pagina 1/5
1
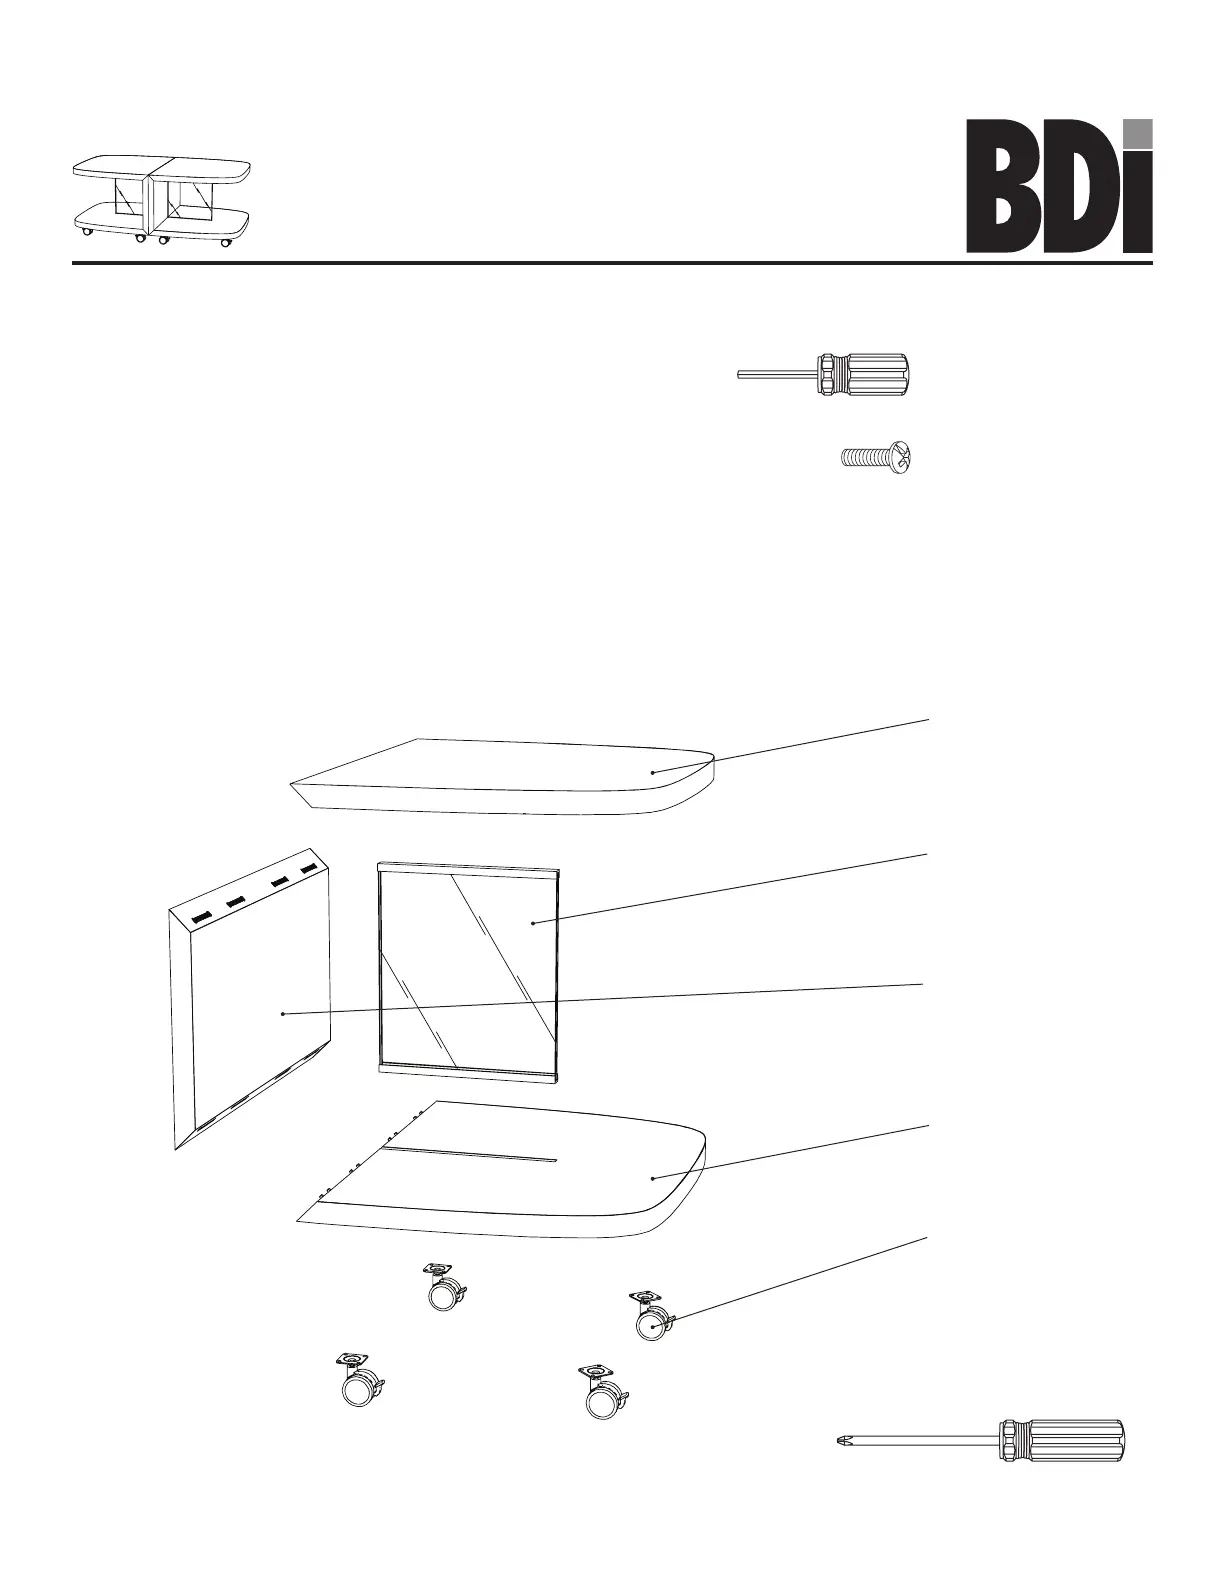
C1 Top Panel x 2
A1 Glass Panel x 2
C2 Middle Panel x 2
C3 Bottom Panel x 2
H2 Swivel Locking
Casters x 8
Product Registration
Registering your new BDI product allows us to send you important
product updates, service information and helpful hints related to your BDI
products. Register today, and you will be entered to win free a
BINK table from BDI: www.bdiusa.com/register
Placement and Maintenance
Your Müv Table is designed for indoor use on level floors.
Clean glass with glass cleaner and wood veneer with a moist cloth.
Müv is engineered for easy assembly. Carefully follow this procedure to
prevent any damage. Do not use power tools for assembly of this product.
Step 1
Unpack and identify the parts listed below. The assembly workspace
should be a non-marring surface such as carpet. For missing hardware
pieces, contact BDI Customer Service at: [email protected].
For all other concerns, please contact your BDI retailer.
bdiusa.com
customerservic[email protected]
Designed by Matthew Weatherly
These distinctive product configurations are protected by US and international patents, trade dress, and/or
copyright laws. Muv & BDI are trademarks of Becker Designed, Inc. All rights reserved. ©2018, BDI
Made in China. 5.17.2019 V5
MÜV
™
1252
Tables
Tool Required:
Phillips Screwdriver
H1 M4 x 12mm
Pan Head Screw x 32
T1 Hex Driver x 1
Component List
Product specificaties
| Merk: | BDI |
| Categorie: | Tafel |
| Model: | Muv 1252 |
Heb je hulp nodig?
Als je hulp nodig hebt met BDI Muv 1252 stel dan hieronder een vraag en andere gebruikers zullen je antwoorden
Handleiding Tafel BDI

6 Januari 2024
6 Januari 2024
6 Januari 2024
6 Januari 2024
5 Januari 2024
5 Januari 2024
5 Januari 2024
5 Januari 2024
5 Januari 2024
5 Januari 2024
Handleiding Tafel
Nieuwste handleidingen voor Tafel
9 Juli 2026
8 Juli 2026
8 Juli 2026
7 Juli 2026
7 Juli 2026
7 Juli 2026
7 Juli 2026
7 Juli 2026
7 Juli 2026
7 Juli 2026