Atlona AT-VTP-800 Handleiding
Atlona Niet gecategoriseerd AT-VTP-800
Bekijk gratis de handleiding van Atlona AT-VTP-800 (12 pagina’s), behorend tot de categorie Niet gecategoriseerd. Deze gids werd als nuttig beoordeeld door 25 mensen en kreeg gemiddeld 4.2 sterren uit 5 reviews. Heb je een vraag over Atlona AT-VTP-800 of wil je andere gebruikers van dit product iets vragen? Stel een vraag
Pagina 1/12
Installation Guide
AT-VTP-800
1
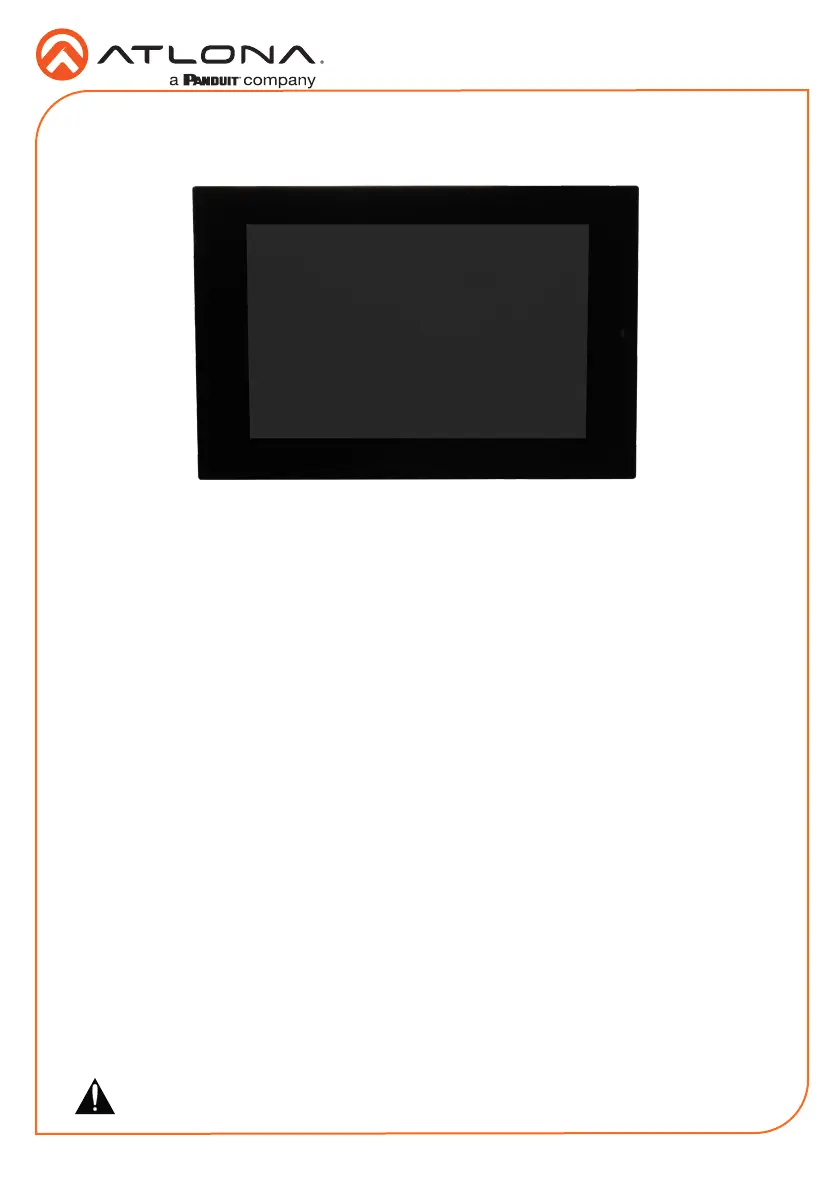
Velocity 8” Touch Panel
AT-VTP-800
1 x AT-VTP-800
1 x Metal mounting plate
4 x Mounting screws
1 x Wall installation template
1 x 2-gang mud ring
1 x Installation Guide
Package Contents
Operating Notes
• The Velocity 8” Touch Panel (AT-VTP-800) must be on the same network as the Velocity
Gateway (AT-VGW-HW) or it will be unable to sync for control.
• The AT-VTP-800 is PoE capable, to power the unit, simply plug it into a 802.3at compatible
network switch. If the network switch is not PoE capable, a PoE injector (purchased separately)
can be used.
IMPORTANT: Velocity Gateway (AT-VGW-HW) must be set up before the AT-VTP-800 is
fully functional.
The Atlona AT-VTP-800-BL and AT-VTP-800-WH are 8” touch panels in black and white,
respectively, for the Atlona Velocity™ Control System. They feature contemporary, rened styling
for modern presentation environments with 1280x800 native resolution, and a capacitive glass
surface that supports multi-touch and gesture interactions. These touch panels conveniently
install into a wall or furniture via a US two-gang opening. Also available is the optional AT-VTP-
TMK tabletop mounting kit for placement on a meeting table or lectern. The VTP-800-BL and
VTP-800-WH feature Power over Ethernet (PoE), enabling a single network connection for data
and power. Setting up the touch panels is eortless as the AV control GUI is automatically
uploaded from the Velocity Control Gateway processor during system conguration.
Product specificaties
| Merk: | Atlona |
| Categorie: | Niet gecategoriseerd |
| Model: | AT-VTP-800 |
| Kleur van het product: | Zwart |
| Gewicht: | 450 g |
| Breedte: | 223.5 mm |
| Diepte: | 36 mm |
| Hoogte: | 148 mm |
| Beeldschermdiagonaal: | 8 " |
| Resolutie: | 1280 x 800 Pixels |
| Ingebouwde luidsprekers: | Ja |
| Aantal luidsprekers: | 1 |
| Certificering: | CE, FCC, WEEE |
| Duurzaamheidscertificaten: | RoHS |
| Touchscreen technologie: | Capacitief |
| Vermogen luidsprekers: | 2 W |
| Type beeldscherm: | LCD |
Heb je hulp nodig?
Als je hulp nodig hebt met Atlona AT-VTP-800 stel dan hieronder een vraag en andere gebruikers zullen je antwoorden
Handleiding Niet gecategoriseerd Atlona

15 Mei 2026
12 Mei 2026
6 Maart 2026
5 Maart 2026
11 Augustus 2025
31 Maart 2025
31 Maart 2025
31 Maart 2025
30 Januari 2025
30 Januari 2025
Handleiding Niet gecategoriseerd
Nieuwste handleidingen voor Niet gecategoriseerd
27 Juli 2026
27 Juli 2026
27 Juli 2026
27 Juli 2026
27 Juli 2026
27 Juli 2026
27 Juli 2026
27 Juli 2026
27 Juli 2026
27 Juli 2026