Apc AR8123BLK Handleiding
Bekijk gratis de handleiding van Apc AR8123BLK (4 pagina’s), behorend tot de categorie Kast. Deze gids werd als nuttig beoordeeld door 15 mensen en kreeg gemiddeld 4.7 sterren uit 7 reviews. Heb je een vraag over Apc AR8123BLK of wil je andere gebruikers van dit product iets vragen? Stel een vraag
Pagina 1/4
100-lbSlidingShelf—AR8123
990-08161/48/00
Overview
The100-lbSlidingShelf(AR8123)mountsintoanAmericanPowerConversion(APC)NetShelter
enclosure.TheSlidingShelf:
•Holdsserversandperipheralsweighingupto100pounds
•Slidesforwardforaccesstomountedequipment
•Hasadjustablerails(28–40in.)
•Canbemountedupsidedowntofunctionasatray
•Comeswithfourfrictionpadsforsecuringyourequipmenttotheshelf
•IsreadyforusewiththeAPCCableManagementArm(AR8129)
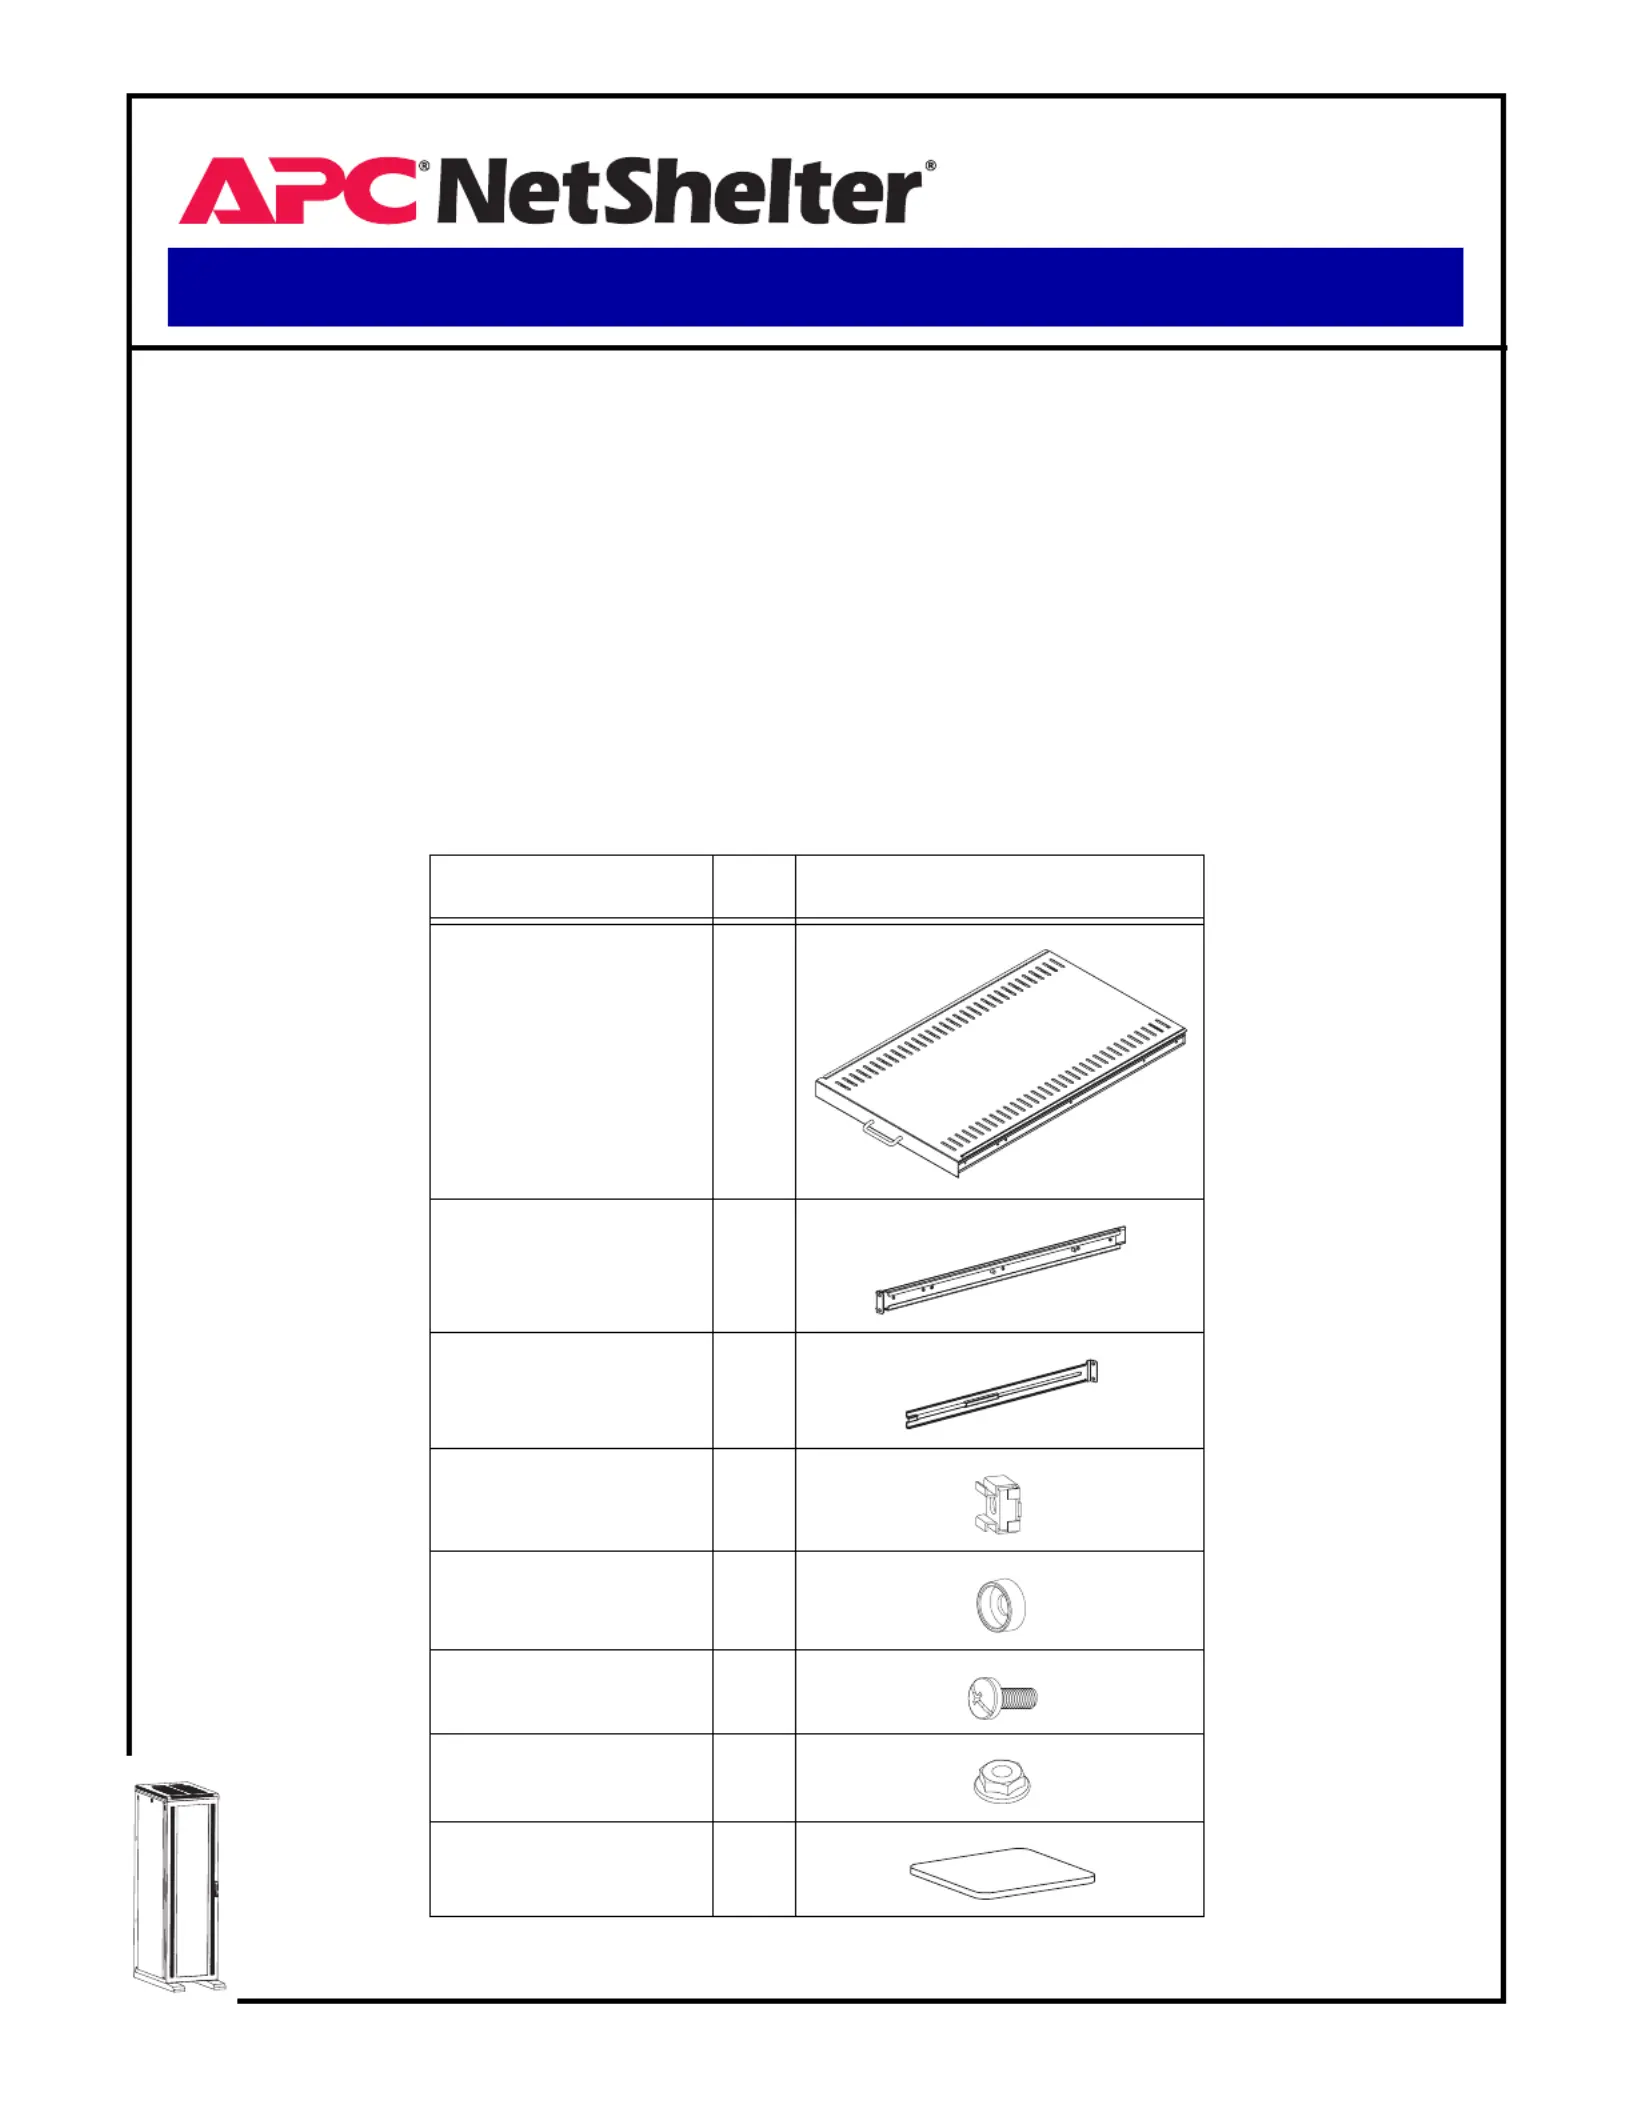
Inventory
ItemQtyFigure
SlidingShelf1
StationaryRail2
MoveableRail2
M6CagedNut8
M6PlasticCupWasher8
M6×16mmPanHead
Slotted/PhillipsScrew
8
M6FlangedNut4
FrictionPad4
Product specificaties
| Merk: | Apc |
| Categorie: | Kast |
| Model: | AR8123BLK |
| Kleur van het product: | Zwart |
| Gewicht: | 13180 g |
| Breedte: | 445 mm |
| Diepte: | - mm |
| Hoogte: | 44 mm |
| Gewicht verpakking: | 17730 g |
| Breedte verpakking: | 838 mm |
| Diepte verpakking: | 89 mm |
| Hoogte verpakking: | 813 mm |
| Soort: | Rekschap |
| Materiaal behuizing: | Metaal |
| Aan/uitschakelaar: | Nee |
| Ingebouwde ventilator: | Nee |
| Met slot: | Nee |
| Aantal per verpakking: | - stuk(s) |
| Ingangsspanning: | - V |
| Maat: | - " |
| Rackcapaciteit: | 1U |
| Code geharmoniseerd systeem (HS): | 85389099 |
| Zwenkwieltjes: | Nee |
| Dikte van materiaal: | - mm |
| Diepte (max): | 721 mm |
| Nuttige breedte: | - mm |
| Inbouwdiepte (max): | 40 mm |
| Verlengarm (max): | - mm |
| Inbouwdiepte (min): | 28 mm |
Heb je hulp nodig?
Als je hulp nodig hebt met Apc AR8123BLK stel dan hieronder een vraag en andere gebruikers zullen je antwoorden
Handleiding Kast Apc

20 Juni 2026
20 Februari 2025
2 December 2024
2 December 2024
25 April 2023
11 April 2023
3 April 2023
16 Maart 2023
28 Februari 2023
21 Februari 2023
Handleiding Kast
Nieuwste handleidingen voor Kast
18 Juni 2026
18 Juni 2026
18 Juni 2026
17 Juni 2026
17 Juni 2026
17 Juni 2026
17 Juni 2026
17 Juni 2026
16 Juni 2026
16 Juni 2026