AMX Enzo NMX-MM-1000 Handleiding
AMX
Niet gecategoriseerd
Enzo NMX-MM-1000
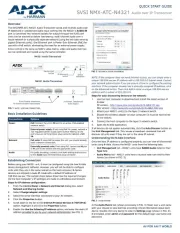
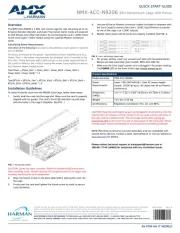
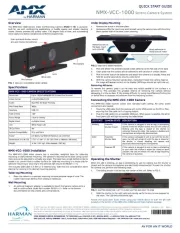
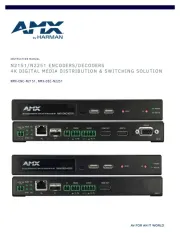
Bekijk gratis de handleiding van AMX Enzo NMX-MM-1000 (2 pagina’s), behorend tot de categorie Niet gecategoriseerd. Deze gids werd als nuttig beoordeeld door 76 mensen en kreeg gemiddeld 4.9 sterren uit 38.5 reviews. Heb je een vraag over AMX Enzo NMX-MM-1000 of wil je andere gebruikers van dit product iets vragen? Stel een vraag
Pagina 1/2

Quick Start Guide
NMX-MM-1000 Enzo™ Meeting Presentation System
Overview
The NMX-MM-1000 Enzo Meeting Presentation System (FG3211-01) allows you to
easily access content and documents stored on USB, on the web, or in the cloud. The
Enzo Media Presentation System is a power-efficient device with no moving parts that
is powered using Power over Ethernet (PoE).
To install the NMX-MM-1000, you will need the following items:
• 1 HDMI cable (Type A female)
• 1 PoE injector or PoE-capable Ethernet switch (802.3af compliant)
• 2 Cat5 cables
• 1 HDMI monitor
• USB keyboard and/or mouse
FIG. 1 NMX-MM-1000 (front panel)
Specifications
The following table lists the specifications for the NMX-MM-1000:
Mounting the NMX-MM-1000
The NMX-MM-1000 can be mounted using an AVB-VSTYLE-SURFACE-MNT V-Style
Single Module Surface Mount Kit (FG1010-722). The NMX-MM-1000 also has rubber
feet which you can apply to the bottom of the unit for table-top mounting.
Attaching Brackets
The Surface Mount Kit is designed for mounting a single module (to a wall, on or
under a desk, etc.) The kit contains brackets and screws. The brackets may be
attached to mount the top or the bottom flush with the mounting surface.
Insert the #4-40 3/16 inch pan head screws (provided) as shown in FIG. 2 and tighten.
Brackets can either align flush with the top or with the bottom.
FIG. 2 Insert screws and tighten
Mounting on a Surface
Note: The #8 x 1/2 inch tapping pan head screws provided for mounting to a flat
surface are designed for wood. If the module needs to be mounted on a different type
of surface, use the appropriate type of fastener, e.g., dry wall anchors (not provided).
1. Place the NMX-MM-1000 in the desired final position on the mounting surface
and mark the screw position as indicated in FIG. 3.
FIG. 3 Mark screw positions
Important: The mark for the screw’s position in each of the mounting holes needs to
be made in the end of the slots (all marks to either the top of the slots or all marks to
the bottom).
2. Set the device aside. If using the wood screws provided, drill pilot holes (drill
size 29; hole diameter 0.136 in.) for the screws 1/2 inch (1.27 cm) deep. Insert
the screws in the holes, but do not tighten them completely.
FIG. 4 Drill pilot holes and insert screws, but do not tighten
3. Align the module with the center of the double key-hole slots over the screws
and slide into place as indicated in FIG. 5.
FIG. 5 Align module over screws and slide into place
4. Tighten the screws.
Installation
Installing the NMX-MM-1000 is a quick and simple process. Before connecting the
NMX-MM-1000 to its peripheral devices and powering the device, be sure to mount
the device using the desired method.
FIG. 6 displays the connections for the NMX-MM-1000.
FIG. 6 NMX-MM-1000 (rear panel)
NMX-MM-1000 Specifications
Power: • Power over Ethernet (PoE), 802.3af
• Maximum Power Consumption: 13W
Environmental: • Operating Temperature: 32° to 104° F (0° to 40° C)
• Storage Temperature: –4º to 158ºF (–20º to 70ºC)
• Operating Humidity: 5% to 85%, non-condensing
Dimensions: 1 3/8” (3.48cm) x 5 3/16” (14.73cm) x 3 5/16” (8.34cm) HWD
Weight: 1.1 lbs. (0.49kg)
Certifications: • RoHS
• FCC
• IC
• CE
• IEC 60950-1
• cULus 60950-1
• VCCI
• C-Tick
Included
Accessories:
• AVB-VSTYLE-SURFACE-MNT V-Style Single Module Surface
Mount Kit (FG1010-722)
• Rubber feet
Optional
Accessories:
• PS-POE-AF-TC, PoE Injector, 802.3af Compliant (FG423-83)
HDMI out to monitor
Cat5 cable from PoE injector to provide power
Connect peripheral devices

For full warranty information, refer to the AMX Instruction Manual(s) associated with your Product(s).
1/14
©2014 AMX. All rights reserved. AMX and the AMX logo are registered trademarks of AMX.
AMX reserves the right to alter specifications without notice at any time.
3000 RESEARCH DRIVE, RICHARDSON, TX 75082 • 800.222.0193 • fax 469.624.7153 • technical support 800.932.6993 • www.amx.com
93-3211-01 REV: B
Step 1: Connecting the NMX-MM-1000 to a Video Output
The NMX-MM-1000 uses standard HDMI cabling to connect to a video output. Use an
HDMI cable to connect the HDMI OUT port on the rear panel of the device to your
display device.
Step 2: Connecting a Keyboard and Mouse
The front and rear panels of the NMX-MM-1000 each feature two Type-A USB ports
for mouse and keyboard functionality.
Note: In addition to a directly connected USB keyboard and mouse, the
NMX-MM-1000 also supports using a 2.4 GHz RF wireless keyboard and mouse
using a wireless dongle. Bluetooth devices are NOT supported.
You can also use the ports for reading from a mass storage device, such as a USB
hard drive or flash drive. (USB external hard drives may require their own power
sources. The maximum current allowed across all USB ports is 4W.)
Note: The USB ports support USB mass storage devices using a FAT format. USB
mass storage devices using an NTFS format may not work on these ports.
Note: You can connect only one USB mass storage device at a time. Once you
connect a USB drive and Enzo mounts the drive, you can access the files on it. If you
do not receive a message stating the USB drive is mounted, Enzo did not recognize
the drive. A storage device’s contents are not accessible if the device is connected
while another storage device occupies a USB port. If a first USB drive is connected,
mounted, and unmounted, a second USB drive will still not be recognized unless the
first USB drive is removed from the Enzo device.
Step 3: Applying Power
Applying power to the NMX-MM-1000 requires Cat5 cable and a PoE injector, such as
the PS-POE-AF-TC available from AMX, or a PoE-capable Ethernet switch. You must
connect port 1 to your network through the PoE injector to receive power to your
NMX-MM-1000 device.
Note: ITE is to be connected only to PoE networks without routing to the outside plant.
1. Connect the PoE injector to an AC outlet (100-240VAC) using a standard power
cord.
2. Using Cat5 cable, connect your network switch to the Data In port on your PoE
injector.
3. Using a separate Cat5 cable, connect the Data & Power Out port on the PoE
injector to LAN Port 1 on the NMX-MM-1000.
FIG. 7 illustrates how to connect the PoE injector to the NMX-MM-1000.
FIG. 7 PoE injector connection
When power is applied, the POWER LED on the front panel appears red then blinks
green while the device is booting. When the device is finished booting and the device
is ready for use, the LED remains solid green. The device usually takes 20-30
seconds to boot. When booting is complete, the NMX-MM-1000 opens to the Enzo
desktop (FIG. 8).
FIG. 8 Enzo desktop
Locating the IP Address of the NMX-MM-1000
On connection, you can access a diagnostics screen on which you can view the IP
address, Ethernet switch status, etc. on the connected video output.
1. When the NMX-MM-1000 completes the boot process and the Enzo desktop
appears, select Start New Session.
2. On the main screen, select Options.
3. From the Select Option menu, select Settings.
4. When the list of settings appears, select System Settings.
5. The Device Info option is selected by default. The IP address of your unit
appears in the Device area.
Setting the Display Resolution
The display resolution on the NMX-MM-1000 is set to Auto by default. You can set a
definite resolution of 1080p or 720p, if needed. Perform these steps to set the display
resolution:
1. On the main screen, select Options.
2. From the Select Option menu, select Settings.
3. When the list of options appears, select System Settings.
4. In the Info section, select Display.
5. Enter the security password in the text box that appears, and select OK. The
default password is 1988.
6. Select Resolution, and select the resolution you want from the list that appears.
When you make a selection, your choice immediately takes effect.
Setting the Date and Time
By default, the NMX-MM-1000 uses the network-provided date and time. You may
want to verify that the date and time are correct while setting up the device. Perform
these steps to set the date and time on the NMX-MM-1000:
1. On the main screen, select Options.
2. From the Select Option menu, select Settings.
3. When the list of options appears, select System Settings.
4. In the System section, select Date & Time.
5. Enter the security password in the text box that appears, and select OK. The
default password is 1988.
6. Check that the current date and time is correct on the device.
7. Select Select time zone and select your time zone from the provided list.
Additional Documentation
For more information about this device, consult the product page at www.amx.com for
data sheets and the NMX-MM-1000 Instruction Manual.
Cat5 cable from
Cat5 cable to Enzo
Data In
Data & Power
Out
your network
Product specificaties
| Merk: | AMX |
| Categorie: | Niet gecategoriseerd |
| Model: | Enzo NMX-MM-1000 |
Heb je hulp nodig?
Als je hulp nodig hebt met AMX Enzo NMX-MM-1000 stel dan hieronder een vraag en andere gebruikers zullen je antwoorden
Handleiding Niet gecategoriseerd AMX
5 Augustus 2025
5 Augustus 2025
4 Augustus 2025
4 Augustus 2025
4 Augustus 2025
4 Augustus 2025
4 Augustus 2025
4 Augustus 2025
4 Augustus 2025
4 Augustus 2025
Handleiding Niet gecategoriseerd
- Vasagle
- Eminence
- Logilink
- Smoby
- Subaru
- Baumr-AG
- Omnitron Systems
- Powerade
- Morris
- Ipevo
- Siku
- RAM Mounts
- Creative
- Juki
- MARTOR
Nieuwste handleidingen voor Niet gecategoriseerd

14 September 2025
13 September 2025

13 September 2025

13 September 2025
13 September 2025
13 September 2025
13 September 2025
13 September 2025
13 September 2025

13 September 2025