Advance Tabco 9-OP-36FM Handleiding
Advance Tabco
Spoelbak
9-OP-36FM
Bekijk gratis de handleiding van Advance Tabco 9-OP-36FM (2 pagina’s), behorend tot de categorie Spoelbak. Deze gids werd als nuttig beoordeeld door 29 mensen en kreeg gemiddeld 4.8 sterren uit 15 reviews. Heb je een vraag over Advance Tabco 9-OP-36FM of wil je andere gebruikers van dit product iets vragen? Stel een vraag
Pagina 1/2

CHECK FOR CONCEALED DAMAGE
FILE CLAIM WITH DELIVERING FREIGHT CARRIER
Mop Sinks are designed and constructed for the use of mop cleaning and associated activity.
Advance Tabco does not recommend product use for any food preparation or activities employing
harsh and active chemicals. Please consult factory regarding unusual applications.
Hauppauge, New York 11788
© ADVANCE TABCO MARCH 2020
Installation Instructions for
Floor Mounted Mop Sinks
Step 4:
Insert Rubber Gland over 2” I.P.S. Stub Pipe (Use liquid soap on
Gland for easy installation). Thread Brass Compression Nut over
Rubber Gland.
Insert Drain Key into Brass Compression Nut (Figure 3).
Using flat blade screw driver, tighten Compression Nut to ensure tight
seal between Rubber Gland and 2” Pipe Stub as shown in Figure 4.
Remove Drain Key and secure Strainer Plate to top of Drain.
Figure 4
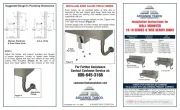
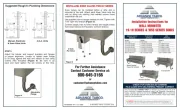
INSTALLATION OF OPTIONAL SIDE SPLASHES
To install optional side splashes, holes will
need to be drilled into the sides of the sink
skirt in the field for one or both sides (as it
applies).
Hole locations to match holes supplied in
the side panel(s). If sink is not yet installed,
we recommend stainless steel 1/4--20 x 1/2”
bolt and nut. If sink is already installed, use
stainless steel sheet metal screws not longer
than 1/2”.

Contents:
(1) Mop Sink
(1) “Z” Mounting Bracket
(1) Drain
Tools Required:
(1) Drain Key (Included with Drain)
(1) Large Flat Screw Driver
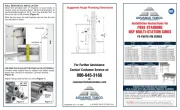
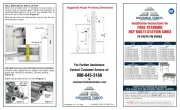
SECTION VIEW OF DRAIN ASSEMBLY
Step 1:
Install “Z” Mounting Bracket 2-1/4” above finished floor shown in Figure 1.
NOTE: Hardware not included.
Step 2:
Assemble Mop Sink Drain to Mop Sink.
NOTE: Do Not install top Strainer Plate, Rubber Gland or
Brass Compression Nut at this time.
Step 3:
Position Mop Sink over 2” I.P.S. stub Pipe while securing rear strap onto
“Z” Mounting Bracket (Figure 2).
Figure 1
X
C
L
Pipe Stub
3” Above
Finished Floor
2-1/4”
Figure 2
NOTE:
2” Pipe Stub must protrude
3” above finished floor for
proper installation.
Recommend using Silicone
Sealant between bottom of
Mop Sink Apron and floor.
Figure 3
View Showing
Drain Key
inside Brass
Compression
Nut
Strainer Plate
Drain Key
Brass
Compression Nut
Rubber Gland
Sink Bottom
Drain Body
Plumbers
Putty
Rubber Washer
Fiber Washer
Locking Nut
OP-20 & OP-40 10-1/2”
OP-28 & OP-48 12-1/2”
MODEL # “X”
Product specificaties
| Merk: | Advance Tabco |
| Categorie: | Spoelbak |
| Model: | 9-OP-36FM |
Heb je hulp nodig?
Als je hulp nodig hebt met Advance Tabco 9-OP-36FM stel dan hieronder een vraag en andere gebruikers zullen je antwoorden
Handleiding Spoelbak Advance Tabco
14 September 2025
14 September 2025
13 September 2025
13 September 2025
13 September 2025
12 September 2025
12 September 2025
12 September 2025
12 September 2025
12 September 2025
Handleiding Spoelbak
- Seima
- Oliveri
- Sloan
- Crown Verity
- Bartscher
- Fulgor Milano
- Kernau
- Royal Catering
- Sani-Lav
- Laveo
- Hotpoint-Ariston
- CDA
- Kohler
- Elkay
- Roca
Nieuwste handleidingen voor Spoelbak
26 Augustus 2025
26 Augustus 2025
26 Augustus 2025
26 Augustus 2025
26 Augustus 2025
26 Augustus 2025
26 Augustus 2025
26 Augustus 2025
25 Augustus 2025
25 Augustus 2025