Wireless Solution WiFi upgrade for G6 Handleiding
Wireless Solution Tv-antenne WiFi upgrade for G6
Bekijk gratis de handleiding van Wireless Solution WiFi upgrade for G6 (2 pagina’s), behorend tot de categorie Tv-antenne. Deze gids werd als nuttig beoordeeld door 14 mensen en kreeg gemiddeld 4.1 sterren uit 2 reviews. Heb je een vraag over Wireless Solution WiFi upgrade for G6 of wil je andere gebruikers van dit product iets vragen? Stel een vraag
Pagina 1/2
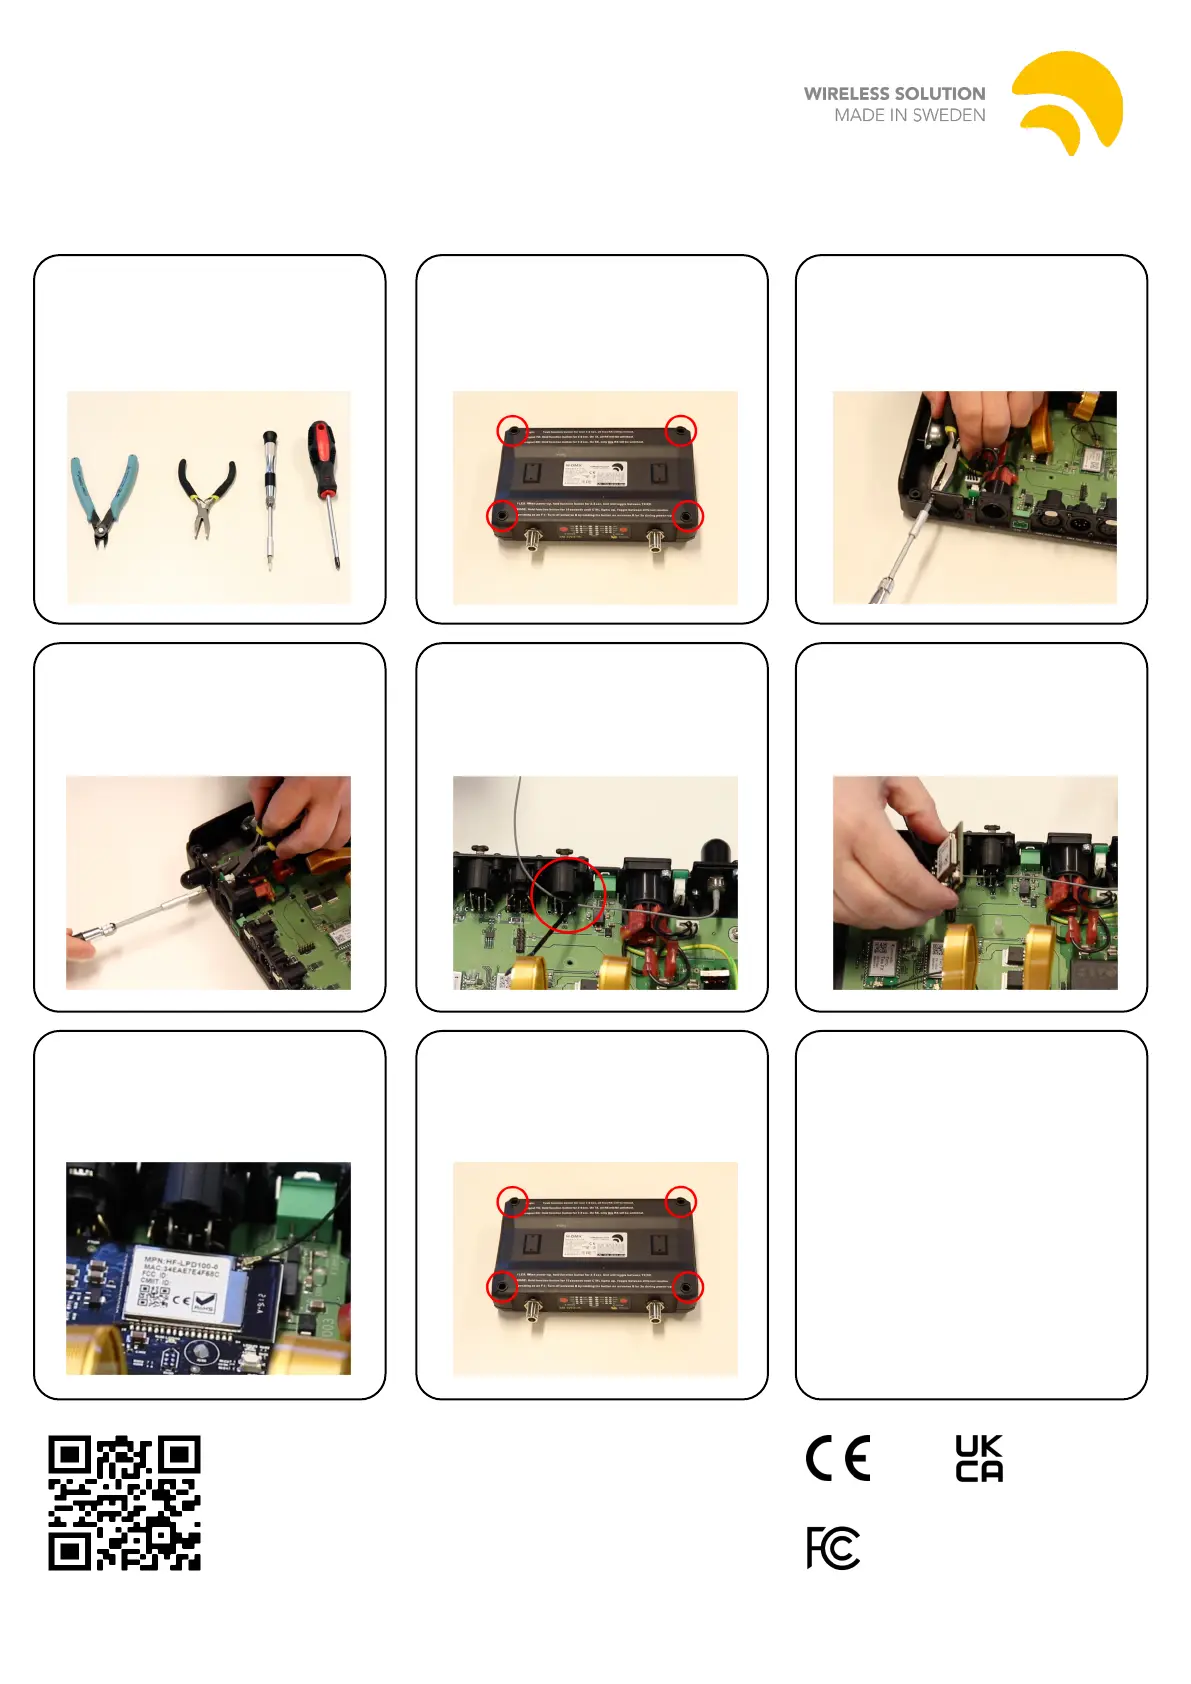
WiFiinstallationinstructions
1.Neededtools:side-cutter,
plier,TorxT10screwdriver,
Philipsscrewdriver.
4.Placetheantennafromthe
insideandfastenitwiththe
screwsandnuts.Usetheplier
andT10screwdrivertotighten.
5.Usethecable-tietofasten
theantennacabletotheXLRto
avoidtheantennatouchingthe
high-voltageparts.
6.Pushthenylonstandoffinto
themountinghole.
MounttheWiFimoduleand
makesureitsnapsintoplace.
2.Unscrewallfourscrews.
Warning:Neveropentheunit
withpowerpluggedin.
3.Removethecoverplate
usingtheT10screwdriverand
theplier.Savethescrewsand
nuts.
7.Connecttheantennacable
totheWiFimodule.
8.Putthetopbackonand
fastenallfourscrews.
ScantheQRcodeforan
installationvideoguide.
FCCID:2ACSVHF-LPD100
WirelessSolutionSwedenAB,Majorebergsvägen2
45175Uddevalla,Swedem
9.Powertheunitupandstart
theW-DMXConguratorapp.
Makesureyourappisof
version1.2.0orlater.
Connecttothedeviceand
chosetoupdatermware.
Iftheapptellsyouthereisno
newrmware,choosetoinstall
anyway.
Aftertheupdateisnished,
yourdeviceisreadytouse.
Product specificaties
| Merk: | Wireless Solution |
| Categorie: | Tv-antenne |
| Model: | WiFi upgrade for G6 |
Heb je hulp nodig?
Als je hulp nodig hebt met Wireless Solution WiFi upgrade for G6 stel dan hieronder een vraag en andere gebruikers zullen je antwoorden
Handleiding Tv-antenne Wireless Solution
Handleiding Tv-antenne
Nieuwste handleidingen voor Tv-antenne

12 Februari 2026
2 Januari 2026
5 November 2025
26 Augustus 2025
18 Augustus 2025
5 Augustus 2025
4 Juli 2025
16 Juni 2025
14 Juni 2025
3 Juni 2025