ViewZ VZ-17RTLD Handleiding
Bekijk gratis de handleiding van ViewZ VZ-17RTLD (11 pagina’s), behorend tot de categorie Monitor. Deze gids werd als nuttig beoordeeld door 6 mensen en kreeg gemiddeld 3.5 sterren uit 3.5 reviews. Heb je een vraag over ViewZ VZ-17RTLD of wil je andere gebruikers van dit product iets vragen? Stel een vraag
Pagina 1/11

INSTALLATION INSTRUCTIONS
NORTH AMERICA
1220 N. Kraemer Blvd.
Anaheim, CA 92806 USA
USA and Canada
Phone: 1-888-99-ViewZ
Other Locations
Phone: (001) 714-630-3380
Fax: (001) 714-630-2335
VZ-CMK01A
Ceiling Lower Assembly Flat Panel Mount
853177002557

VZ-CMK01A
Page 2 Visit the ViewZ website at http://www.viewzusa.com Installation Instructions
Contact ViewZ with any questions:
(888) 99-ViewZ
techsupport@viewzusa.com
Contents
Warning Statements
Weight Limit
Maximum Flat Panel Weight:
50 lbs.
THE CEILING STRUCTURE MUST BE CAPABLE OF
SUPPORTING AT LEAST FIVE TIMES THE WEIGHT OF
THE FLAT PANEL. IF NOT, THE CEILING STRUCTURE
MUST BE REINFORCED.
PRIOR TO THE INSTALLATION OF THIS PRODUCT, THE INSTALLATION INSTRUCTIONS MUST BE READ AND
COMPLETELY UNDERSTOOD. KEEP THESE INSTALLATION INSTRUCTIONS IN AN EASILY ACCESSIBLE LOCATION
FOR FUTURE REFERENCE.
PROPER INSTALLATION PROCEDURE BY A QUALIFIED SERVICE TECHNICIAN MUST BE FOLLOWED, AS OUTLINED
IN THESE INSTALLATION INSTRUCTIONS. FAILURE TO DO SO COULD RESULT IN PROPERTY DAMAGE, SERIOUS
PERSONAL INJURY, OR EVEN DEATH.
SAFETY MEASURES MUST BE PRACTICED AT ALL TIMES DURING THE ASSEMBLY OF THIS PRODUCT. USE
PROPER SAFETY EQUIPMENT AND TOOLS FOR THE ASSEMBLY PROCEDURE TO PREVENT PERSONAL INJURY.
VIEWZ DOES NOT WARRANT AGAINST DAMAGE CAUSED BY THE USE OF ANY VIEWZ PRODUCT FOR PURPOSES
OTHER THAN THOSE FOR WHICH IT WAS DESIGNED OR DAMAGE CAUSED BY UNAUTHORIZED ATTACHMENTS
OR MODIFICATIONS, AND IS NOT RESPONSIBLE FOR ANY DAMAGES, CLAIMS, DEMANDS, SUITS, ACTIONS OR
CAUSES OF ACTION OF WHATEVER KIND RESULTING FROM, ARISING OUT OF OR IN ANY MANNER RELATING TO
ANY SUCH USE, ATTACHMENTS OR MODIFICATIONS.
At least two qualied people should perform the assembly procedure. Personal injury and/or property damage can result
from dropping or mishandling the projector.
If mounting to wall studs or ceiling studs, make sure that the mounting screws are anchored into the center of the wall studs
or ceiling studs. Use of an edge-to-edge stud nder is recommended.
Be aware of the mounting environment. If drilling and/or cutting into the mounting surface, always make sure that there
are no electrical wires in wall. Cutting or drilling into an electrical line may cause serious personal injury.
Make sure there are no water or natural gas lines inside the wall where the mount is to be located. Cutting or drilling into a
water or gas line may cause severe property damage or personal injury.
This product is intended for indoor use only. Use of this product outdoors could lead to product failure and/or serious
personal injury.
Do not install near sources of high heat. Do not install on a structure that is prone to vibration, movement or chance of
impact.
Weight Limit. 2 ....................................................................................................................................................................
Warning Statements. 2 .......................................................................................................................................................
Installation Tools. ............................................................................................................................................................. 3
Parts List.......................................................................................................................................................................... 3
Mounting Hardware. ........................................................................................................................................................ 4
Features. 5 .........................................................................................................................................................................
Installing the VZ-CMK01A Mount. ................................................................................................................................... 6
Introduction. .............................................................................................................................................................. 6
Attaching the VZ-CMK01A. ............................................................................................................................................. 6
Mounting Hardware. ........................................................................................................................................................ 7
Selecting the Mounting Hardware. ............................................................................................................................ 7
Universal Spacer Installation. 8 ...................................................................................................................................
VZ-AP200 Adapter Plate Installation. ........................................................................................................................ 8
Attaching the Flat Panel to the VZ-CMK01A Mount. ....................................................................................................... 9
Adjusting the Mount Tension. ........................................................................................................................................ 10
Technical Specications. ............................................................................................................................................... 10
Warranty. ........................................................................................................................................................................11
Disclaimer. ......................................................................................................................................................................11

VZ-CMK01A
Installation Instructions Visit the ViewZ website at http://www.viewzusa.com Page 3
Parts List
Installation Tools
Make sure your ViewZ product has the following hardware and components before beginning installation. If there are
parts missing and/or damaged, stop the installation and call ViewZ at (888) 99-ViewZ.
VZ-CMK01A Mount Hardware
VZ-CMK01A
(Qty 1)
The following tools may be required depending upon your particular installation. They are not included.
Pencil Protective Eyewear
Phillips Tip Screwdriver
Power Drill
Ladder
2
1
Tape Measure
Socket Wrench
VZ-AP200 Adapter Plate
(Qty 1)
M3 Allen Wrench
(Supplied)
Universal Spacers
(Qty 30)
M4 Flat Washers
(Qty 4)
Thread Depth Indicator
(Supplied)
M5 Flat Washers
(Qty 4)
14mm Socket
(Supplied)
Product specificaties
| Merk: | ViewZ |
| Categorie: | Monitor |
| Model: | VZ-17RTLD |
| Kleur van het product: | Zwart |
| LED-indicatoren: | Ja |
| Bluetooth: | Nee |
| Stroom: | 3 A |
| Beeldscherm: | LCD |
| Beeldschermdiagonaal: | 17 " |
| Resolutie: | 1024 x 768 Pixels |
| Touchscreen: | Nee |
| Oorspronkelijke beeldverhouding: | 5:4 |
| Ethernet LAN: | Nee |
| Kijkhoek, horizontaal: | 160 ° |
| Kijkhoek, verticaal: | 160 ° |
| Geïntegreerde geheugenkaartlezer: | Nee |
| Typische contrastverhouding: | 1000:1 |
| Frequentiebereik horizontaal: | 31 - 64 kHz |
| Frequentiebereik verticaal: | 56 - 75 Hz |
| VGA (D-Sub)poort(en): | 1 |
| PC audio ingang: | Ja |
| PC Audio-uitgang: | Ja |
| DVI-poort: | Ja |
| Bevestigingsmogelijkheid voor kabelslot: | Nee |
| Ingebouwde luidsprekers: | Ja |
| Gemiddeld vermogen: | 4 W |
| Stroomverbruik (in standby): | - W |
| Aantal luidsprekers: | 2 |
| Certificering: | TUV-NRTL(UL), CB, FCC(B), CE-Emc(LVD) |
| Beeldscherm, aantal kleuren: | 16.78 miljoen kleuren |
| Formaat analoog signaal: | PAL, SECAM |
| HD type: | Niet ondersteund |
| Responstijd: | 5 ms |
| Pixel pitch: | 0.264 x 0.264 mm |
| Ondersteunde grafische resoluties: | 1024 x 768 (XGA) |
| VESA-montage: | Ja |
| Paneelmontage-interface: | 100 x 100 mm |
| Helderheid (typisch): | 250 cd/m² |
| Beeldverhouding: | 5:4 |
| Geïntegreerde TV Tuner: | Nee |
| Ingebouwde camera: | Nee |
| Diepte ( zonder voet ): | 60 mm |
| Hoogte (zonder voet ): | 390.5 mm |
| Breedte ( zonder voet ): | 382.4 mm |
| Gewicht (zonder voet): | 5940 g |
| Thin client geïnstalleerd: | Nee |
| Mobile High-Definition Link ( MHL ): | Nee |
| Mean time between failures (MTBF): | 50000 uur |
| Wifi: | Nee |
| Stroomverbruik (typisch): | 36 W |
| Bedrijfstemperatuur (T-T): | 0 - 40 °C |
Heb je hulp nodig?
Als je hulp nodig hebt met ViewZ VZ-17RTLD stel dan hieronder een vraag en andere gebruikers zullen je antwoorden
Handleiding Monitor ViewZ
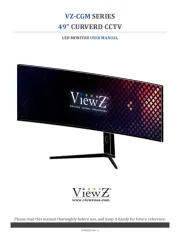
10 April 2025
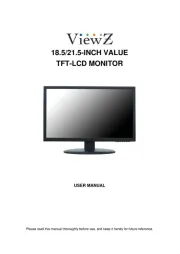
26 Maart 2025
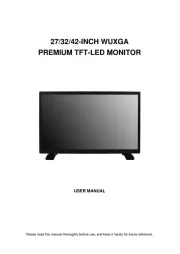
26 Maart 2025
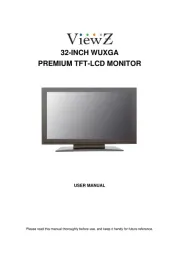
26 Maart 2025
26 Maart 2025
26 Maart 2025
26 Maart 2025
26 Maart 2025
26 Maart 2025
26 Maart 2025
Handleiding Monitor
- Zalman
- Corsair
- Antelope Audio
- AIS
- Shure
- Genelec
- Dynaudio
- OSEE
- ITek
- Enttec
- Archos
- Fostex
- Maxdata
- MSI
- Starboard
Nieuwste handleidingen voor Monitor
15 September 2025

15 September 2025
15 September 2025
15 September 2025

15 September 2025

14 September 2025

14 September 2025
12 September 2025
11 September 2025
9 September 2025