Uni-T LM573R Handleiding
Uni-T hallókészülék LM573R
Bekijk gratis de handleiding van Uni-T LM573R (38 pagina’s), behorend tot de categorie hallókészülék. Deze gids werd als nuttig beoordeeld door 137 mensen en kreeg gemiddeld 4.7 sterren uit 2 reviews. Heb je een vraag over Uni-T LM573R of wil je andere gebruikers van dit product iets vragen? Stel een vraag
Pagina 1/38
LM573R Laser Level
User Manual
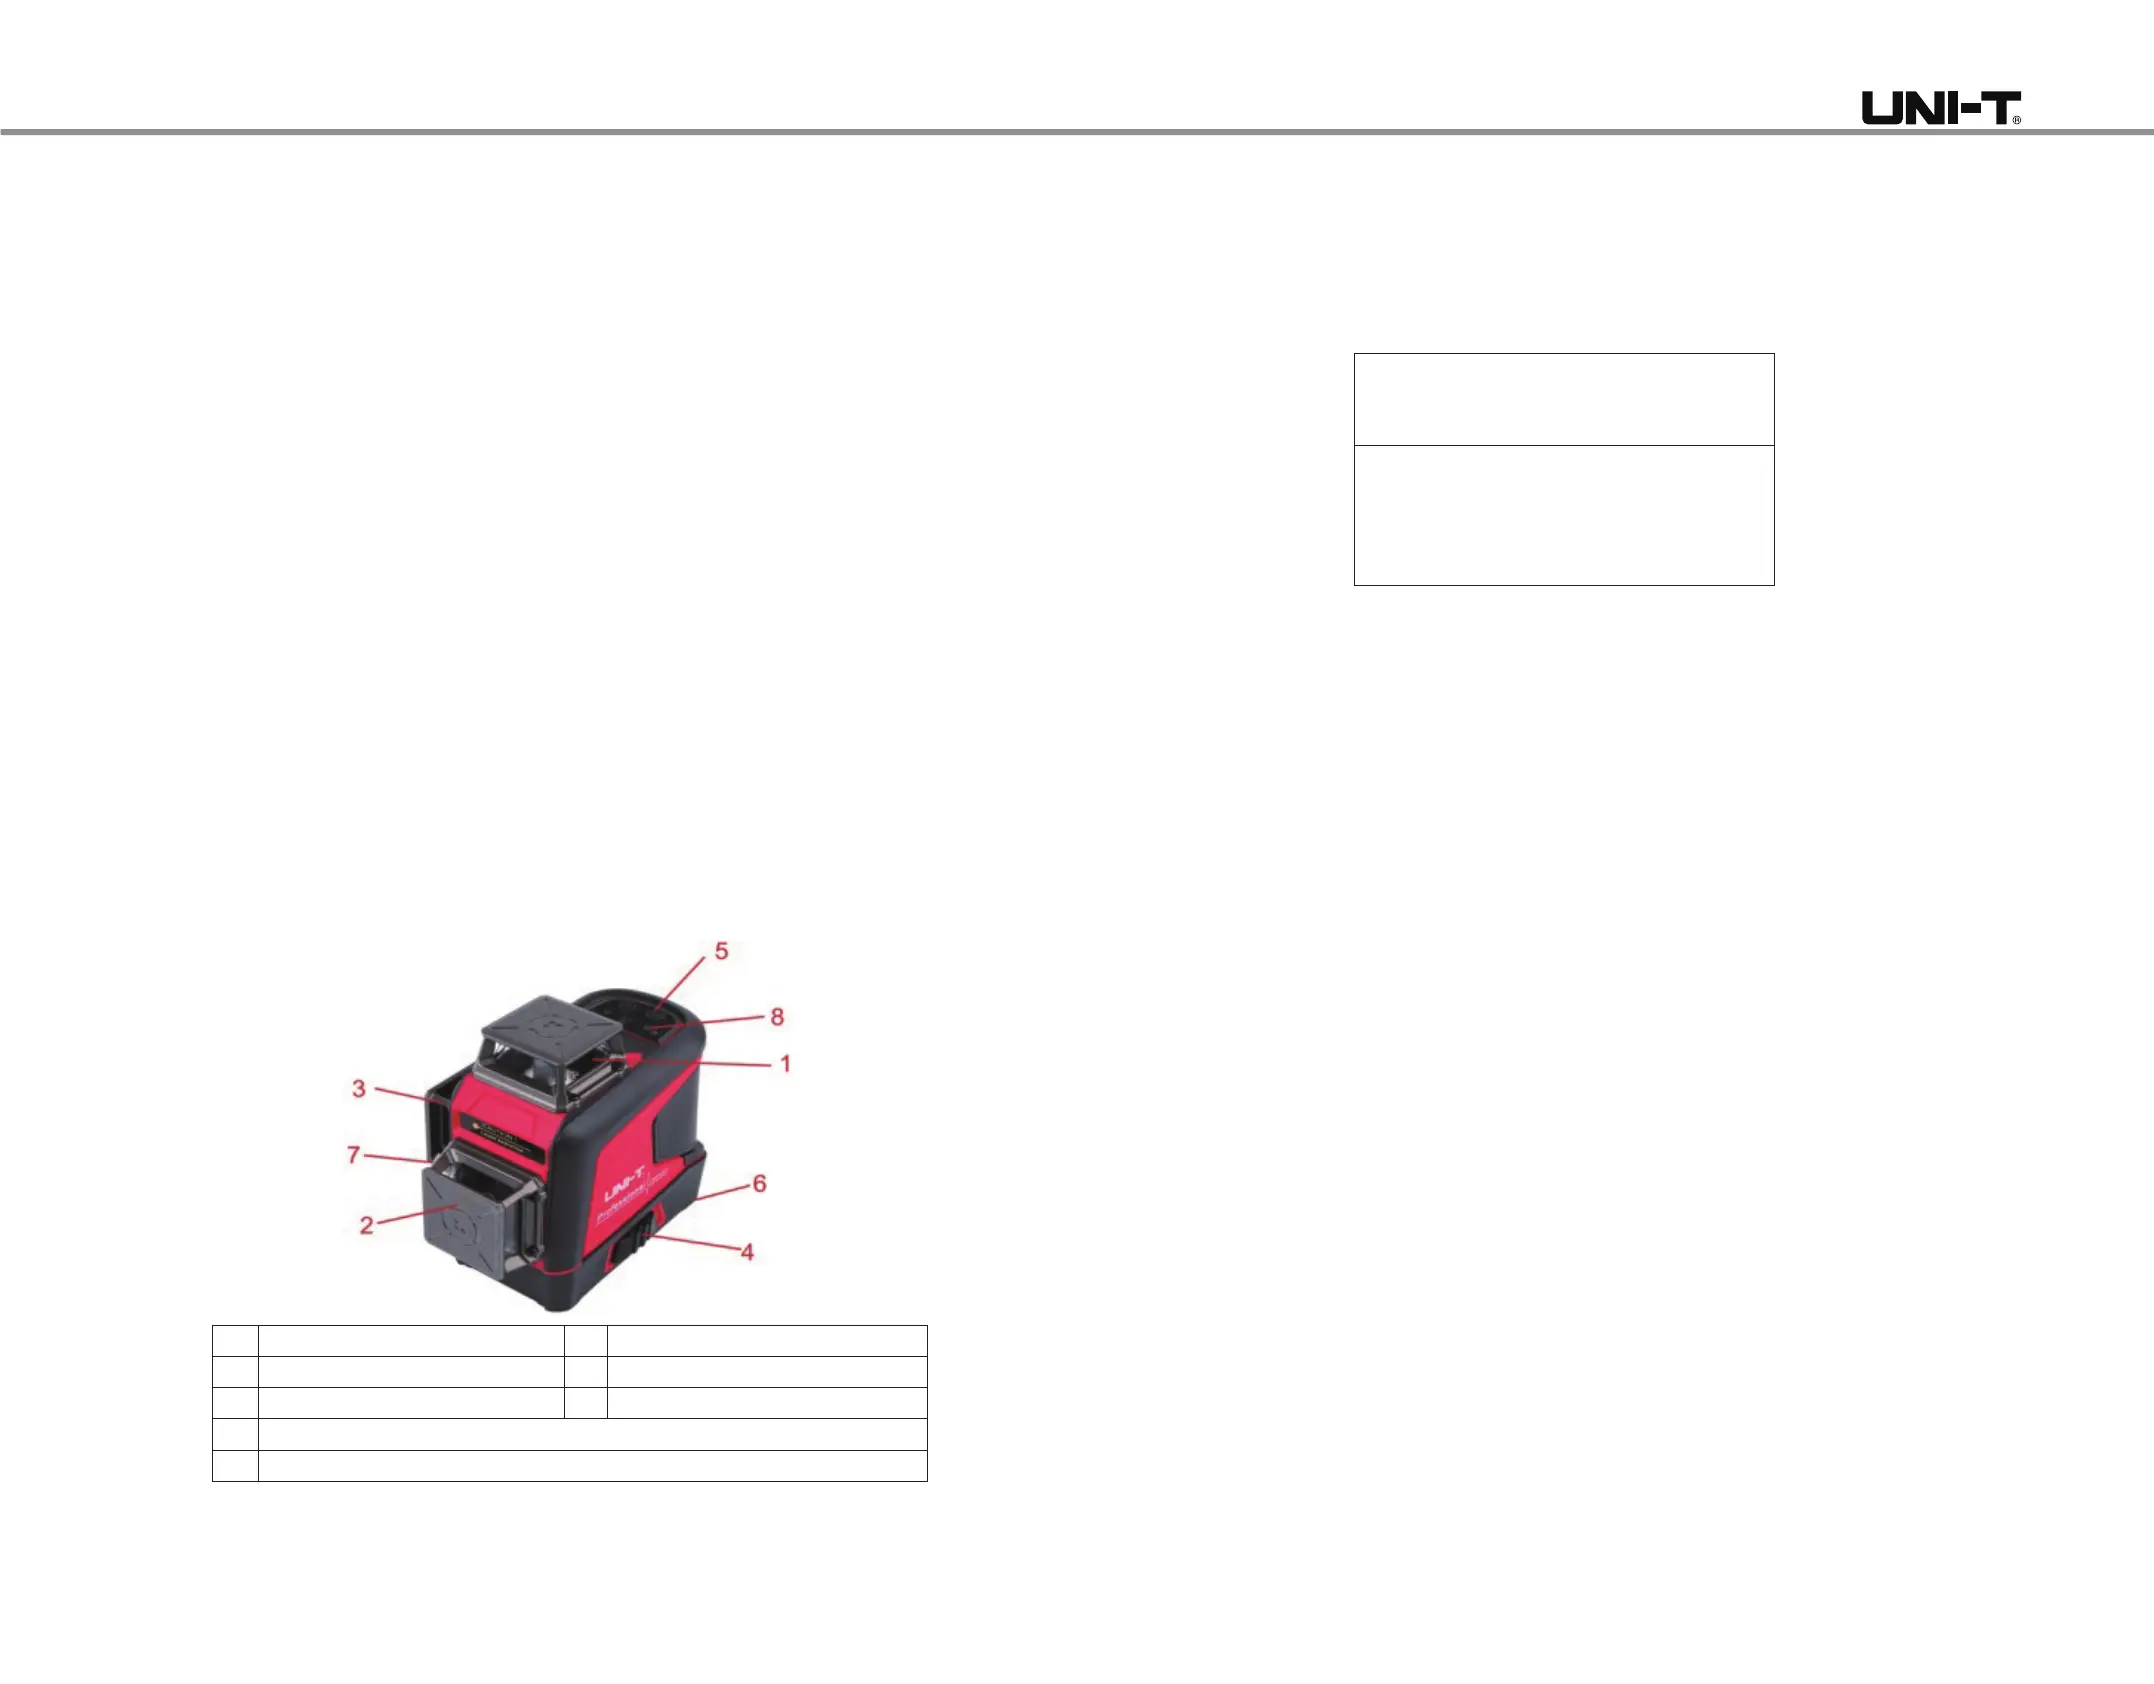
1. Product Structure
1 360° horizontal glass window 2 360° vertical glass window V1
3 360° vertical glass window V2 4 Pendulum lock
5 Button 6 Battery cover
7 Charging interface
8 LED indicator
2. Safety Instructions
Before using this product, please carefully read and follow the safety instructions, otherwise
the warranty may be invalid.
Warning!
Class 2 laser product
Wavelength: 635nm±10nm
Laser radiation:
Do not stare into beam
Do not directly expose to eyes
Avoid using optical instruments
3. Cautions
Some product kits will provide glasses. Please note that these glasses are not safety glasses.
They are only used to help users recognize the laser beam in strong ambient light or when the
light source of the laser instrument is distant.
Do not stare into beam or directly observe the laser beam via an optical instrument or set the
instrument at the eye level (to avoid damage to eyes).
Do not d
isassemble the laser instrument without authorization.
Do not refit the instrument without authorization in any way; otherwise it may cause
harmful laser radiation exposure.
Do not use the laser instrument around children or allow them to use it.
Exposure to Class 2 lasers for no more than 2 seconds is generally considered safe,
because natural eyelid reflexes (blinking) usually can provide adequate protection.
4. Operation Guidelines
When the laser instrument is locked, press and hold the V button to turn it on and emit a
horizontal laser line. At this time, the laser l
ine will flash once every 5 seconds, and the
indicator will be green.
When the instrument is unlocked (toggle the pendulum lock to the unlocked position) and
turned on, it can also emit a horizontal laser line. When the instrument exceeds its
self-leveling range (3°±1°), the laser beam will flash quickly.
Continuously press the V button to step through the operating modes of the instrument.
Generate
1# vertical plane
Generate 2# vertical plane
Simultaneously generate two vertical planes
Press the H button to switch to the horizontal plane
Generate a horizontal plane
Long press the V button to adjust the laser line brightness (three scales).
Preface
Thank you for purchasing this brand new LM573R laser level. In order to use this product
safely and correctly, please read this manual thoroughly, especially the Safety Instructions
part.
After reading this manual, it is recommended to keep the manual at an easily accessible place,
preferably close to the device, for future reference.
Limited Warranty and Liability
Uni-Trend guarantees that the prod
uct is free from any defect in material and workmanship
within one year from the purchase date. This warranty does not apply to damages caused by
accident, negligence, misuse, modification, contamination and improper handling. The dealer
shall not be entitled to give any other warranty on behalf of Uni-Trend. If you need warranty
service within the warranty period, please contact your seller directly.
This warranty is the only compensation you can obtain. Uni-Trend will not be responsible for
any special, indirect, incidental or subsequent damage or loss caused by any reason or
speculation. As some areas or countries do not allow limitations on implied warranties and
incidental or subsequent damage, the above limitation of liability and stipulation may not apply
to you.
P/N:110401112036X
Product specificaties
| Merk: | Uni-T |
| Categorie: | hallókészülék |
| Model: | LM573R |
Heb je hulp nodig?
Als je hulp nodig hebt met Uni-T LM573R stel dan hieronder een vraag en andere gebruikers zullen je antwoorden
Handleiding hallókészülék Uni-T

25 Februari 2026
11 Augustus 2025
10 Augustus 2025
6 Maart 2024
6 Maart 2024
6 Maart 2024
6 Maart 2024
6 Maart 2024
6 Maart 2024
6 Maart 2024
Handleiding hallókészülék
Nieuwste handleidingen voor hallókészülék
5 Mei 2026
13 April 2026
12 Maart 2026
10 Februari 2026
2 Januari 2026
27 December 2025
23 December 2025
19 December 2025
19 December 2025
18 December 2025