Thermaltake Dr. Power III Handleiding
Thermaltake Niet gecategoriseerd Dr. Power III
Bekijk gratis de handleiding van Thermaltake Dr. Power III (2 pagina’s), behorend tot de categorie Niet gecategoriseerd. Deze gids werd als nuttig beoordeeld door 29 mensen en kreeg gemiddeld 4.0 sterren uit 7 reviews. Heb je een vraag over Thermaltake Dr. Power III of wil je andere gebruikers van dit product iets vragen? Stel een vraag
Pagina 1/2
Dr.Power III
User Manual
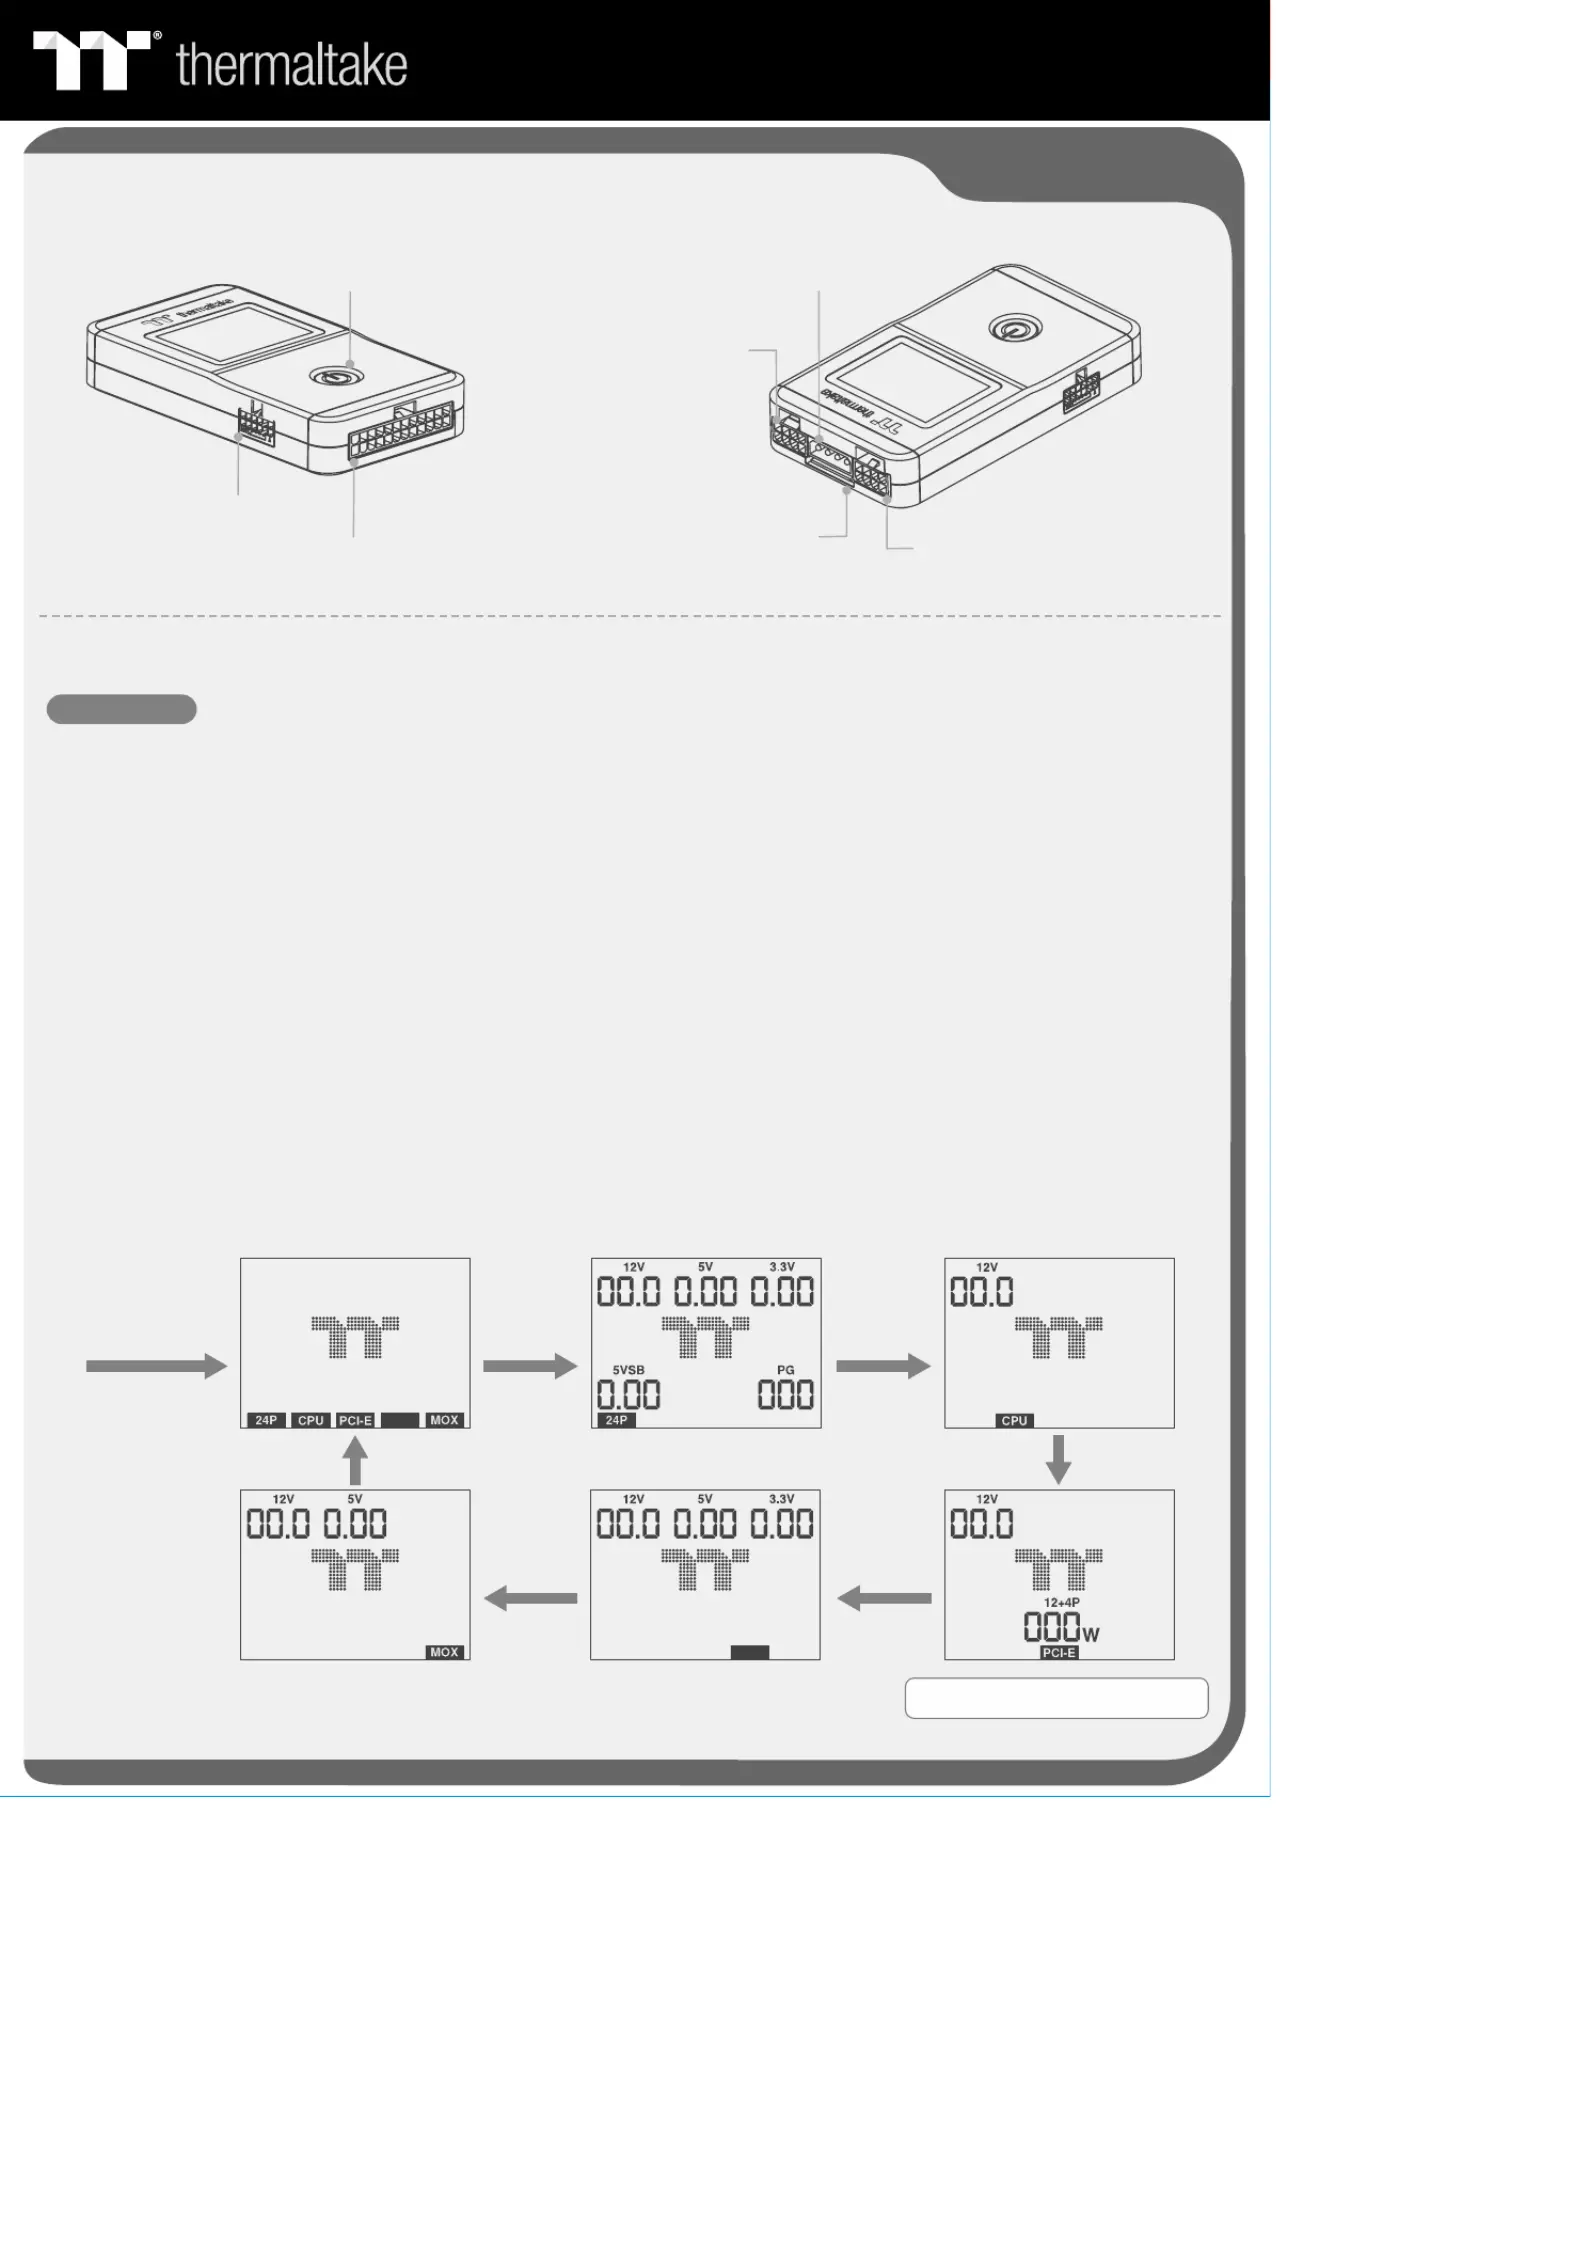
24pin connector
Check button
CPU 4pin or 8pin connector
Peripheral connector
SATA connector
PCI-E 6pin or 8pin connector
12+4pin connector
Connector Introduction
Operation Instructions
Manual Mode
1. Plug the PSU connectors into Dr.Power III.
2Switch the PSU I/O switch to the “-” position. The screen will then display the TT logo animation..
3The screen will display the icons of the connectors that have been plugged into Dr.Power III..
4Press the CHECK button to start the manual testing mode. The screen will display the 24P icon, the output voltage of .
each group, and PG.
5Press the CHECK button again. The system will proceed with the next test point CPU. The screen will display the CPU icon .
and the corresponding voltage output.
6Press the CHECK button again. The system will proceed with the next test point PCI-E. The screen will display the PCI-E icon .
and the corresponding voltage output. If the PCI-E 12+4pin is connected, the screen will display the SENSE0/SENSE1
sideband signals of the PCI-E 12+4pin connector (150W/300W/450W/600W).
7Press the CHECK button again. The system will proceed with the next test point MOX. The screen will display the MOX icon .
and the corresponding voltage output.
8Press the CHECK button again. The system will proceed with the next test point SATA. The screen will display the SATA icon .
and the corresponding voltage output.
9Press the CHECK button again to return to step 3..
10If no fault occurs during the test, the LCD backlight will remain white. Once any fault occurs, the LCD backlight will turn red .
and make a “beep” sound.
Connect all of the
connectors and
turn on the PSU
Press buttonPress button
Press button
Press button
Press button
Press button
Note: 12+4P will only be displayed when
PCI-E 12+4pin is connected.
SATA
SATA
Product specificaties
| Merk: | Thermaltake |
| Categorie: | Niet gecategoriseerd |
| Model: | Dr. Power III |
| Kleur van het product: | Zwart |
| Ingebouwd display: | Ja |
| Breedte: | 74.8 mm |
| Diepte: | 135.8 mm |
| Hoogte: | 24.4 mm |
| Certificering: | CE |
| Duurzaamheidscertificaten: | CE |
| Backlight-kleur: | Wit/Rood |
| Type beeldscherm: | LCD |
| Display met achtergrondverlichting: | Ja |
| Supported motherboard form factors: | ATX |
| Garantieperiode: | 3 jaar |
| DC uitgangsspanningtest: | 5Vsb, +12V, +3.3V, +5V |
| Ondersteunde voedingsconnectors: | ATX (24-pin), SATA |
Heb je hulp nodig?
Als je hulp nodig hebt met Thermaltake Dr. Power III stel dan hieronder een vraag en andere gebruikers zullen je antwoorden
Handleiding Niet gecategoriseerd Thermaltake

13 Juli 2026
10 Juli 2026
10 Juli 2026
4 Mei 2026
3 Mei 2026
2 Mei 2026
2 Mei 2026
21 April 2026
10 Maart 2026
4 Maart 2026
Handleiding Niet gecategoriseerd
Nieuwste handleidingen voor Niet gecategoriseerd
18 Juli 2026
18 Juli 2026
18 Juli 2026
18 Juli 2026
18 Juli 2026
18 Juli 2026
17 Juli 2026
17 Juli 2026
17 Juli 2026
17 Juli 2026