TFA 38.2027 Handleiding
TFA
Niet gecategoriseerd
38.2027
Bekijk gratis de handleiding van TFA 38.2027 (4 pagina’s), behorend tot de categorie Niet gecategoriseerd. Deze gids werd als nuttig beoordeeld door 264 mensen en kreeg gemiddeld 4.5 sterren uit 132.5 reviews. Heb je een vraag over TFA 38.2027 of wil je andere gebruikers van dit product iets vragen? Stel een vraag
Pagina 1/4

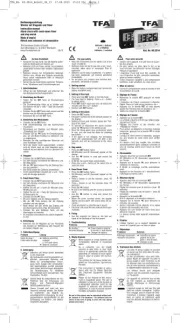
• Durch gleichzeitiges Drücken der MIN und SEC Taste wird die
Anzeige gelöscht.
4.2 Stoppuhr
• Drücken Sie die START/STOP Taste.
• M und S blinken und die Zählung beginnt
• Mit der START/STOP Taste können Sie die Zählung anhalten und
neu starten.
• Durch gleichzeitiges Drücken der MIN und SEC Taste wird die
Anzeige gelöscht.
4.3 Befestigung
• Benutzen Sie die Magnete zur Befestigung oder den ausklappba-
ren Ständer auf der Rückseite des Gerätes zum Aufstellen.
5. Pflege und Wartung
• Reinigen Sie das Gerät mit einem weichen, leicht feuchten Tuch.
Keine Scheuer- oder Lösungsmittel verwenden!
• Entfernen Sie die Batterien, wenn Sie das Gerät längere Zeit
nicht verwenden.
• Bewahren Sie Ihr Gerät an einem trockenen Platz auf.
5.1 Batteriewechsel
• Tauschen Sie die Batterien aus, wenn die Anzeige oder der
Alarmton schwächer wird.
• Vergewissern Sie sich, dass die Batterien polrichtig eingelegt sind.
6. Fehlerbeseitigung
Problem Lösung
Keine Anzeige ➜ Batterien polrichtig einlegen
➜ Batterien wechseln
Unkorrekte Anzeige Batterien wechseln➜
Wenn Ihr Gerät trotz dieser Maßnahmen immer noch nicht funktio-
niert, wenden Sie sich an den Händler, bei dem Sie das Produkt
gekauft haben.
7. Entsorgung
Dieses Produkt wurde unter Verwendung hochwertiger Materialen
und Bestandteile hergestellt, die recycelt und wiederverwendet
werden können.
Batterien und Akkus dürfen keinesfalls in den Haus-
müll!
Als Verbraucher sind Sie gesetzlich verpflichtet, ge-
brauchte Batterien und Akkus zur umweltgerechten
Entsorgung beim Handel oder entsprechenden Sammel-
stellen gemäß nationaler oder lokaler Bestimmungen
abzugeben.
Die Bezeichnungen für enthaltene Schwermetalle sind:
Cd=Cadmium, Hg=Quecksilber, Pb=Blei
Dieses Gerät ist entsprechend der EU-Richtlinie über die
Entsorgung von Elektro- und Elektronik-Altgeräten
(WEEE) gekennzeichnet.
Dieses Produkt darf nicht mit dem Hausmüll entsorgt
werden. Der Nutzer ist verpflichtet, das Altgerät zur
umweltgerechten Entsorgung bei einer ausgewiesenen
Annahmestelle für die Entsorgung von Elektro- und
Elektronikgeräten abzugeben.
8. Technische Daten
Minuten: Bis 99
Sekunden: Bis 59
Gehäusemaße: 60 x 21 x 70 mm
Gewicht: 60 g (nur Gerät)
TFA Dostmann GmbH & Co. KG, Zum Ottersberg 12, D-97877 Wertheim.
Diese Anleitung oder Auszüge daraus dürfen nur mit Zustimmung von TFA Dost-
mann veröffentlicht werden. Die technischen Daten entsprechen dem Stand bei
Drucklegung und können ohne vorherige Benachrichtigung geändert werden.
www.tfa-dostmann.de 04/12
Timer und Stoppuhr
Vielen Dank, dass Sie sich für dieses Gerät aus dem Hause TFA ent-
schieden haben.
1. Bevor Sie mit dem Gerät arbeiten
•Lesen Sie sich bitte die Bedienungsanleitung genau durch.
•Durch die Beachtung der Bedienungsanleitung vermeiden Sie
auch Beschädigungen des Geräts und die Gefährdung Ihrer
gesetzlichen Mängelrechte durch Fehlgebrauch.
•Für Schäden, die aus Nichtbeachtung dieser Bedienungsanlei-
tung verursacht werden, übernehmen wir keine Haftung.
•Beachten Sie besonders die Sicherheitshinweise!
•Bewahren Sie diese Anleitung gut auf!
2. Einsatzbereich und alle Vorteile Ihres neuen Gerätes auf
einen Blick
• Timer und Stoppuhr mit Sensortasten
• Minuten- und Sekunden-Anzeige
• Mit Alarmton
• 99 Min. und 59 Sec.
• Mit Magneten und Ständer (ausklappbar)
3. Zu Ihrer Sicherheit
• Das Produkt ist ausschließlich für den oben beschriebenen Ein-
satzbereich geeignet. Verwenden Sie das Produkt nicht anders,
als in dieser Anleitung dargestellt wird.
• Das eigenmächtige Reparieren, Umbauen oder Verändern des
Gerätes ist nicht gestattet.
• Dieses Gerät ist nicht für medizinische Zwecke oder zur öffent-
lichen Information geeignet und nur für den privaten Gebrauch
bestimmt.
Vorsicht!
Verletzungsgefahr:
• Bewahren Sie das Gerät und die Batterien außerhalb der Reich-
weite von Kindern auf.
• Batterien nicht ins Feuer werfen, kurzschließen, auseinander
nehmen oder aufladen. Explosionsgefahr!
• Batterien enthalten gesundheitsschädliche Säuren. Um ein Aus-
laufen der Batterien zu vermeiden, sollten schwache Batterien
möglichst schnell ausgetauscht werden. Verwenden Sie nie
gleichzeitig alte und neue Batterien oder Batterien unterschiedli-
chen Typs. Beim Hantieren mit ausgelaufenen Batterien chemika-
lienbeständige Schutzhandschuhe und Schutzbrille tragen!
Wichtige Hinweise zur Produktsicherheit!
• Setzen Sie das Gerät keinen extremen Temperaturen, Vibratio-
nen und Erschütterungen aus.
• Vor Feuchtigkeit schützen.
4. Bedienung
• Klappen Sie den Ständer aus und schieben Sie den Batteriefach-
deckel nach unten (siehe Markierung).
• Klappen Sie den Ständer wieder ein und legen Sie zwei neue 1,5 V
AAA Batterien, polrichtig ein.
• Klappen Sie den Ständer wieder aus und setzen Sie den Batterie-
fachdeckel wieder ein.
• Auf dem Display erscheinen 00 (M) und 00 (S).
• Das Gerät ist jetzt betriebsbereit.
4.1 Count down Timer
• Drücken Sie die MIN Taste, um die Minuten (max. 99 Minuten)
einzustellen
• Drücken Sie die SEC Taste, um die Sekunden (max. 59 Sekunden)
einzustellen.
• Ein kurzer Signalton ertönt bei jedem Tastendruck.
• Halten Sie die MIN Taste oder die SEC Taste gedrückt, gelangen
Sie in den Schnelllauf.
• Drücken Sie die START/STOP Taste.
• M und S blinken und die Zählung beginnt
• Mit der START/STOP Taste können Sie die Zählung anhalten und
neu starten.
• Nach Ablauf der Zeit blinkt das Display und ein Alarmsignal
ertönt (max. 60 Sekunden).
•
Drücken Sie die START/STOP Taste, um das Alarmsignal zu beenden.
• Es erscheint automatisch die zuletzt eingestellte Zeit.
• Mit der START/STOP Taste können Sie die Zählung neu starten.
Bedienungsanleitung
Instruction manual
Mode d'emploi
Kat. Nr. 38.2027Kat. Nr. 38.2027Kat. Nr. 38.2027
Timer und Stoppuhr
Timer and stopwatch
Thank you for choosing this instrument from TFA.
1. Before you use it
•Please be sure to read the instruction manual carefully.
•Following the instruction manual for use will prevent damage to
the device and loss of your statutory rights arising from defects
due to incorrect use.
•We shall not be liable for any damage occurring as a result of
not following these instructions.
•Please take particular note of the safety advice!
•Please look after this manual for future reference.
2. Field of operation and all of the benefits of your new
instrument at a glance
• Count-up and count-down timer with sensor buttons
• Minutes and seconds display
• With beep alarm
• Up to 99 min. and 59 sec.
• With magnet and stand (fold out)
3. For your safety
• The product is exclusively intended for the field of application
described above. The product should only be used as described
within these instructions.
• Unauthorised repairs, modifications or changes to the product
are prohibited.
• The product is not be used for medical purpose or for public
information, but is intended only for home use.
Caution!
Risk of injury:
• Keep this instrument and the batteries out of reach of children.
• Batteries must not be thrown into the fire, short-circuited, taken
apart or recharged. Risk of explosion!
• Batteries contain harmful acids. Low batteries should be changed
as soon as possible to prevent damage caused by a leaking bat-
tery. Never use a combination of old and new batteries together,
nor batteries of different types. Wear chemical-resistant protec-
tive gloves and glasses when handling leaked batteries.
Important information on product safety!
• Do not place the unit near extreme temperatures, vibration or
shock.
• Protect from moisture.
4. Operation
• Fold out the stand and slide the battery compartment down-
wards (see marking).
• Fold in the stand again and insert two new batteries (2 x 1,5 V
AAA). Ensure batteries polarity are correct.
• Fold out the stand again and replace the battery compartment
lid again.
• 00 (M) and 00 (S) appear on the display.
• The unit is ready for use.
4.1 Count Down Timer
• Press the MIN button to adjust the minutes (max. 99 minutes).
• Press the SEC button to adjust the secondes (max. 59 seconds).
• A brief beep tone will sound with each button click.
• Press and hold MIN or SEC button in the setting mode for fast
running.
• Press the START/STOP button.
• M and S are flashing and the count down process starts.
• With the START/STOP button you can stop and restart the count-
ing.
• When the timer counted down, the display flashes and the alarm
will sound (max. 60 seconds).
• Press the START/STOP button to stop the alarm.
• The timer will recall the last selected time automatically.
• With the START/STOP button you can restart the countdown
again.
• Push the MIN and SEC button at the same time to reset the timer.
RoHS
TFA_No_38.2027_Anleit_D_GB_F 18.04.2012 10:33 Uhr Seite 1

Nous vous remercions d'avoir choisi l'appareil de la Société TFA.
1. Avant d'utiliser l'appareil
•Lisez attentivement le mode d'emploi.
•En respectant ce mode d'emploi, vous éviterez d'endommager
l'appareil et de perdre vos droits résultant d'un défaut pour
cause d'utilisation non-conforme.
•Nous n'assumons aucune responsabilité pour des dommages qui
auraient été causés par le non-respect du présent mode d'em-
ploi.
•Suivez bien toutes les consignes de sécurité!
•Conservez soigneusement le mode d'emploi!
2. Aperçu du domaine d'utilisation et de tous les avantages
de votre nouvel appareil
• Minuteur et chronomètre avec touches tactiles
• Affichage minutes et secondes
• Avec alarme
• Jusqu’à 99 minutes et 59 secondes
• Avec aimants et support (dépliable)
3. Pour votre sécurité
• L'appareil est destiné uniquement à l'utilisation décrite ci-dessus.
Ne l'utilisez jamais à d'autres fins que celles décrites dans le pré-
sent mode d'emploi.
• Vous ne devez en aucun cas démonter ou modifier l'appareil par
vous-même.
• Cet appareil ne convient pas à une utilisation médicale ni pour
l'information publique, il est uniquement destiné á un usage
privé.
Attention!
Danger de blessure:
• Tenir l'appareil et les piles hors de la portée des enfants.
• Ne jetez jamais les piles dans le feu, ne les court-circuitez pas, ne
les démontez pas et ne les rechargez pas. Risques d'explosion!
• Les piles contiennent des acides nocifs pour la santé. Une pile fai-
ble doit être remplacée le plus rapidement possible, afin d'éviter
une fuite. Ne jamais utiliser d'anciennes piles avec des piles neu-
ves simultanément ou bien encore des piles de types différents.
Pour manipuler des piles qui ont coulé, utilisez des gants de pro-
tection chimique spécialement adaptés et portez des lunettes de
protection !
Conseils importants de sécurité du produit!
• Évitez d’exposer l’appareil à des températures extrêmes, à des
vibrations ou à des chocs.
• Protégez-le contre l'humidité.
4. Utilisation
• Relevez le support et poussez le couvercle du compartiment de la
pile vers le bas (voir le marquage).
• Retournez le support de nouveau et insérez deux piles neuves 1,5
V AAA, contrôlez la bonne polarité des piles.
• Relevez le support de nouveau et refermez le couvercle du com-
partiment des piles.
• 00 (M) et 00 (S) apparaissent sur l'écran.
• L´instrument est maintenant prêt à fonctionner.
4.1 Minuteur digital
• Appuyez sur la touche M pour réglez les minutes (max. 99).
• Appuyez sur la touche S pour réglez les secondes (max. 59).
• Un signal sonore se fait entendre à chaque fois que vous appuyez
sur une touche.
• Maintenez appuyée la touche M ou la touche S pour parvenir à
l'affichage rapide.
• Appuyez sur la touche START/STOP.
• M ou S commencent à clignoter et le compteur commence.
• Appuyez sur la touche START/STOP pour arrêter ou remettre en
marche le compteur.
• Une alarme sonne dès que le temps s'est écoulé (environ 60
secondes).
• Appuyez sur la touche START/STOP pour démarrer le minuteur.
• Le dernier temps réglé apparaît automatiquement.
Timer and stopwatch
4.2 Stopwatch
• Press the START/STOP button.
• M and S are flashing and the count up process starts.
• With the START/STOP button you can stop and restart the count-
ing.
• Push the MIN and SEC button at the same time to reset the timer.
4.3 Attachment
• Use the magnets for fixing or the fold out stand at the backside
of the instrument for standing.
5. Care and maintenance
• Clean it with a soft damp cloth. Do not use solvents or scouring
agents.
• Remove the batteries if you do not use the product for a lengthy
period.
• Keep the instrument in a dry place.
5.1 Battery replacement
• Replace the batteries when the display becomes weak or the
alarm tone declines.
• Make sure they have the correct polarity.
6. Troubleshooting
Problem Solution
No display ➜ Ensure batteries polarity are correct
➜ Change batteries
Incorrect display Change batteries➜
If your device fails to work despite these measures contact the sup-
plier from whom you purchased it.
7. Waste disposal
This product has been manufactured using high-grade materials
and components which can be recycled and reused.
Never dispose empty batteries and rechargeable batter-
ies in household waste.
As a consumer, you are legally required to take them to
your retail store or to appropriate collection sites
depending to national or local regulations in order to
protect the environment.
The symbols for the heavy metals contained are:
Cd=cadmium, Hg=mercury, Pb=lead
This instrument is labelled in accordance with the EU
Waste Electrical and Electronic Equipment Directive
(WEEE).
Please do not dispose of this instrument in household
waste. The user is obligated to take end-of-life devices
to a designated collection point for the disposal of elec-
trical and electronic equipment, in order to ensure envi-
ronmentally-compatible disposal.
8. Specifications
Minutes: up to 99 m
Seconds: up to 59 m
Housing dimension: 60 x 21 x 70 mm
Weight: 60 g (only instrument)
TFA Dostmann GmbH & Co. KG, Zum Ottersberg 12, D-97877 Wertheim.
No part of this manual may be reproduced without written consent of TFA Dost-
mann. The technical data are correct at the time of going to print and may
change without prior notice.
www.tfa-dostmann.de 04/12
Bedienungsanleitung
Instruction manual
Mode d'emploi
Kat. Nr. 38.2027Kat. Nr. 38.2027Kat. Nr. 38.2027
Minuteur et chronomètre
Minuteur et chronomètre
• Appuyez sur la touche START/STOP pour démarrer le compteur
de nouveau.
• Appuyez sur les touches M et S simultanément pour que l'affi-
chage disparaisse.
4.2 Chronomètre
• Appuyez sur la touche START/STOP.
• M et S clignotent et le compteur démarre.
• Appuyez sur la touche START/STOP pour arrêter ou remettre en
marche le compteur.
• Appuyez sur les touches M et S simultanément, pour que l'affi-
chage disparaisse.
4.3 Fixation
• Utilisez l’aimant ou le support dépliable au revers de l'appareil
pour la fixation.
5. Entretien et maintenance
• Pour le nettoyage de l'appareil, utilisez un chiffon doux et humi-
de. N’utilisez aucun agent solvant abrasif!
• Enlevez les piles, si vous n'utilisez pas votre minuteur pendant
une durée prolongée.
• Conservez votre appareil dans un endroit sec.
5.1 Remplacement de la pile
• Remplacez les piles si l’affichage ou la sonnerie de l'alarme s'af-
faiblissent.
• Assurez-vous que les piles sont introduites selon la bonne polarité.
6. Dépannage
Problème Solution
Aucun affichage ➜ Contrôlez la bonne polarité des piles
➜ Changez les piles
Affichage incorrecte ➜Changez les piles
Si votre appareil ne fonctionne toujours pas malgré ces mesures,
adressez-vous au vendeur auquel vous avez acheté votre appareil.
7. Traitement des déchets
Ce produit a été fabriqué avec des matériaux et des composants de
haute qualité qui peuvent être recyclés et réutilisés.
Les piles et accus usagés ne peuvent en aucun cas être
jetés dans les ordures ménagères !
En tant qu'utilisateur, vous avez l'obligation légale de
rapporter les piles et accus usagés à votre revendeur ou
de les déposez dans une déchetterie proche de votre
domicile conformément à la réglementation nationale
et locale.
Les métaux lourds sont désignés comme suit:
Cd=cadmium, Hg=mercure, Pb=plomb
Cet appareil est conforme aux normes de l'UE relatives
au traitement des déchets électriques et électroniques
(WEEE).
L'appareil usagé ne doit pas être jeté dans les ordures
ménagères. L’utilisateur s’engage, pour le respect de
l’environnement, à déposez l’appareil usagé dans un
centre de traitement agréé pour les déchets électriques
et électroniques.
8. Caractéristiques techniques
Minutes jusqu'à 99
Secondes jusqu'à 59
Mesure de boîtier: 60 x 21 x 70 mm
Poids: 60 g (seule appareil)
TFA Dostmann GmbH & Co. KG, Zum Ottersberg 12, D-97877 Wertheim.
La reproduction, même partielle du présent mode d'emploi est strictement inter-
dite sans l'accord explicite de TFA Dostmann. Les spécifications techniques de ce
produit ont été actualisées au moment de l'impression et peuvent être modifiées,
sans avis préalable.
www.tfa-dostmann.de 04/12
RoHS
TFA_No_38.2027_Anleit_D_GB_F 18.04.2012 10:33 Uhr Seite 2

4.2 Cronometro
• Premete il tasto START/STOP.
• M e S lampeggiano e comincia il conteggio.
• Azionando il tasto START/STOP si può arrestare o avviare il crono-
metro.
• Tenendo premuto contemporaneamente il tasto MIN e SEC il
display viene azzerato.
4.3 Posizionamento
• Utilizzate le calamite o il supporto sul retro dell’apparecchio per
la sua sistemazione.
5. Cura e manutenzione
• Per pulire l'apparecchio utilizzare solo un panno morbido legger-
mente inumidito. Non usare solventi o abrasivi.
• Rimuovere le batterie, se non si utilizza l'apparecchio per un
periodo prolungato.
• Collocare il dispositivo in un luogo asciutto.
5.1 Sostituzione della batteria
• Quando le indicazioni sul display o il segnale acustico di allarme
diventano più deboli, sostituite le batterie.
• Inserire le batterie con la giusta polarità.
6. Guasti
Problema Risoluzione del problema
Nessuna indicazione Inserire le batterie ➜
➜ Cambiare le batterie
Indicazione non corretta Cambiare le batterie➜
Qualora il vostro apparecchio continui a non funzionare nonostan-
te queste procedure, rivolgetevi al rivenditore presso il quale lo
avete acquistato.
7. Smaltimento
Questo prodotto è stato realizzato utilizzando materiali e compo-
nenti di alta qualità che possono essere riciclati e riutilizzati.
È assolutamente vietato gettare le batterie tra i rifiuti
domestici.
In qualità di consumatori, siete tenuti per legge a con-
segnare le batterie usate al negoziante o ad altri enti
preposti al riciclaggio in conformità alle vigenti disposi-
zioni nazionali o locali, ai fini di uno smaltimento eco-
logico.
Le sigle dei metalli pesanti contenuti sono:
Cd=cadmio, Hg=mercurio, Pb=piombo
Questo apparecchio è etichettato in conformità alla
Direttiva UE sullo smaltimento delle apparecchiature
elettriche ed elettroniche (WEEE).
Questo prodotto non deve essere smaltito insieme ai
rifiuti domestici. Il consumatore è tenuto a consegnare
il vecchio apparecchio presso un punto di raccolta per lo
smaltimento di apparecchiature elettriche ed elettroni-
che ai fini di uno smaltimento ecologico.
8. Dati tecnici
Minuti: fino a 99
Secondi: fino a 59
Dimensioni esterne 60 x 21 x 70 mm
Peso: 60 g (solo apparecchio)
TFA Dostmann GmbH & Co. KG, Zum Ottersberg 12, D-97877 Wertheim.
È vietata la pubblicazione delle presenti istruzioni o di parti di esse senza una pre-
cedente autorizzazione della TFA Dostmann. I dati tecnici corrispondono allo
stato del prodotto al momento della stampa e possono cambiare senza preavviso.
www.tfa-dostmann.de 04/12
Timer e cronometro
Vi ringraziamo per aver scelto l'apparecchio della TFA.
1. Prima di utilizzare l'apparecchio
•Leggete attentamente le istruzioni per l'uso.
•Seguendo le istruzioni per l'uso, eviterete anche di danneggiare
il dispositivo e di pregiudicare, a causa di un utilizzo scorretto, i
diritti del consumatore che vi spettano per legge.
•Decliniamo ogni responsabilità per i danni derivanti dal mancato
rispetto delle presenti istruzioni per l'uso.
•Prestate particolare attenzione alle misure di sicurezza!
•Conservate con cura queste istruzioni per l'uso!
2. Tutte le applicazioni e tutti i vantaggi del vostro nuovo
apparecchio
• Timer e cronometro con tasti a sensore
• Visualizzazione di minuti e secondi
• Con segnale acustico
• Mass. 99 min e 59 sec.
• Con calamite e supporto (pieghevole)
3. Per la vostra sicurezza
• Il prodotto è adatto esclusivamente agli utilizzi di cui sopra. Non
utilizzate il prodotto in maniera diversa da quanto descritto in
queste istruzioni.
• Non sono consentite riparazioni, alterazioni o modifiche non
autorizzate del dispositivo.
• Questo apparecchio non è adatto a scopi medici né per dimostra-
zioni pubbliche ma è destinato esclusivamente ad un uso privato.
Avvertenza!
Pericolo di lesioni:
•
Tenere il dispositivo e le batterie lontano dalla portata dei bambini.
• Non gettare le batterie nel fuoco, non polarizzarle in maniera
scorretta, non smontarle e non cercare di ricaricarle. Pericolo di
esplosione!
• Le batterie contengono acidi nocivi per la salute. Sostituire quan-
to prima le batterie quasi scariche, in modo da evitare che si sca-
richino completamente. Non utilizzate mai contemporaneamen-
te batterie usate e batterie nuove né batterie di tipi diversi.
Quando si maneggiano batterie esaurite indossare sempre guan-
ti resistenti alle sostanze chimiche e occhiali di protezione.
Avvertenze sulla sicurezza del prodotto!
• Non esporre l'apparecchio a temperature estreme, vibrazioni e
urti.
• Proteggere dall’umidità.
4. Uso
• Ribaltare il supporto e far scorrere il vano batteria verso il basso
(vedi simbolo).
• Piegare il supporto e inserire due batterie nuove AAA da 1,5 V,
osservando la corretta polarità.
• Ribaltare il supporto di nuovo e collocare il coperchio della bat-
teria.
• Sul display vengono visualizzati 00 (M) e 00 (S).
• L'apparecchio è pronto per l'uso.
4.1 Timer
• Premete il tasto MIN per impostare i minuti (mass. 99).
• Premete il tasto SEC per impostare i secondi (mass. 59).
• Si sente un breve segnale acustico quando si preme.
• Tenere premuto il tasto MIN o SEC in modalità impostazione per
procedere velocemente.
• Premete il tasto START/STOP.
• M e S lampeggiano e comincia il conteggio.
• Azionando il tasto START/STOP si può arrestare o avviare il timer.
• Trascorso il tempo, il display lampeggia e viene emesso un segna-
le di allarme (ca. 60 secondi).
• Premete il tasto START/STOP per spegnere la sveglia.
• Appare automaticamente il tempo selezionato.
• Azionando il tasto START/STOP si può avviare il timer.
• Tenendo premuto contemporaneamente il tasto MIN e SEC il
display viene azzerato.
Istruzioni per l'uso
Gebruiksaanwijzing
Instrucciones de uso
Kat. Nr. 38.2027Kat. Nr. 38.2027Kat. Nr. 38.2027
Timer e cronometro
Timer en stopwatch
Hartelijk dank dat u voor dit apparaat van de firma TFA hebt geko-
zen.
1. Voor u met het apparaat gaat werken
• Leest u a.u.b. de gebruiksaanwijzing aandachtig door.
•Door rekening te houden met wat er in de handleiding staat,
vermijdt u ook beschadigingen van het apparaat en riskeert u
niet dat uw wettelijke rechten bij gebreken niet meer gelden
door verkeerd gebruik.
•
Voor schade die wordt veroorzaakt doordat u geen rekening
houdt met de handleiding aanvaarden wij geen aansprakelijkheid.
•Neem in elk geval acht op de veiligheidsinstructies !
•Bewaar deze instructies a.u.b. goed!
2. Hoe u uw nieuw apparaat kunt gebruiken en alle voorde-
len ervan in één oogopslag
• Timer en stopwatch met sensor toetsen
• Aanwijzing minuten en seconden
• Met alarmtoon
• Tot 99 min. en 59 sec.
• Met magneten en standaard (uitklapbaar)
3. Voor uw veiligheid
• Het produkt is uitsluitend geschikt voor de hierboven beschreven
doeleinden. Gebruik het produkt niet anders dan in deze hand-
leiding is aangegeven.
• Het eigenmachtig repareren, verbouwen of veranderen van het
apparaat is niet toegestaan.
• Het apparaat is niet geschikt voor medische doeleinden of voor
openbare informatie, maar bestemd voor particulier gebruik.
Voorzichtig!
Kans op letsel:
• Bewaar het apparaat en de batterijen buiten de reikwijdte van
kinderen.
• Batterijen niet in het vuur gooien, niet kortsluiten, niet uit elkaar
halen of opladen. Kans op explosie!
• Batterijen bevatten zuren die de gezondheid schaden. Zwakke
batterijen moeten zo snel mogelijk worden vervangen om lekka-
ge van de batterijen te voorkomen. Gebruik nooit tegelijkertijd
oude en nieuwe batterijen of batterijen van een verschillend
type. Draag keukenhandschoenen die bestand zijn tegen chemi-
caliën en een beschermbril wanneer u met uitgelopen batterijen
hanteert!
Belangrijke informatie over de produktveiligheid!
• Stel het apparaat niet bloot aan extreme temperaturen, trillin-
gen en schokken.
• Tegen vocht beschermen.
4. Bediening
• Klap de staander uit en schuif het batterijdeksel naar beneden
(zie marking).
• Klap de staander dicht en plaats er twee nieuwe batterijen in (2 x
1,5 V AAA). Batterijen met de juiste poolrichting plaatsen.
• Klap de staander terug uit en plaats het batterijdeksel er weer in.
• 00 (M) en 00 (S) verschijnen op het display.
• Het apparaat is nu bedrijfsklaar.
4.1 Timer
• Druk op de MIN toets, en u kunt de minuten instellen (max. 99
minuten).
• Druk op de SEC toets, en u kunt de seconden instellen (max. 59
seconden).
• U hoort een kort signaal wanneer u op de toets drukt.
• Als u de MIN of SEC toets ingedrukt houdt, komt u in de snelloop.
• Druk op de START/STOP toets.
• M en S knipperen en de telling beginnt.
• Met de START/STOP toets kunt u de telling ook laten stoppen of
overnieuw laten beginnen.
• Na afloop van de ingestelde tijd, knippert het display en u hoort
een alarmsignaal (ca. 60 minuten).
• Druk op de START/STOP toets en u kunt het alarm beëindigen.
• De laatst gezette tijd verschijnt automatisch weer.
• Met de START/STOP toets kunt u de telling overnieuw laten
beginnen.
RoHS
TFA_No_38.2027_Anleit_I_NL_E 18.04.2012 10:34 Uhr Seite 1
Product specificaties
| Merk: | TFA |
| Categorie: | Niet gecategoriseerd |
| Model: | 38.2027 |
| Kleur van het product: | Wit |
| Gewicht verpakking: | 60 g |
| Breedte verpakking: | 90 mm |
| Diepte verpakking: | 21 mm |
| Hoogte verpakking: | 70 mm |
| Materiaal behuizing: | Kunststof |
| Accu/Batterij voltage: | 1.5 V |
| Ondersteund aantal accu's/batterijen: | 2 |
| Aantal per verpakking: | 1 stuk(s) |
| Timer duur: | 99 min |
| Type product: | Digitale kookwekker |
| Type batterij: | AAA |
Heb je hulp nodig?
Als je hulp nodig hebt met TFA 38.2027 stel dan hieronder een vraag en andere gebruikers zullen je antwoorden
Handleiding Niet gecategoriseerd TFA
4 Augustus 2025
14 Juli 2025

27 Maart 2025

4 Maart 2025

4 Maart 2025
25 Februari 2025

25 Februari 2025

11 December 2024

11 December 2024

11 December 2024
Handleiding Niet gecategoriseerd
- Umarex
- QSC
- Labpano
- E.ziclean
- Hamax
- Corberó
- Quersus
- Tesseract Modular
- Weller
- Axxess
- ChargeHub
- Bernstein
- Danfoss
- Edouard Rousseau
- JL Cooper
Nieuwste handleidingen voor Niet gecategoriseerd
15 September 2025
15 September 2025

15 September 2025

15 September 2025
15 September 2025

15 September 2025

15 September 2025

15 September 2025
15 September 2025
15 September 2025