Sunding SD-558A Handleiding
Sunding Fietscomputer SD-558A
Bekijk gratis de handleiding van Sunding SD-558A (2 pagina’s), behorend tot de categorie Fietscomputer. Deze gids werd als nuttig beoordeeld door 20 mensen en kreeg gemiddeld 4.4 sterren uit 6 reviews. Heb je een vraag over Sunding SD-558A of wil je andere gebruikers van dit product iets vragen? Stel een vraag
Pagina 1/2
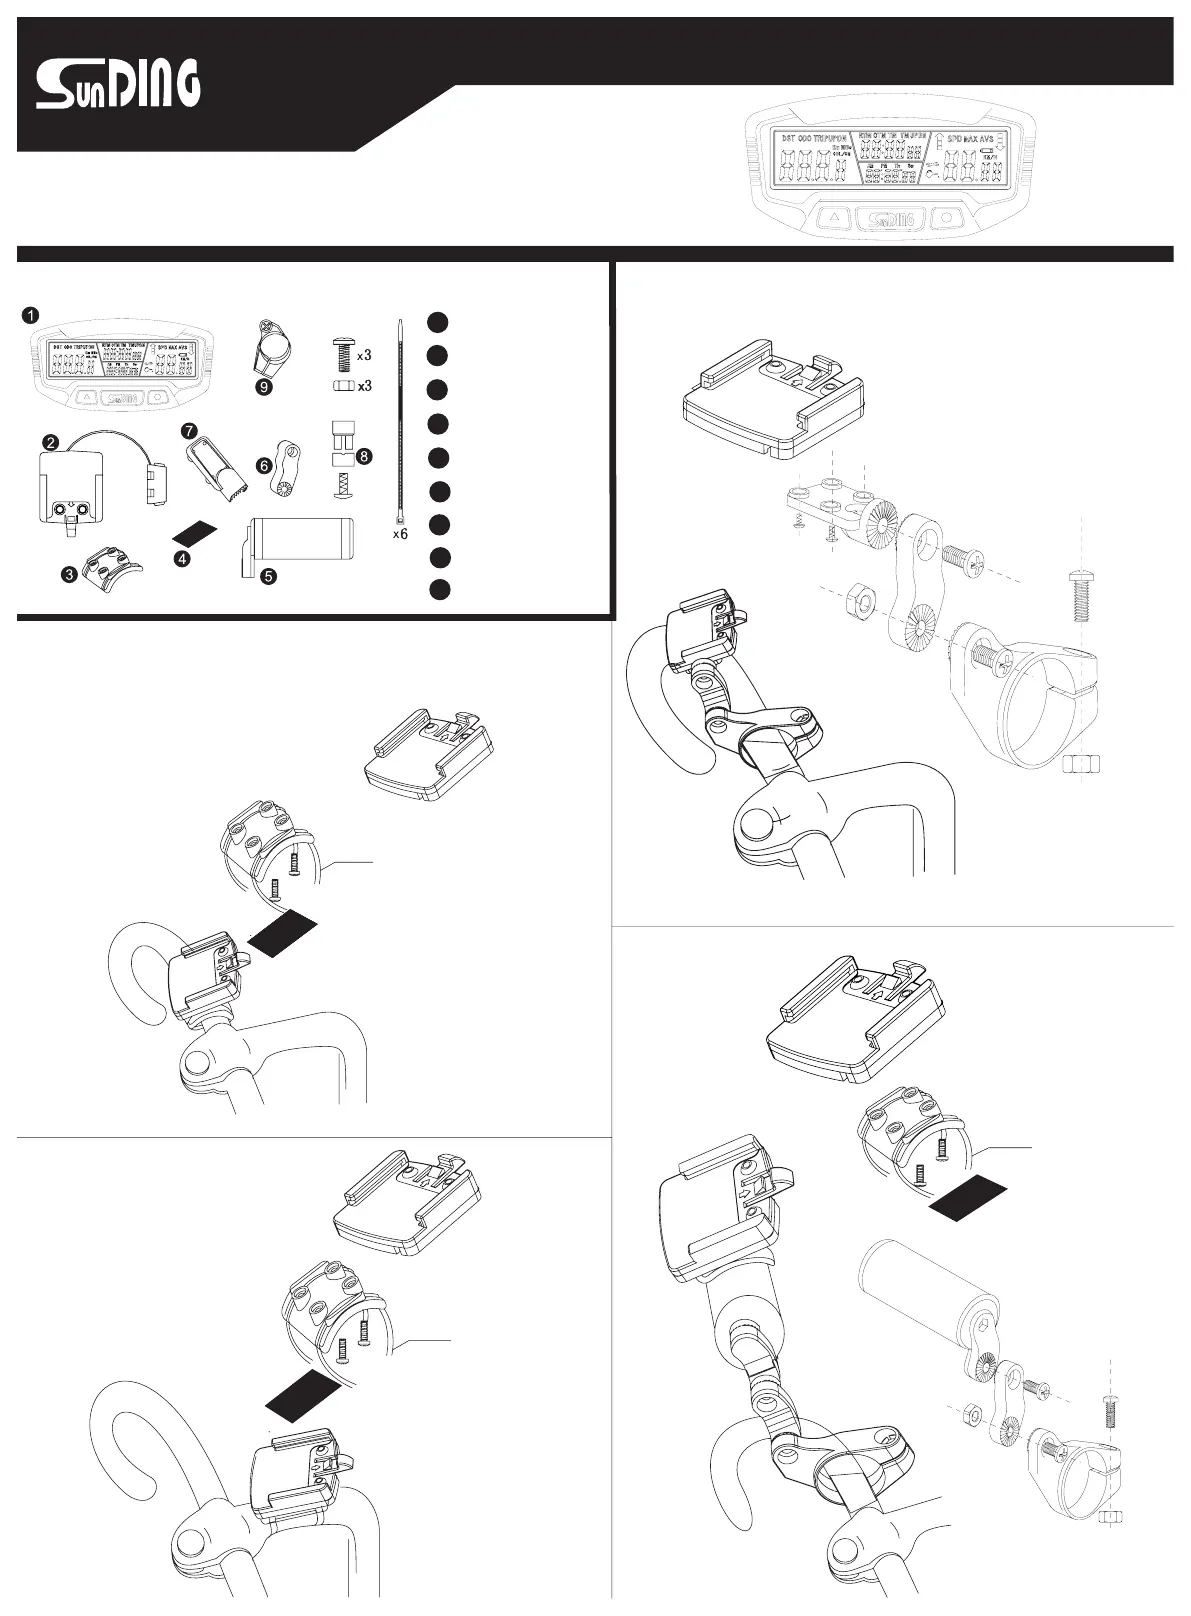
SD-558A Installation
Computerandaccessories:
1
2
3
4
5
6
Computer
Mountingshoe
Fixedshoe
Spongesticker
Fixedrings
Connectionbar
7
8
9
Bridgebar
Magnetcover
Lockbar
Installationofmountingshoe:
Caution:The mounting shoe and fixed shoe is already
installed and with sponge sticker.
Youcanintalledthembyfour
differentways.Therightis
The 1st way:
Mounting shoe
Fixed shoe
Ties
Spongesticker
The 2nd way:
Mounting shoe
Fixed shoe
Sponge sticker
Ties
The4thway:
Mounting shoe
Fixed shoe
Sponge sticker
Ties
The3rdway:
Mounting shoe
www.sunding.com
Product specificaties
| Merk: | Sunding |
| Categorie: | Fietscomputer |
| Model: | SD-558A |
Heb je hulp nodig?
Als je hulp nodig hebt met Sunding SD-558A stel dan hieronder een vraag en andere gebruikers zullen je antwoorden
Handleiding Fietscomputer Sunding

25 Augustus 2025
22 April 2025
22 April 2025
8 Juli 2023
7 Juli 2023
6 Juli 2023
5 Juli 2023
5 Juli 2023
4 Juli 2023
3 Juli 2023
Handleiding Fietscomputer
Nieuwste handleidingen voor Fietscomputer
23 Juli 2026
20 Juli 2026
14 Juni 2026
15 Mei 2026
11 Mei 2026
16 Maart 2026
15 Maart 2026
14 Maart 2026
5 December 2025
23 September 2025