Soundmaster UR170WE Handleiding
Soundmaster
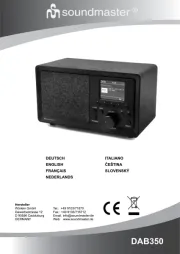
Radio
UR170WE
Bekijk gratis de handleiding van Soundmaster UR170WE (7 pagina’s), behorend tot de categorie Radio. Deze gids werd als nuttig beoordeeld door 47 mensen en kreeg gemiddeld 4.8 sterren uit 24 reviews. Heb je een vraag over Soundmaster UR170WE of wil je andere gebruikers van dit product iets vragen? Stel een vraag
Pagina 1/7

'(876&+ ,7$/$1,2
(1*/,6+ 1256.
)5$1d$,6 69(16.
1('(5/$1'6
856:85:(
+HUVWHOOHU
:|UOHLQ*PE+ 7HO
*HZHUEHVWUDVVH )D[
'&DGRO]EXUJ (PDLOLQIR#ZRHUOHLQFRP
*(50$1< :HEZZZZRHUOHLQFRP

This symbol indicates the presence of dangerous
voltage inside the enclosure, sufficient enough to
cause electric shock.
This symbol indicates the presence of important
operating and maintenance instructions for the
device.
Safety, Environmental and Setup Instructions
• Use the device in dry indoor environments only.
• Protect the device from humidity.
• Do not open the device. Refer opening and servicing to qualified personnel. RISK OF ELECTRIC SHOCK!
• Connect this device to a properly installed and earthed wall outlet only. Make sure the mains voltage corresponds with
the specifications on the rating plate.
• Make sure the mains cable stays dry during operation. Do not pinch or damage the mains cable in any way.
• A damaged mains cable or plug must immediately be replaced by an authorized service center.
• In case of lightning, immediately disconnect the device from the mains supply.
• Children should be supervised by parents when using the device.
• Clean the device with a dry cloth only.
Do NOT use CLEANING AGENTS or ABRASIVE CLOTHS!
• Do not expose the device to direct sunlight or other heat sources.
• Install the device at a location with sufficient ventilation in order to prevent heat accumulation.
• Do not cover the ventilation openings!
• Install the device at a safe and vibration-free location.
• Install the device as far away as possible from computers and microwave units; otherwise radio reception may be
disturbed.
• Do not open or repair the enclosure. It is not safe to do so and will void your warranty. Repairs only by authorized
service/ customer center.
• Only use mercury and cadmium-free batteries.
• Used batteries are hazardous waste and NOT to be disposed of with the household waste!!!
Return the batteries to your dealer or to collection points in your community.
• Keep batteries away from children. Children might swallow batteries.
Contact a physician immediately if a battery was swallowed.
• Check your batteries regularly to avoid battery leakage.
• Batteries shall not be exposed to excessive heat such as sunshine, fire or the like.
• CAUTION: Danger of explosion if battery is incorrectly replaced
Replace only with the same or equivalent type
ENVIRONMENTAL PROTEC
TION
Do not dispose of this product with the normal household waste at the end
of its life cycle. Return it to a collection point for the recycling of electrical
and electronic devices. This is indicated by the symbol on the product,
user manual or packaging.
The materials are reusable according to their markings. By reusing, recycling or
other forms of utilization of old devices you make an important contribution to
the protection of our environment.
Please contact your local authorities for details about collection points.
WARNING
Risk of electric shock
Do not open
!
Caution: To reduce the risk of electric shock, do not remove the
cover (or back). There are no user serviceable parts inside. Refer
servicing to qualified service personnel.

UK-1
FEATUR ES
AND
CONTROLS
FEATURES AND CONTROLS 1. SPEAKER
1 2. SCROLL BUTTON
3. MEMORY BUTTON
4. SELECT BUTTON
5. STANDBY/ON BUTTON
6.
7.
MODE BUTTON
BACKLIGHT BUTTON
8. SNOOZE BUTTON
9. INFO BUTTON
2
3
4
5 6 7 8 9 10 11 12
17 18
15
14
13
16
10. MENU BUTTON
11. SLEEP BUTTON
12. MUTE BUTTON
13. ALARM 1 BUTTON
14. ALARM 2 BUTTON
15. VOLUME BUTTON
16. LCD DISPLAY
17. AC CORD
18
.
WIRE ANTENNA
LISTENIN G
TO
YOUR
RADIO
Hints for better
reception
This radio carries a single DAB/FM lead wire antenna, to obtain the best performance, you should fully
extend the wire antenna and adjust the position as well as the direction until you find the best reception.
For ideal DAB reception, always maintain the lead wire antenna in a vertical position (holding it upward or
downward behind the unit) is highly recommended.
Getting
started
When the radio is connected to the AC power for the first time, it will be in standby mode. The display
backlight will be on for a few seconds and the clock will be finally displayed. Press the STANDBY/ON
button once to turn the radio on, it will then automatically enter into the DAB mode and perform auto scan
function. During the scan the display will show g together with a slide bar that indicates the ³6FDQQLQ «´
progress of the scan and the amount of stations that have been found so far. (F. 1) (F. 2)
Once the scan has finished, the radio will select the first alphanumerically found station. You can now
press the or button to explore the found stations and then press the SELECT button to select your Ÿ ź
station.
F1 F2
Note: If there is no stations found after auto scan, the radio will then enter into the Tune Select Menu, you
can now press the / buttons followed by pressing the SELECT button to select l tune orŸ ź ³0DQXD ´
³$XWRVFD Q´ for stations.
Clock
setting
The clock will only set and be updated if you can receive DAB signals in your location. In order for the
clock to synchronise to the current local time, you must leave it one DAB station for a short period. Manual
clock setting is not required.
DAB auto
scan
The auto scan will search for the entire DAB Band III channels. After the scan has finished, the first
alphanumerically found station will be automatically selected.
1. To activate auto scan, first press the MENU button to enter into the Tune Select Menu and then press
the or button to select , finally press the SELECT button to confirm, the display will Ÿ ź ³$XWR VF DQ´
show g and a progressing slide bar.(F. 3)³6FDQQ LQ «´
2. All the stations that have been found will be stored automatically, to explore the stations that have
been found, press the or buttons and when you find a station that you would like to listen to,Ÿ ź
Product specificaties
| Merk: | Soundmaster |
| Categorie: | Radio |
| Model: | UR170WE |
| Kleur van het product: | Silver, White |
| Ingebouwd display: | Ja |
| Gewicht: | 550 g |
| Breedte: | 149 mm |
| Diepte: | 139 mm |
| Hoogte: | 62 mm |
| Geïntegreerde klok: | Ja |
| Stroombron: | AC |
| Land van herkomst: | China |
| Snooze functie: | Ja |
| Ingebouwde luidsprekers: | Ja |
| Gemiddeld vermogen: | 1 W |
| Volumeregeling: | Digitaal |
| Certificering: | CE |
| Geluidsalarm(en): | Ja |
| Soort tuner: | Digitaal |
| Wekker: | Ja |
| Backlight: | Ja |
| Backlight-kleur: | Blauw |
| Inclusief dockingstation: | Nee |
| Thermometer: | Nee |
| MP3 afspelen: | Nee |
| Ondersteunde frequentiebanden: | DAB+, FM |
| Aantal voorkeurszenders: | 10 |
| Radio: | Klok |
| Projectie: | Nee |
| Apple docking-compatibiliteit: | Niet ondersteund |
| Dimbaar: | Ja |
| FM-band: | 87.5 - 108 MHz |
| Aantal alarmen: | 2 |
| Hoorbaar alarmtype: | Radio/Zoemer |
| Kleuring: | Monochromatisch |
| PLL-synthesizer: | Ja |
| DAB III band bereik: | 174 - 240 MHz |
| AC-ingangsspanning: | 100 - 240 V |
| AC-ingangsfrequentie: | 50 / 60 Hz |
| Slaaptimer: | Ja |
| Type beeldscherm: | LCD |
| Duur timer (max): | 90 min |
| Timerduur (minimum): | 10 min |
Heb je hulp nodig?
Als je hulp nodig hebt met Soundmaster UR170WE stel dan hieronder een vraag en andere gebruikers zullen je antwoorden
Handleiding Radio Soundmaster

20 Februari 2025
15 Januari 2025

17 Juni 2024

27 Juli 2023

15 Juni 2023

15 Juni 2023

7 Juli 2023

20 Juni 2023

15 Juni 2023

12 Juni 2023
Handleiding Radio
- SW-Stahl
- TFA Dostmann
- Naxa
- Sunwind
- Caliber
- Pyle
- Terratec
- Audac
- La Crosse Technology
- Tangent
- Adler
- Whistler
- Festool
- Zebra
- JL Audio
Nieuwste handleidingen voor Radio
3 Augustus 2025
29 Juli 2025
29 Juli 2025
29 Juli 2025
29 Juli 2025
29 Juli 2025
28 Juli 2025

28 Juli 2025
28 Juli 2025
28 Juli 2025