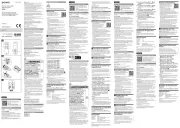
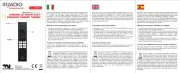
Sony RM-V201 Handleiding
Sony
Afstandsbediening
RM-V201
Bekijk gratis de handleiding van Sony RM-V201 (3 pagina’s), behorend tot de categorie Afstandsbediening. Deze gids werd als nuttig beoordeeld door 166 mensen en kreeg gemiddeld 4.6 sterren uit 83.5 reviews. Heb je een vraag over Sony RM-V201 of wil je andere gebruikers van dit product iets vragen? Stel een vraag
Pagina 1/3

For the customers in the U.S.A.
WARNING
This equipment has been tested and found to comply with the limits
for a Class B digital device, pursuant to Part 15 of the FCC Rules.
These limits are designed to provide reasonable protection against
harmful interference in a residential installation. This equipment
generates, uses, and can radiate radio frequency energy and, if not
installed and used in accordance with the instructions, may cause
harmful interference to radio communications. However, there is
no guarantee that interference will not occur in a particular
installation. If this equipment does cause harmful interference to
radio or television reception, which can be determined by turning
the equipment off and on, the user is encouraged to try to correct the
interference by one or more of the following measures:
• Reorient or relocate the receiving antenna.
• Increase the separation between the equipment and receiver.
• Connect the equipment into an outlet on a circuit different from
that to which the receiver is connected.
• Consult the dealer or an experienced radio/TV technician for help.
You are cautioned that any changes or modifications not expressly
approved in this manual could void your authority to operate this
equipment.
Setting Up the Remote Commander
About Presetting the Commander
The Commander is preset at the factory to operate Sony brand
components.
If you’re using the Commander with a Sony component, you won’t
need to preset the Commander before you start using it.
To set up the Commander to use with other (non-Sony)
manufacturers’ components, or to use with a component that is not
preset at the factory, you’ll need to follow the instructions in this
manual to preset the Commander with the correct code number for
your components. (See the supplied “Component Code Numbers”
also.)
Notes
• The Commander can be set up to operate only one component per
button – unless their code numbers happen to be the same. For
example, you cannot set up the Commander to operate a Sony TV
and a Panasonic TV simultaneously (because they use different
code numbers).
• You may not be able to operate even a Sony brand component with
the factory presetting. In such a case, follow the procedure in
“Setting the Code.”
Installing the Batteries
Slide open the battery compartment and insert two size AA (R6)
batteries (not supplied).
Be sure to line up the + and – on the batteries with the + and – on the
battery compartment.
1 2
When to replace the batteries
Under normal conditions, batteries will last up to 6 months. If the
Commander does not operate properly, the batteries might be worn
out. Replace the batteries with new ones.
Notes
• Replace both batteries with new ones.
• Do not take more than 20 minutes to replace the batteries;
otherwise, your setting of the code numbers will be erased.
Notes on Batteries
• Do not mix old batteries with new ones or mix different types of
batteries together.
• If the electrolyte inside the battery should leak, wipe the
contaminated area of the battery compartment with a cloth and
replace the old batteries with new ones. To prevent the electrolyte
from leaking, remove the batteries when you plan not to use the
Commander for a long period of time.
Setting the Code
Follow the steps 1 and 2 below for each component you plan to use
with the Commander.
Step 1: Entering the Code Number
1 See the supplied “Component Code numbers”, and find the three-
digit code number for the desired component.
If more than one code number is listed, use the number that’s
listed first to complete the steps below.
For example, if you’re setting up a Philips’ VCR, you would use
the code number 035.
If your component isn’t listed, see “Searching for the Correct
Code.”
2 Press and release the S (set) button.
S
3 Press the button of the component that you want to set up.
TV VCR DVD
CBL/SAT
Note
On the and buttons, “cable box”, and “DVD player”CBL/SAT DVD
are assigned respectively at the factory. But you can also assign other
components on these buttons. For details, see “Changing the
Component Type on the CBL/SAT and DVD buttons.”
4 Enter the component’s code number. For example, if you’re
entering the code for a Philips VCR, you would press .-35
5 Press and release the ENT button to store the code number in the
Commander’s memory.
ENT
6 Go to “Step 2: Checking if the Code Number Works” to finish
setting up.
If you press a wrong button in step 4
Press and release the (set) button and then go back to step 3.S
Step 2: Checking if the Code Number Works
1 Power on the component you want to set up.
2 Aim the Remote Commander at the component and press a button
to check if that button works.
For example, press the button to see if it works on yourPOWER
component .
3 Check that the other buttons of the Commander is operating the
corresponding functions of the component.
If the Commander Doesn’t Seem to Be Working...
• First, try repeating these setup procedures using the other codes
listed for your component (see the supplied “Component Code
Numbers”).
• If – after trying all the codes listed for your component – you still
cannot get the Commander to work properly, try the search
method described in “Searching for the Correct Code.”
Tip
You can write down the code number on the label inside the battery
compartment lid.
Searching for the Correct Code
If you’ve tried all the code numbers listed for your component and
you still cannot get the Commander to work (or if your component is
not listed in the “Component Code Numbers” tables), try these
steps.
1 Power on the component you want to set up. Insert a tape or disc
if necessary.
2 Press and release the S (set) button.
3 Press the button of the component on the Commander that you
want to set up.
4 Press and release the CH+ button. Then press and release the
POWER button.
5 Repeat step 4 until the correct code number is found.
Each time you press the button and then the CH+ POWER button,
a new code number will be transmitted.
Keep trying until your component operates by receiving the
transmitted signal from the Commander (e.g., the power turns off,
the CH+ function works, playback starts, etc.) Be patient as you do
this; it may take about 70 tries until the correct code number is
located.
6 When the correct code is found, press the ENT button to store the
code number in the Commander’s memory.
7 Check that the Commander is operating the other functions of
your component by pressing the corresponding buttons on the
Commander. If they seem to be working properly, you’re done
setting up the Commander.
If the component does not operate properly, repeat steps 1 to 6 and
search for another code.
If you still cannot get the Commander to work properly, see
“Troubleshooting.”
Changing the Component Type on the CBL/
SAT and DVD buttons
At the factory, “cable box” is assigned on the CBL/SAT button and
“DVD player” on the button. By completing the followingDVD
procedure, you can change this setting so that you can set up any
component on these buttons.
1 Press the S (set) button and release it.
2 Press the CBL/SAT DVD or button.
3 Press and release the x (stop) button.
4 Press and release one of the following buttons;
1 to assign a VCR
3 to assign a digital satellite receiver
8 to assign a TV
9 to assign a cable box
- to assign a DVD player
5 Press and release the ENT button.
6 Enter the component’s code number by following steps 2 to 6 of
“Entering the Code Number”, or steps 1to 7 of “Searching for the
Correct Code.”
Operating a Component
1 Press the button of the desired component on the Commander.
TV VCR DVD
CBL/SAT
2 Point the Commander directly at the component.
3 Press the button for the function you want to use.
See “Remote Button Descriptions” for complete descriptions of the
buttons on the Commander.
Notes on Using the Remote Commander
Basically, use this Commander in the same way as the Commanders
supplied with your components.
• Using this Commander will not increase the functions of your
components. The functions of the Commander are limited to the
functions of the components themselves. For example, if your TV
does not have a MUTING function, the button on thisMUTING
Commander will not function with your TV.
• Some functions of the component may not work with this
Commander.
• If your cable box can control volume, be sure to set its volume
switch to a medium position. If the volume on the cable box is
turned down completely, you will not be able to adjust your TV’s
volume with the Commander.
Component that can be preset
TV
VCR
Cable box/Digital satellite receiver/
DVD player/TV/VCR
Button
TV
VCR
CBL/SAT
DVD
Factory setting
Sony TV
Sony VHS VCR
—
Sony DVD player
English
3-230-686- (1)11
Remote Commander RM-V201
Operating Instructions
Manual de instrucciones (parte posterior)
Sony Corporation © 2001 Printed in China
Operating a DVD player
3 To select numbers 10 and
above. For example, to select
track 15, press and thenPIP
press .5
4 N: To play.
m: To rewind.
M: To fast-forward.
x: To stop.
X: To pause.
5 To display the title menu.
6 To change the sound.
7 To show the current play status
on the screen.
8 To move the cursor upward,
downward, to the left, or to the
right.
Specifications
Operable distance Approx. 7 m (23 ft) (varies depending of the
component of each manufacturer)
Power requirements Two size AA (R6) batteries (not supplied)
Battery life Approx. 6 months (varies depending on frequency of
use)
Dimensions Approx. 51.8 × 195 × 31 mm (w/h/d)
(2 1/ 8× 7 3/ 4× 1 1/4 in.)
Mass Approx. 100 g (3.5 oz.) (not including batteries)
Design and specifications are subject to change without notice.
Troubleshooting
If you have problems setting up or using the Commander:
• When setting up the Commander, carefully go through the procedures
described in “Setting the Code.” If the code that’s listed first for your
component doesn’t work, try all the codes for your component - in the order
in which they’re listed. If all the codes fail to work (or if your component is
not listed in this manual), try using the procedures in “Searching for the
Correct Code.”
• Check that you’re aiming the Commander directly at the component, and that
there are no obstructions between the Commander and the component.
• Make sure the batteries you’re using are not worn out, and that they’re
inserted correctly.
• Check that the button of the , , TV VCR CBL/SAT, or DVD is pressed to choose
your desired component.
• Check that the component has infrared remote capability. For example, if
your component didn’t come with a remote commander, it probably isn’t
capable of being controlled by a remote commander.
• Should any problem persist, reset the Commander to the factory setting by
pressing the buttons simultaneously.POWER TV VIDEO, / and VOL–
For the customers in the U.S.A.
Customer Support Information
If – after you’ve read through this manual – you still cannot get the
Remote Commander to work properly, call the Sony Customer
Support Helpline at 1-800-822-2217.
Operating a TV, VCR, or cable box
3 4 5, , and
TV: To operate the Picture-in-
Picture function. Press each
button or combination of
buttons as described in the
table below.
VCR:
N: To play.
x: To stop.
m: To rewind.
M: To fast-forward.
z NREC: To record, press
while pressing z.
6 TV: To change the input mode.
VCR: To switch the antenna
output.
7 TV: To display the current
channel on TV.
VCR: To expose the on-screen
display.
8 TV/VCR: To move the cursor
upward, downward, to the left,
or to the right.
9 TV/VCR: To call up the MENU
display.
qd and qf
To change the channel. For
example, to change to channel
5, press 0 and (or press and5 5
ENT).
qh TV: To operate SLEEP function
on the TV. (Works only for a
TV with the SLEEP function.)
VCR: To change the input
mode.
qj TV/VCR: To enter the selection.
qk Channel up: +
Channel down: –
ql TV/cable box: To operate
JUMP FLASHBACK, or
CHANNEL RETURN function on
the TV depending on the
setting of the TV’s
manufacturer.
Notes
• There may be cases you may turn on/off the cable box by pressing the CH+ or
CH– buttons on the Commander.
• If your cable box can control volume, be sure to set its volume control to a
medium position. If the volume on the cable box is turned down completely,
you will not be able to adjust your TV’s volume with the Commander.
PIP operations
Press To
PIP Turn on/off the “window” picture.
GUIDE Turn off the “window” picture.
m M or Change the TV channel in the “window” picture.
z Change the input mode of the “window” picture.
x Move the location of the “window” picture.
N Swap the “main” picture and the “window” picture.
X Freeze the “window” picture.
9 To display the DVD menu.
qd Number buttons : To set items
selected from the screen.
qf To enter the setting. To set
items selected from the screen.
qg To clear the selected characters
from the screen.
qh To switch the subtitle.
qj To execute items selected from
the screen.
qk To proceed to next/previous
location or song.
ql To return to the last previous
screen.
RM-V201
MUTING
VOL CH
RECALL
TV/VIDEO
DISP
TV
S
VCR DVD
POWER
CBL/SAT
REC
PIP ENT
SLEEP GUIDE
MENU OK
1
2
9
0
qa
8
7
5
6
4
3
qs
qd
qf
qg
qh
qj
ql
qk
Operating a digital satellite receiver
3 To use the “FAVORITE”
function.
4 N: To exit the mode.
6 To switch the output of the
digital satellite receiver to the
TV. (When you connect a TV
cable or antenna to the receiver,
the output switches between a
TV and SAT program.)
8 To scroll through the Master
Guide.
9 To call up the MENU display.
qd and qf
To change the channel. For
example, to change to channel
5, press and (or press and0 5 5
ENT).
qg To bring up the Master Guide.
qh To bring up the Station Index.
qj To select the channel that’s
highlighted. To bring up the
Station Index when a program
guide is not displayed.
qk Channel up: +
Channel down: –
To page through the guide
when a program guide is
displayed.
ql To tune to the last tuned
station.
Remote Button Descriptions
General
1 To set up the Commander.
2 Component select buttons.
To switch to the operations
of each component, press
the button on which that
component is assigned.
q; Volume up: +
Volume down: –
qa To mute the volume on TV.
qs To turn on and off the
power of the selected
component.


Cuándo reemplazar las pilas
En condiciones normales, las pilas durarán hasta 6 meses. Si el
telemando no funciona adecuadamente, es posible que las pilas estén
agotadas. Reemplace las pilas por otras nuevas.
Notas
• Reemplace ambas pilas por otras nuevas.
• No tarde más de 20 minutos en reemplazar las pilas, porque de lo
contrario su ajuste de números de código se borrará.
Notas sobre las pilas
• No mezcle una pila nueva con otra vieja, ni dos de tipos diferentes.
• Si se fuga el electrólito de las pilas, limpie la parte contaminada del
compartimiento de las pilas con un paño y reemplace las pilas
viejas por otras nuevas. Para evitar la fuga del electrólito, extraiga
las pilas cuando no vaya a utilizar el telemando durante mucho
tiempo.
Programación del código
Realice los pasos 1 y 2 siguientes para cada componente que planee
utilizar con el telemando.
Paso 1: Introducción del número de código
1 Consulte los “Números de código de componentes”
suministrados, y busque el número de código de tres cifras para el
componente deseado.
Si hay más de un número de código en la lista, utilice el primero
de ellos para completar los pasos siguientes.
Por ejemplo, para una videograbadora Philips, utilice el número
de código 035.
Si su componente no está en la lista, consulte “Búsqueda del
código correcto.”
2 Presione y suelte la tecla S (ajuste).
S
3 Presione la tecla del componente que desee ajustar.
TV VCR DVD
CBL/SAT
Nota
En las teclas se han asignado respectivamente en laCBL/SAT y DVD
fábrica “adaptador para cablevisión” y “reproductor de discos
DVD”. Pero usted también podrá asignar otros componentes a estas
teclas. Con respecto a los detalles, consulte “Cambio del tipo de
componentes de las teclas CBL/SAT y DVD”.
4 Introduzca el número de código del componente. Por ejemplo,
para introducir el código para una videograbadora Philips,
presione .-35
5 Presione la tecla ENT para almacenar el número de código en la
memoria del telemando.
ENT
6 Para finalizar la programación, vaya al “Paso 2: Comprobación
del funcionamiento de un número de código.”
Si p2-ha presionado una tecla errónea en el paso 4
Presione y suelte el botón (ajuste), y después vaya al paso 3.S
Paso 2: Comprobación del funcionamiento de un
número de código
1 Conecte la alimentación del componente que desee ajustar.
2 Apunte con el telemando hacia el componente y presione una
tecla para comprobar si trabaja.
Por ejemplo, presione la tecla para ver si trabaja en suPOWER
componente.
3 Compruebe si las otras teclas del telemando controlan las
funciones correspondientes del componente.
Descripción de las teclas del telemando
General
1 Para programar el telemando.
2 Teclas selectoras de
componentes. Para cambiar a
las operaciones de cada
componente, presione la tecla
a la que haya asignado el
componente.
q; Para aumentar el volumen: +
Para reducir el volumen: –
qa Para silenciar el volumen del
televisor.
qs Para conectar y desconectar la
alimentación del componente
seleccionado.
3 4 5, , y
TV (Televisor): Para utilizar la
función de imagen en imagen.
Presione cada tecla, o
combinación de teclas, como se
describe en la tabla siguiente.
VCR (Videograbadora):
N: Para reproducir.
x: Para parar.
m: Para retroceder.
M: Para avanzar rápidamente.
z NREC: Para grabar, presione
manteniendo presionada
z.
6 TV: Cambio del modo de entrada.
VCR: Para cambiar la salida de
antena.
7 TV: Para hacer que se visualice el
canal actual en el televisor.
VCR: Para hacer que se visualicen
las indicaciones en pantalla.
8 TV/VCR: Para mover el cursor
hacia arriba, hacia abajo, hacia la
izquierda, o hacia la derecha.
Control de un televisor (TV), videograbadora (VCR) o
adaptador para cablevisión
9 TV/VCR: Para invocar la
visualización de MENU.
qd qf y
Para cambiar el canal. Por
ejemplo, para cambiar al canal 5,
presione 0 y 5 (o presione 5 y
ENT).
qh TV: Para controlar la función de
SLEEP (cronodesconexión) del
televisor. (Solamente trabajará si
el televisor posee tal función.)
VCR: Cambio del modo de
entrada.
qj TV/VCR: Para introducir la
selección.
qk Para pasar a canales superiores: +
Para pasar a canales inferiores: –
ql TV/adaptador para cablevisíon:
Para controlar la función de
cambio entre dos canales ( ,JUMP
FLASHBACK CHANNEL o
RETURN) del televisor,
dependiendo del ajuste del
fabricante de dicho televisor.
Si el telemando parece que no trabaja...
• En primer lugar, repita estos procedimientos de programación
utilizando los otros códigos de la lista para su componente
(consulte las tablas de “Números de código de componentes”).
• Si, después de haber probado todos los códigos de la lista para su
componente, el telemando sigue sin trabajar adecuadamente,
consulte el método de búsqueda descrito en “Búsqueda del código
correcto.”
Sugerencia
Usted podrá escribir el número de código en la etiqueta del interior
de la tapa del compartimiento de la batería.
Búsqueda del código correcto
Si p2-ha intentado todos los números de código de la lista para su
componente y el telemando sigue sin trabajar (o si sus componentes
no están indicados en las tablas de “Números de código de
componentes”), pruebe estos puntos.
1 Conecte la alimentación del componente que desee ajustar. Si es
necesario, inserte un cassette o un disco.
2 Presione y suelte la tecla S (ajuste).
3 Presione la tecla del componente que desee ajustar.
4 Presione y suelte la tecla . Después presione y suelte la teclaCH+
POWER.
5 Repita el paso 4 hasta que encuentre el número de código correcto.
Cada vez que presione la tecla y después la tecla , seCH+ POWER
transmitirá un nuevo número de código.
Continúe intentándolo hasta que su componente funcione al
recibir la señal transmitida desde el telemando (p. ej., se
desconecta la alimentación, la función de CH+ trabaja, se inicia la
reproducción, etc.). Tenga paciencia cuando realice esto, porque es
posible que tenga que realizar 70 intentos hasta encontrar el
número de código correcto.
6 Cuando encuentre el código correcto, presione la tecla ENT para
almacenar el número de código en la memoria del telemando.
7 Compruebe si el telemando controla las otras funciones de su
componente presionando las teclas correspondientes de dicho
telemando. Si parece trabajar correctamente, habrá finalizado el
preajuste del telemando.
Si el componente no funciona correctamente, repita los pasos 1 a 6 y
busque otro código.
Si el telemando sigue sin trabajar adecuadamente, consulte “Solución
de problemas.”
Cambio del tipo de componente de las
teclas CBL/SAT y DVD
En la fábrica “adaptador para cablevisión” se p2-ha asignado a la tecla
CBL/SAT DVD y el “reproductor de discos DVD ” en la tecla . Al
realizar el procedimiento siguiente es posible cambiar este ajuste de
forma que pueda ajustar cualquier componente con estos botones.
1 Presione y suelte la tecla S (ajuste).
2 Presione la tecla CBL/SAT DVD o .
3 Presione y suelte la tecla x (parada).
4 Presione y suelte una de las teclas siguientes;
1 para asignar una videograbadora
3 para asignar un sintonizador de recepción vía satélite digital
8 para asignar un televisor
9 para asignar un adaptador para cablevisión
- para asignar un reproductor de discos DVD
5 Presione y suelte la tecla ENT.
6 Introduzca el número de código del componente siguiendo los
pasos 2 a 6 de “Introducción del número de código”, o los pasos 1
a 7 de “Búsqueda del código correcto.”
Control de un componente
1 Presione la tecla correspondiente al componente deseado del
telemando.
TV VCR DVD
CBL/SAT
2 Apunte con el telemando directamente hacia el componente.
3 Presione la tecla correspondiente a la función que desee utilizar.
Con respecto a la descripción completa de las teclas del telemando,
consulte “Descripción de las teclas del telemando.”
Notas sobre la utilización del telemando
Básicamente, utilice este telemando de la misma forma que el
suministrado con sus componentes.
• La utilización de este telemando no aumentará las funciones de sus
componentes. Las funciones del telemando estarán limitadas a las
de los propios componentes. Por ejemplo, si su televisor no posee
función de silenciamiento (MUTING), la tecla de esteMUTING
telemando no trabajará con su televisor.
• Algunas funciones del componente pueden no trabajar con este
telemando.
• Si su adaptador para cablevisión puede controlar el volumen,
cerciórese de ajustar su selector de volumen a una posición
intermedia. Si redujese completamente el volumen del adaptador
para cablevisión, no podría ajustar el volumen de su televisor con
el telemando.
Para los clientes de EE. UU.
ADVERTENCIA
Este equipo p2-ha sido probado y se p2-ha encontrado que cumple con los
límites para dispositivos digitales de Clase B, de acuerdo con la Parte
15 de las normas de la FCC. Estos límites han sido diseñados para
proporcionar una protección razonable contra interferencias
perjudiciales en una instalación residencial. Este equipo genera,
utiliza, y puede radiar energía de radiofrecuencia y, si no se instala y
utiliza de acuerdo con las instrucciones, puede causar interferencias
perjudiciales en las radiocomunicaciones. Sin embargo, no existe
ninguna garantía de que tales interferencias no se produzcan en una
instalación particular. Si este equipo causa interferencias
perjudiciales, lo que podrá determinarse desconectando y volviendo
a conectar su alimentación, se ruega que el usuario corrija las
interferencias tomando una o más de las medidas siguientes:
• Reorientación o reubicación de la antena receptora.
• Aumento de la separación entre el equipo y el receptor.
• Conexión del equipo a un tomacorriente diferente del utilizado por
el receptor.
• Solicitud de ayuda al proveedor o a un técnico de radio/televisión
experimentado.
Tenga en cuenta que cualquier cambio o modificación no
expresamente aprobado en este manual puede anular su autoridad
para utilizar este equipo.
Preparación del telemando
Sobre el preajuste del telemando
El telemando p2-ha sido preajustado en fábrica para gobernar
componentes de marca Sony.
Si va a utilizar el telemando con componentes Sony, no necesitará
preajustarlo antes de comenzar a utilizarlo.
Para ajustar el telemando a fin de utilizarlo con componentes de
otros fabricantes (no Sony), o para usarlo con un componente que no
haya sido preajustado en fábrica, tendrá que seguir las instrucciones
de este manual para preajustar el telemando con los números de
código correctos para sus componentes. (Consulte también los
“Números de código de componentes” suministrados.)
Notas
• El telemando solamente podrá programarse para controlar a la vez
un componente por tecla, a menos que sus números de código sean
iguales. Por ejemplo, usted no podrá programar el telemando para
controlar un televisor Sony y otro Panasonic simultáneamente
(porque sus números de código son diferentes).
• Quizás no pueda gobernar un componente Sony con el preajuste de
fábrica. En tal caso, realice el procedimiento de “Programación del
código.”
Colocación de las pilas
Deslice y abra el compartimiento de las pilas, e inserte dos pilas de
tamaño AA (R6) (no suministradas).
Cerciórese de alinear + y – de las pilas con + y – del compartimiento
de las mismas.
1 2
Español
Componente a programar
Televisor
Videograbadora
Adaptador para cablevisión/
Sintonizador de recepción vía
satélite digital/Reproductor de
discos DVD/Televisor/
Videograbadora
Tecla
TV
VCR
CBL/SAT
DVD
Ajuste de fábrica
Televisor Sony
Videograbadora VHS Sony
—
Reproductor de discos
DVD Sony
RM-V201
MUTING
VOL CH
RECALL
TV/VIDEO
DISP
TV
S
VCR DVD
POWER
CBL/SAT
REC
PIP ENT
SLEEP GUIDE
MENU OK
1
2
9
0
qa
8
7
5
6
4
3
qs
qd
qf
qg
qh
qj
ql
qk
Notas
• Puede darse el caso de que resulte posible conectar/desconectar la
alimentación del adaptador para cablevisión presionando la tecla o CH+ CH–
del telemando.
• Si su adaptador para cablevisión puede controlar el volumen, cerciórese de
ajustar su selector de volumen a una posición intermedia. Si redujese
completamente el volumen del adaptador para cablevisión, no podría ajustar
el volumen de su televisor con el telemando.
Operaciones de PIP
Presione Para
PIP activar/desactivar la imagen de la “ventanilla”.
GUIDE desactivar la imagen de la “ventanilla”.
m M o cambiar el canal de televisión de la imagen de la
“ventanilla”.
z cambiar el modo de entrada de la imagen de la
“ventanilla”.
x cambiar la ubicación de la imagen de la “ventanilla”.
N intercambiar la imagen ”principal” por la de la
“ventanilla”.
X congelar la imagen de la “ventanilla”.
Control de un sintonizador de recepción vía satélite digital
3 Para utilizar la función
“FAVORITE”.
4 N: Para salir del modo.
6 Para cambiar la salida del
sintonizador de recepción vía
satélite digital al televisor.
(Cuando haya conectado un
sistema de cablevisión o una
antena de televisión al receptor de
radiodifusión digital, la salida
cambiará entre los programas del
televisor y los del sistema de SAT
digital).
8 Para desplazarse por la Guía
principal.
9 Para invocar la visualización de
MENU.
qd y qf
Para cambiar el canal. Por
ejemplo, para cambiar al canal 5,
presione 0 y 5 (o presione 5 y
ENT).
qg Para hacer que aparezca la Guía
principal.
qh Para hacer que se visualice el
índice de emisoras.
qj Para seleccionar el canal
resaltado. Para hacer que se
visualice el índice de emisoras
cuando no se visualice una guía
de programas.
qk Para pasar a canales superiores: +
Para pasar a canales inferiores: –
Para desplazarse por las páginas
de la guía cuando se esté
visualizando una guía de
programas.
ql Para sintonizar la última emisora
recibida.
Control de un reproductor de discos DVD
3 Para seleccionar 10 y números
superiores. Por ejemplo, para
seleccionar la canción 15, presione
PIP 5 y después .
4 N: Para reproducir.
m: Para retroceder.
M: Para avanzar rápidamente.
x: Para parar.
X: Para realizar una pausa.
5 Para hacer que se visualice el
menú de títulos.
6 Para cambiar el sonido.
7 Para hacer que en la pantalla
aparezca el estado de
reproducción actual.
8 Para mover el cursor hacia arriba,
hacia abajo, hacia la izquierda, o
hacia la derecha.
9 Para hacer que se visualice el
menú de un disco DVD.
qd Teclas numéricas: Para establecer
los elementos seleccionados de la
pantalla.
qf Para introducir un ajuste o para
establecer los elementos
seleccionados de la pantalla.
qg Para borrar los caracteres
seleccionados de la pantalla.
qh Para cambiar el subtítulo.
qj Para ejecutar los elementos
seleccionados de la pantalla.
qk Para localizar la canción anterior/
siguiente
ql Para volver a la pantalla anterior.
Especificaciones
Alcance de control Aprox. 7 m (23 ft) (puede variar dependiendo del
componente de cada fabricante)
Alimentación Dos de tamaño AA (R6) (no suministradas)
Duración de las pilas Aprox. 6 meses (puede variar dependiendo de la
frecuencia de utilización)
Dimensiones Aprox. 51,8 × 195 × 31 mm (an/al/prf)
Peso Aprox. 100 g (excluyendo las pilas)
El diseño y las especificaciones están sujetos a cambio sin previo aviso.
Solución de problemas
Si tiene problemas al programar o utilizar el telemando:
• Cuando programe el telemando, siga cuidadosamente los procedimientos
descritos en “Programación del código.” Si el primer código de la lista para
su componente no trabaja, pruebe los demás de la lista para dicho
componente, en el orden de la lista. Si no trabaja ninguno de los códigos (o si
su componente no está en la lista de este manual), pruebe los procedimientos
de “Búsqueda del código correcto.”
• Compruebe si está apuntando directamente hacia el componente, y que no
haya obstáculos entre el telemando y el componente.
• Cerciórese de que las pilas que esté utilizando no estén agotadas y de que
estén insertadas correctamente.
• Compruebe si p2-ha presionado la tecla , o del telemandoTV VCR CBL/SAT, , DVD
correspondiente al componente deseado.
• Compruebe que el componente pueda controlarse con rayos infrarrojos. Por
ejemplo, si su componente no vino con telemando, probablemente no podrá
controlarse con un telemando.
• Si el problema persiste, reponga el telemando a los ajustes de fábrica
presionando simultáneamente las teclas POWER TV VIDEO, / y VOL–.
Para los clientes de EE.UU.
Información para ayuda a los clientes
Si después de haber leído este manual, el telemando sigue sin
funcionar adecuadamente, llame a Customer Support Helpline,
1-800-822-2217.
Product specificaties
| Merk: | Sony |
| Categorie: | Afstandsbediening |
| Model: | RM-V201 |
Heb je hulp nodig?
Als je hulp nodig hebt met Sony RM-V201 stel dan hieronder een vraag en andere gebruikers zullen je antwoorden
Handleiding Afstandsbediening Sony
4 Juli 2025
26 April 2024
26 April 2024

26 April 2024
26 April 2024

26 April 2024

26 April 2024
26 April 2024

26 April 2024
26 April 2024
Handleiding Afstandsbediening
- Universal Remote Control
- Satechi
- Meliconi
- Watson
- AEG
- Eminent
- GE
- Marantz
- Bang Olufsen
- Innr
- Genius
- Daikin
- Kenwood
- Genaray
- Elite Screens
Nieuwste handleidingen voor Afstandsbediening
15 September 2025
8 September 2025
8 September 2025
1 September 2025

1 September 2025
1 September 2025
1 September 2025

31 Augustus 2025
19 Augustus 2025
18 Augustus 2025