Smeg KSEC61X Handleiding
Bekijk gratis de handleiding van Smeg KSEC61X (20 pagina’s), behorend tot de categorie Afzuigkap. Deze gids werd als nuttig beoordeeld door 13 mensen en kreeg gemiddeld 4.7 sterren uit 7 reviews. Heb je een vraag over Smeg KSEC61X of wil je andere gebruikers van dit product iets vragen? Stel een vraag
Pagina 1/20

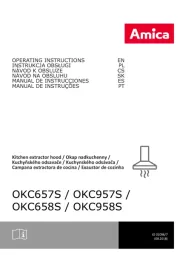
Instruction Manual
Cooker Hoods KSEC61X // KSEC61NE // KSEC61EB // KSEC91X
Manuel d ’instructions
Hottes Aspirantes KSEC61X // KSEC61NE // KSEC61EB // KSEC91X
Manual de instrucciones
Campanas Extractoras KSEC61X // KSEC61NE // KSEC61EB // KSEC91X
Libretto istruzioni
Cappe Aspirante KSEC61X // KSEC61NE // KSEC61EB // KSEC91X
Gebruikshandleiding
Afzuigkappen KSEC61X // KSEC61NE // KSEC61EB // KSEC91X
Bedieningsanleitung
Dunstabzugshauben KSEC61X // KSEC61NE // KSEC61EB // KSEC91X
Ðóêîâîäñòâî ïî ýêñïëóàòàöèè
Âûòÿ æêà KSEC61X // KSEC61NE // KSEC61EB // KSEC91X
Manual de Instru ções
Exaustores KSEC61X // KSEC61NE // KSEC61EB // KSEC91X
Bruksanvisning
K ksfl kt KSEC61X // KSEC61NE // KSEC61EB // KSEC91X ö ä
20/04/09

English
Dear customer,
We congratulate you on your choice. We are
sure that this modern, functional and
practical article, constructed from highest
quality materials, will fully meet your
requirements.
Please read all the sections of this
INSTRUCTION MANUAL before using the
extractor for the first time to be able to obtain
its full performance and to avoid any
breakdowns that could arise from its misuse,
also allowing small problems to be
overcome.
Keep and store this manual. It will always
provide useful information on the extractor
and will help other people to use it.
Safety Instructions
Before using the extractor for the first time,
you must read the following safety
instructions.
* Never pull the cable to unplug the extractor.
* Do not switch on the extractor if the
electricity cable is worn out or has cuts or if
there are signs of deterioration around the
control panel.
* If the extractor stops working or functions
abnormally, unplug it from the mains and
advise the technical service.
* Do not leave gas burning without a pan
above it under the hood.
* Do not allow grease to accumulate in any
part of the extractor, especially in the filter as
this COULD PRODUCE A FIRE RISK
* Do not flambé food under the hood.
* Before installing the extractor consult local
rules and regulations in force with respect to
current standards on air and fumes.
* Before connecting the extractor to the
mains, check that both the voltage and the
frequency conform to what shown on the
characteristics label of the extractor located
inside it.
* The cooker hoods provided with plug must
preserve it accessible. In the opposite way, it
is necessary to install an omnipolar switch
with at least a distance of 3 mm. between
Line (L) and Neutral (N).
* The room must be provided with
appropriate ventilation if the extractor is
going to be used at the same time as other
food processing equipment not using
electrical power.
* We recommend the use of gloves and
caution when cleaning the inside of the
extractor.
* Your extractor is designed for domestic use
and only for expelling and purifying gases
arising from food preparation. Its use for any
other purpose must be at your own
responsibility and may be dangerous.
* You should contact the nearest Qualified
Technical Assistance Service for any repairs
always using original spare parts. Repairs
and modifications carried out by others could
damage the apparatus or cause it to
malfunction, and risking your safety. The
manufacturer cannot be held liable for
inappropriate use of the apparatus.
Description of the appliance (Fig.1)
A Motor controls, three speeds.
B Light switch independent from motor
commands.
C Two lamps for hood lighting.
D Filters located over cooking area,
easily removable for cleaning (2 or 3
according to model).
E Extractable group that allows a greater
gas capture area.
F Possibility of incorporating active
charcoal filters (Fig. 5)
G Motor functionning indicator light.
H-I Anti return tabs to be located in the
outlet mouth, locating their ends in the
holes provided.
4
5
F
I
E

1
2
INOX COLOR
Speed
Vitesse Velocidad
Velocità
Snelheid Absaugleistung
Ñêîðîñòü
Velocidade
Hastighet
First Première
Primera Prima Laag Erste Primeira F Ïåðâàÿ örsta
Second
Deuxième
Segunda
Seconda
Hoog Zweite Segunda Andra Âòîðàÿ
Third Troisième
Tercera Terza Intensief Dritte Terceira Tredje Òðåòüÿ
Light Lumi reè
Luz Luce Licht Beleuchtung Luz Lampa Ñâåò
On Allum Encendidoé
Accesa
Schakelaar
aan Ein Acesa Âêëþ÷åí P å
Off Eteint Apagado
Spenta
Schakelaar
uit Aus Âûêëþ÷åí
Desligada Av
3
Instructions for use
By pushing buttons shown in the figure 2, you
will be able to control the functions of the
extractor
Two achieve better extraction, we recommend
switching on the extractor a few minutes
before starting to cook (3 - 5 minutes) so that
the air flow is continuous and stable when
extracting the fumes.
Likewise, keep the extractor switched on for a
few minutes when cooking is complete to
allow all fumes and odours to be expelled.
Cleaning and maintenance
Before carrying out any cleaning or
maintenance activities, ensure that the
extractor is disconnected from the mains.
To carry out cleaning and maintenance, follow
the Safety Instructions.
Filter cleaning
To remove the filters from their locations
release the anchoring points. Clean the filter,
either by putting it in the dishwasher (see
notes) or leaving it standing in hot water to
simplify the removal of grease or, if wished, by
means of special sprays (protecting the non
metallic parts). Once clean, leave it to dry.
Notes: cleaning in the dishwasher with
aggressive detergents may darken the surface
of metallic parts, without this affecting its gas
retaining properties.
N.B. The filter must be cleaned at least once a
month depending on how often the extractor is
used. It must be remembered that grease
accumulates in the extractor when cooking,
whether it is switched on or not.
Cleaning of the extractor body
The use of warm (40ºC approx.) soapy water
is recommended. A cloth moistened in this
water is used for cleaning the extractor, paying
special attention to the grids. Afterwards, dry it
using a lint-free cloth.
Note:
* Never use metallic scouring pads or abrasive
products that could damage the surface.
* Do not use scrapers with metallic surfaces
such as knives, scissors etc.
Active charcoal filter
* To install the charcoal filter, disassemble the
lid, introduce the filter in the position provided
and reassemble the lid.
* The carbon filter lasts from three to six
months depending on the particular conditions
of use.
* The activated carbon filter can neither be
washed nor regenerated. Once it is exhausted,
it must be changed.
* To replace the exhausted filter with a new
one, we will make in the same way that in its
assembly, previously extracting the spent filter.
Changing Bulbs
* It is important that the mains are
disconnected, and ensure the bulbs that are to
be replaced are not hot.
* Remove the light lens to expose the
extractable lamps.
* The maximum bulbs power is 40W.
Technical Information (Fig.3)
Dimensions Width = 600//900 mm
Depth = 500 mm
Height = 150 mm
Electrical characteristics:
REFER TO RATING PLATE
I
H
D
A
B
G
C
E
Product specificaties
| Merk: | Smeg |
| Categorie: | Afzuigkap |
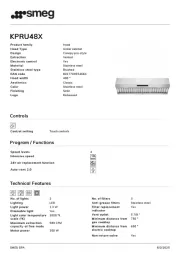
| Model: | KSEC61X |
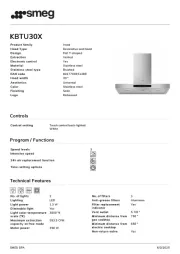
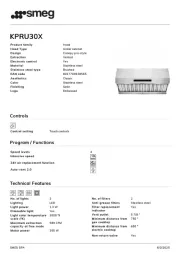
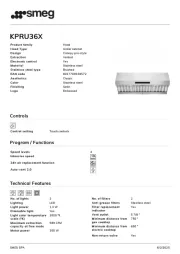
| Soort bediening: | Knoppen |
| Kleur van het product: | Roestvrijstaal |
| Breedte: | 600 mm |
| Diepte: | 500 mm |
| Hoogte: | 150 mm |
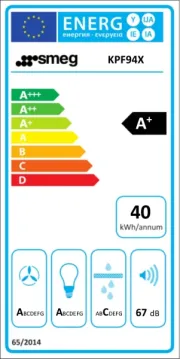
| Geluidsniveau: | 44 dB |
| Energie-efficiëntieklasse: | F |
| Soort: | Semi-inbouw (uittrekbaar) |
| Motor vermogen: | 125 W |
| Maximale afzuigcapaciteit: | 260 m³/uur |
| Afzuigmethode: | Luchtafvoer |
| Aantal lampen: | 2 gloeilamp(en) |
| Soort vetfilter: | Aluminium |
| Vermogen lamp: | 40 W |
| Aantal filters: | 2 stuk(s) |
| Stroomvoorziening: | 220 - 240 V, 50 Hz |
| Aantal snelheden: | 3 |
| Stroomverbruik (typisch): | 205 W |
Heb je hulp nodig?
Als je hulp nodig hebt met Smeg KSEC61X stel dan hieronder een vraag en andere gebruikers zullen je antwoorden
Handleiding Afzuigkap Smeg
8 September 2025
11 Augustus 2025
11 Augustus 2025
11 Augustus 2025
11 Augustus 2025
16 Juni 2025
16 Juni 2025

15 Juni 2025
15 Juni 2025
15 Juni 2025
Handleiding Afzuigkap
- Bielmeier
- Hanseatic
- Emilia
- Vent-A-Hood
- Classique
- Halifax
- Juno-electrolux
- Mx Onda
- Sharp
- Kelvinator
- Elica
- Nodor
- Sirius
- Cecotec
- Qasair
Nieuwste handleidingen voor Afzuigkap
13 September 2025
9 September 2025
9 September 2025
9 September 2025
9 September 2025
9 September 2025
8 September 2025
8 September 2025
8 September 2025
8 September 2025