SilverStone SST-TOB04 Handleiding
SilverStone Niet gecategoriseerd SST-TOB04
Bekijk gratis de handleiding van SilverStone SST-TOB04 (2 pagina’s), behorend tot de categorie Niet gecategoriseerd. Deze gids werd als nuttig beoordeeld door 127 mensen en kreeg gemiddeld 4.3 sterren uit 9 reviews. Heb je een vraag over SilverStone SST-TOB04 of wil je andere gebruikers van dit product iets vragen? Stel een vraag
Pagina 1/2
G11233720
Optical Storage
TOB04
Warranty Information
This product has a limited 1 year warranty in North America and Australia.
For information on warranty periods in other regions, please contact your reseller or SilverStone
authorized distributor.
1. Product component defects or damages resulted from defective production is covered under warranty.
Defects or damages with the following conditions will be fixed or replaced under SilverStone Technology’s jurisdiction.
a) Usage in accordance with instructions provided in this manual, with no misuse, overuse, or other inappropriate actions.
b) Damage not caused by natural disaster (thunder, fire, earthquake, flood, salt, wind, insect, animals, etc…)
c) Product is not disassembled, modified, or fixed. Components not disassembled or replaced.
d) Warranty mark/stickers are not removed or broken.
Loss or damages resulted from conditions other than ones listed above are not covered under warranty.
2. Under warranty, SilverStone Technology’s maximum liability is limited to the current market value for the product (depreciated value, excluding
shipping, handling, and other fees). SilverStone Technology is not responsible for other damages or loss associated with the use of product.
3. Under warranty, SilverStone Technology is obligated to repair or replace its defective products. Under no circumstances will SilverStone
Technology be liable for damages in connection with the sale, purchase, or use including but not limited to loss of data, loss of business, loss of
profits, loss of use of the product or incidental or consequential damage whether or not foreseeable and whether or not based on breach of warranty,
contract or negligence, even if SilverStone Technology has been advised of the possibility of such damages.
4. Warranty covers only the original purchaser through authorized SilverStone distributors and resellers and is not transferable to a second hand
purchaser.
5. You must provide sales receipt or invoice with clear indication of purchase date to determine warranty eligibility.
6. If a problem develops during the warranty period, please contact your retailer/reseller/SilverStone authorized distributors or SilverStone
http://www.silverstonetek.com.
Please note that: (i) You must provide proof of original purchase of the product by a dated itemized receipt; (ii) You shall bear the cost of shipping
(or otherwise transporting) the product to SilverStone authorized distributors. SilverStone authorized distributors will bear the cost of shipping
(or otherwise transporting) the product back to you after completing the warranty service; (iii) Before you send the product, you must be issued a
Return Merchandise Authorization (“RMA”) number from SilverStone. Updated warranty information will be posted on SilverStone’s official website.
Please visit http://www.silverstonetek.com for the latest updates.
Warranty terms & conditions
Additional info & contacts
For North America ([email protected])
SilverStone Technology in North America may repair or replace defective product with refurbished product that is not new but has been functionally tested.
Replacement product will be warranted for remainder of the warranty period or thirty days, whichever is longer. All products should be sent
back to the place of purchase if it is within 30 days of purchase, after 30 days, customers need to initiate RMA procedure with SilverStone Technology
in USA by first downloading the “USA RMA form for end-users” form from the below link and follow its instructions.
http://silverstonetek.com/contactus.php
For Australia only ([email protected])
Our goods come with guarantees that cannot be excluded under the Australian Consumer Law.
You are entitled to a replacement or refund for a major failure and for compensation for any other reasonably foreseeable loss or damage.
You are also entitled to have the goods repaired or replaced if the goods fail to be of acceptable quality and the failure does not amount to a major failure.
Please refer to above “Warranty terms & conditions” for further warranty details.
SilverStone Technology Co., Ltd. 12F No. 168 Jiankang Rd., Zhonghe Dist., New Taipei City 235 Taiwan R.O.C. + 886-2-8228-1238
(standard international call charges apply)
For Europe ([email protected])
For all other regions ([email protected])
Usage of any controls, adjustment, or procedure other than those specified herein may result in
hazardous radiation exposure.
Please do not disassemble this product to prevent any exposure by laser emanations which is
harmful to human eyes.
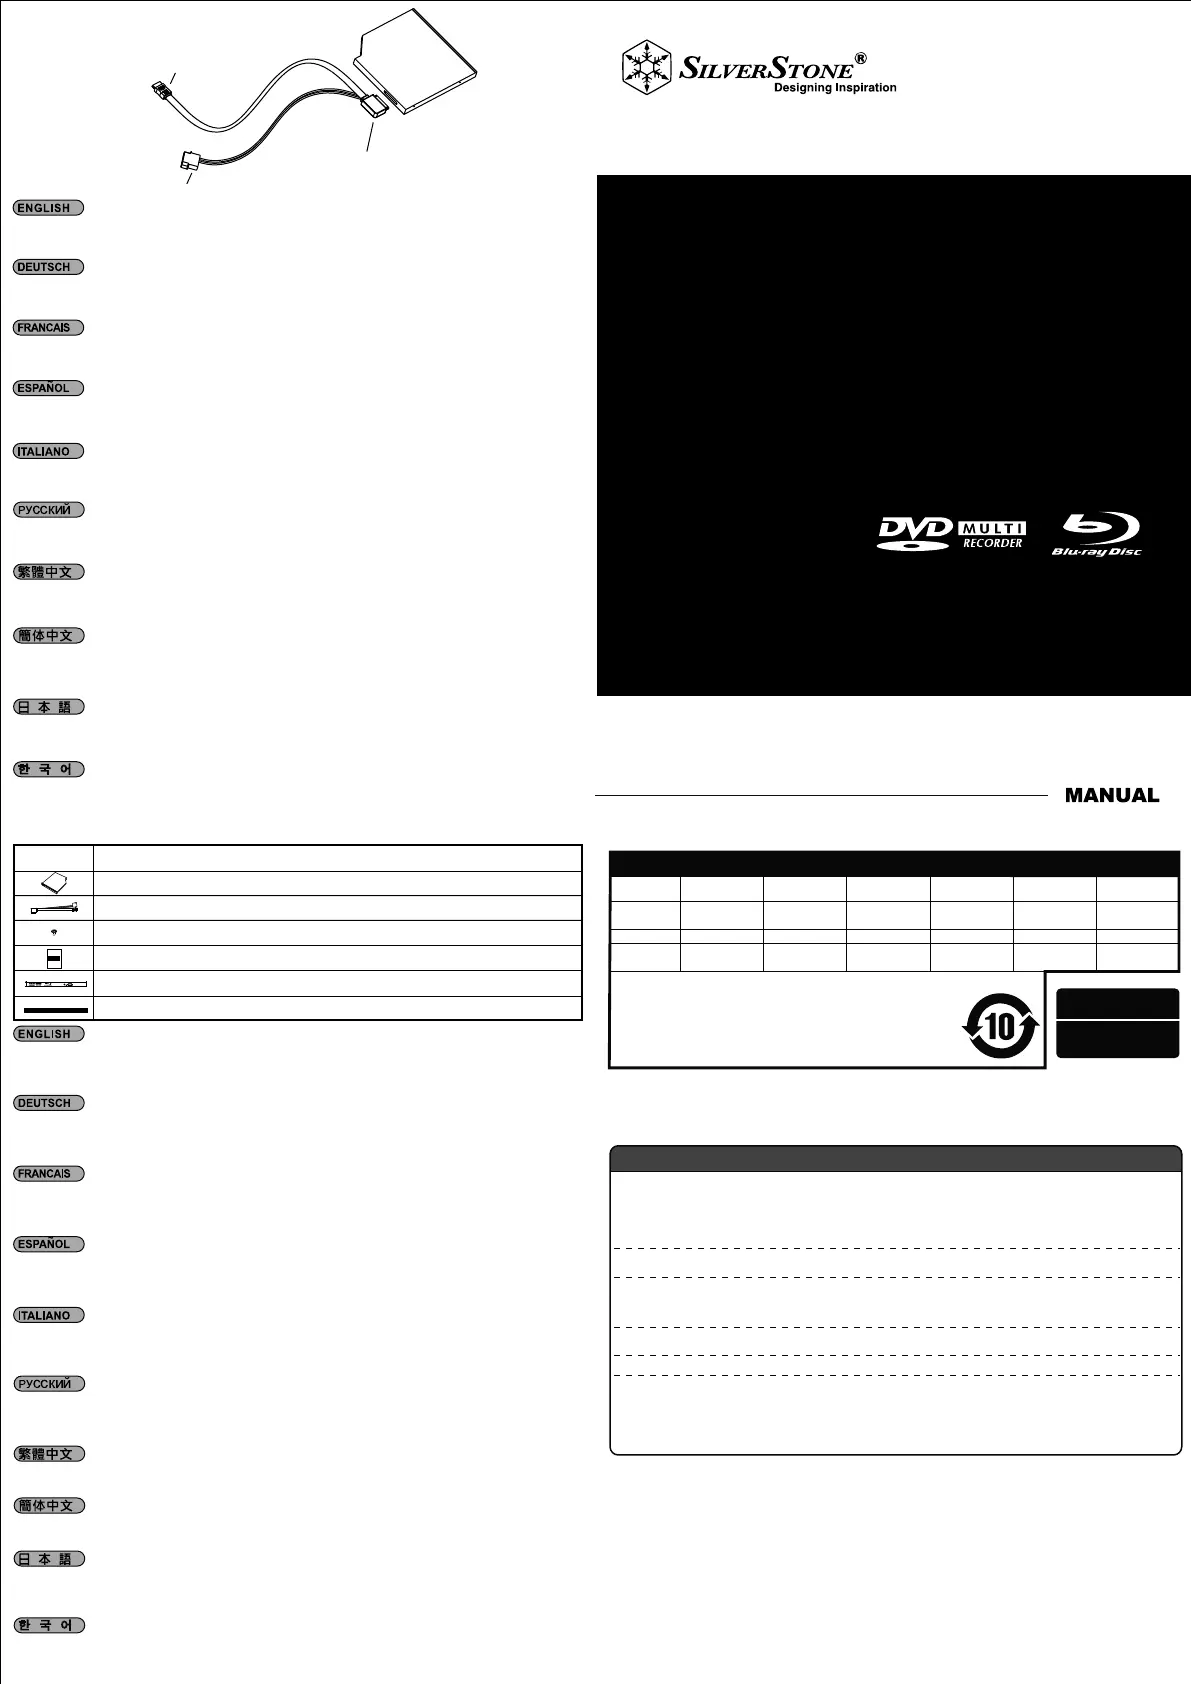
Item PicsName
to Motherboard
Adapter
to Power Supply
Tray-loading slim Blu-ray writer
Slimline SATA adapter cable
Screws
Installation guide
Nameplate
Mylar
Verwendung von Kontrollen, Einstellungen oder Methoden, die hier nicht festgelegt worden sind,
kann zu gefährlicher Strahlenbelastung führen.
Bitte bauen Sie dieses Produkt nicht auseinander, um jegliches Gefahrenpotenzial durch
Laserstrahlung zu verhindern, die schädlich für menschliche Augen ist.
Le maniement de tout contrôle, réglage ou procédure, autres que celles spécifiées ici peuvent
entraîner une exposition à des radiations dangereuses.
Veuillez ne démonter cet appareil en aucun cas, ceci pour éviter toute exposition aux rayons laser
car ceux-ci sont dangereux et très néfastes pour les yeux humains.
El uso de controles, ajustes o procedimientos distintos a los especificados aquí podrían provocar
una exposición a radiación.
Por favor, no desmonte este producto para evitar cualquier exposición a emanaciones láser que
podrían ser dañinas para los ojos humanos.
El uso de controles, ajustes o procedimientos distintos a los especificados aquí podrían provocar
una exposición a radiación.
Por favor, no desmonte este producto para evitar cualquier exposición a emanaciones láser que
podrían ser dañinas para los ojos humanos.
Любыесредствауправления, настройкиилидействия, кромездесьописанных, могутстать
причинойопасногорадиоактивногооблучения.
Неразбирайтеизделие, иначевашиглазамогутподвергнутьсявредномулазерному
излучению.
使用非說明書中指定的任何控制,調整或程序可能會造成暴露在放射線下的危險。
請勿自行拆卸本產品以避免暴露在雷射放射線中。(雷射線對眼睛有害)
使用非说明书中指定的任何控制,调整或程序可能会造成暴露在放射线下的危险。
请勿自行拆卸本产品以避免暴露在雷射放射线中。(雷射线对眼睛有害)
ここで記述されている以外の制御、調節、手順を行うと、有害な電磁波にさらされる恐れが
あります。
この製品は分解しないでください。目に有害なレーザー光さらされる恐れがあります。
언급된 조작 이외의 조정이나 다른 조작들은 위험한 레이저 방사 노출을 유발할 수 있습니다.
사람의 눈에 유해한 레이저 노출을 막기위해서 제품을 절대 분해하지 마십시요.
1. Please connect SATA connector to the SATA jack on your motherboard
2. Please connect power cable connector to your power supply
3. Please connect the adapter onto optical drive
1. Bitte verbinden Sie den SATA-Anschluss mit der SATA-Buchse an Ihrer Hauptplatine
2. Bitte verbinden Sie den Anschluss des Stromkabels mit Ihrer Stromversorgung
3. Bitte verbinden Sie den Adapter mit dem optisches Laufwerk
1. Veuillez brancher le connecteur SATA à la prise SATA de votre carte mère
2. Veuillez brancher le connecteur du câble d’alimentation à votre alimentation
3. Veuillez brancher l’adaptateur sur le lecteur optique
1. Por favor, introduzca el conector SATA en el receptor SATA de su placa base
2. Conecte el conector del cable de corriente a su fuente de alimentación
3. Conecte el adaptador en el dispositivo óptico
1. Connettere il cavo SATA al connettore della scheda madre
2. Connettere il cavo di alimentazione all’alimentatore
3. Connettere l’adattatore su unità ottica
1. Подключите SATA-коннекторк SATA-разъемуматеринскойплаты
2. Подключитесиловойразъемкблокупитания
3. Подключитеадаптеркустройств
1. 請將SATA接頭接上主機板SATA插槽
2. 請將電源線接頭接上您的電源
3. 請將接頭連接光碟機
1. 请将SATA接头接上主板SATA插槽
2. 请将电源线接头接上您的电源
3. 请将接头连接光驱
1. SATAコネクタをマザーボード上のSATAジャックに接続します
2. 電源ケーブルコネクタを電源に接続します
3. アダプタを光学ドライブに接続します
1. SATA 커넥터는 메인보드의 SATA 잭에 연결 합니다
2. 파워 케이블 커텍터를 파워 서플라이에 연결합니다
3. 어댑터를 광 드라이브 에 연결합니다
有毒有害物质/元素及其化学含量表
部件名称
印刷电路板及
其电子组件
外壳
外部信号连接头
及线材
多溴二苯醚
(PBDE)
○
○
○
多溴联苯
(PBB)
○
○
○
六价铬
(Cr(VI))
○
○
○
镉
(Cd)
○
○
○
汞
(Hg)
○
○
○
铅
(Pb)
×
×
×
产品合格证
检验员:检01
生产日期:见产品条码
O:表示该有毒有害物质在该部件所有均质材料中的含量均在SJ / T 11363-2006
标准规定的限量要求以下。
X:表示该有毒有害物质至少在该部件的某一均质材料中的含量超出SJ / T 11363-2006
标准规定的限量要求,然该部件仍符合欧盟指令2002/95 / EC的规范
备注:本产品所标示之环保使用期限,系指在一般正常使用状况下。
9.5mm tray-loading
slim 6x Blu-ray writer
Product specificaties
| Merk: | SilverStone |
| Categorie: | Niet gecategoriseerd |
| Model: | SST-TOB04 |
| Kleur van het product: | Zwart |
| Interface: | SATA |
| Intern: | Ja |
| Optische drive type: | BD, BD-R, BD-R DL, BD-RE, CD, CD-R, CD-RW, DVD, DVD+R, DVD+RW, DVD-R, DVD-R DL, DVD-RAM, DVD-RW |
| Laadmechanisme: | Lade |
| Drive, omvang buffer: | 4 MB |
| Schrijfsnelheid CD: | 24 x |
| DVD+R schrijfsnelheid: | 8 x |
| DVD-R schrijfsnelheid: | 8 x |
| DVD-R Double Layer schrijfsnelheid: | 4 x |
| DVD+R Double Layer schrijfsnelheid: | 4 x |
| DVD-RW schrijfsnelheid: | 6 x |
| DVD+RW schrijfsnelheid: | 8 x |
| DVD-RAM schrijfsnelheid: | 5 x |
| Leessnelheid CD: | 24 x |
| DVD+R leessnelheid: | 8 x |
| DVD-R leessnelheid: | 8 x |
| DVD-R Double Layer leessnelheid: | 8 x |
| Code geharmoniseerd systeem (HS): | 84717030 |
| CD-R schrijfsnelheid: | 24 x |
| CD-RW schrijfsnelheid: | 10 x |
| DVD-RW leessnelheid: | 8 x |
| CD-R leessnelheid: | 24 x |
| CD-RW leessnelheid: | 24 x |
| DVD-RAM leessnelheid: | 5 x |
| BD-RE schrijfsnelheid: | 2 x |
| BD-R schrijfsnelheid: | 6 x |
| BD-R Dual Layer write speed: | 6 x |
| BD-ROM leessnelheid: | 6 x |
| BD-R leessnelheid: | 6 x |
| BD-RE leessnelheid: | 6 x |
| BD-R Dual Layer read speed: | 6 x |
| BD-RE Dual Layer leessnelheid: | 6 x |
Heb je hulp nodig?
Als je hulp nodig hebt met SilverStone SST-TOB04 stel dan hieronder een vraag en andere gebruikers zullen je antwoorden
Handleiding Niet gecategoriseerd SilverStone

6 Juli 2026
1 April 2026
30 Maart 2026
30 Maart 2026
16 Maart 2026
20 Februari 2026
20 Februari 2026
20 Februari 2026
20 Februari 2026
19 Februari 2026
Handleiding Niet gecategoriseerd
Nieuwste handleidingen voor Niet gecategoriseerd
22 Juli 2026
22 Juli 2026
22 Juli 2026
22 Juli 2026
21 Juli 2026
21 Juli 2026
21 Juli 2026
21 Juli 2026
21 Juli 2026
21 Juli 2026