SilverStone MS09C Handleiding
Bekijk gratis de handleiding van SilverStone MS09C (2 pagina’s), behorend tot de categorie Externe harde schijf. Deze gids werd als nuttig beoordeeld door 73 mensen en kreeg gemiddeld 5.0 sterren uit 5 reviews. Heb je een vraag over SilverStone MS09C of wil je andere gebruikers van dit product iets vragen? Stel een vraag
Pagina 1/2
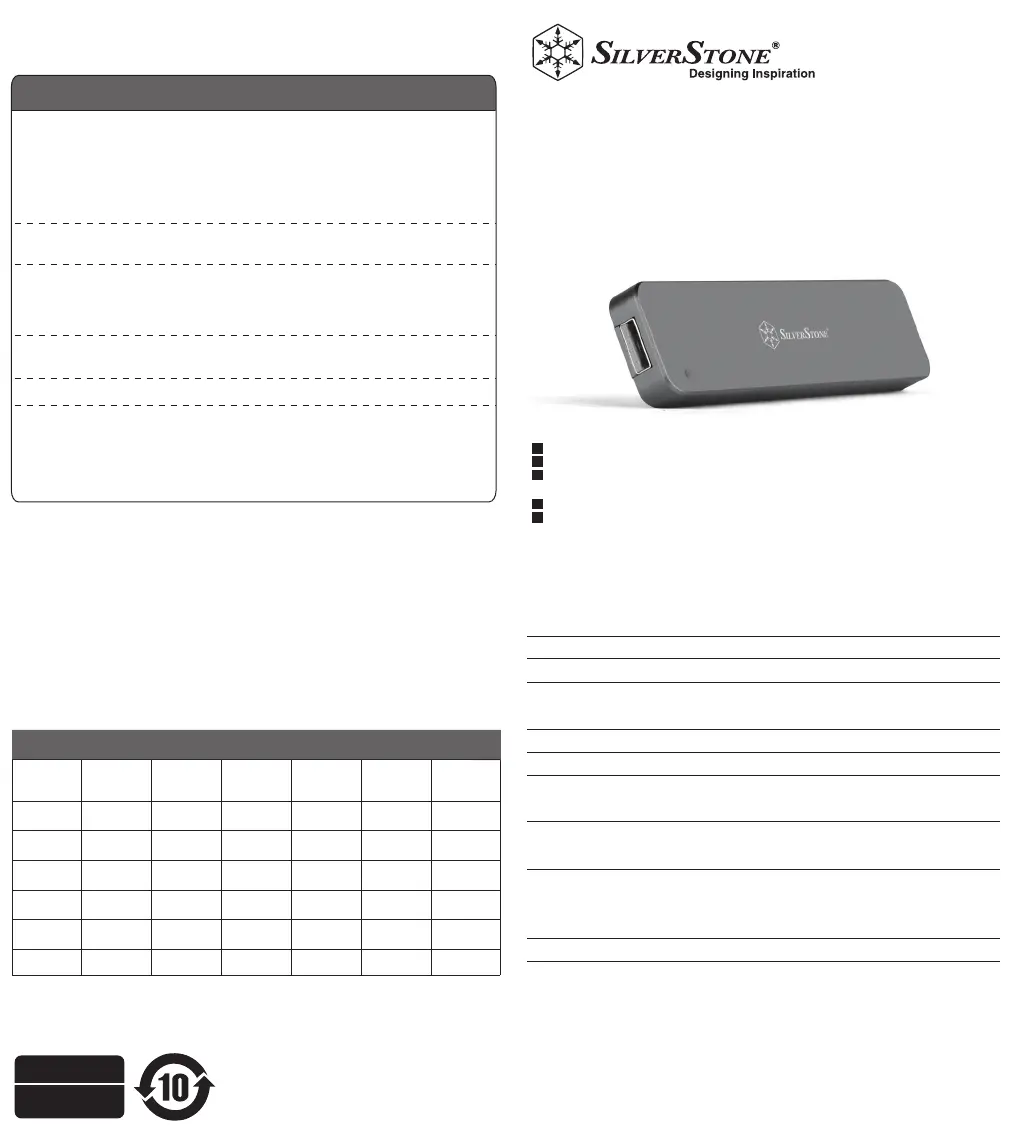
M.2 SATA external SSD enclosure
with USB 3.1 Gen 2
Specifications
Package Content
MS09
Support 2260 or 2280 form factors of B key M.2 SATA SSD
Premium all aluminum exterior with small, pocketable design
Latest USB 3.1 Gen 2 interface up to 10Gb/s super speed
transfer rate
Robust USB Type-A interface and no driver installation required
Retractable USB connector design
Model No.
Color
Material
Data transfer rate
Connector
Controller
LED indicator
Support type of M.2 SSD
Operating system support
Net weight
Dimension
MS09 x 1
Screwdriver x 1
Spare outer shell screws x 2
SST-MS09C
Charcoal
Aluminum unibody shell and plate
USB 3.1 Gen 2 up to 10Gbps
(Compatible with USB 3.1 Gen 1 / 3.0 / 2.0 / 1.1)
USB Type-A
VIA VL715
Solid Blue: Powered
Blinking Blue: Reading / writing
B Key SATA Type M.2 SSD x 1
Support 22mm x 60mm or 22mm x 80mm size
Microsoft Windows 10/8.1/8/7 (32bit/64bit)
or future release version
Mac 10.8.6 or future release versions
33g ± 5g
110mm (W) x 9mm (H) x 26mm (D)
4.33" (W) x 0.35" (H) x 1.02" (D)
www.silverstonetek.com
NO: G11231870
Additional info & contacts
For North America ([email protected])
SilverStone Technology in North America may repair or replace defective product with refurbished product that is not new but has been functionally tested.
Replacement product will be warranted for remainder of the warranty period or thirty days, whichever is longer. All power supplies should be sent back to the
place of purchase if it is within 30 days of purchase, after 30 days, customers need to initiate RMA procedure with SilverStone Technology in USA by first
downloading the “USA RMA form for end-users” form from the below link and follow its instructions.
http://silverstonetek.com/contactus.php
For Australia only ([email protected])
Our goods come with guarantees that cannot be excluded under the Australian Consumer Law. You are entitled to a replacement or refund for a major failure
and for compensation for any other reasonably foreseeable loss or damage. You are also entitled to have the goods repaired or replaced if the goods fail to be
of acceptable quality and the failure does not amount to a major failure. Please refer to above “Warranty terms & conditions” for further warranty details.
SilverStone Technology Co., Ltd. 12F No. 168 Jiankang Rd., Zhonghe Dist., New Taipei City 235 Taiwan R.O.C. + 886-2-8228-1238
(standard international call charges apply)
For Europe ([email protected])
For all other regions ([email protected])
Warranty Information
This product has a limited 1 year warranty in North America, Europe, and Australia.
For information on warranty periods in other regions, please contact your reseller or SilverStone authorized distributor.
1. Product component defects or damages resulted from defective production is covered under warranty. Defects or damages with the following conditions will be fixed
or replaced under SilverStone Technology’s jurisdiction.
a) Usage in accordance with instructions provided in this manual, with no misuse, overuse, or other inappropriate actions.
b) Damage not caused by natural disaster (thunder, fire, earthquake, flood, salt, wind, insect, animals, etc…)
c) Product is not disassembled, modified, or fixed. Components not disassembled or replaced.
d) Warranty mark/stickers are not removed or broken.
Loss or damages resulted from conditions other than ones listed above are not covered under warranty.
2. Under warranty, SilverStone Technology’s maximum liability is limited to the current market value for the product (depreciated value, excluding shipping, handling,
and other fees). SilverStone Technology is not responsible for other damages or loss associated with the use of product.
3. Under warranty, SilverStone Technology is obligated to repair or replace its defective products. Under no circumstances will SilverStone Technology be liable for
damages in connection with the sale, purchase, or use including but not limited to loss of data, loss of business, loss of profits, loss of use of the product or incidental
or consequential damage whether or not foreseeable and whether or not based on breach of warranty, contract or negligence, even if SilverStone Technology has been
advised of the possibility of such damages.
4. Warranty covers only the original purchaser through authorized SilverStone distributors and resellers and is not transferable to a second hand
purchaser.
5. You must provide sales receipt or invoice with clear indication of purchase date to determine warranty eligibility.
6. If a problem develops during the warranty period, please contact your retailer/reseller/SilverStone authorized distributors or SilverStone
http://www.silverstonetek.com.
Please note that: (i) You must provide proof of original purchase of the product by a dated itemized receipt; (ii) You shall bear the cost of shipping (or otherwise
transporting) the product to SilverStone authorized distributors. SilverStone authorized distributors will bear the cost of shipping (or otherwise transporting) the product
back to you after completing the warranty service; (iii) Before you send the product, you must be issued a Return Merchandise Authorization (“RMA”) number from
SilverStone. Updated warranty information will be posted on SilverStone’s official website. Please visit http://www.silverstonetek.com for the latest updates.
Warranty terms & conditions
○:表示该有毒有害物质在该部件所有均质材料中的含量均在SJ/T11364-2014标准规定的限量要求以下。
×:表示该有毒有害物质在该部件材料中的含量超出SJ/T11364-2014标准规定的限量要求。
有毒有害物质/元素及其化学含量表
部件名称
风扇
电子卡
线材
螺丝
包材
机壳
(金属)
多溴二苯醚
(PBDE)
多溴联苯
(PBB)
六价铬
(Cr(VI))
镉
(Cd)
汞
(Hg)
铅
(Pb)
○
○
○
○
○
○
○
○
○
○
○
○
○
○
○
○
○
○
○
○
○
○
○
○
○
○
○
○
○
○×
×
×
×
×
○
产品合格证
检验员:检01
生产日期:见产品条码
本表中有×的部件均符合欧盟RoHS法规,即欧盟第2011/65/EU号指令要求。
Product specificaties
| Merk: | SilverStone |
| Categorie: | Externe harde schijf |
| Model: | MS09C |
Heb je hulp nodig?
Als je hulp nodig hebt met SilverStone MS09C stel dan hieronder een vraag en andere gebruikers zullen je antwoorden
Handleiding Externe harde schijf SilverStone

12 Maart 2026
22 Mei 2025
22 Mei 2025
27 Februari 2024
26 Februari 2024
26 Februari 2024
26 Februari 2024
26 Februari 2024
26 Februari 2024
18 Februari 2024
Handleiding Externe harde schijf
Nieuwste handleidingen voor Externe harde schijf
21 Mei 2026
12 Mei 2026
27 April 2026
30 Maart 2026
26 Maart 2026
25 Maart 2026
13 Maart 2026
25 Februari 2026
14 Januari 2026
29 November 2025