Sennheiser ClipMic Digital Handleiding
Sennheiser Microfoon ClipMic Digital
Bekijk gratis de handleiding van Sennheiser ClipMic Digital (2 pagina’s), behorend tot de categorie Microfoon. Deze gids werd als nuttig beoordeeld door 76 mensen en kreeg gemiddeld 4.8 sterren uit 3 reviews. Heb je een vraag over Sennheiser ClipMic Digital of wil je andere gebruikers van dit product iets vragen? Stel een vraag
Pagina 1/2
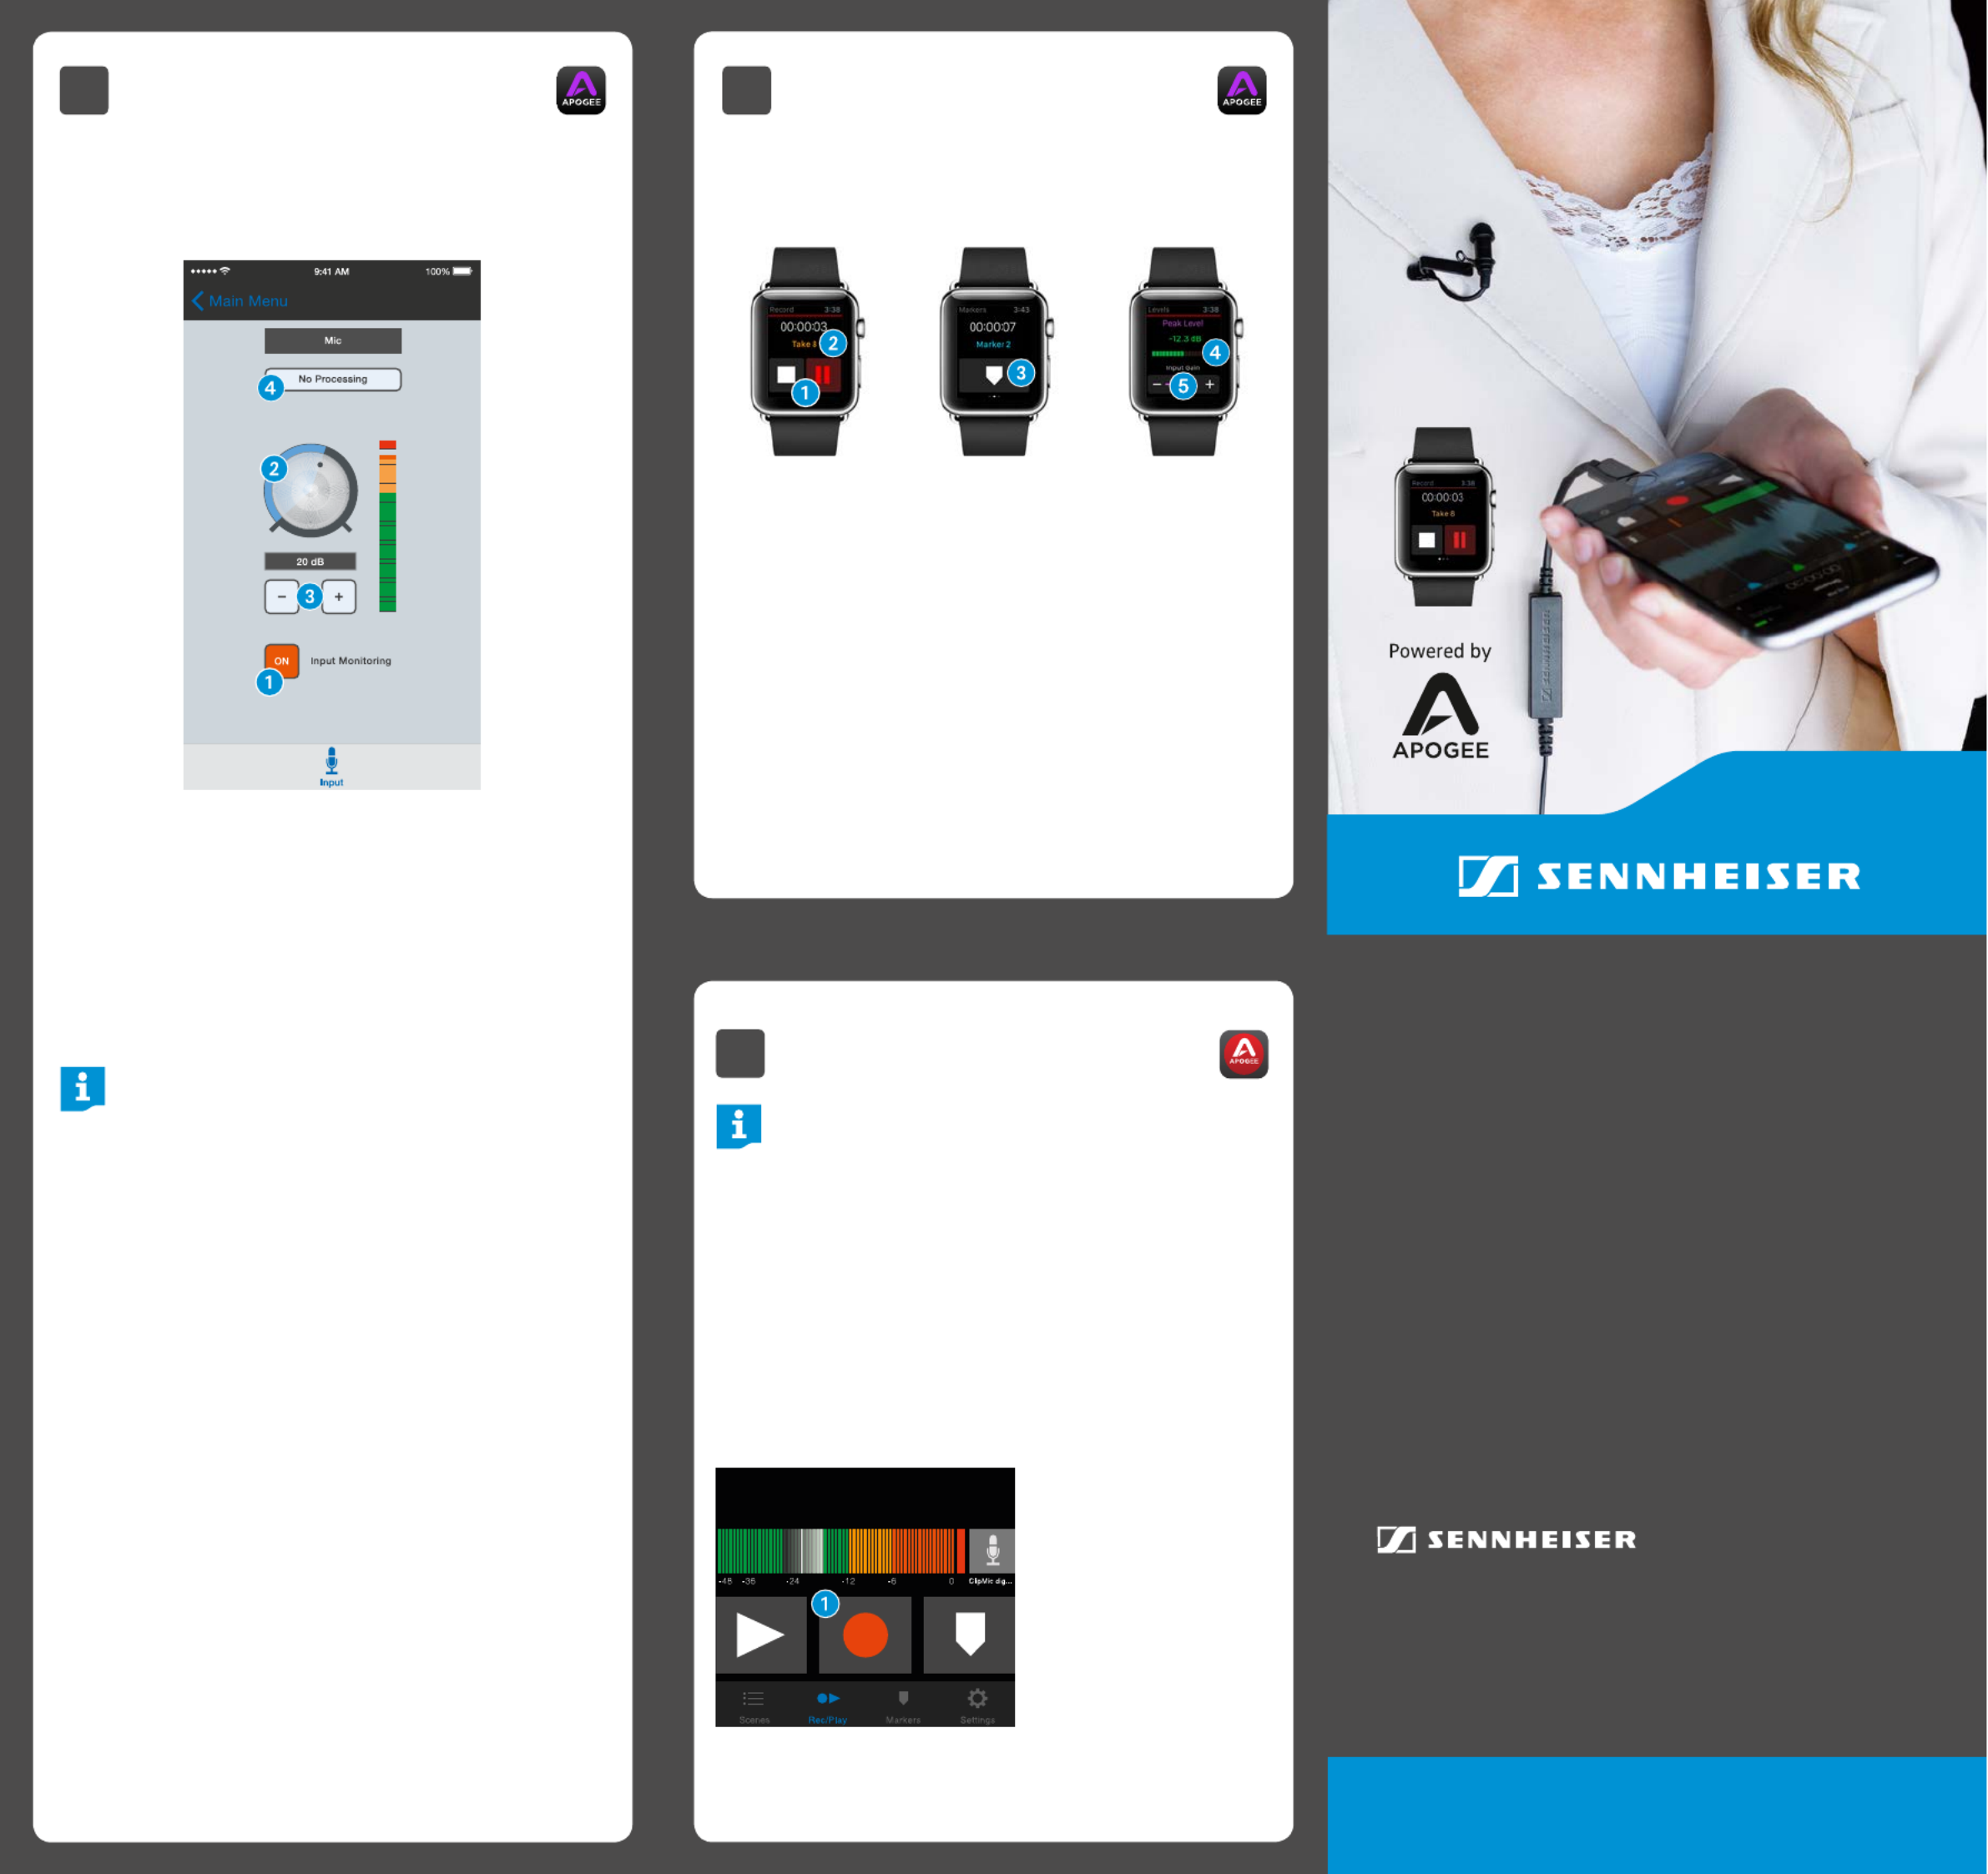
3B Adjusting Input Level with
Apogee Maestro App
XOpen Apogee Maestro app and choose Sennheiser
ClipMic digital from the main menu.
1 Tap the button to hear your micro-Input Monitoring
phone input.
2 Turn the knob to increase or decrea-Gain Adjustment
se the microphone input to the desired level. Small
adjustments can also be made by pressing either the
“–“or “+“ buttons 3.
Tips for Setting Input Level
The best way to do this is to monitor the loudest
sound you will be recording and adjust the input
gain so the input metering remains green, yellow or
orange and not red. If the microphone input meter
becomes red when recording, the input is too high
and the recording will be distorted.
4 Select an preset. The presets use Input Processing
onboard DSP processing to shape the sound with EQ,
compression and limiting to achieve the most natural
or unique result. Select or leave as is to No Processing
bypass this feature.
1 Tap to operate transport controls.
2 Force tap to toggle favorite status.
3 Tap to add a marker.
4 Tap to reset max. peak display.
5 Tap “+” or “–“ to adjust input gain.
ClipMic digital
Quick Start Guide
4Recording
Note:
It is recommended that you set your iOS device to
airplane mode to prevent any incoming calls from
disrupting your recordings.
XOpen Apogee MetaRecorder or any other Core Audio
compatible recording App.
ClipMic digital should be automatically detected and
selected as the input device.
XIf you haven’t already done so, connect headphones to
the built-in output on your iOS device and enable input
monitoring in the recording App.
XTap the button Record 1 in the App to begin.
3C Apple Watch Remote
Control
XMetaRecorder offers an Apple Watch App to remotely
operate these controls.
Sennheiser electronic GmbH & Co. KG
Am Labor 1, 30900 Wedemark, Germany
www.sennheiser.com
Publ. 06/18 A06
Product specificaties
| Merk: | Sennheiser |
| Categorie: | Microfoon |
| Model: | ClipMic Digital |
| Snoerlengte: | 1.6 m |
| Connectiviteitstechnologie: | Bedraad |
| Microfoon mute: | Ja |
| Aansluiting: | Lightning |
| Microphone direction type: | Omnidirectioneel |
| Bit rate: | 24 Bit |
| Frequentie microfoon: | 30 - 20000 Hz |
| Gewicht microfoon: | 24 g |
Heb je hulp nodig?
Als je hulp nodig hebt met Sennheiser ClipMic Digital stel dan hieronder een vraag en andere gebruikers zullen je antwoorden
Handleiding Microfoon Sennheiser

11 Oktober 2025
29 September 2025
7 Augustus 2025
4 Augustus 2025
14 April 2025
13 April 2025
13 April 2025
13 April 2025
26 Maart 2025
20 December 2024
Handleiding Microfoon
Nieuwste handleidingen voor Microfoon
5 Juni 2026
3 Juni 2026
1 Juni 2026
23 Mei 2026
21 Mei 2026
21 Mei 2026
20 Mei 2026
19 Mei 2026
13 Mei 2026
12 Mei 2026