Saris MHS Light Kit Handleiding
Saris Niet gecategoriseerd MHS Light Kit
Bekijk gratis de handleiding van Saris MHS Light Kit (4 pagina’s), behorend tot de categorie Niet gecategoriseerd. Deze gids werd als nuttig beoordeeld door 16 mensen en kreeg gemiddeld 4.7 sterren uit 6 reviews. Heb je een vraag over Saris MHS Light Kit of wil je andere gebruikers van dit product iets vragen? Stel een vraag
Pagina 1/4
FOLLOW INSTRUCTIONS
MHS Light Kit # 4695
Assembly Instructions | Instrucciones de montaje | Instructions d’assemblage
LOT CODE
REGISTER YOUR PRODUCT
https://saris.com/pages/product-registration
ASSEMBLY/INSTALLATION VIDEO
https://saris.com/pages/videos
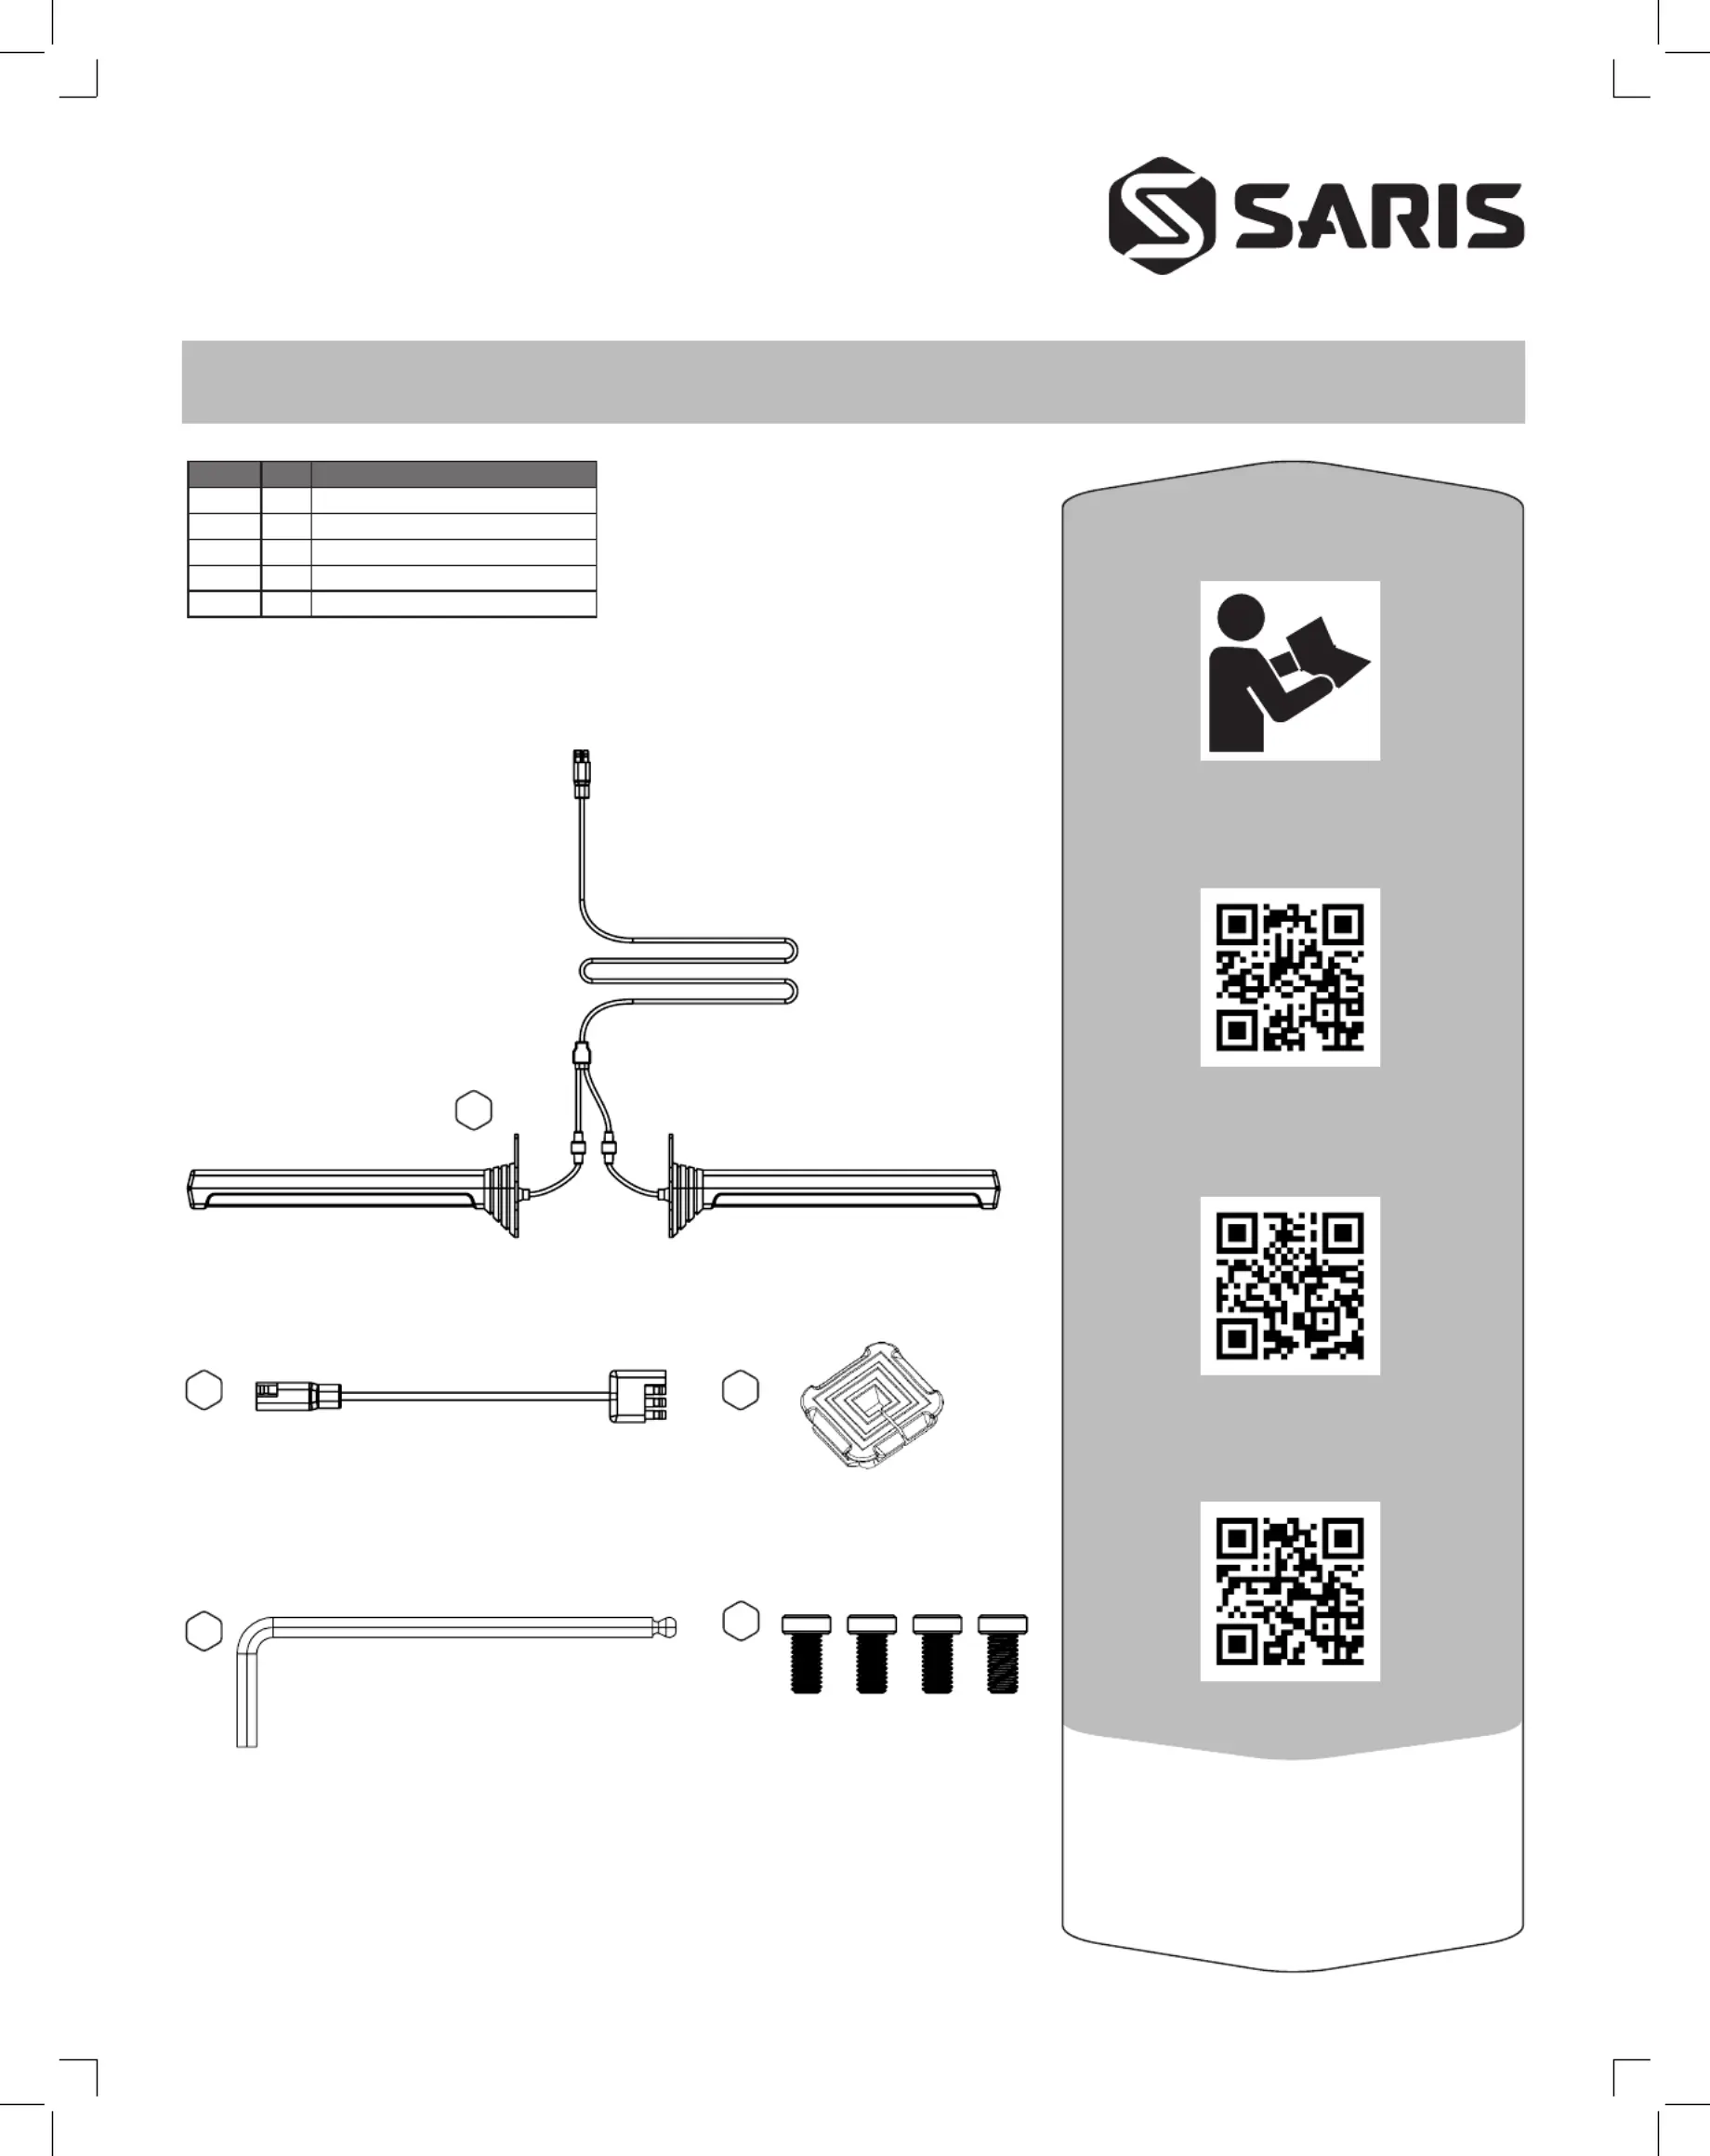
WHAT’S IN THE BOX
LETTERQTYPART DESCRIPTION
A1LED Light Bar set
B14 pin square to 4 pin flat adapter
C2Wire pass through plug
D1Hex Key
E4Bolts 5 mm
FOLLOW INSTRUCTIONS
SARIS FIT GUIDE
https://saris.com/pages/hitch-fit-guide
A
C
E
B
D
Product specificaties
| Merk: | Saris |
| Categorie: | Niet gecategoriseerd |
| Model: | MHS Light Kit |
Heb je hulp nodig?
Als je hulp nodig hebt met Saris MHS Light Kit stel dan hieronder een vraag en andere gebruikers zullen je antwoorden
Handleiding Niet gecategoriseerd Saris

17 Maart 2026
12 November 2025
11 November 2025
10 November 2025
10 November 2025
10 November 2025
10 November 2025
9 November 2025
2 September 2025
2 September 2025
Handleiding Niet gecategoriseerd
Nieuwste handleidingen voor Niet gecategoriseerd
8 Juni 2026
8 Juni 2026
8 Juni 2026
7 Juni 2026
7 Juni 2026
7 Juni 2026
7 Juni 2026
7 Juni 2026
6 Juni 2026
6 Juni 2026