Saris Cycle-On Pro Handleiding
Saris Fietsendrager Cycle-On Pro
Bekijk gratis de handleiding van Saris Cycle-On Pro (4 pagina’s), behorend tot de categorie Fietsendrager. Deze gids werd als nuttig beoordeeld door 16 mensen en kreeg gemiddeld 4.5 sterren uit 6 reviews. Heb je een vraag over Saris Cycle-On Pro of wil je andere gebruikers van dit product iets vragen? Stel een vraag
Pagina 1/4
20" wheel
tray mount
Standard wheel
tray mount
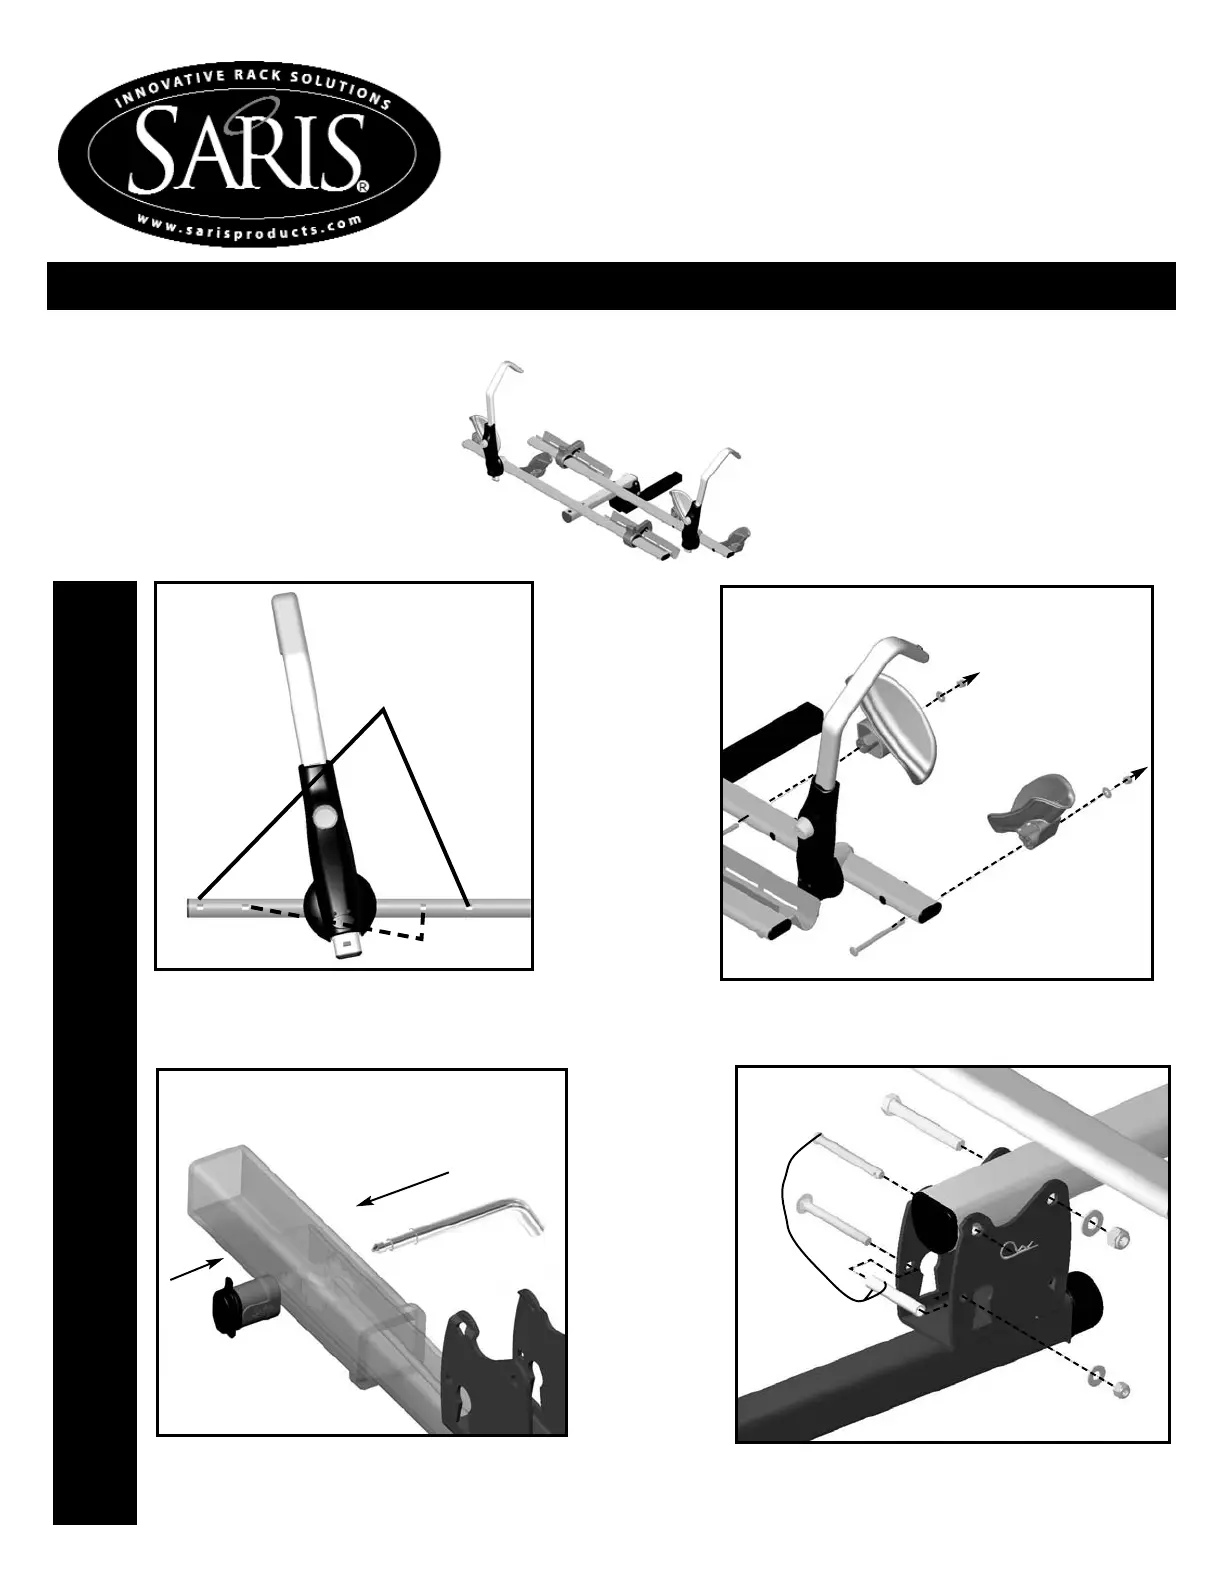
USER MANUAL
CCyyccllee--OOnnPPrroo
Please READ and FOLLOW all instructions carefully.
4017 (1 1/4” RECEIVER) OR 4018 (2” RECEIVER)
ASSEMBLE FRONT WHEELTRAYS - Determine which holes you
will use to mount the front wheel trays (Fig. 1A). For 20” tires inner-
most holes must be used(20” tire bikes cannot be mounted on the
#4012 add on kit).
Tube
Bolt
Front Wheel
Tray
Washer
Nut
Insert bolt through tube, slide wheel tray on, fasten with washer
and nut (Fig. 1B). Tighten nut until it is snug, where wheel tray
pivots freely. Repeat for each of the 2 front wheel trays.
Next attach the rack to the tilt bracket. Assemble in stepped
order (step 1, 2, 3) as shown above. Tighten knob at end of
bracket until bracket is tight in receiver.
1
2
3
Insert plugs into
unused holes.
1A
1B
2B
MUST use 2 wheel trays per wheel.
See Picture 4B.
Front Wheel
Tray
Washer
Nut
Bolt
Tube
Insert hitch pin and lock into place as shown above. (Note:
Do not stick locking cable through hole, only hitch pin.)
Steel Pin
Pin with
Lanyard
Knob
1
2
Product specificaties
| Merk: | Saris |
| Categorie: | Fietsendrager |
| Model: | Cycle-On Pro |
Heb je hulp nodig?
Als je hulp nodig hebt met Saris Cycle-On Pro stel dan hieronder een vraag en andere gebruikers zullen je antwoorden
Handleiding Fietsendrager Saris

17 Februari 2023
17 Februari 2023
26 April 2023
26 April 2023
26 April 2023
26 April 2023
17 Februari 2023
Handleiding Fietsendrager
Nieuwste handleidingen voor Fietsendrager
29 Mei 2026
28 Mei 2026
27 Mei 2026
31 December 2026
22 December 2025
26 November 2025
24 November 2025
22 November 2025
21 November 2025
21 November 2025