Ripmax A6M Zero Handleiding
Bekijk gratis de handleiding van Ripmax A6M Zero (41 pagina’s), behorend tot de categorie Radiografisch bestuurbaar speelgoed. Deze gids werd als nuttig beoordeeld door 30 mensen en kreeg gemiddeld 4.6 sterren uit 5 reviews. Heb je een vraag over Ripmax A6M Zero of wil je andere gebruikers van dit product iets vragen? Stel een vraag
Pagina 1/41
Instruction Manual Book
A6M ZERO
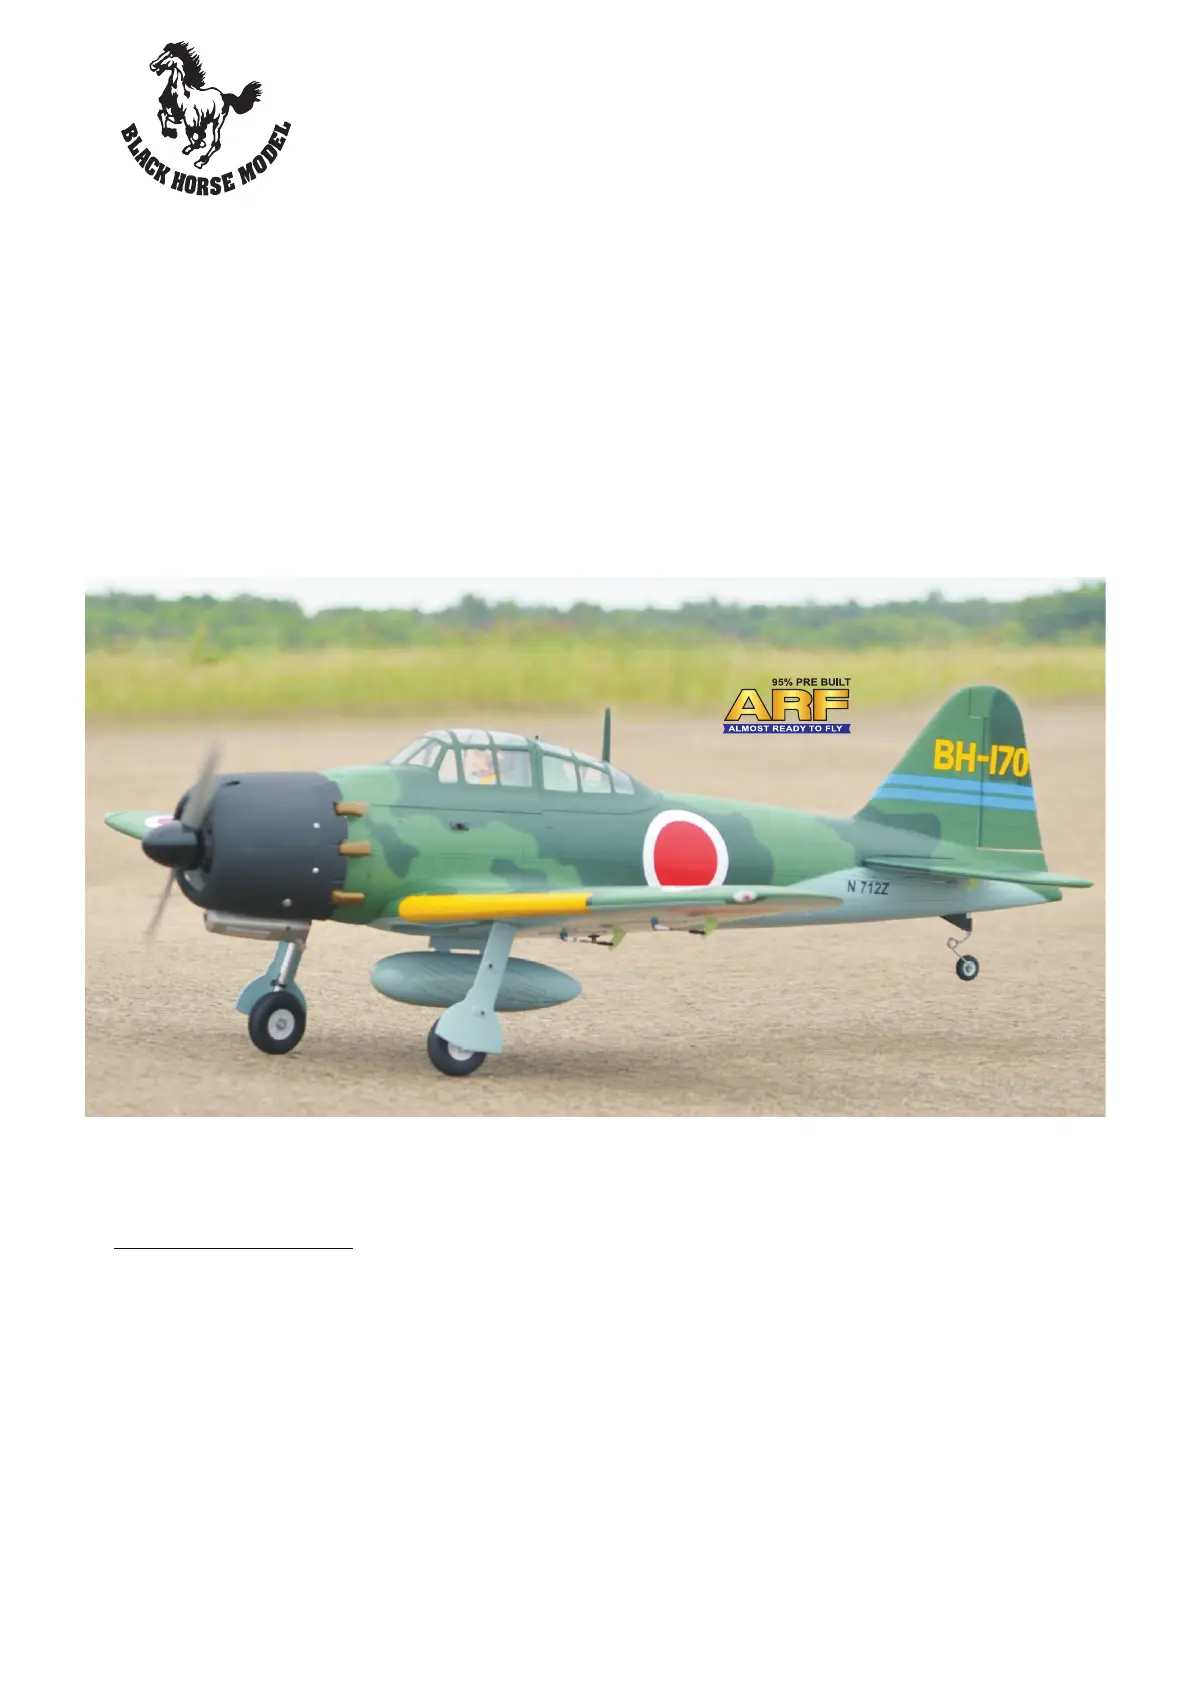
Item code: BH171.
Made in Vietnam.
OPTION ELECTRIC RETRACT GEAR (NOT INCLUDING).
ONLY INCLUDING OLEO STRUTS.
ALL BALSA - PLY WOOD CONSTRUCTION.
COVERED IN A HEAT-SHRINK FILM WITH PRINTED.
SPECIFICATION:
- Wingspan: 1,720 mm (67.72 in).
- Length: 1,375 mm (54.13 in).
- Weight: 4.4 - 4.6 kg (9.68 - 10.12lbs).
2
- Wing area: 46.5 dm.
2
- Wing loading: 94.62 g/dm.
- Servo mount: 42mm x 21mm.
- Wing type: Naca Airfoil.
- Spinner: 70mm.
- Gear type: Electric retract gear,
size: (92.2 x 51 x 30.6)mm (not included).
Oleo struts (included).
Parts listing required (not included):
- Radio: 06 channels.
- Servo: 07 servos.
- Engine: 75 - 95 2 strokes; 15 cc gas.
- Motor: Brushless outrunner 1200-2200W, 650KV.
- Propeller: Suit with your engine.
Recommended Motor and Battery set up (not included):
- Motor: RIMFIRE.60.
- Lipo cell: 6 cells 4,000-5,000mAh.
- Receiver battery: 6V/ 800-1200 mAh.
- ESC: 80A.
95% ALMOST READY TO FLY
Glow and EP
Product specificaties
| Merk: | Ripmax |
| Categorie: | Radiografisch bestuurbaar speelgoed |
| Model: | A6M Zero |
| Kleur van het product: | Camouflage |
| Oplader: | Nee |
| Lengte: | 1375 mm |
| Constructietype: | Bijna klaar om te vliegen |
| Batterijen vereist: | Ja |
| Meegeleverde ontvanger: | Nee |
| Batterijen inbegrepen: | Nee |
| Type product: | Gevechtsvliegtuig |
| Type motor: | Elektromotor |
| Reproductie: | Ja |
| Spanwijdte: | 1720 mm |
| Vleugeloppervlak: | 4650 cm² |
| Aanbevolen batterij: | Hi 6S 5500mah 30C |
Heb je hulp nodig?
Als je hulp nodig hebt met Ripmax A6M Zero stel dan hieronder een vraag en andere gebruikers zullen je antwoorden
Handleiding Radiografisch bestuurbaar speelgoed Ripmax

10 Februari 2024
12 Mei 2023
21 Februari 2023
Handleiding Radiografisch bestuurbaar speelgoed
Nieuwste handleidingen voor Radiografisch bestuurbaar speelgoed
16 Juli 2026
13 Juli 2026
9 Juli 2026
9 Juli 2026
8 Juli 2026
8 Juli 2026
7 Juli 2026
7 Juli 2026
7 Juli 2026
6 Juli 2026