Regency Greenfire GFi350L Handleiding
Bekijk gratis de handleiding van Regency Greenfire GFi350L (48 pagina’s), behorend tot de categorie Heater. Deze gids werd als nuttig beoordeeld door 48 mensen en kreeg gemiddeld 5.0 sterren uit 24.5 reviews. Heb je een vraag over Regency Greenfire GFi350L of wil je andere gebruikers van dit product iets vragen? Stel een vraag
Pagina 1/48

Models: GFi350LNG-R
GFi350LLP-R
GFi350LULPG-R
Owners &
Installation
Manual
10.28.20
LISTINGS AND CODE APPROVALS
These gas appliances have been tested
in accordance with AS 5263.0, AS/NZS
5263.1.3 and have been certified by the
Australian Gas Association for installation
and operation as described in these Instal-
lation and Operating Instructions.
Your unit should be serviced annually by
an authorised service person.
919-769e
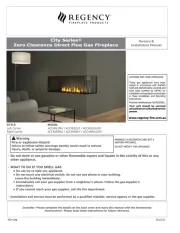
Greenfire® GFi350L Gas Inbuilt
FOR YOUR SAFETY
What to do if you smell gas:
Do not try to light any appli-
ance
Do not touch any electrical
switch: do not use any phone
in your building.
Immediately call your gas
supplier from a neighbour's
phone. Follow the gas sup-
plier's instructions.
If you cannot reach your gas
supplier, call the fire depart-
ment.
WARNING:
Improper installation, adjustment, alteration,
service or maintenance can cause injury or
property damage. Refer to this manual. For
assistance or additional information consult
an authorised installer, service agency or
the gas supplier.
FOR YOUR SAFETY
Do not store or use gasoline or other flam-
mable vapours and liquids in the vicinity of
this or any other appliance.
Installation and service must be performed
by an authorised installer, service agency or
the gas supplier.
PLEASE KEEP THESE INSTRUCTIONS
FOR FUTURE REFERENCE

REGENCY GAS INBUILT FIREPLACE
TO THE NEW OWNER
Congratulations! You are the owner of a state-of-the-art Gas Inbuilt Fireplace by Fireplace Products International Ltd.
The Regency Gas Fireplace Series of hand crafted appliances has been designed to provide you with all the warmth
and charm of a fireplace, at the flick of a switch. The model GFi350L of this series has been approved by Australian
Gas Association for both safety and efficiency. As it also bears our own mark, it promises to provide you with economy,
comfort and security for many trouble free years to follow. Please take a moment now to acquaint yourself with these
instructions and the many features of your Regency Fireplace.
PAIRING YOUR REMOTE CONTROL
The control box will only learn the remote ID codes during the first 30 seconds after
power is applied and will ignore this special command from the remote afterward.
To match the control box to the remote, follow the steps below:
1. Remove a battery from the remote handset.
2. Remove main power to the control box by turning off the isolation switch or switch
on the GPO to the heater.
3. Wait 30 seconds (approx.)
4. Reconnect main power to the control box.
5. Immediately put the battery back in the remote & point the remote in the direction
of the heater.
6. Press and hold the PROG and FAN buttons simultaneously. The letters "LC" will
appear on the display indicating ID code transmission.
7. Release both buttons.
8. The display will revert to the normal off mode display. The heater should light - spark,
burner, etc. - even though the remote screen says the heater is off.
9. Press the OFF button on the remote. The heater should turn off.
10. Wait approx. 30 seconds to turn the heater on again & check that all functions work
- fan speed and flame height can be adjusted, etc.
Note: To view a step-by-step pairing video please visit
regency-fire.com.au/Customer-Care/Fireplace-Care-Videos
Note: The remote control handset has a set of unique ID codes that is pre-progarmmed
into its memory. This set of ID codes helps to differentiate one remote control
handset from another; only the control box with a matching ID code will respond
to a handset.
Note: The fan cannot be turned off during operation of this appliance.

Regency GFi350L Gas Fireplace Inbuilt 3
table of
contents
Pairing the Remote Handset and Control Box ID Code .2
Unit Dimensions ............................................................5
For your Safety ..............................................................6
Gas Pipe Testing ............................................................6
Before you Start .............................................................6
Installation Checklist ......................................................6
Minimum Fireplace Dimensions ....................................7
Masonry Installation ...............................................7
Mantel Leg Clearances ..................................................8
Minimum Clearances to Combustibles ..........................8
Optional Mock Fireplace (Zero Clearance) Dimensions 9
(no masonry chimney) ...................................................9
Optional mock fireplace (zero clearance) Installation ..10
Standoff Assembly .......................................................10
Quick Install Kit - Zero Clearance Box Dimensions ....11
Quick Install Kit - Zero Clearance box installation .......12
Framing & Finishing .....................................................13
Gas Connection ..........................................................14
Draft Diverter ..............................................................15
Connection ..................................................................15
Gas Connection ..........................................................15
Flueing .........................................................................15
Test for Flue Spillage ...................................................15
High Elevation ..............................................................16
Gas Line Installation ....................................................16
Pilot Adjustment ...........................................................16
Gas Pipe Pressure Testing ..........................................16
845 S.I.T. Valve Description .........................................16
Aeration Adjustment ....................................................16
Conversion Kit from NG to LP or ULPG ......................17
Optional Enamel Panels ..............................................19
Log Set Installation ......................................................20
Glass Door Installation ................................................23
Faceplate & Trim Installation ........................................24
Primary Glass Guard Installation .................................25
Optional Mesh Guard Installation ................................25
4 Piece Faceplate Installation ......................................26
Wiring ..........................................................................27
Operating Instructions ................................................28
Lighting Instructions ....................................................28
Shutdown Instructions .................................................28
First Fire ......................................................................28
Remote Control ..........................................................28
Summary Of Controls .................................................28
Fan Operation ..............................................................28
Copy of Lighting Plate Instructions ..............................29
Normal Operating Sounds of Gas Appliances .............29
Resetting the Unit ........................................................29
Maintenance Instructions ............................................30
General Vent Maintenance ..........................................30
Glass Gasket ...............................................................30
Glass Door ...................................................................30
Glass Replacement .....................................................30
Valve Tray Replacement ..............................................31
Fan Maintenance .........................................................32
Pressure Switch Replacement ....................................32
Gas Maintenance ........................................................34
Electronic Components Parts List ...............................35
Main Assembly ............................................................36
Faceplate Assembly ....................................................38
Burner and Pilot Assembly ..........................................38
4 Piece Faceplate Assembly .......................................39
Warranty ......................................................................40
Product specificaties
| Merk: | Regency |
| Categorie: | Heater |
| Model: | Greenfire GFi350L |
Heb je hulp nodig?
Als je hulp nodig hebt met Regency Greenfire GFi350L stel dan hieronder een vraag en andere gebruikers zullen je antwoorden
Handleiding Heater Regency

8 Juli 2023

7 Juli 2023

4 Juli 2023

4 Juli 2023

4 Juli 2023

4 Juli 2023

30 Juni 2023

30 Juni 2023

29 Juni 2023
Handleiding Heater
- Haeger
- Rinnai
- Powr-Flite
- Plieger
- Livoo
- Perfect Aire
- Eurom
- Korona
- Jindara
- Yellow Garden Line
- Maginon
- Medisana
- Reer
- Einhell
- Lervia
Nieuwste handleidingen voor Heater

12 September 2025

12 September 2025

10 September 2025

9 September 2025

9 September 2025

8 September 2025

8 September 2025
8 September 2025

8 September 2025

8 September 2025