Pioneer CA-HR-FD-EVO.001 Handleiding
Pioneer
Niet gecategoriseerd
CA-HR-FD-EVO.001
Bekijk gratis de handleiding van Pioneer CA-HR-FD-EVO.001 (4 pagina’s), behorend tot de categorie Niet gecategoriseerd. Deze gids werd als nuttig beoordeeld door 37 mensen en kreeg gemiddeld 5.0 sterren uit 19 reviews. Heb je een vraag over Pioneer CA-HR-FD-EVO.001 of wil je andere gebruikers van dit product iets vragen? Stel een vraag
Pagina 1/4
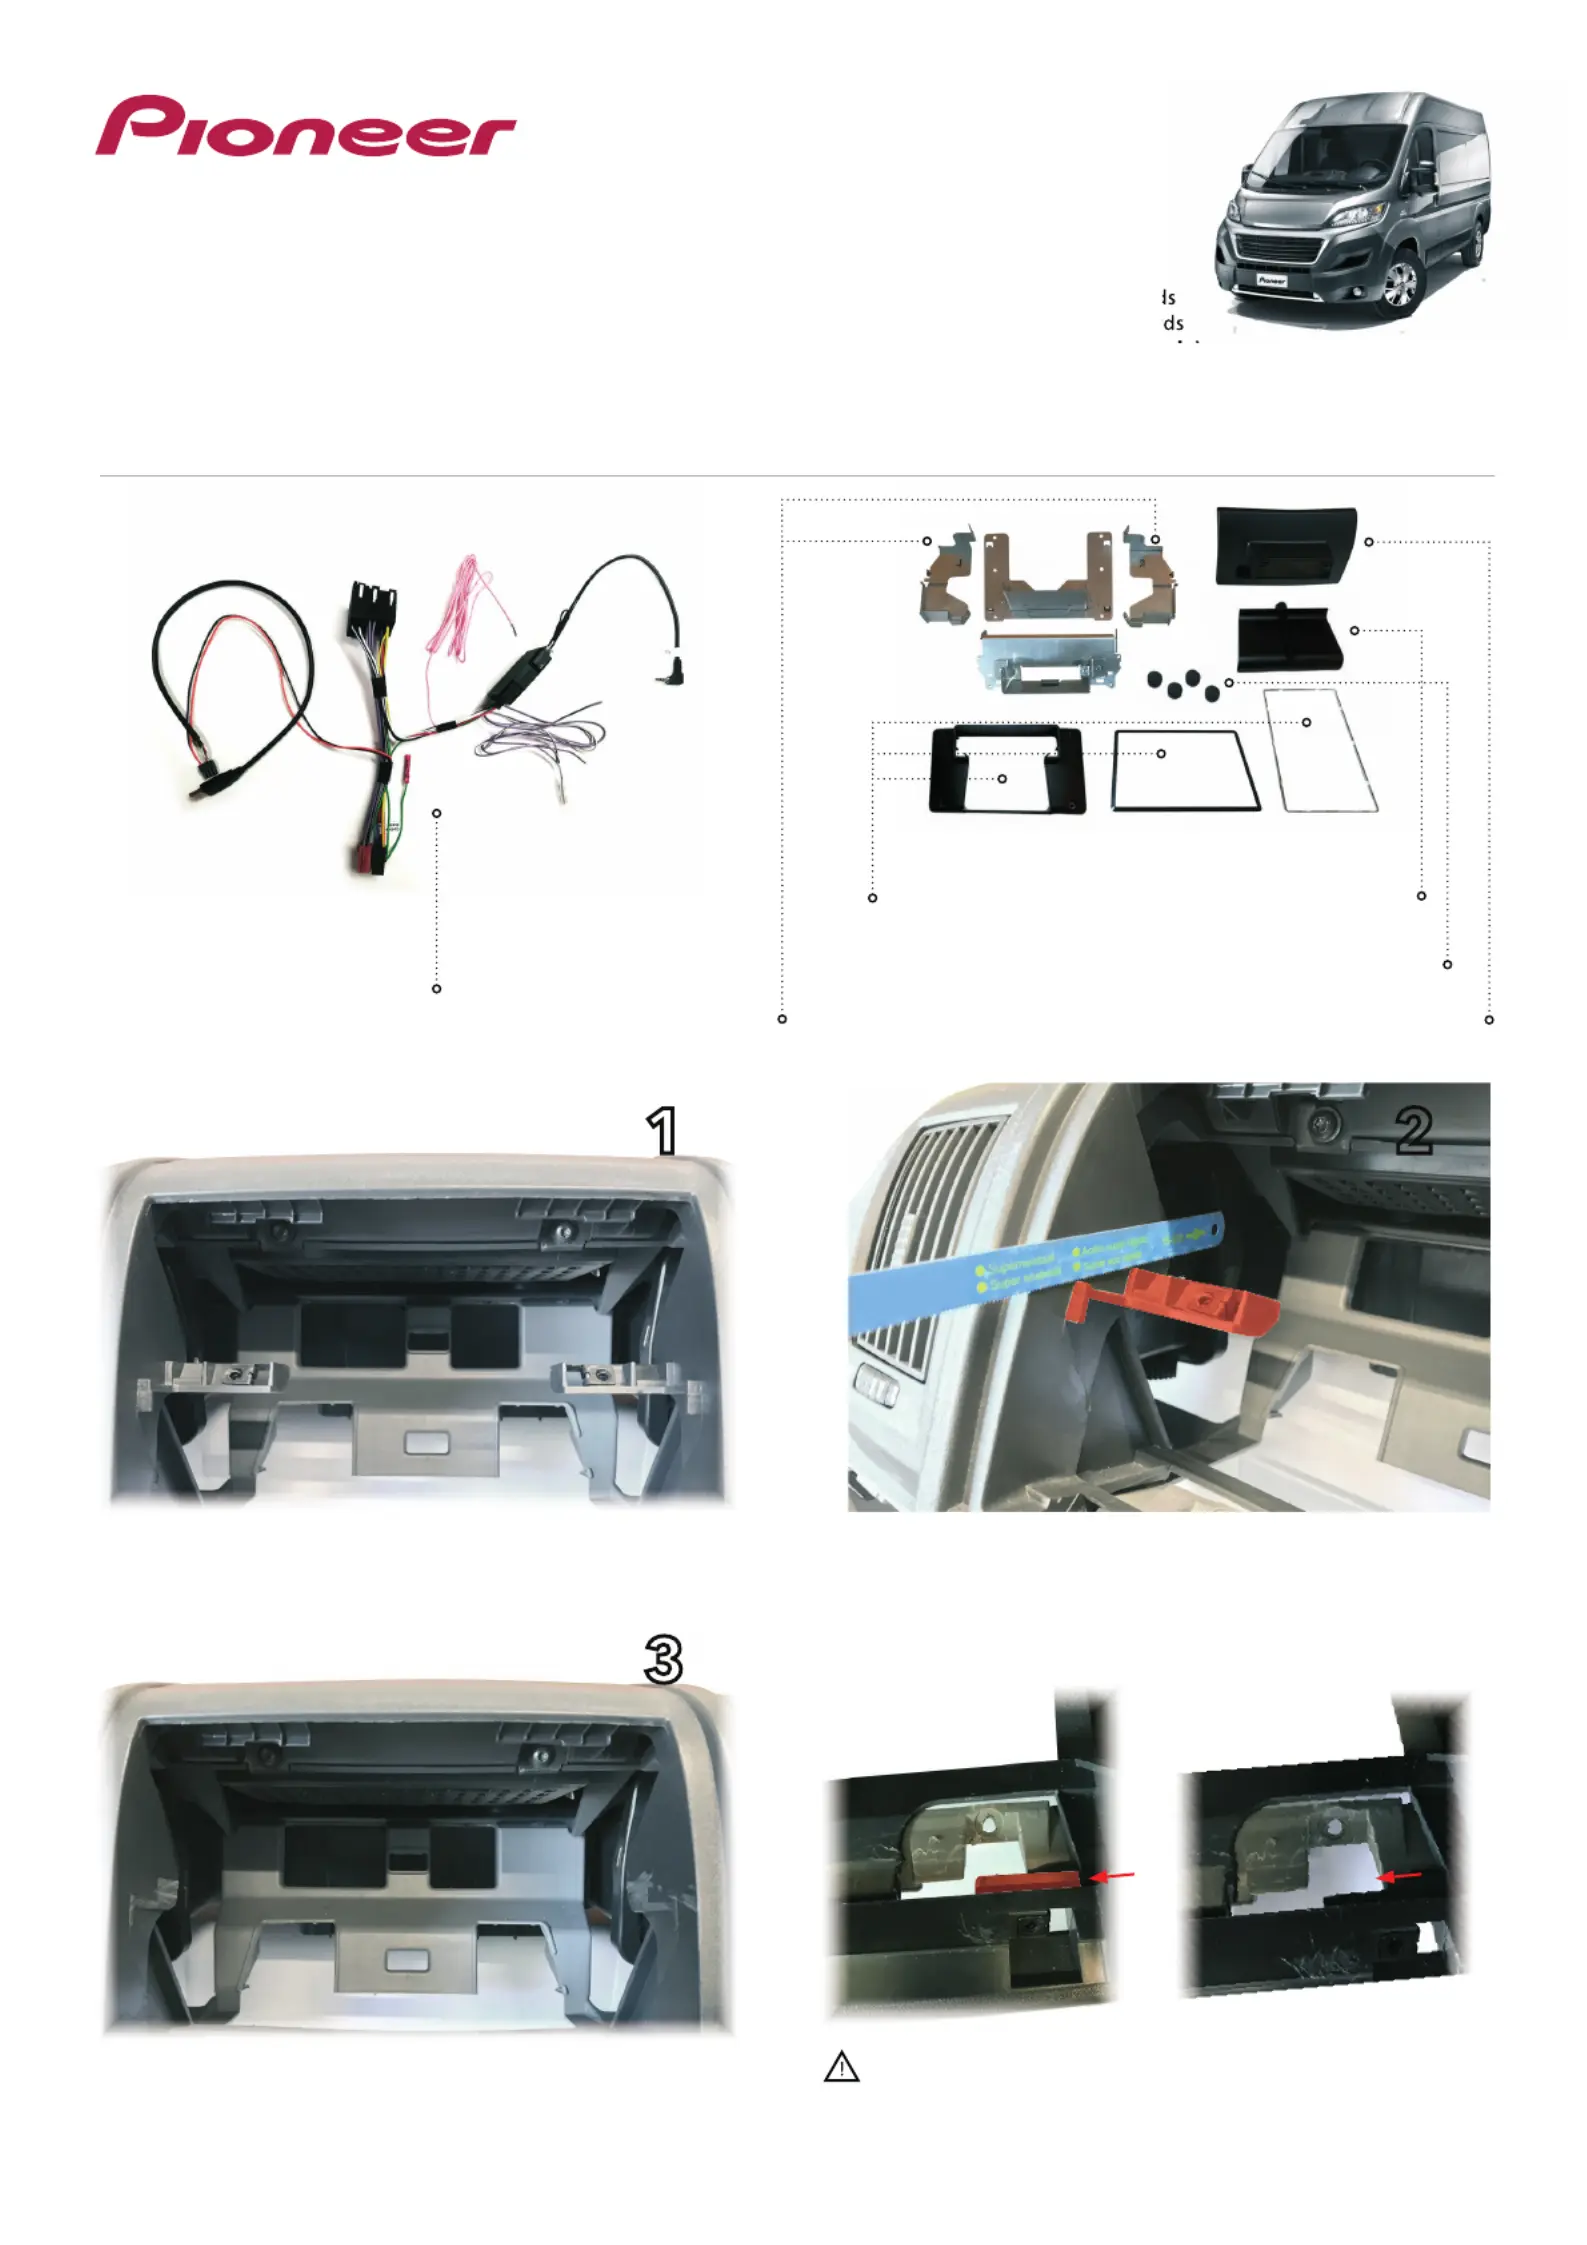
Installation manual SPH-EVO82DAB-DUC | Version 1.0
EN - Installation Manual
Original dashboard
Screen brackets
Interface
Dashboard cover
Screw covers
Cable cover
Screen cover
Result after the modification
Cut out the center supports / support bar
1 2
3
CA-HR-FD-EVO.001
INSTALLATION KIT FOR SPH-EVO82DAB-DUC
Compatibility:
• Fiat Ducato from 2007 onwards
• Peugeot Boxer from 2007 onward
• Citroen Jumper from 2007 onwar
(open dash platform with ISO only)
Result after the cut
If the van comes with these ridges, please remove by cutting
to make space for the metal brackets.
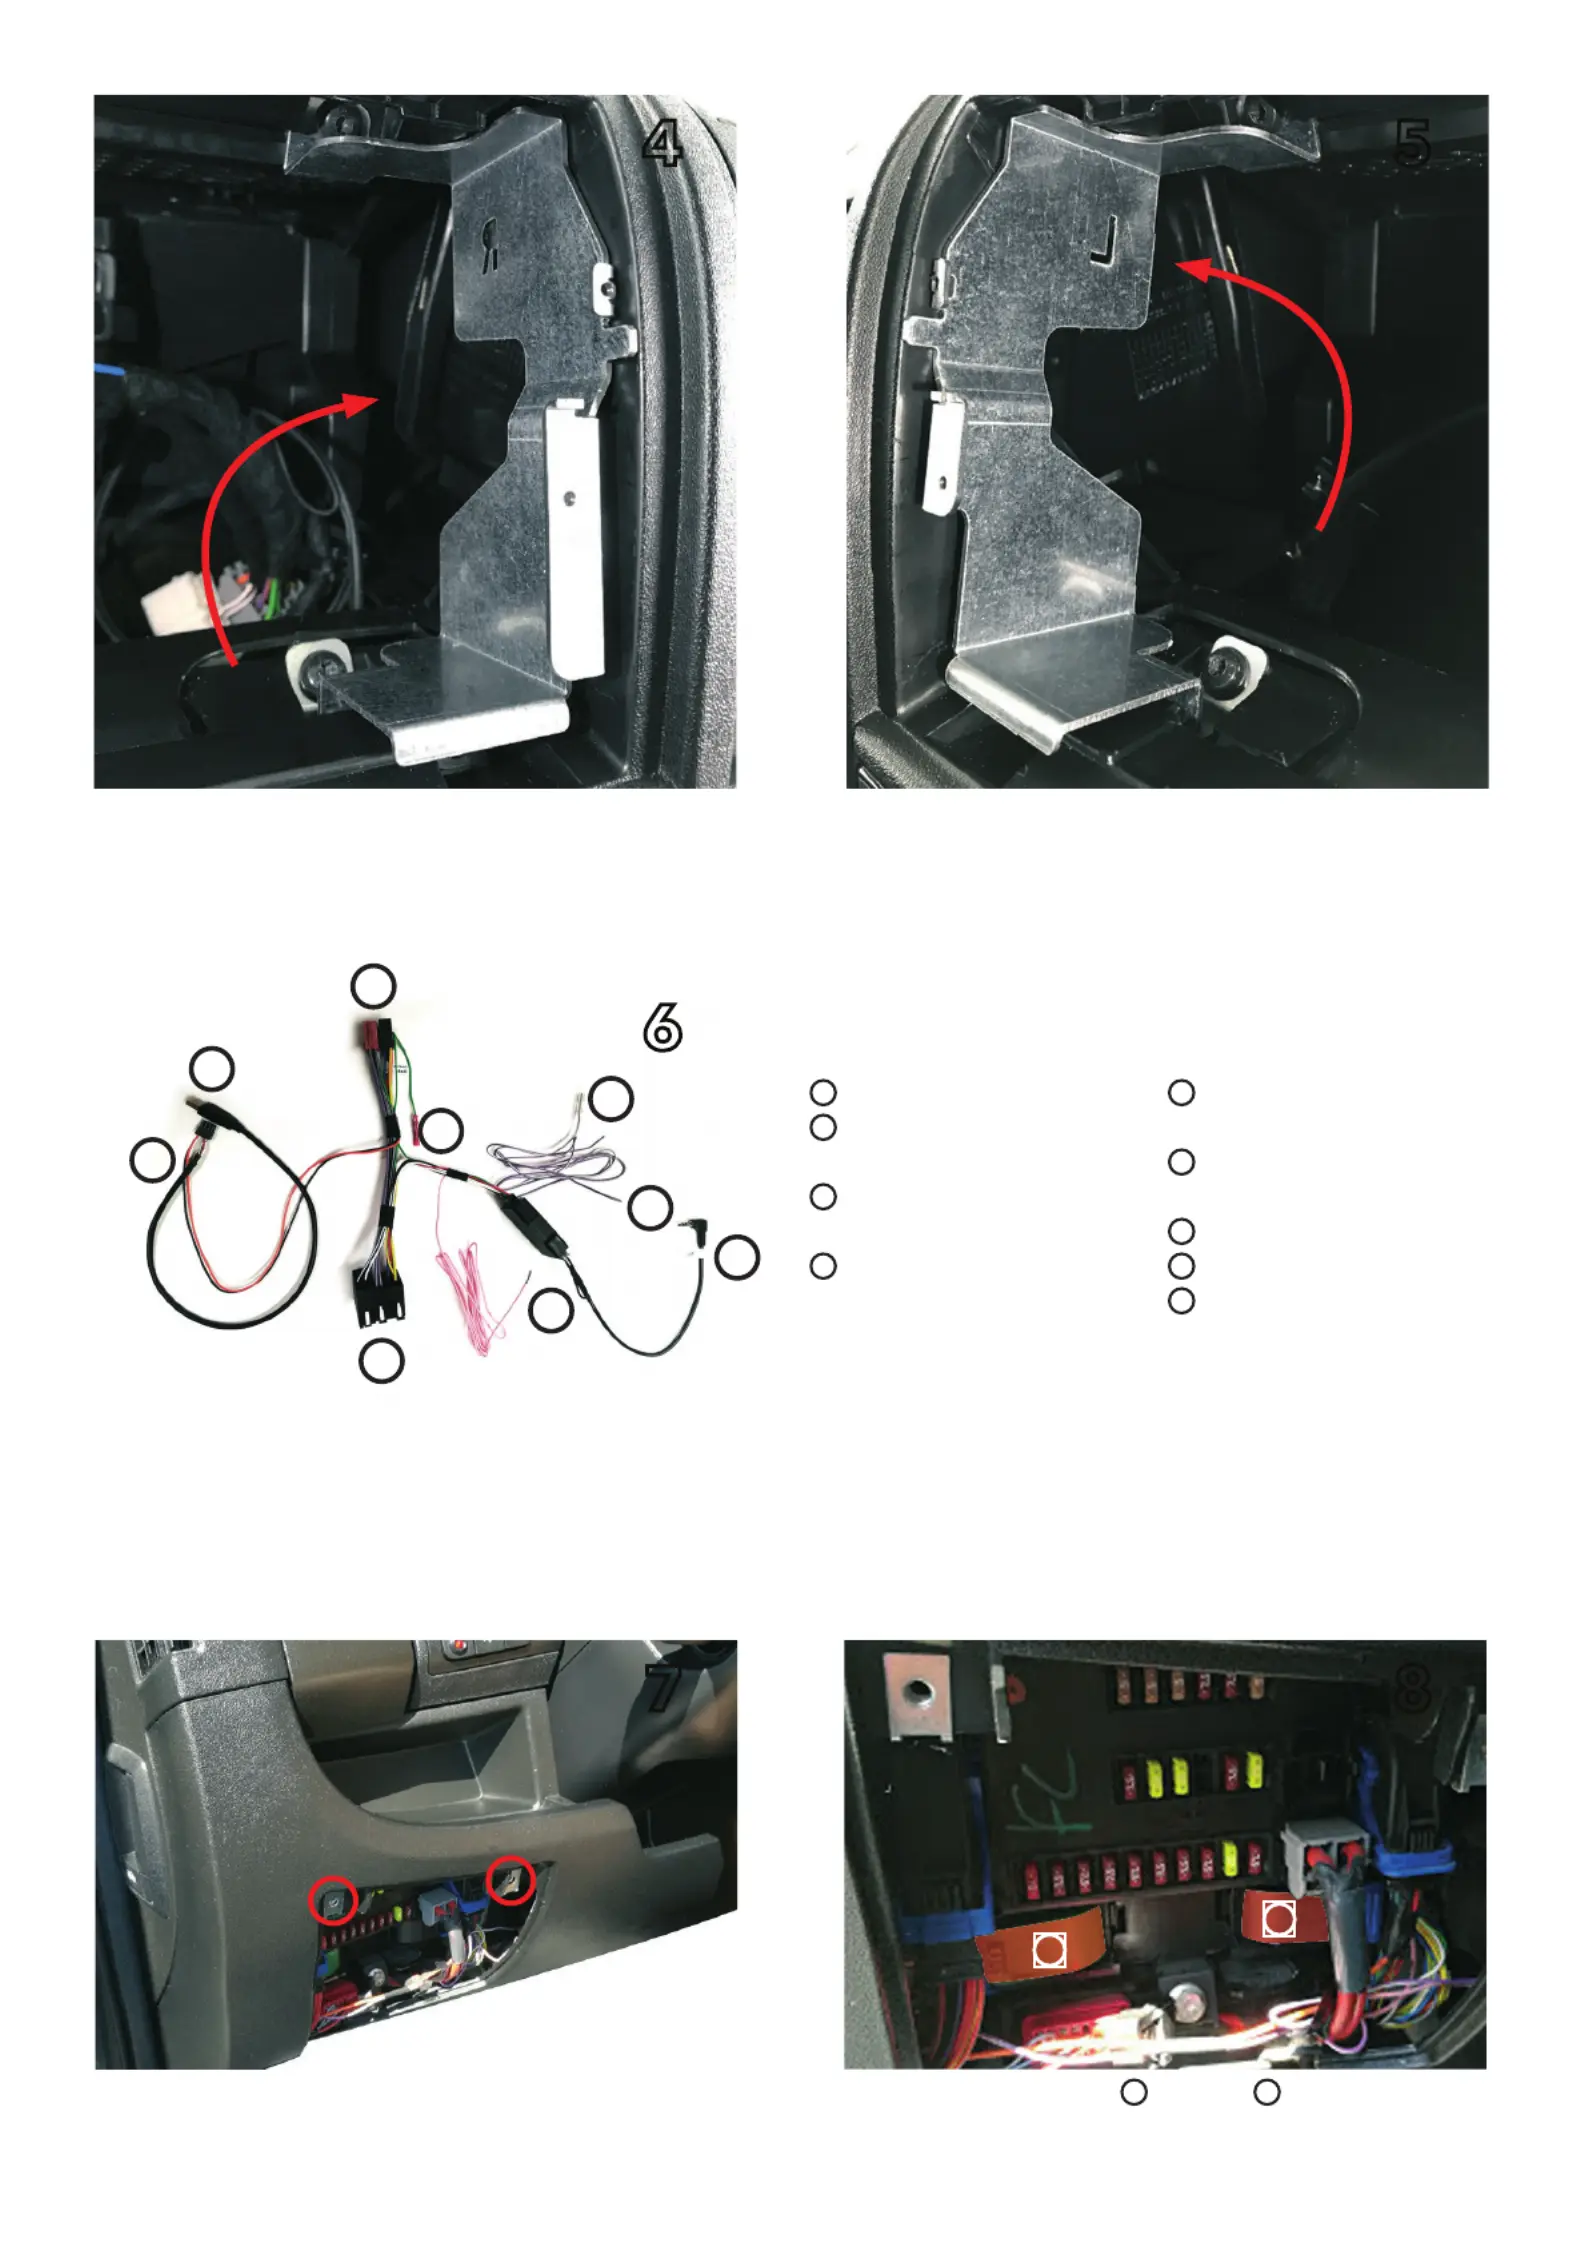
Installation manual SPH-EVO82DAB-DUC | Version 1.0
Install right side bracket using the van’s original torx screw
Install the steering wheel interface
Locate the green
1
and black
2
connector
Install left side bracket using the van’s original torx screw
Open the fuse box by taking out 2 screws
4 5
6
7 8
1
To SPH power cable
2
To parking brake (green)
on SPH power cable
3
To reverse (purple)
on SPH power cable
4
Install vehicle fuse box
(see image 9 & 10)
5
Steering wheel control to
SPH unit backside
6
Install vehicle fuse box
(see image 11 & 12)
7
To van’s main connector
8
To fascia’s USB socket
9
To SPH’s USB input (backside)
1
2
3
4
5
6
7
8
9
1
2

Installation manual SPH-EVO82DAB-DUC | Version 1.0
Insert or splice the purple reverse cable
from the interface onto PIN number 4
Take the screen and install the metal support
using the 2 middle screws
Insert the pink speedpulse cable
from the interface in PIN number 56
After installing the interface, slide the unit into the dashboard,
routing the display cable underneath
and tighten 4 small allen screws
Remove the green connector and slide open
Put the fascia in (make sure to connect the USB on the panel)
and tighten with 2 screws
Remove the black connector and slide open
Screw the screen support onto the pioneer unit
using 6 flathead screws supplied with the unit
9
15
11
13
10
16
12
14
Product specificaties
| Merk: | Pioneer |
| Categorie: | Niet gecategoriseerd |
| Model: | CA-HR-FD-EVO.001 |
Heb je hulp nodig?
Als je hulp nodig hebt met Pioneer CA-HR-FD-EVO.001 stel dan hieronder een vraag en andere gebruikers zullen je antwoorden
Handleiding Niet gecategoriseerd Pioneer

2 Juni 2025
28 Januari 2025
28 Januari 2025
4 Januari 2025

4 Januari 2025

4 Januari 2025

4 Januari 2025

31 December 2025

31 December 2025

31 December 2025
Handleiding Niet gecategoriseerd
- Snakebyte
- M-e
- Hughes & Kettner
- Meriden
- Nautilus
- Ziehl
- H.Koenig
- TV One
- Titanwolf
- Benchmark
- Contax
- Polti
- Bulman
- Noordi
- IFM
Nieuwste handleidingen voor Niet gecategoriseerd

13 September 2025

13 September 2025

13 September 2025

13 September 2025

13 September 2025

13 September 2025

13 September 2025

13 September 2025

13 September 2025
13 September 2025