Netgear GS324v2 Handleiding
Netgear Niet gecategoriseerd GS324v2
Bekijk gratis de handleiding van Netgear GS324v2 (2 pagina’s), behorend tot de categorie Niet gecategoriseerd. Deze gids werd als nuttig beoordeeld door 13 mensen en kreeg gemiddeld 4.0 sterren uit 4 reviews. Heb je een vraag over Netgear GS324v2 of wil je andere gebruikers van dit product iets vragen? Stel een vraag
Pagina 1/2
Installation Guide
Package contents
• Switch model GS324v2
• Detachable power cord (varies by region)
• Wall-mount kit screws
• Rack-mount kit
• Four rubber footpads
• Installation guide
Note: We recommend that you use Category 5e (Cat 5e) cable or higher for
Gigabit Ethernet connections.
1. Register with the NETGEAR Insight app
1. Search for NETGEAR Insight and download the latest app.
2. Set up a NETGEAR account if you do not have one.
3. Tap the menu in the upper-left corner.
4. Tap REGISTER ANY NETGEAR DEVICE.
5. Use the camera on your mobile device to scan the serial number bar code, or
enter the serial number located on the bottom of the switch.
6. Tap .GO
The switch is registered and added to your account. You can now view the
switch in the NETGEAR Insight app.
Note: Because this is an unmanaged switch, you cannot congure or manage it
in NETGEAR Insight.
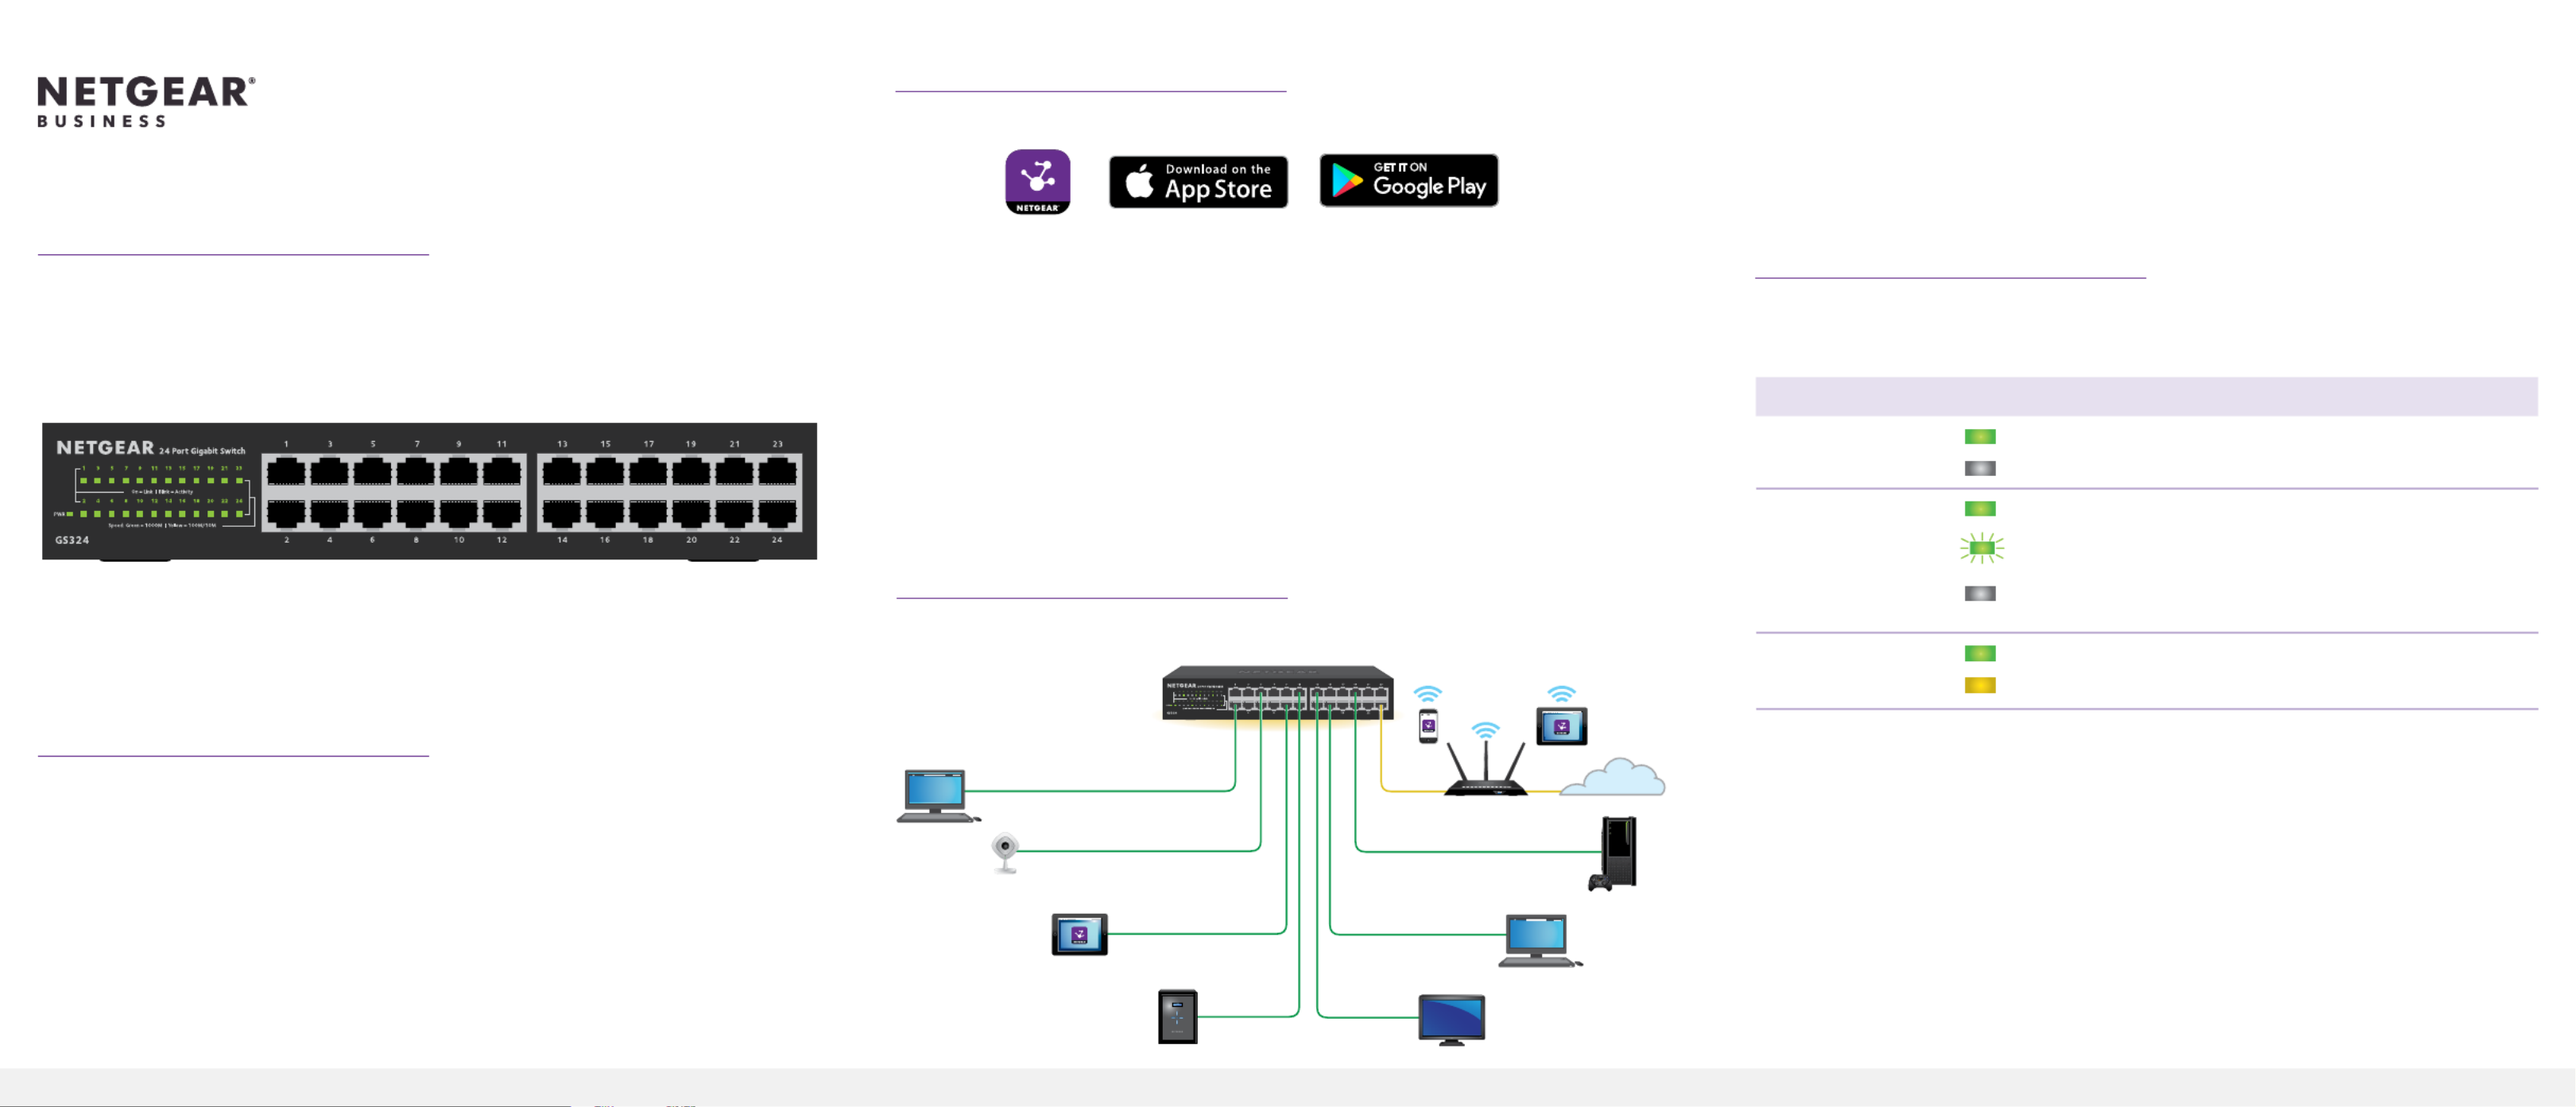
2. Connect the switch
Sample connections
24-Port Gigabit Ethernet Unmanaged Switch
GS324v2
This switch is designed for indoor use only. If you want to connect it to a device
located outdoors, the outdoor device must be properly grounded and surge
protected, and you must install an Ethernet surge protector inline between the
switch and the outdoor device. Failure to do so can damage the switch.
Before connecting this switch to outdoor cables or devices, see
https://kb.netgear.com/000057103 for safety and warning information.
3. Check the LEDs
When you connect the power adapter to the switch and plug it into an electrical
outlet, the LEDs indicate the status.
LED Description
Power LED
On. The switch is receiving power.
Off. The switch is not receiving power.
Port Number LEDs
(Link Activity)
Link. Link on this port.
Activity (Blinking). Activity on this port.
No link (off). No activity on this port.
Port speed LEDs
1000 Mbps
100/10 Mbps
Internet
GS324v2 switch
Router
IP camera
Desktop
Desktop
Laptop
Gaming console
ReadyNAS SmartTV
Product specificaties
| Merk: | Netgear |
| Categorie: | Niet gecategoriseerd |
| Model: | GS324v2 |
Heb je hulp nodig?
Als je hulp nodig hebt met Netgear GS324v2 stel dan hieronder een vraag en andere gebruikers zullen je antwoorden
Handleiding Niet gecategoriseerd Netgear

22 April 2026
30 Maart 2026
17 Maart 2026
29 September 2025
29 September 2025
29 September 2025
29 September 2025
28 Juli 2025
4 Juli 2025
15 Juni 2025
Handleiding Niet gecategoriseerd
Nieuwste handleidingen voor Niet gecategoriseerd
8 Juni 2026
8 Juni 2026
8 Juni 2026
8 Juni 2026
8 Juni 2026
8 Juni 2026
8 Juni 2026
8 Juni 2026
8 Juni 2026
8 Juni 2026