MetroVac Air Force Blaster B-3INDWB Handleiding
MetroVac
Stofzuiger
Air Force Blaster B-3INDWB
Bekijk gratis de handleiding van MetroVac Air Force Blaster B-3INDWB (5 pagina’s), behorend tot de categorie Stofzuiger. Deze gids werd als nuttig beoordeeld door 13 mensen en kreeg gemiddeld 4.3 sterren uit 7 reviews. Heb je een vraag over MetroVac Air Force Blaster B-3INDWB of wil je andere gebruikers van dit product iets vragen? Stel een vraag
Pagina 1/5

Blaster Series Manual
ALL MODELS ARE: All Steel Construction; Back Matte Finish; 4.0 Peak HP Twin Fan Motor; 10 Amps;
1,20 260 Watts, Airflow: CFM 1 ; 12’ Grounded Conductor Cord ” ” ”. Unit size / Unit weight: 12 x 8 x 6.5 , 8.4
lbs.
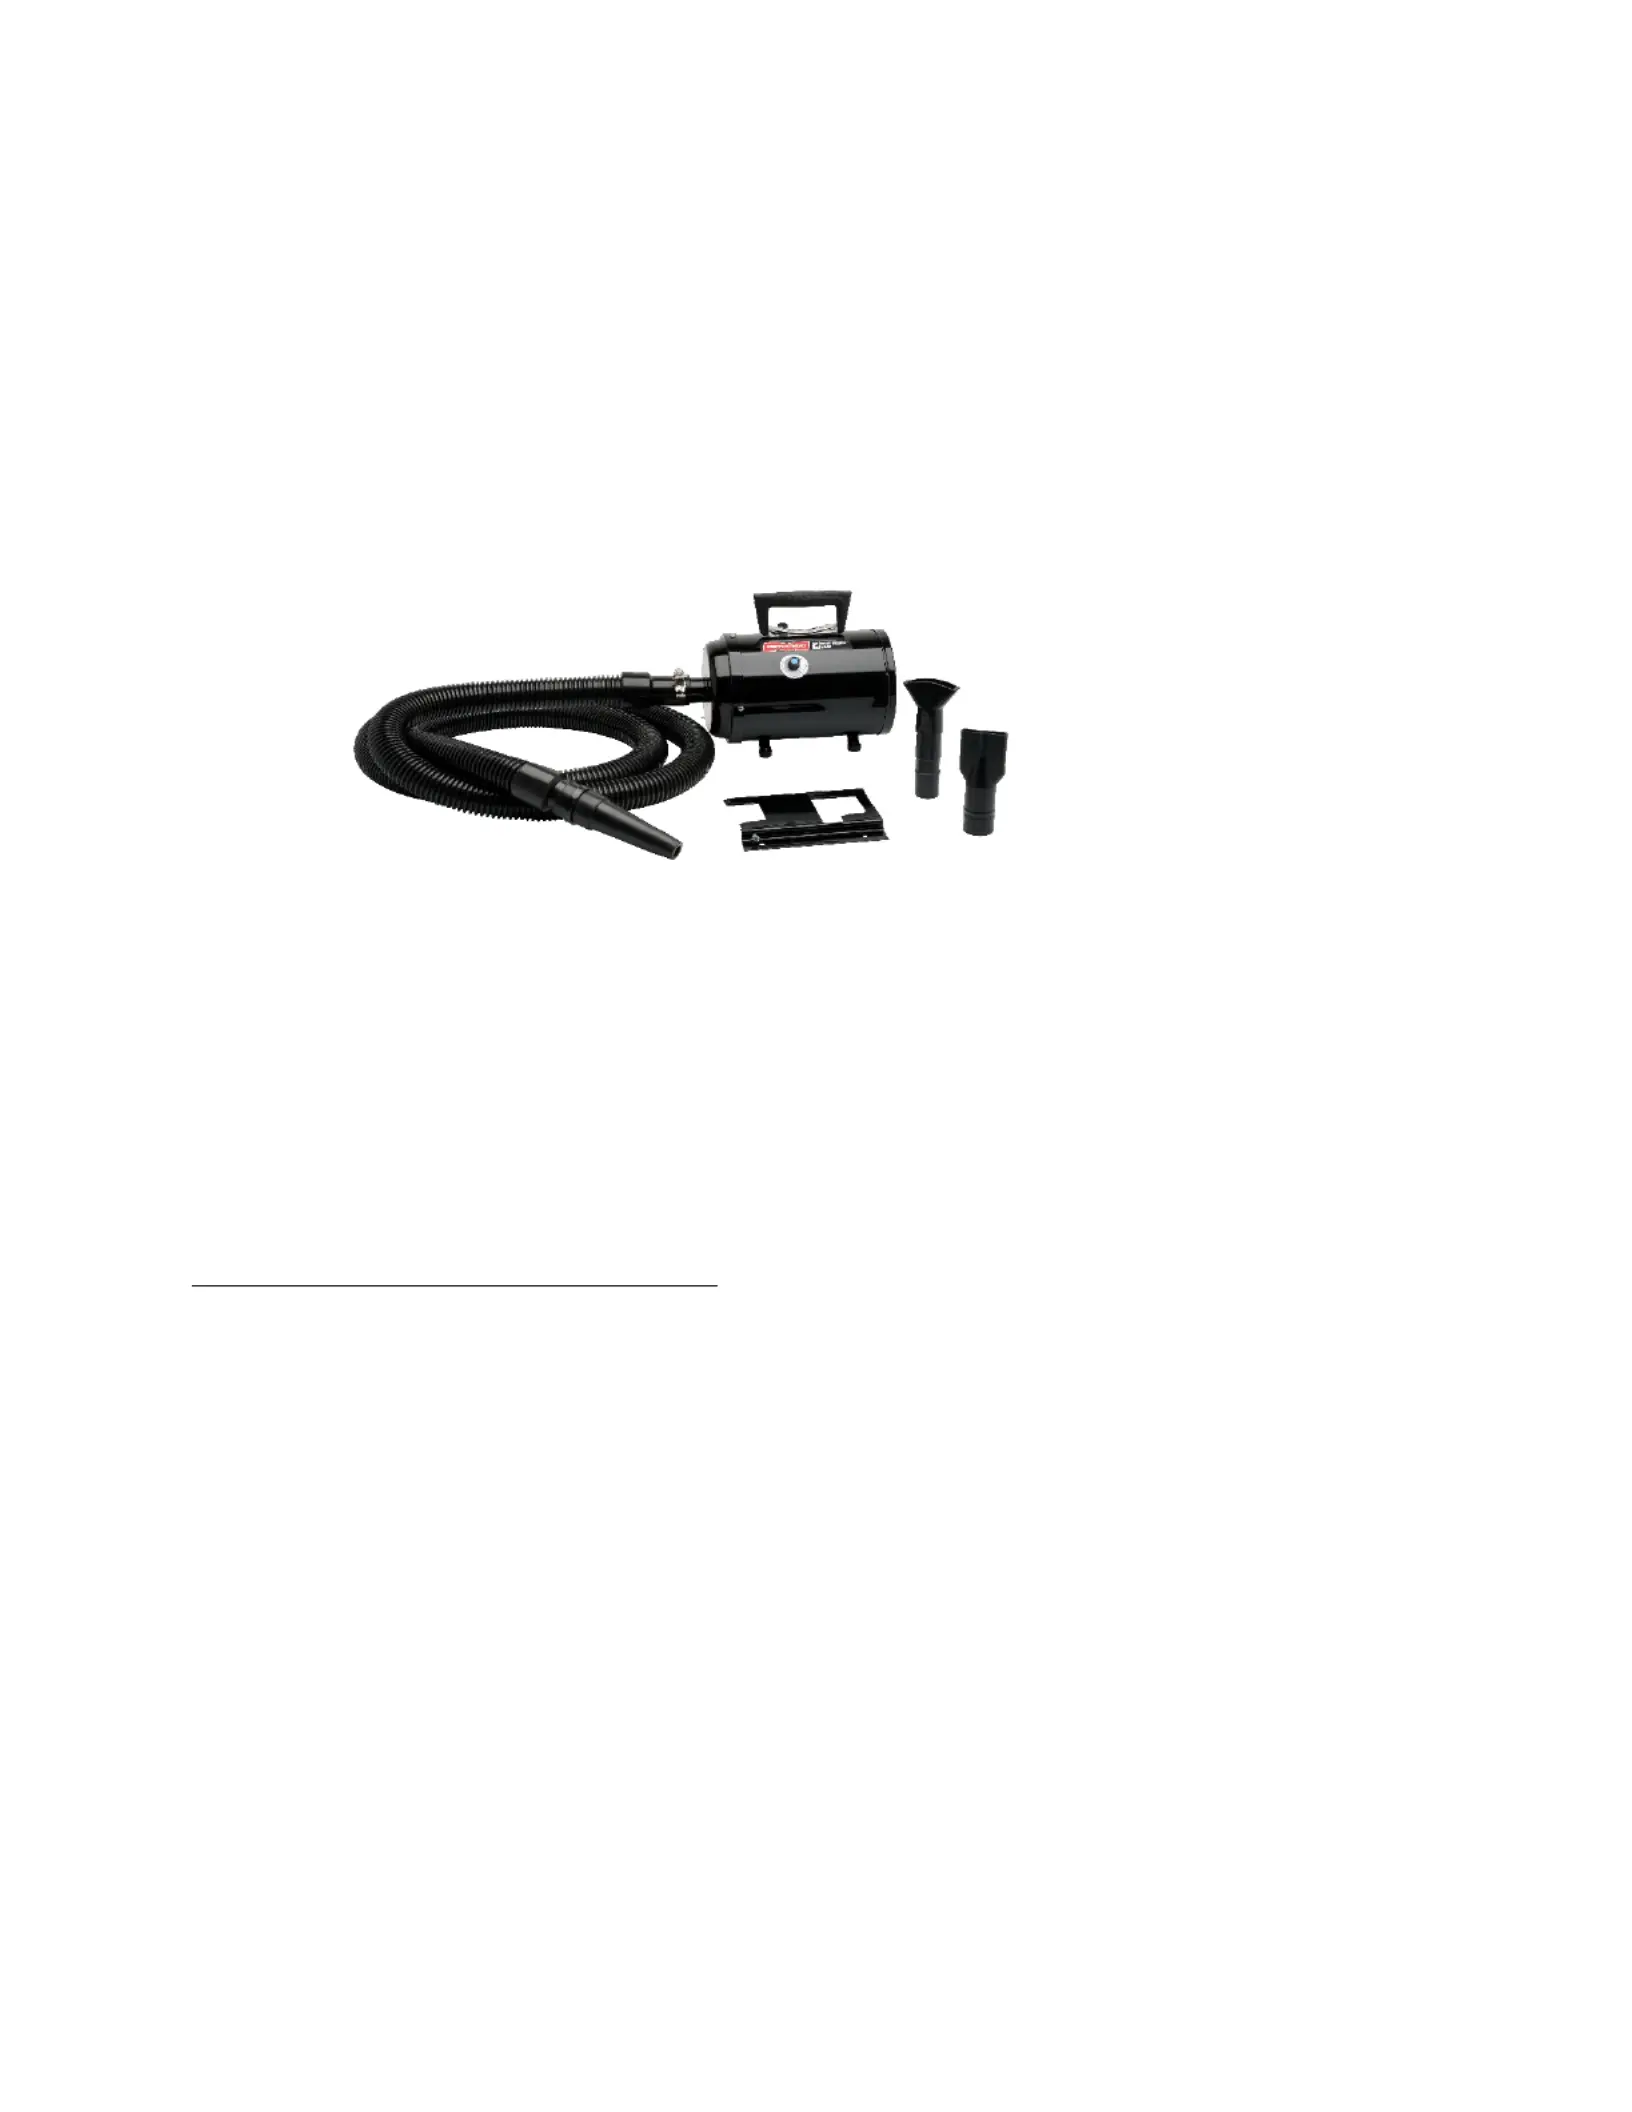
ACCESSORIES: 10ft. x 1 ½” Heavy Duty Hose.
Different models and what they come with:
B-3 ( -141273): 114 Single Speed; Blower Nozzle; Air Flare; Adapter.
B-3V (114-115038): Variable Speed; Blower Nozzle Air Flare Adapter. , , &
B-3-HTV-AFBR (114-580850): Variable Speed w/ Heating Element; Large Blower Nozzle; Air Flare.
(Model shown.)
B3- (103-141631CD ): Single Speed; Crevice Tool, Blower Nozzle, Air Flare & Inflator Adaptor.
B3-CDAFBR (103-142140): Single Speed, Blower Nozzle, Adapter, Micro Adapter, Air Streamer Tool Air ,
Flare, & Wall mount bracket.
B-3IND (110-142157): Air Flare; Blower Nozzle.
B-3INDWB (110-105053): Blower Nozzle, & Mounting Bracket.
INSTRUCTIONS (Instructions are general for all B-3 Models. Some of the below information may not
pertain to your specific model. Check list above for parts and accessories that go with your particular
machine):

• Insert the grounded Power Supply Cord into a grounded outlet.
o IMPORTANT: THE PRODUCT MUST BE GROUNDED.
o WARNING: INPROPER CONNECTION OF THE EQUIPMENT GROUNDING
CONDUCTOR CAN RESULT IN A RISK OF ELECTRIC SHOCK!
• Fit the hose over the steel tube protruding from the front-end cap of the power unit. Tighten the
adjustable clamp to keep the hose securely on the dryer.
• Start the blower:
o 1-Speed: Push the On/Off Switch from left to right.
o Variable: Turn knob from low, clockwise to high.
• Attach or remove the attachments to or from the hose to control the air velocity.
• For even greater air flow, the hose cuff on the blower end screws off in a counterclockwise
direction and screws back on in a clockwise direction.
CAUTION: If your machine has suction but does not clean when the hose is attached, remove the
hose from the suction end and place it on the blower end. Blow out the hose, it may be clogged.
ADDITIONAL PARTS FOR PURCHASE (the below items are available for purchase on our website
www.MetroVac.com; use the provided product # in the search):
• Foam Filters MVC – –56F
• Hoses:
o 10’ Hose – MVC- 56D
o 30’ Hose For Blaster – – – MVC 56MB 30
• Carbon Brushes ABC–3
• AirForce Mounting Bracket AFBR – –1
• Adapter Cuff MVC-184 –
• Heavy Duty Blower Nozzle MVC-195AA –
• “Airflare” Utility Nozzle – MVC-195AB
• Cage/Bracket Kit CBK-4 (grooming) –
• Motorcycle Dryer 5-Piece Attachment Kit BCK-5 –
• Soft Pack Carry All Bag MVC- –420G
• 4Wheel Dolly B 4WD– –
• 4Wheel Dolly W/ Swivel Wheels B 4WDSW – –
• 3 – – – Piece Handle MVC 47
• Switches (you cannot replace a variable speed switch with a one speed switch or vice versa):
o 1 Speed: MVC- 74
o Variable Speed: MVC- -OHM 46A
• Motor MVC-157D –
• Sealing Gasket MVC 155A –
Air Force Mounting Bracket Instructions (bracket sold separately: AFBR-1 ):
PLEASE FOLLOW THE DIRECTIONS CAREFULLY TO MOUNT THE BRACKET PROPERLY.
FOR STEEL GROOMING TABLES:
1. Place Bracket 11” from end of the table and ½” from the front of the table.
2. Mark 4 holes where indicated.
3. With A ¼” drill bit and electric drill create ¼” holes.

4. Mount bracket with the screws and nuts supplied for steel grooming tables.
5. After the Mounting plate has been secured and tightened, place blower on mounting plate and slide
dryer (see illustration) until legs lock into place.
6. After dryer is locked into place, screw into threaded hole on side of the bracket to avoid movement
of the dryer as a result of vibration.
SIDE VIEW
11”
FOR WOODEN GROOMING TABLES:
1. Place bracket 11” from end of the table and ½” from the front of the table.
2. Mark 4 holes where indicated.
3. Attach bracket with 4 self-tapping wood screws.
4. Follow steps 5 & 6 as described above.
SIDE VIEW
11”
BOTTOM VIEW
TO MOUNT ON WALL
1. Place Air Force Mounting Bracket on the wall where desired with open portion of bracket in upright
position.
2. With bracket as template, mark 4 holes where indicated.
3. With a Phillips head screwdriver or “punch” create holes in sheetrock.
4. Attach bracket with 4 self-tapping wood screws and mollies (supplied).
5. After the mounting plate has been secured and tightened, place blower on mounting plate and slide
dryer (see illustration) until legs lock into place.
6. When the dryer is locked into place screw into threaded hole on side of the bracket to avoid
movement of the dryer as a result of vibration.
STEEL TABLE
WOODEN TABLE
BRACKET
BRACKET
Product specificaties
Merk: | MetroVac |
Categorie: | Stofzuiger |
Model: | Air Force Blaster B-3INDWB |
Heb je hulp nodig?
Als je hulp nodig hebt met MetroVac Air Force Blaster B-3INDWB stel dan hieronder een vraag en andere gebruikers zullen je antwoorden
Handleiding Stofzuiger MetroVac
15 Juni 2025
15 Juni 2025
15 Juni 2025
16 December 2024
16 December 2024
16 December 2024
MetroVac Air Force Master Blaster MB-3CDSWB-30220 Handleiding
16 December 2024
16 December 2024
16 December 2024
10 December 2024
Handleiding Stofzuiger
- Eibenstock
- Cocraft
- Kress
- Shop-Vac
- Arcelik
- Hitachi
- Bimar
- Exquisit
- Cecotec
- Ulsonix
- Fieldmann
- Bartscher
- Einhell
- Al-ko
- Bluesky
Nieuwste handleidingen voor Stofzuiger
17 Juli 2025
15 Juli 2025
15 Juli 2025
15 Juli 2025
15 Juli 2025
15 Juli 2025
15 Juli 2025
15 Juli 2025