Maytag MAT20CS Handleiding
Maytag
Wasmachine
MAT20CS
Bekijk gratis de handleiding van Maytag MAT20CS (4 pagina’s), behorend tot de categorie Wasmachine. Deze gids werd als nuttig beoordeeld door 17 mensen en kreeg gemiddeld 4.9 sterren uit 9 reviews. Heb je een vraag over Maytag MAT20CS of wil je andere gebruikers van dit product iets vragen? Stel een vraag
Pagina 1/4

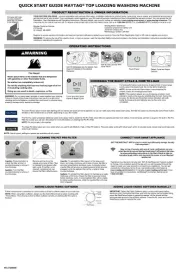
Quick Start Guide
Setting Up and Using Your Top Load Washer
CONNECT INLET HOSES
TO FAUCETS
1CONNECT INLET
HOSES TO WASHER &
CHECK FOR LEAKS
3
Do not overtighten or use tape or
sealants when attaching to faucets.
Make sure that both hot
and cold water hoses are
connected to the correct
faucets. The washer will
not operate unless both
hoses are connected.
IMPORTANT:
Make sure that water faucets are turned on fully before using the washer
for the rst time.
If there is no/low water pressure
to the washer, the cycle status
lights will appear as shown at
right. To clear, open and close
the lid.
4
CHANGING COIN SLIDE PRICING
Refer to
W10813856
Coin Slide
Installation
Instructions
for detailed
instructions
located in the coin box.
*Applies only to select models.
CLEAR
WATER LINES
2
Do not
overtighten
or use tape
or sealants
when attaching
to washer.
KEYS, COIN SLIDE, AND COIN BOX*
FREE XFA
800-ESD-KEYS
012124
DO NOT
DUPLICATE
LOCATION OF KEYS
Coin box key (shown) comes
taped to coin box lock.
Service door key is locked
inside coin box.
Document the key code
(engraved on coin box key)
in a safe place.
If key is lost, contact 1-800-523-1510
for replacement (not covered by warranty).
Have key code handy; otherwise, locksmith
will have to drill out coin box and replacement coin
box (part no. 4396671) will have to be installed.
*Applies only to select models.
W10837642A
W10862486A - SP
CONNECTING WATER
Make sure that the washer is level (see the “Level Washer” section in the Installation Instructions). Run
a wash cycle to verify that the washer is working correctly and has no leaks at faucets and inlet hoses.
Insert new hose washers (in
separate bag) into each end of inlet hoses.
Firmly seat washers into couplings.
Turn on
faucets and
check for
leaks at both ends of hoses.
In
Use
Soak/
Wash Rinse Final
Spin Done
CYCLE STATUS

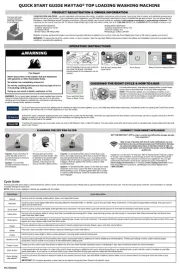
Quick Start Guide
Cycle Status Lights Indicate Cycle Progress
LIGHTS
IN USE
This LED remains lit after cycle starts. Remains
on until cycles are completed and washer is in
Done status.
SOAK/WASH
This LED remains lit during the wash portion
of the cycle.
RINSE
This LED remains lit during the rinse portion of the
cycle. Fabric softener may be added at this stage
of the cycle.
FINAL SPIN/LID LOCKED
The Final Spin and Lid Locked LEDs will both remain
lit during this portion of the cycle. If you need to open
the lid prior to cycle completion, press and hold
START for 3 seconds.
DONE
This LED remains lit when the cycle is complete,
and will turn off when the lid is opened.
W10837642A
W10762486A - SP
© 2016. All rights reserved. 10/16
Fire Hazard
Never place items in the washer that
are dampened with gasoline or other
flammable fluids.
No washer can completely remove oil.
Do not dry anything that has er had any ev
type of oil on it (including cooking oils).
Doing so can result in death, explosion,
or fire.
In
Use
Soak/
Wash Rinse Final
Spin Done Lid
Locked
CYCLE STATUS
In
Use
Soak/
Wash Rinse Final
Spin Done Lid
Locked
CYCLE STATUS
In
Use
Soak/
Wash Rinse Final
Spin Done Lid
Locked
CYCLE STATUS
In
Use
Soak/
Wash Rinse Final
Spin Done Lid
Locked
CYCLE STATUS
In
Use
Soak/
Wash Rinse Final
Spin Done Lid
Locked
CYCLE STATUS

Guide de démarrage rapide
Paramétrage et utilisation de votre laveuse
à chargement par le dessus
RACCORDER LES TUYAUX
D’ARRIVÉE D’EAU
AUX ROBINETS
1RACCORDER LES
TUYAUX D’ARRIVÉE
D’EAU À LA LAVEUSE
ET VÉRIFIER QU’IL
N’Y A PAS DE FUITE
3
Ne pas serrer excessivement
ni utiliser de ruban adhésif ou
de dispositif d’étanchéité lors
de la xation aux robinets.
Vérier que
le tuyau d’eau
chaude est
connecté au
robinet d’eau
chaude et que
le tuyau d’eau
froide est connecté au
robinet d’eau froide. La
laveuse ne fonctionnera
pas à moins que les deux
tuyaux sont raccordés.
IMPORTANT :
Vérier que les robinets d’eau sont entièrement ouverts avant d’utiliser
la laveuse pour la première fois.
Si la pression de l’eau vers la laveuse est
faible ou inexistante, les témoins lumineux
afche comme indiqué à droite. Pour
effacer, ouvrir et fermer le couvercle.
4
MODIFICATION DE LA TARIFICATION
DE LA GLISSIÈRE
Voir les
Instructions
d’Installation
de la glissière
W10813856
pour des instructions
détaillées, situées dans la boîte à monnaie.
* S’applique uniquement aux modèles
sélectionnés.
PURGER LES
CANALISATIONS
D’EAU
2
LES CLÉS, LA GLISSIÈRE ET LA BOÎTE À MONNAIE*
FREE XFA
800-ESD-KEYS
012124
DO NOT
DUPLICATE
EMPLACEMENT DES CLÉS
La clé de la boîte à monnaie
(montrée) est attachée avec du
ruban adhésif au verrou de la
boîte à monnaie.
La clé de la porte de service est
verrouillée à l’intérieur de la boîte à monnaie.
Garder le code de la clé (gravé sur la clé
de la boîte à monnaie) dans un endroit sûr.
Si la clé est perdue, appeler le 1-800-523-1510 pour obtenir
un remplacement (non couvert par la garantie). Garder le
code à portée de main; dans le cas contraire, un serrurier
va devoir percer la boîte à monnaie et une boîte à monnaie
de remplacement (no. de pièce 4396671) devra être installé.
* S’applique uniquement aux modèles sélectionnés.
RACCORDEMENT DE L’EAU
Vérier que la laveuse est de niveau (voir la section “Établissement de l’aplomb de la laveuse”
dans les Instructions d’installation). Exécuter un programme de lavage pour vérier que la laveuse
fonctionne correctement et qu’il n’y a pas de fuite aux robinets et les tuyaux d’arrivée d’eau.
Insérer les rondelles de tuyau neuves (dans
un sac séparé) dans chaque extrémité des
tuyaux d’arrivée d’eau. Insérer fermement
les rondelles dans les raccords.
W10837642A
W10862486A - SP
Ne pas serrer
excessivement ni
utiliser de ruban
adhésif ou de
dispositif d’étanchéité lors
de la xation à la laveuse.
Ouvrir les robinets
et contrôler les
éventuelles
fuites aux deux extrémités
des tuyaux.
In
Use
Soak/
Wash Rinse Final
Spin Done
CYCLE STATUS
Product specificaties
| Merk: | Maytag |
| Categorie: | Wasmachine |
| Model: | MAT20CS |
Heb je hulp nodig?
Als je hulp nodig hebt met Maytag MAT20CS stel dan hieronder een vraag en andere gebruikers zullen je antwoorden
Handleiding Wasmachine Maytag
9 September 2025
9 September 2025
8 September 2025
8 September 2025
8 September 2025
8 September 2025
8 September 2025
8 September 2025
8 September 2025
11 Februari 2025
Handleiding Wasmachine
- Gorenje
- Thermador
- Palsonic
- Panasonic
- Artusi
- Summit
- Elektra Bregenz
- Heinner
- Nordmende
- Hilton
- Samsung
- Tisira
- SIBIR
- Uniprodo
- Blomberg
Nieuwste handleidingen voor Wasmachine
10 September 2025
9 September 2025
9 September 2025
9 September 2025
9 September 2025
9 September 2025
8 September 2025
8 September 2025
8 September 2025
8 September 2025