Manfrotto XPRO OVER Handleiding
Bekijk gratis de handleiding van Manfrotto XPRO OVER (2 pagina’s), behorend tot de categorie Statief. Deze gids werd als nuttig beoordeeld door 43 mensen en kreeg gemiddeld 4.7 sterren uit 8 reviews. Heb je een vraag over Manfrotto XPRO OVER of wil je andere gebruikers van dit product iets vragen? Stel een vraag
Pagina 1/2
MMXPROA3B
取り外し可能石突
脚ロックテンションの調整
脚ロックレバー”A”を緩めたにもかかわらず伸縮部が滑ってしまう場合は、次の手順に従って
ロックテンションを調整する必要があります。
ロックレバー”A”を解除します。
脚の一つに付いている専用キー”N”を使って、ネジ”P”を時計方向に回します。通常、1/3回転
程度で適切なロックテンションに調整されます。
5
6
설치
모노포드의 높이를 변경하려면 락 킹 컬러 "B"의 레버 "A"를 돌려줍니다.
원하는 높이로 설정 후 레버 "A"를 잠급니다.
모노포드에 헤드 장착하기
캡 "C"를 열어줍니다.
모든 카메라와 호환하여 사용할 수 있도록 이중 1/4" & 3/8" 동축 스프링 고정
나사 "D"가 포함되어 있습니다.
암나사 고정 소켓을 카메라 위에 두고 헤드 고정 나사를 그 위에 둡니다.
가볍게 카메라를 누르듯이 힘을 가하면서 나사를 돌려줍니다.
바깥의 3/8" 스프링형 나사가 아래로 눌리면서 모노포드의 고정 나사와 1/4"
고정나사가 자동으로 연결 될 것입니다.
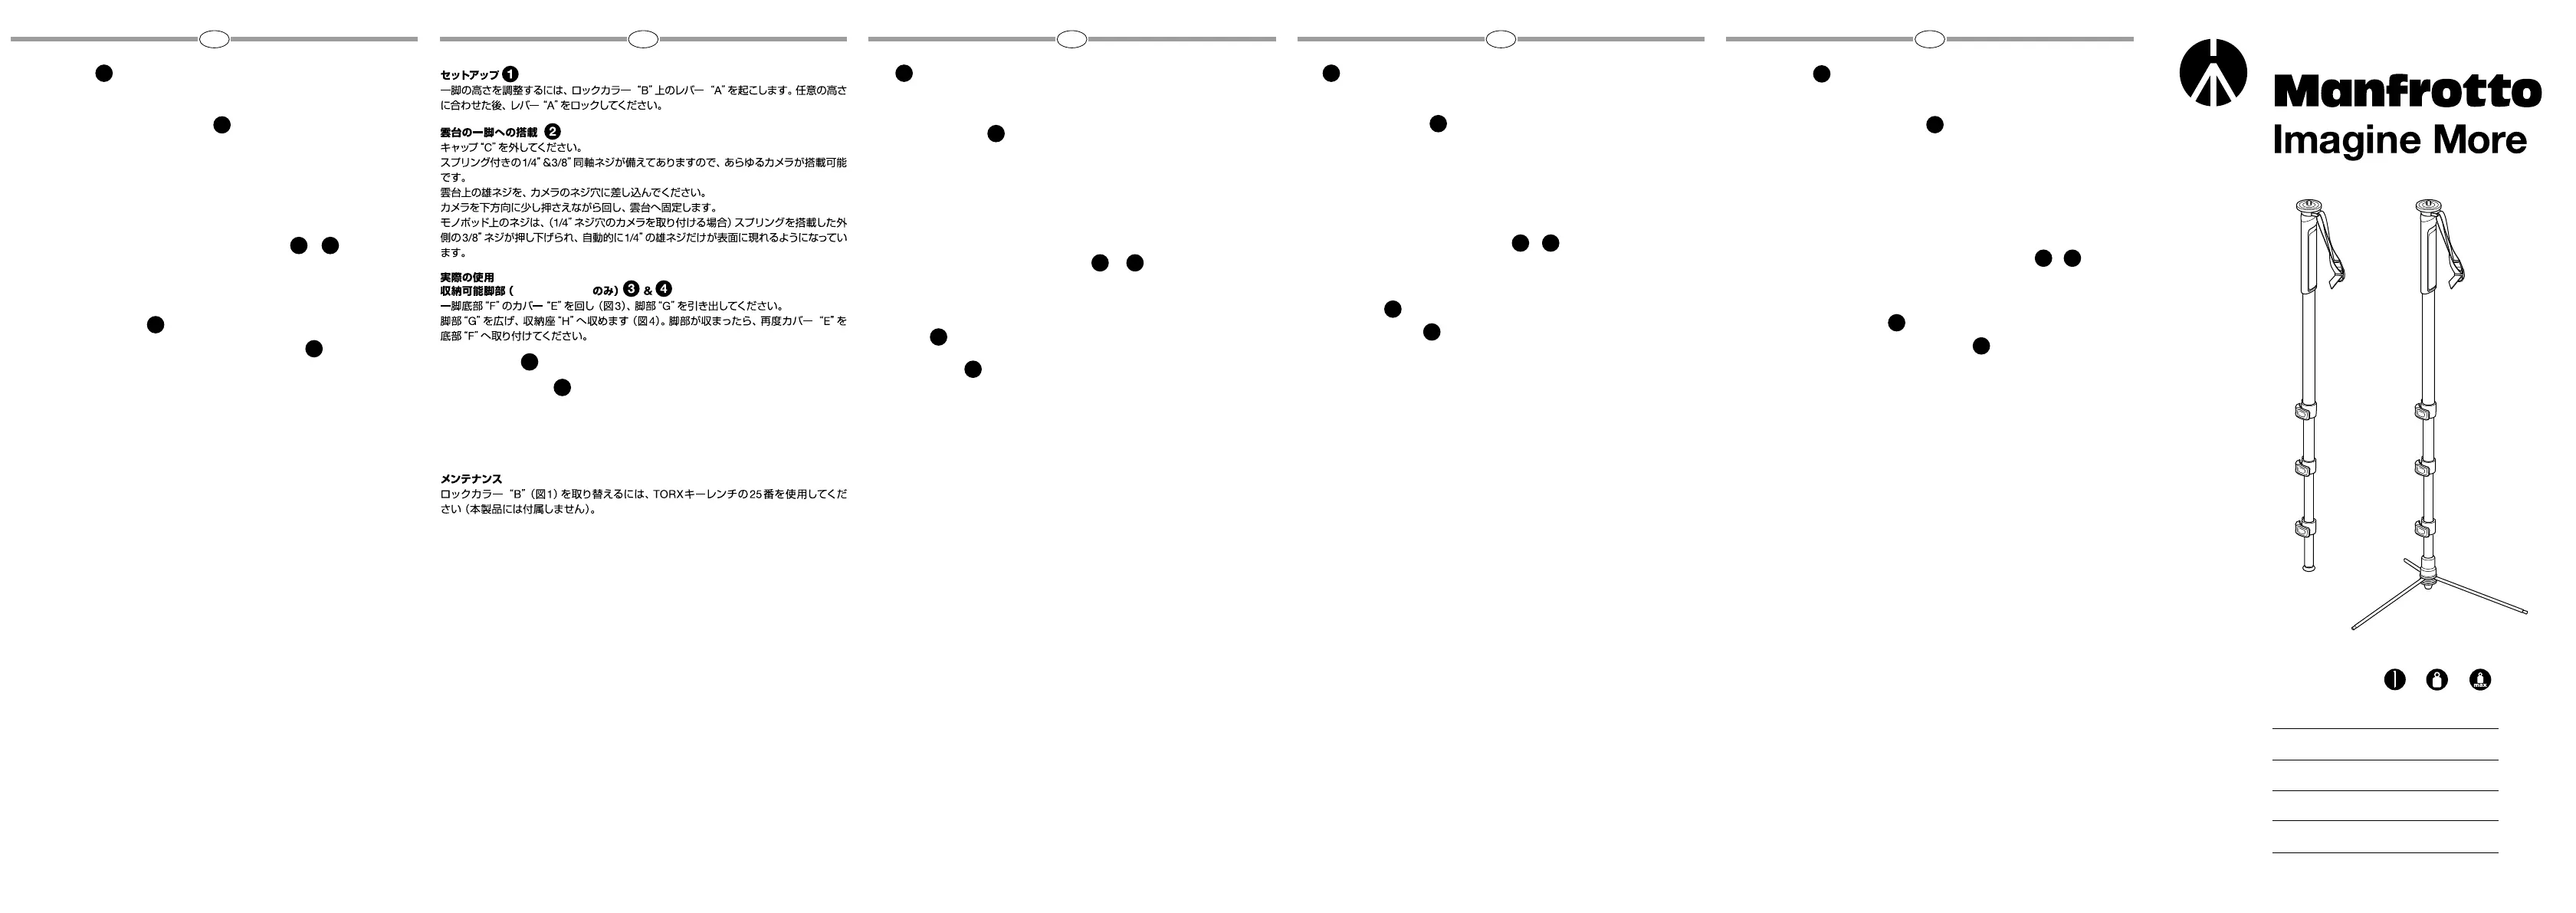
접이식 다리 사용 (MMXPROA3B에만 적용) &
모노포드의 하단 베이스 “F” (fig. 3)의 커버 “E”를 열고 다리 “G”를 빼냅니다.
다리 “G”를 열어 “H”에 (fig. 4) 맞게 한 다음 커버 “E”를 다시 베이스 “F”에 두고
조여줍니다.
분리 가능한 피트
다리 락 킹 강도 조정하기
만일 락 킹 레버 "A"를 잠근 상태에서도 연장시킨 다리의 길이가 유지 되지
않는다면 락 킹의 강도가 조절되어야 합니다.
락 킹 강도조절을 위해서는:
-락 레버 "A"를 풀어줍니다.
-나사 "P"를 트라이포드 다리 중 하나에 포함된 키 "N"을 사용하여
시계방향으로 돌려줍니다.
보통 3번정도 돌려주면 알맞은 락 킹 강도로 보정이 완료됩니다.
관리
락 킹 컬러 "B" (fig.1)를 교체하려면 25번 TORX 키를(비포함) 사용하시기
바랍니다.
1
2
34
5
6
"РАССТАНОВКА
Чтобы увеличить высоту монопода откройте рычаг "А" на фиксаторе "В". Когда
необходимая высота достигнута закройте рычаг "А" обратно.
УСТАНОВКА ГОЛОВКИ НА МОНОПОД
Снимите колпачек "С"
Под ним расположен винт "D" с двойной резьбой 1/4” и 3/8”, с помощью которого
вы сможете установить любую камеру.
Расположите ответное отверстие на камере поверх винта.
Вращайте монопод пока не почувствуете легкое давление на камеру.
Камера закрепиться на креплении 1/4”, автоматически придавив внешнее
крепление 3/8”.
ЭКСПЛУАТАЦИЯ
ВЫДВИЖНЫЕ НОГИ (ТОЛЬКО ДЛЯ МОДЕЛИ MMXPROA3B)
и
Выкрутите крышку "E" в основание монопода "F" (рис.3) и выдвинете ноги "G".
Расположите ноги "G" так, чтобы они входили в пазы "H" (рис. 4) затем прикрутите
крышку "E" к основанию монопода "F".
СЪЕМНАЯ НАСАДКА НА НОГУ
РЕГУЛИРОВКА ЖЕСТКОСТИ ФИКСАЦИИ НОГИ
Если телескопическая нога не фиксируются даже при закрытых рычагах "А",
необходимо увеличить жёсткость фиксации.
Для этого необходимо:
-открыть рычаги "А"
-повернуть винт "Р" по часовой стрелке, используя специальный ключ "N",
который расположен на одной из ног штатива.
Обычно трети оборота достаточно чтобы достичь необходимой жёсткости
крепления.
ОБСЛУЖИВАНИЕ
Чтобы заменить фиксатор "В" (рис.1) пожалуйста используйте ключ типа "TORX"
#25 (не входит в комплект поставки).
1
2
34
5
6
JRUEKOCN
Cod. 1088109 - 06/15 Copyright © 2015 Manfrotto Bassano Italy
PREPARATION
Para ajustar la altura del monopie gire la palanca “A” de la abrazadera “B”.
Cuando haya alcanzado la altura deseada bloquéela con la palanca “A”.
ADAPTAR LA ROTULA AL MONOPIE
Quitar las protección “C”
El monopie es dotato de tornillo de fijacion “D” de doble rosca, coaxial de 1/4”
y 3/8”.
La rosca de 3/8” es mantenida en posición mediante un resorte interno y en el
montaje de un aparato con rosca de 1/4” aquella se retrae dejando expuesta la
rosca de 1/4”.
USO
PATILLAS RETRACTILES (sólo para MMXPROA3B)
Y
Desenrosque el tapón “E” en la base del monopie “F” (fig. 3) y saque las
patillas “G”.
Abralas para que se acoplen en los asientos “H” (fig. 4). Después vuelva a
enroscar el tapón “E” en la base “F”.
TAPONES REMOVIBLES
AJUSTE DE LA TENSIÓN DEL BLOQUEO DE LA PATA
Si las extensions telescópicas de las patas se deslizan incluso después de
haber cerrado la pinza de bloqueo “A”, será necesario ajustar la tension de
bloqueo.
Para hacer esto:
-libere la pinza de bloqueo “A”
-gire el tornillo “P” en el sentido de las agujas del reloj usando la llave especial
“N” proporcionada en una de las patas del trípode.
Normalmente un tercio de vuelta sera suficiente para conseguir la tensión de
bloqueo correcta.
MANTENIMIENTO
Para reemplazar el collar de bloqueo “B” (fig. 1), por favor, use una llave TORX
del número 25 (no proporcionada con el producto).
1
2
34
5
6
INSTRUCTIONS
MMXPROA3B
168 cm1,1 kg10 kg
66,1"2,43 lbs22 lbs
MMXPROA3
160 cm0,7 kg10 kg
63"1,54 lbs22 lbs
MMXPROA4
180 cm0,75 kg8 kg
70,9"1,65 lbs17,6 lbs
MMXPROA5
141 cm0,7 kg6 kg
55,5"1,54 lbs13,2 lbs
MMXPROC4
164,5 cm0,6 kg5 kg
64,8"1,32 lbs11 lbs
MMXPROC5
176 cm0,62 kg5 kg
69,3"1,37 lbs11 lbs
设置
为了调整独脚架的高度,请松开在锁扣“B”上的扳扣“A”。
当达到已经期望的高度,请锁紧扳扣“A”。
将云台安装在独脚架上
移除盖子“C”
兼具1/4”和3/8”螺纹的接口,装有弹簧可调节的顶板“D”可以用来装配所
有相机。
将相机底部的母螺丝固定接口对准云台上的螺丝锁定。
旋转螺丝并轻轻向下压相机。
独脚架螺口将自动匹配1/4”螺丝,向下压则3/8”螺丝适配。
使用
可伸缩脚管(仅支持MMXPROA3B版本)
&
从独脚架架底座“F”(图3)上旋下盖子“E”,收回腿“G”。
打开腿管“G”以便他们能够配合底座“H”(图4),然后旋紧盖子“E”到底
座“F”。
可拆卸脚钉
脚管锁松紧度调整
如果可伸缩脚管的松紧度在已经紧固了扳扣“A”之后还不够,则需要调整锁扣
的松紧度。
为了做到这个:
--请松开扳扣“A”
--然后使用提供在脚架腿管上的特别扳手“N”顺时针旋转螺丝“P”。
一般旋转三分之一圈将足够达到理想的锁紧度。
保养
为了替换扳锁“B”(图1),请使用25号六角扳手(须另购)。
1
2
34
5
6
Product specificaties
| Merk: | Manfrotto |
| Categorie: | Statief |
| Model: | XPRO OVER |
| Kleur van het product: | Zwart |
| Gewicht: | - g |
| Hoogte (min): | 560 mm |
| Hoogte (max): | 1800 mm |
| Maximale gewichtscapaciteit: | 8 kg |
| Materiaal: | Aluminium |
| Lengte wanneer opgevouwen: | 560 mm |
| Aantal secties: | 4 |
| Bijlage: | 1/4 " |
Heb je hulp nodig?
Als je hulp nodig hebt met Manfrotto XPRO OVER stel dan hieronder een vraag en andere gebruikers zullen je antwoorden
Handleiding Statief Manfrotto

12 November 2025
19 Oktober 2025
29 Juli 2025
29 Maart 2025
28 Maart 2025
28 Maart 2025
28 Maart 2025
28 Maart 2025
28 Maart 2025
28 Maart 2025
Handleiding Statief
Nieuwste handleidingen voor Statief
19 April 2026
13 April 2026
13 April 2026
28 Maart 2026
27 Maart 2026
27 Maart 2026
27 Maart 2026
25 Maart 2026
25 Maart 2026
25 Maart 2026