Lumens OIP-AC01 Handleiding
Lumens Niet gecategoriseerd OIP-AC01
Bekijk gratis de handleiding van Lumens OIP-AC01 (56 pagina’s), behorend tot de categorie Niet gecategoriseerd. Deze gids werd als nuttig beoordeeld door 25 mensen en kreeg gemiddeld 4.5 sterren uit 4 reviews. Heb je een vraag over Lumens OIP-AC01 of wil je andere gebruikers van dit product iets vragen? Stel een vraag
Pagina 1/56
www.MyLumens.com
Copyright ©2021 Lumens Digital Optics Inc. All rights reserved.
5100462- SEP. 2021 50
OIP-AC01 Quick Installation Guide
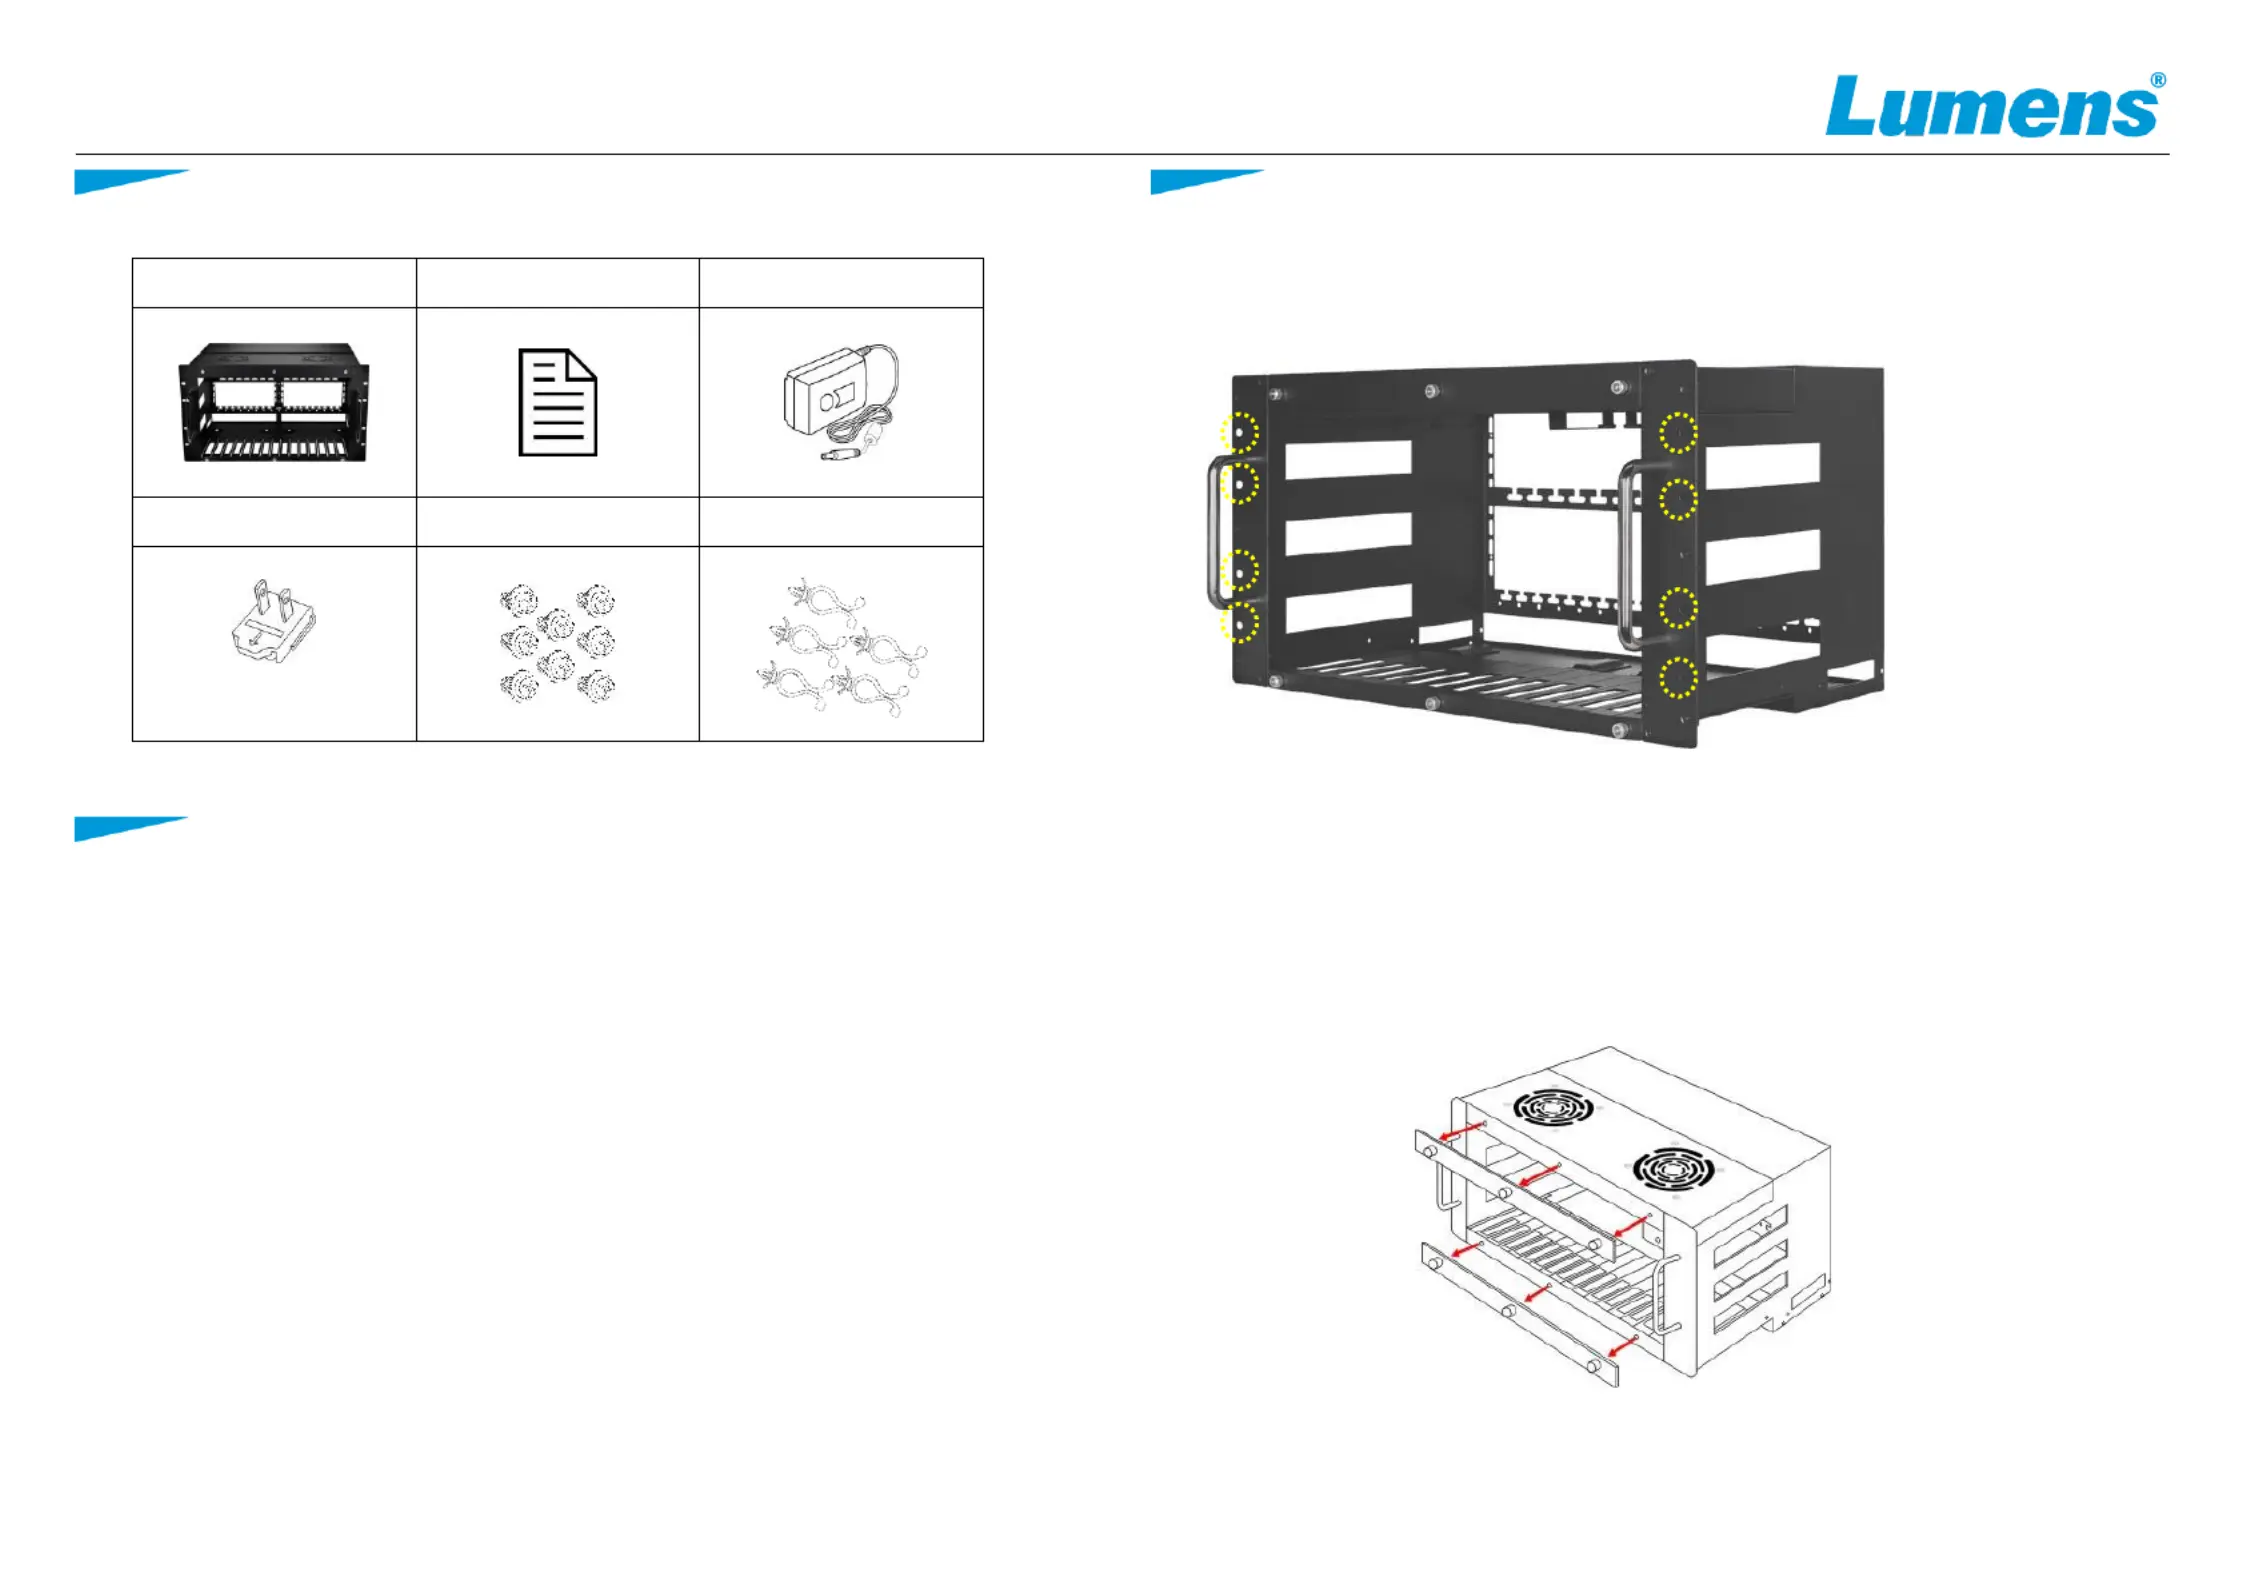
1. PACKAGECONTENTS
6U Rack Chassis
Installation Guide
Power Adapter
Power Connector
M5 Screw p1-x8
Cable Clip p1-x5
(Appearance may vary
depending on country/region
2. Power & System Requirements
Power Requirement: DC 12V, 3A power supply for the cooling fan system.
System Requirement:
The 6U rack chassis requires a minimum of 266.7mm (10.5in) contiguous
free space in the rack for mounting.
With the Cooling Fan System installed, an additional 1U space above the
chassis should be left empty to provide space for air to ow freely.
3. Installation Instructions
STEP 1
Install the OIP-AC01 to the rack with M5 Screws*8pcs.
STEP 2
Unscrew the 3 thumbscrews holding the top locking panel in place, and remove
the panel from the front of the chassis. Unscrew the 3 thumbscrews holding the
bottom locking panel in place, and remove the panel from the front of the
chassis.
Note: The thumbscrews are connected to the locking panels with a retention mechanism
and will not come completely free when they have been unscrewed from the chassis.
Product specificaties
| Merk: | Lumens |
| Categorie: | Niet gecategoriseerd |
| Model: | OIP-AC01 |
Heb je hulp nodig?
Als je hulp nodig hebt met Lumens OIP-AC01 stel dan hieronder een vraag en andere gebruikers zullen je antwoorden
Handleiding Niet gecategoriseerd Lumens

30 Maart 2026
10 Maart 2026
26 Augustus 2025
5 Juli 2025
5 Juli 2025
5 Juli 2025
5 Juli 2025
5 Juli 2025
5 Juli 2025
11 Maart 2025
Handleiding Niet gecategoriseerd
Nieuwste handleidingen voor Niet gecategoriseerd
10 Juni 2026
10 Juni 2026
10 Juni 2026
10 Juni 2026
10 Juni 2026
10 Juni 2026
10 Juni 2026
10 Juni 2026
9 Juni 2026
9 Juni 2026