LUCIDA MaxCore Terra MT-602 Handleiding
LUCIDA
Niet gecategoriseerd
MaxCore Terra MT-602
Bekijk gratis de handleiding van LUCIDA MaxCore Terra MT-602 (12 pagina’s), behorend tot de categorie Niet gecategoriseerd. Deze gids werd als nuttig beoordeeld door 9 mensen en kreeg gemiddeld 4.5 sterren uit 5 reviews. Heb je een vraag over LUCIDA MaxCore Terra MT-602 of wil je andere gebruikers van dit product iets vragen? Stel een vraag
Pagina 1/12

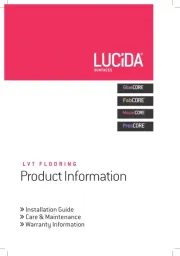
Product Information
S P C F L O O R I N G
Installation Guide
Care & Maintenance
Warranty Information

2 | Product Information
Part 1. Installation Guide
Thank you for choosing a Lucida product. When properly installed and cared for, your new flooring
will be easy to maintain and keep its great look for years.
Please read all the instructions before you begin the installation. Improper installation will void
warranty.
WARNING!
Your old Floors may contain Asbestos!
DO NOT SAND, DRY SWEEP, DRY SCRAPE, DRILL,
SAW, BEAD-BLAST OR MECHANICALLY CHIP OR
PULVERIZE PREVIOUSLY INSTALLED EXISTING
RESILIENT FLOORING, BACKING, LINING FELT,
ASPHALTIC “CUTBACK” ADHESIVES OR OTHER
ADHESIVES, AS THESE PRODUCTS MAY CONTAIN
ASBESTOS FIBERS AND/OR CRYSTALLINE
SILICA.
• Avoid creating dust when removing
existing ooring and adhesive.
Inhalation of such dust is a cancer
and respiratory tract hazard.
Smoking by individuals exposed to
asbestos bers greatly increases
the risk of serious bodily harm.
• Unless positively certain that the
product is a non-asbestos-containing
material, you must presume it
contains asbestos. Regulations may
require that the material be tested
to determine asbestos content and
may govern the removal and disposal
of material. See current edition of
the Resilient Floor Covering Institute
(RFCI) publication Recommended Work
Practices for Removal of Resilient Floor
Coverings for detailed information
and instructions on removing all
resilient covering structures.
TOOLS REQUIRED:
Spacers, rubber mallet, ruler, pencil, tape
measure, utility knife.
I. GENERAL PREPARATIONS
•
It is preferable to lay boards following the
direction of the main source of light.
•
For the best result, make sure to always
work from 2 to 3 cartons at a time, mixing
the planks during the installation.
•
Prior to installation, inspect material in
daylight for visible faults/damage. No claims
on surface defects will be accepted after
installation.
•
Check if subfloor/site conditions comply with
the specifications described below. If you are
not satisfied, do not install, and contact your
supplier.
•
Flooring products can be damaged by
rough handling before installation. Exercise
care when handling and transporting these
products. Store, transport and handle the
flooring planks in a manner to prevent any
damage. Store cartons flat, never on edge.
• Flooring products can be heavy and bulky.
Always use proper lifting techniques when
handling these products. Whenever possible,
make use of material-handling equipment
such as dollies or material carts. Never lift
more than you can safely handle.
•
Calculate the room surface prior to installation
and plan an extra 5% of flooring for cutting
waste.
• The environment where the flooring is to be
installed is critically important for successful
installation and continued performance of the
flooring products. The flooring is intended
to be installed in interior locations only and
the space must meet climate and structural
requirements as well.
•
Flooring should only be installed in
temperature-controlled environments. It is
necessary to maintain a constant temperature

Product Information | 3
before, during and after the installation.
•
Portable heaters are not recommended as
they may not heat the room and subfloor
sufficiently. Kerosene heaters should never
be used.
• This product does not need acclimation.
•
For floor surfaces exceeding 6400ft
2
(620m
2
)
and/or lengths exceeding 80 lineal feet (25m),
use expansion moldings.
II. SUBFLOOR INFORMATION
•
Inspect your subfloor before you begin, it must
be clean, dry and level to 3/16” (5mm) within
10 feet (3 meters). Substrates must be free
from excessive moisture or alkali. Remove
dirt, paint, varnish, wax, oils, solvents, any
foreign matter and contaminates.
• Do not use products containing petroleum,
solvents or citrus oils to prepare substrates
as they can cause staining and expansion of
the new flooring.
•
Although this floor is waterproof, it is not
aimed to be used as a moisture barrier. The
subfloor must be dry. Moisture emission from
subfloor cannot exceed 3 lbs. per 1,000 sq.
ft. per 24 hours as measured with the calcium
chloride test in accordance with ASTM
F1869-04 or ASTM F2170 In-Situ Relative
Humidity not to exceed 75%.
•
This product is also not to be installed
in areas that have a risk of flooding or
permanent wetness such as hot tubs, saunas
or outdoor areas.
•
When employing the direct glue down
installation method, DO NOT include a
6-mil poly lm vapor barrier in the assembly.
Flooring material must be adhered directly
to the subfloor. Flooring should NEVER be
glued to a polyfilm vapor barrier.
RADIANT HEAT NOTICE
Radiant heat systems must have a minimum
of 1/2” separation from the product. The
maximum operating temperature should
never exceed 85°F (30°C).
• Use of an in-oor temperature sensor
is recommended to avoid overheating.
• In-oor Radiant Heat: Flooring can
be installed over 1/2” embedded
radiant heat using the oating
or glue down method.
•
Before installing over newly constructed
radiant heat systems, operate the system
at maximum capacity to force any residual
moisture from the cementitious topping of
the radiant heat system. Moisture emission
from subfloor cannot exceed 3 lbs. per 1,000
sq. ft. per 24 hours as measured with the
calcium chloride test in accordance with
ASTM F1869-04 or ASTM F2170 In-Situ
Relative Humidity not to exceed 75%.
• Turn the heat off for 24 hours before, during
and 24 hours after installation when installing
over radiant heated subfloors. Failure to
turn the heat off may result in significantly
shortened working time of the adhesive.
•
Make sure that the temperature in the room is
at least 60°F (15°C) during installation.
•
Floor temperature must not exceed 85°F
(30°C).
•
Once the installation has been completed,
the heating system should be turned on and
increased gradually (5 degree increments)
until returning to normal operating conditions.
•
Refer to the radiant heat system’s
manufacturer recommendations for
additional guidance.
•
Failure to strictly follow adhesive
manufacturer’s guidelines may result in
failure and void the warranty.
ELECTRIC HEATING MATS NOTICE
Electric heating mats that are not embedded
into the suboor are not recommended for use
below the oors.
• Using electric heating mats that are
not embedded and applied directly
underneath the oors could void the
warranty for your oor in case of failure.
• It is best to install the ooring
over embedded radiant oor
heating systems and adhere to
the guidelines listed above.
Product specificaties
| Merk: | LUCIDA |
| Categorie: | Niet gecategoriseerd |
| Model: | MaxCore Terra MT-602 |
Heb je hulp nodig?
Als je hulp nodig hebt met LUCIDA MaxCore Terra MT-602 stel dan hieronder een vraag en andere gebruikers zullen je antwoorden
Handleiding Niet gecategoriseerd LUCIDA

1 Augustus 2025

1 Augustus 2025

1 Augustus 2025

1 Augustus 2025

1 Augustus 2025

1 Augustus 2025
1 Augustus 2025

1 Augustus 2025

1 Augustus 2025

1 Augustus 2025
Handleiding Niet gecategoriseerd
- Flexson
- Metrel
- Speco Technologies
- Lowepro
- Cardiostrong
- Goodram
- Venta
- Approx
- Fizzics
- Bruynzeel
- Trixie
- White Lightning
- Glock
- AMS Neve
- Besco
Nieuwste handleidingen voor Niet gecategoriseerd

1 Augustus 2025
1 Augustus 2025
1 Augustus 2025
1 Augustus 2025
1 Augustus 2025

1 Augustus 2025
1 Augustus 2025
1 Augustus 2025
1 Augustus 2025
1 Augustus 2025