Liftmaster 889LM Handleiding
Bekijk gratis de handleiding van Liftmaster 889LM (12 pagina’s), behorend tot de categorie Niet gecategoriseerd. Deze gids werd als nuttig beoordeeld door 57 mensen en kreeg gemiddeld 4.3 sterren uit 7 reviews. Heb je een vraag over Liftmaster 889LM of wil je andere gebruikers van dit product iets vragen? Stel een vraag
Pagina 1/12
1
MyQ®CONTROL PANEL
MODEL 889LM
To prevent possible SERIOUS INJURY or DEATH from electrocution:
• Be sure power is NOT connected BEFORE installing door control.
• Connect ONLY to 7-28 VOLT low voltage wires.
To prevent possible SERIOUS INJURY or DEATH from a closing garage door:
• Install door control within sight of garage door, out of reach of children at a
minimum height of 5 feet (1.5 m) above floors, landings, steps or any other
adjacent walking surface, and away from ALL moving parts of door.
• NEVER permit children to operate or play with door control push buttons or
remote control transmitters.
• Activate door ONLY when it can be seen clearly, is properly adjusted, and
there are no obstructions to door travel.
• ALWAYS keep garage door in sight until completely closed. NEVER permit
anyone to cross path of closing garage door.
• DO NOT install this door control on garage door opener systems controlling
one-piece or swing doors.
To provide an adequate visual alert, the garage door opener light bulb(s) MUST
be a minimum of 40 Watt (or equivalent).
The MyQ Control Panel is intended to be installed with Security+® Garage Door
Openers manufactured between 1998 and present. The MyQ Control Panel is NOT
compatible with Security+ 2.0® Garage Door Openers. DO NOT install this door
control on garage door opener systems controlling one-piece or swing doors.
APPLICATION
The MyQ Control Panel offers a quick and convenient way to add Security+ 2.0 and
MyQ technology to your existing garage door opener. MyQ technology uses a
900MHz signal to provide two-way communication between the garage door
opener and MyQ enabled accessories. When programmed to the LiftMaster®
Internet Gateway you can monitor and control your garage door from any internet
enabled computer or smartphone. You may program up to 12 Security+ 2.0
remote controls, 2 Security+ 2.0 keyless entries and a combination of 16 MyQ
accessories to the MyQ control panel.
COMPATIBLE ACCESSORIES
Security+ 2.0® Accessories:MyQ Accessories:
Model 891LM
1- Button Remote Control
Model 823LM
Remote Light Switch
Model 893LM
3-Button Remote Control
Model 825LM
Remote Light Control
Model 890MAX
3-Button Mini MAX Remote Control
Model 828LM
LiftMaster® Internet Gateway
Model 893MAX
3-Button MAX Remote Control
Model 827LM
myQ Remote LED Light
Model 895MAX
3-Button Premium MAX Remote Control
Model 877LM
Wireless Keyless Entry
Model 878MAX
Wireless MAX Keyless Entry
OVERVIEW
Install the MyQ Control Panel in place of the existing door control, within sight of
garage door, out of reach of small children at a minimum height of 5 feet (1.5 m)
above floors, landings, steps or any other adjacent walking surface, and away from
ALL moving parts of door. Due to power consumption the MyQ Control Panel
cannot be used in conjunction with another wired door control connected to your
garage door opener. If an additional door control is needed, the wireless door
control model 885LM can be programmed to the MyQ Control Panel.
To program the 885LM to the MyQ Control Panel, follow the remote control
programming steps. When in battery back-up mode, any feature using unattended
operation such as Timer-to-Close, closure from a garage door and gate monitor or
remote operation utilizing the LiftMaster® Internet Gateway will be disabled.
1. Disconnect all electrical and battery power (if applicable) to the garage door
opener.
2. Remove the existing door control from the wall.
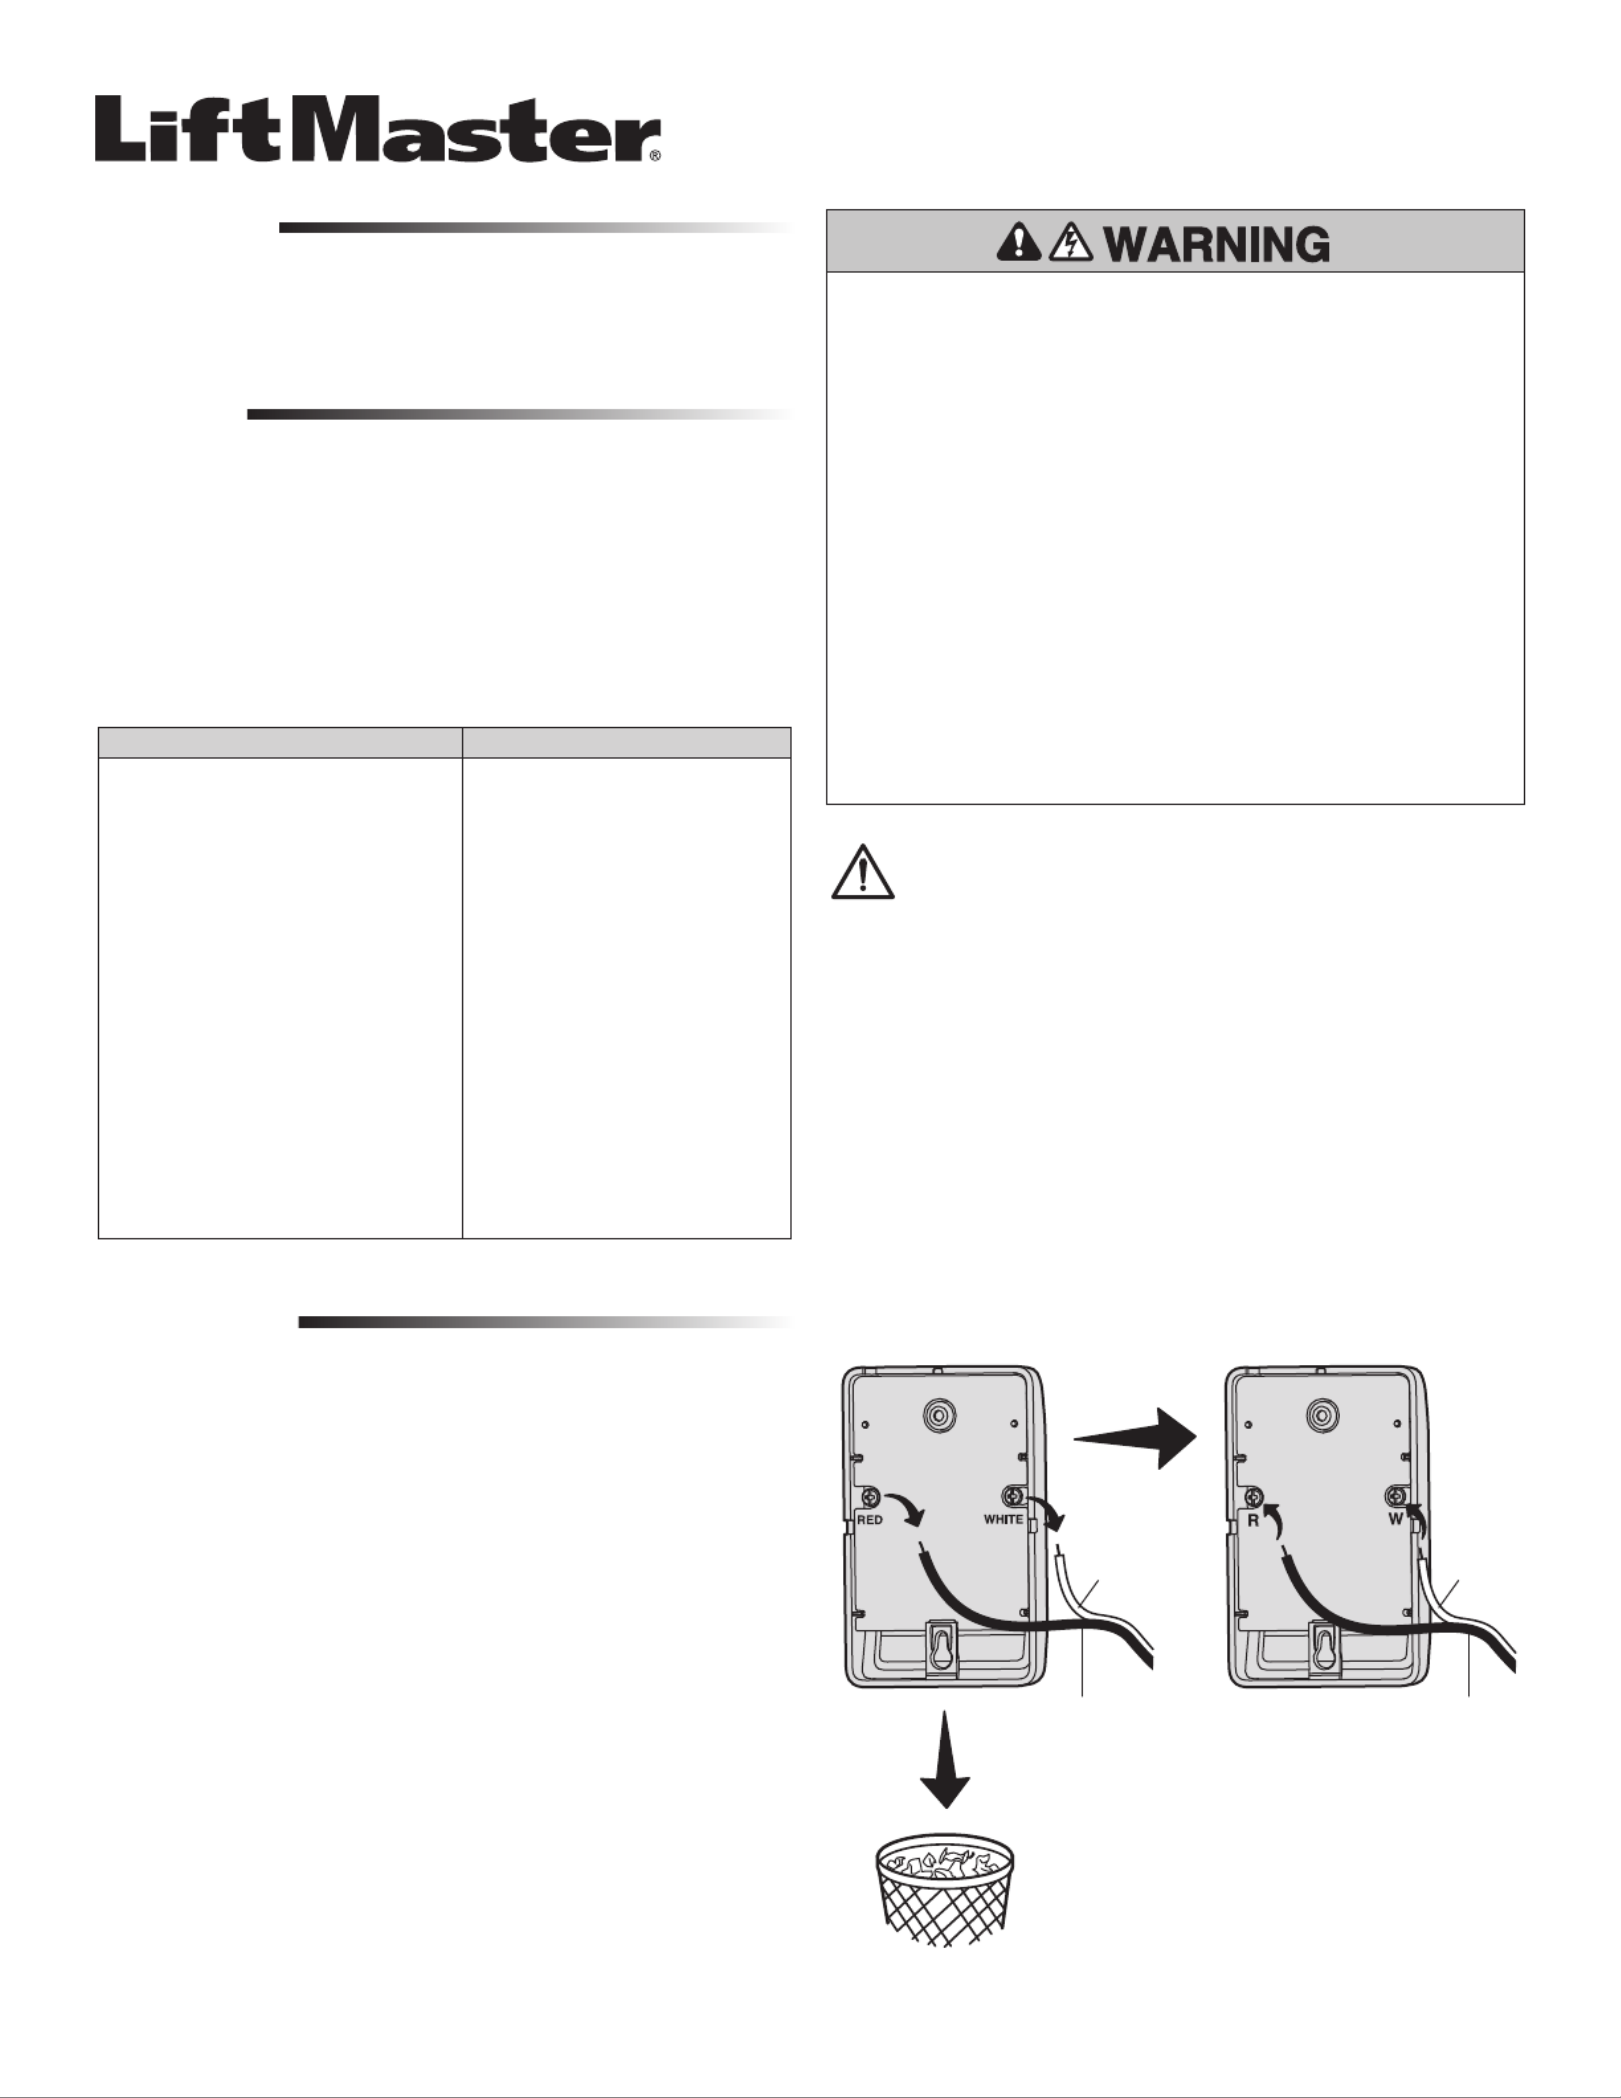
3. Note the polarity of the wires connected to the existing door control.
• Label the wire connected to the RED terminal.
• Label the wire connected to the WHITE terminal.
Disconnect the wires from the existing door control.
4. Connect the wires to the new MyQ Control Panel. Make sure the polarity is
correct.
• Red wire to the R terminal.
• White wire to the W terminal.
INSTALLATION Existing Door Control
Discard, donate
or recycle
Wire from
RED terminal
Connect
RED wire to
R terminal
Wire from
WHITE
terminal
Connect
WHITE
wire to W
terminal
MyQ Control Panel
5. Mount the MyQ Control Panel to the wall.
6. Reconnect power. The yellow command LED and the red learn LED will
blink quickly for up to 5 minutes as the control panel recharges. When the
control panel is operational, the yellow command LED will glow steadily.
7. To test the control panel, press the push bar to activate the garage door
opener.
WARNING: This product can expose you to chemicals including
lead, which are known to the State of California to cause cancer or
birth defects or other reproductive harm. For more information go to
www.P65Warnings.ca.gov.
Product specificaties
| Merk: | Liftmaster |
| Categorie: | Niet gecategoriseerd |
| Model: | 889LM |
Heb je hulp nodig?
Als je hulp nodig hebt met Liftmaster 889LM stel dan hieronder een vraag en andere gebruikers zullen je antwoorden
Handleiding Niet gecategoriseerd Liftmaster

31 Maart 2026
30 Maart 2026
10 Juni 2025
5 Augustus 2024
8 Juli 2024
8 Juli 2024
11 Juni 2024
11 Juni 2024
11 Juni 2024
11 Juni 2024
Handleiding Niet gecategoriseerd
Nieuwste handleidingen voor Niet gecategoriseerd
8 Juni 2026
8 Juni 2026
8 Juni 2026
8 Juni 2026
8 Juni 2026
8 Juni 2026
8 Juni 2026
8 Juni 2026
8 Juni 2026
8 Juni 2026